[Previous][Next]
REMOVAL AND INSTALLATION
 
 
Pre-removal operation
  • Liftgate trim removal (Refer to GROUP 52A - Liftgate Trim .)
  • Liftgate spoiler removal (Refer to GROUP 51 - Liftgate Spoiler .)
  • Rear wiper blade assembly, rear wiper motor and rear washer hose removal (Refer to GROUP 51 - Rear Wiper and Washer .)
  • High-mounted stop light assembly removal (Refer to GROUP 54A - High-mounted stop light .)
  • Liftgate garnish removal (Refer to GROUP 51 - Liftgate Garnish .)
  • Liftgate window glass removal (Refer to .)
Post-installation operation
  • Liftgate alignment (Refer to .)
  • Adjustment of Liftgate height (Refer to .)
  • Liftgate window glass installation (Refer to .)
  • Liftgate garnish installation (Refer to GROUP 51 - Liftgate Garnish .)
  • High-mounted stop light assembly installation (Refer to GROUP 54A - High-mounted stop light .)
  • Rear wiper blade assembly, rear wiper motor and rear washer hose installation (Refer to GROUP 51 - Rear wiper and washer .)
  • Liftgate spoiler installation (Refer to GROUP 51 - Liftgate Spoiler .)
  • Liftgate trim installation (Refer to GROUP 52A - Liftgate Trim .)
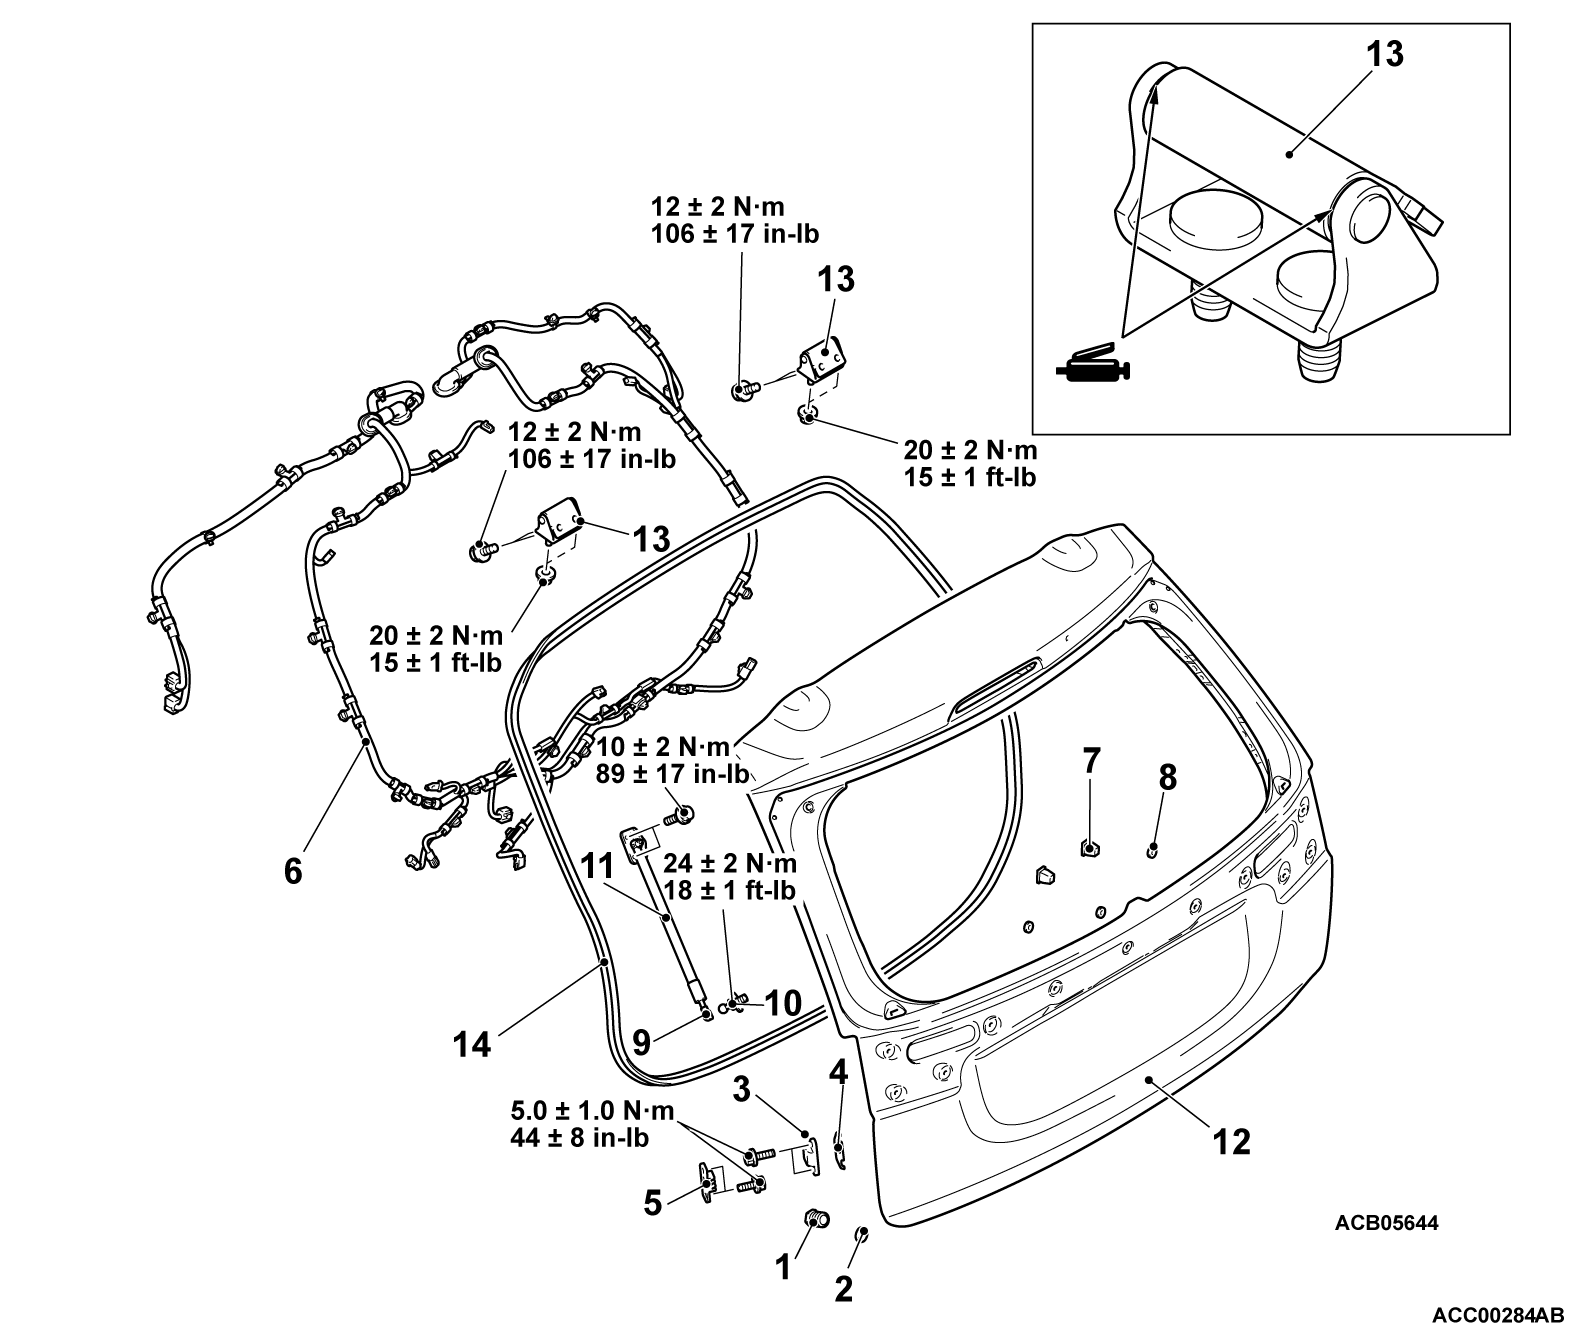
Liftgate assembly removal steps
1.Damper
2.Plug
3.Liftgate damper upper
4.Shim <Vehicles with shim>
5.Liftgate damper lower
6.Liftgate harness
7.Screw grommet
8.License plate pad
<<A>>9.Liftgate gas spring connection
10.Ball joint
11.Liftgate gas spring assembly
12.Liftgate assembly
Liftgate hinge removal steps
Headlining (Refer to GROUP 52A - Headlining .)
>>B<<13.Liftgate hinge
Liftgate opening weatherstrip removal
Rear end trim (Refer to GROUP 52A - Interior trim .)
>>A<<14.Liftgate opening weatherstrip
 
 
REMOVAL SERVICE POINT
 
 
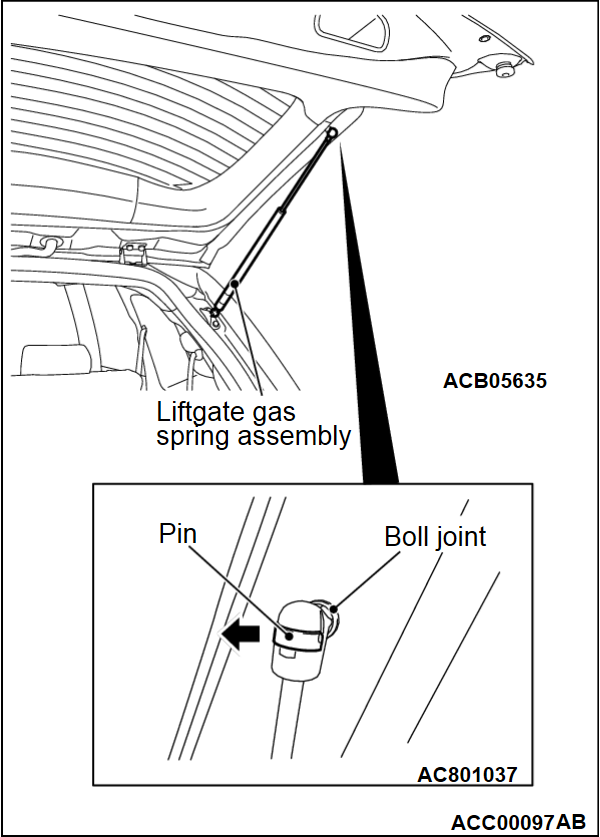
<<A>LIFTGATE GAS SPRING CONNECTION REMOVAL
caution
  • Do not disassemble or throw the liftgate gas spring assembly into the fire.
  • Before disposal, make a hole to remove the gas.
  • Make sure that the piston rod should not collect any foreign particles.
Slide the pin and remove the liftgate gas spring assembly from the ball joint in the direction of the arrow.


INSTALLATION SERVICE POINTS
 
 
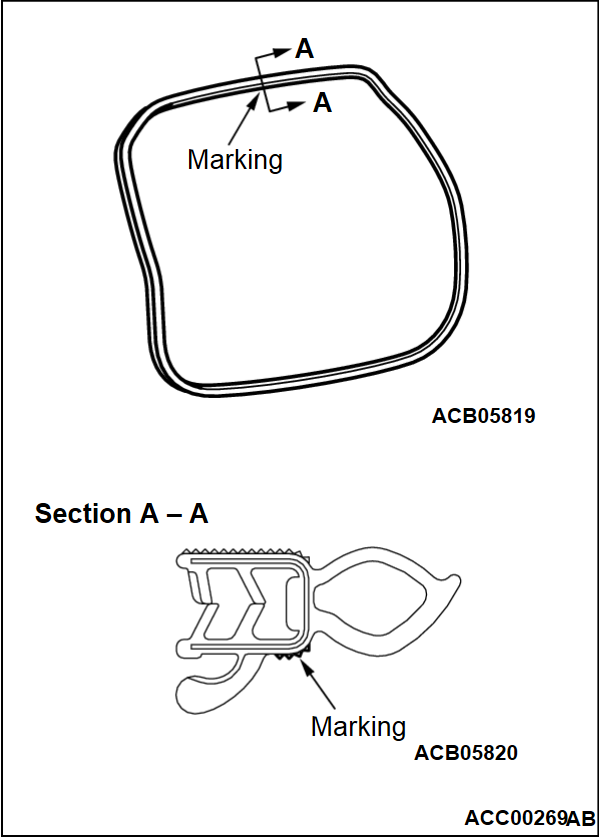
>>A<< LIFTGATE OPENING WEATHERSTRIP INSTALLATION
The marking on the liftgate opening weatherstrip should be positioned at the center of the body.


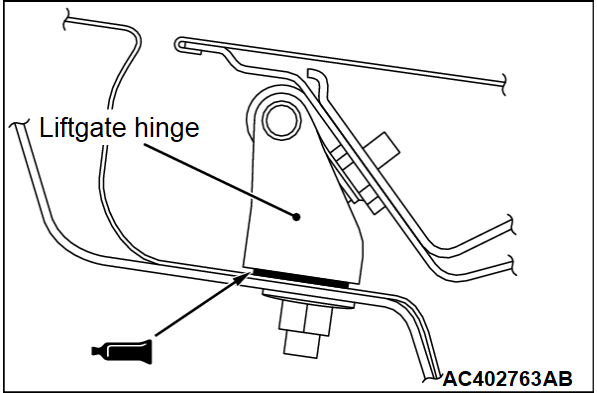
>>B<< LIFTGATE HINGE INSTALLATION
Apply the specified sealant to the liftgate hinge mounting surface, and install the Liftgate hinge.
Specified Adhesive: 3M ATD Part No.8531 Heavy drip check sealer, 3M ATD Part No.8646 Automotive joint and seam sealer or equivalent