Removal and Installation
| danger | PHEV vehicles have high voltage batteries, so incorrect handling may cause electric shock and electric leakage. Work correctly, according to the work procedure, when performing inspection and maintenance. |
| warning |
|
| caution |
|
REMOVAL
1. Shut off the high-voltage circuit. Refer to PRECAUTIONS ON HOW TO USE THE HIGH-VOLTAGE VEHICLE .
.
 .
.2. Check the voltage of the high-voltage circuit. Refer to PRECAUTIONS ON HOW TO USE THE HIGH-VOLTAGE VEHICLE .
.
 .
.3. Drain the EV coolant. Refer to EV COOLANT CHANGE .
.
 .
.4. Drain the rear transaxle fluid. Refer to TRANSAXLE FLUID CHANGE .
.
 .
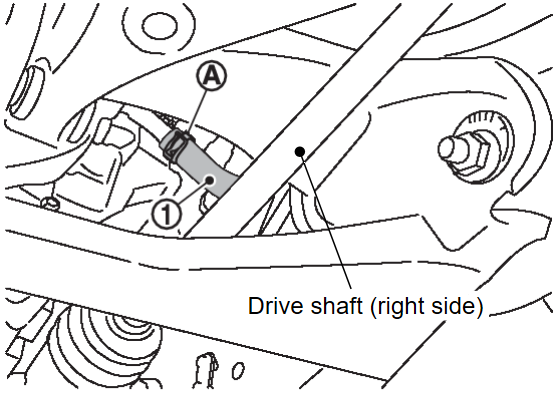
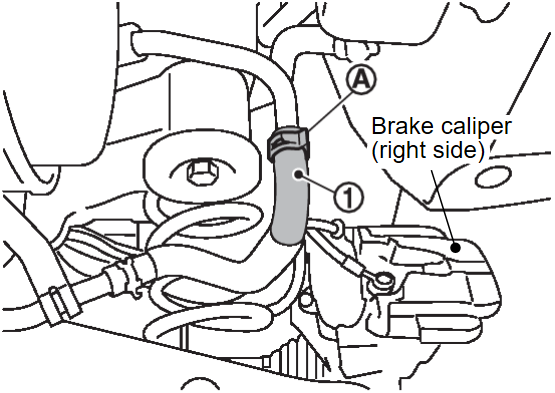
.5. Widen hose clip  at the front side of the rear motor, and disconnect the EV radiator piping hose H
  . Refer to WATER HOSE/WATER PIPE REMOVAL AND INSTALLATION
 .
.
 at the front side of the rear motor, and disconnect the EV radiator piping hose H
  . Refer to WATER HOSE/WATER PIPE REMOVAL AND INSTALLATION
 .
.6. Widen hose clip  at the rear right side of the rear motor, and disconnect the EV radiator piping hose X
  . Refer to WATER HOSE/WATER PIPE REMOVAL AND INSTALLATION
 .
.
 at the rear right side of the rear motor, and disconnect the EV radiator piping hose X
  . Refer to WATER HOSE/WATER PIPE REMOVAL AND INSTALLATION
 .
.7. Remove main muffler. Refer to EXHAUST PIPE AND MAIN MUFFLER REMOVAL AND INSTALLATION .
.
 .
.8. Remove rear stabilizer. Refer to Removal and Installation .
.
 .
.9. Remove drive shaft. Refer to Removal and Installation .
.
 .
.10. Remove rear axle housing. Refer to Removal and Installation .
.
 .
.11. Remove the cable protector and service lid from the rear motor.
12. Remove the drive battery rear cable (REMCU) and body wiring harness (rear motor side) mounting bolts from the rear motor.
13. Disconnect the drive battery rear cable (REMCU) and body wiring harness from the rear motor.
14. Set jack rear suspension member.
| caution |
|
15. Remove rear suspension member stay.
16. Remove rear suspension member mounting bolts.
17. Slowly lower jack, remove rear suspension member with rear lower link, rear suspension arm and rear motor/rear transaxle assembly.
| caution | Operate while checking that jack supporting status is stable. |
18. Remove the following parts.
- Rear motor/rear transaxle assembly: Refer to MOTOR (ELECTRIC MOTOR UNIT) REMOVAL AND INSTALLATION
 .
. - Rear lower link: Refer to Removal and Installation
 .
. - Rear suspension arm: Refer to Removal and Installation
 .
.
19. Perform inspection after removal. Refer to Inspection .
.
 .
.INSTALLATION
Note the following, and install in the reverse order of the removal.
- Perform final tightening of fixing parts at the vehicle installation position (rubber bushing), under unladen conditions with tires on level ground.
- Perform inspection after installation. Refer to Inspection
 .
.
![[Previous]](../../../buttons/fprev.png)
![[Next]](../../../buttons/fnext.png)

