Removal and Installation
REMOVAL
| warning |
|
| note | When removing components such as hoses, tubes/lines, etc., cap or plug openings to prevent fluid from spilling. |
1. Remove engine under cover. Refer to Removal and Installation .
.
 .
.2. Remove cooling fan shroud flap if necessary. Refer to Removal and Installation .
.
 .
.3. Drain engine coolant from radiator. Refer to Draining .
.
 .
.| caution |
|
4. Remove radiator hose (lower) from radiator.
5. Remove radiator hose (lower) and reservoir tank hose [reservoir tank ‐ radiator hose (upper)] from engine with the following procedure if necessary:
- Remove alternator. Refer to Removal and Installation.Removal and Installation

- Remove radiator hose (lower) from engine.
- Remove reservoir tank hose [reservoir tank ‐ radiator hose (upper)] from engine.
6. Remove radiator hose (lower) clip from cooling fan shroud.
7. Disconnect CVT fluid cooler hose from CVT oil warmer. Refer to Removal and Installation.Removal and Installation

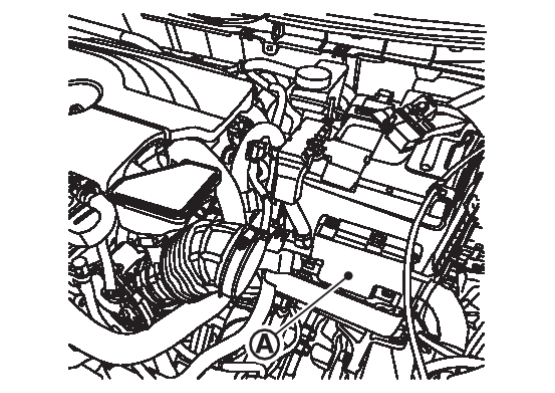
8. Remove air guide upper panel.
9. Remove air duct inlet. Refer to Removal and Installation.Removal and Installation

10. Remove air cleaner assembly. Refer to Removal and Installation.Removal and Installation

11. Remove front bumper assembly. Refer to Removal and Installation.Removal and Installation

12. Remove front combination light. Refer to Removal and Installation.Removal and Installation

13. Remove radiator core support upper. Refer to Removal and Installation.Removal and Installation

14. Remove mounting bracket.
15. Disconnect cooling fan control module harness connector.
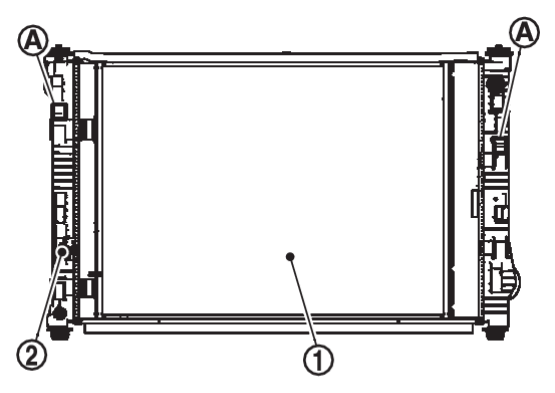
16. Remove condenser  from radiator
  , and move it frontward.
 from radiator
  , and move it frontward.
 | : Lock |
| caution |
|
17. Remove radiator hose (upper) from radiator.
| caution | Never spill engine coolant on drive belt. |
18. Remove radiator hose (upper) from engine with the following procedure if necessary:
| caution | Never spill engine coolant on drive belt. |
- Remove radiator hose (upper) clip from cooling fan shroud.
- Remove the battery positive terminals. Refer to Removal and Installation.Removal and Installation

- Remove engine harness bracket
 from battery tray.
 - Disconnect ECM harness connectors from ECM. Refer to ECM : Removal & Installation

- Remove radiator hose (upper) from engine.
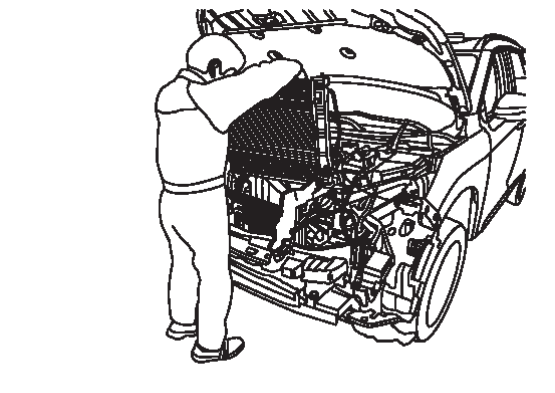
19. Remove radiator and cooling fan assembly from vehicle.
| caution |
|
20. Remove cooling fan assembly from radiator.
21. Remove air guide LH and air guide RH if necessary.
22. Remove air guide lower if necessary.
INSTALLATION
Note the following, and install in the reverse order of removal.
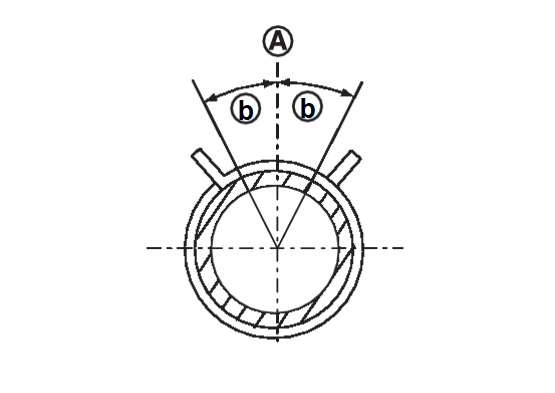
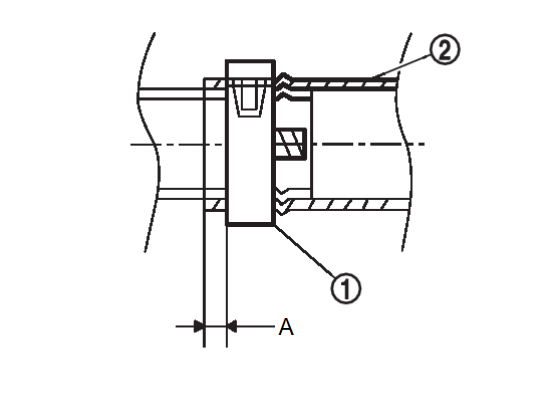
Radiator hose
| caution |
|
| note |
|
![[Previous]](../../../buttons/fprev.png)
![[Next]](../../../buttons/fnext.png)


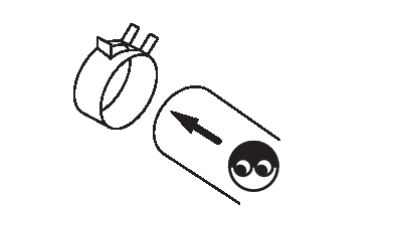
 : Vehicle upper
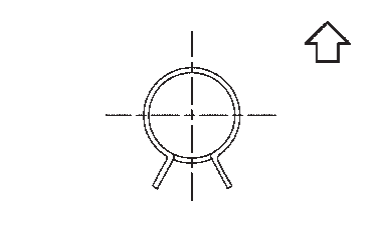
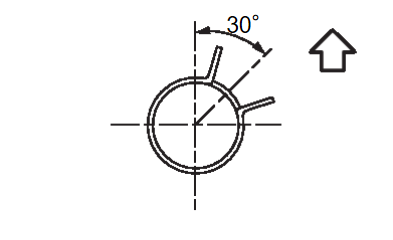
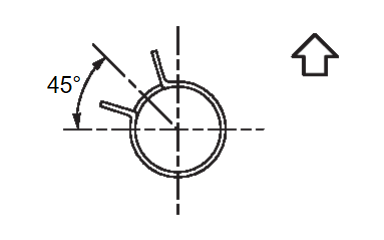
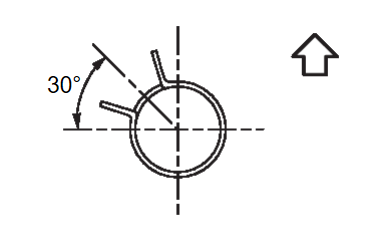
 created by the hose clamp pawl and the specified line