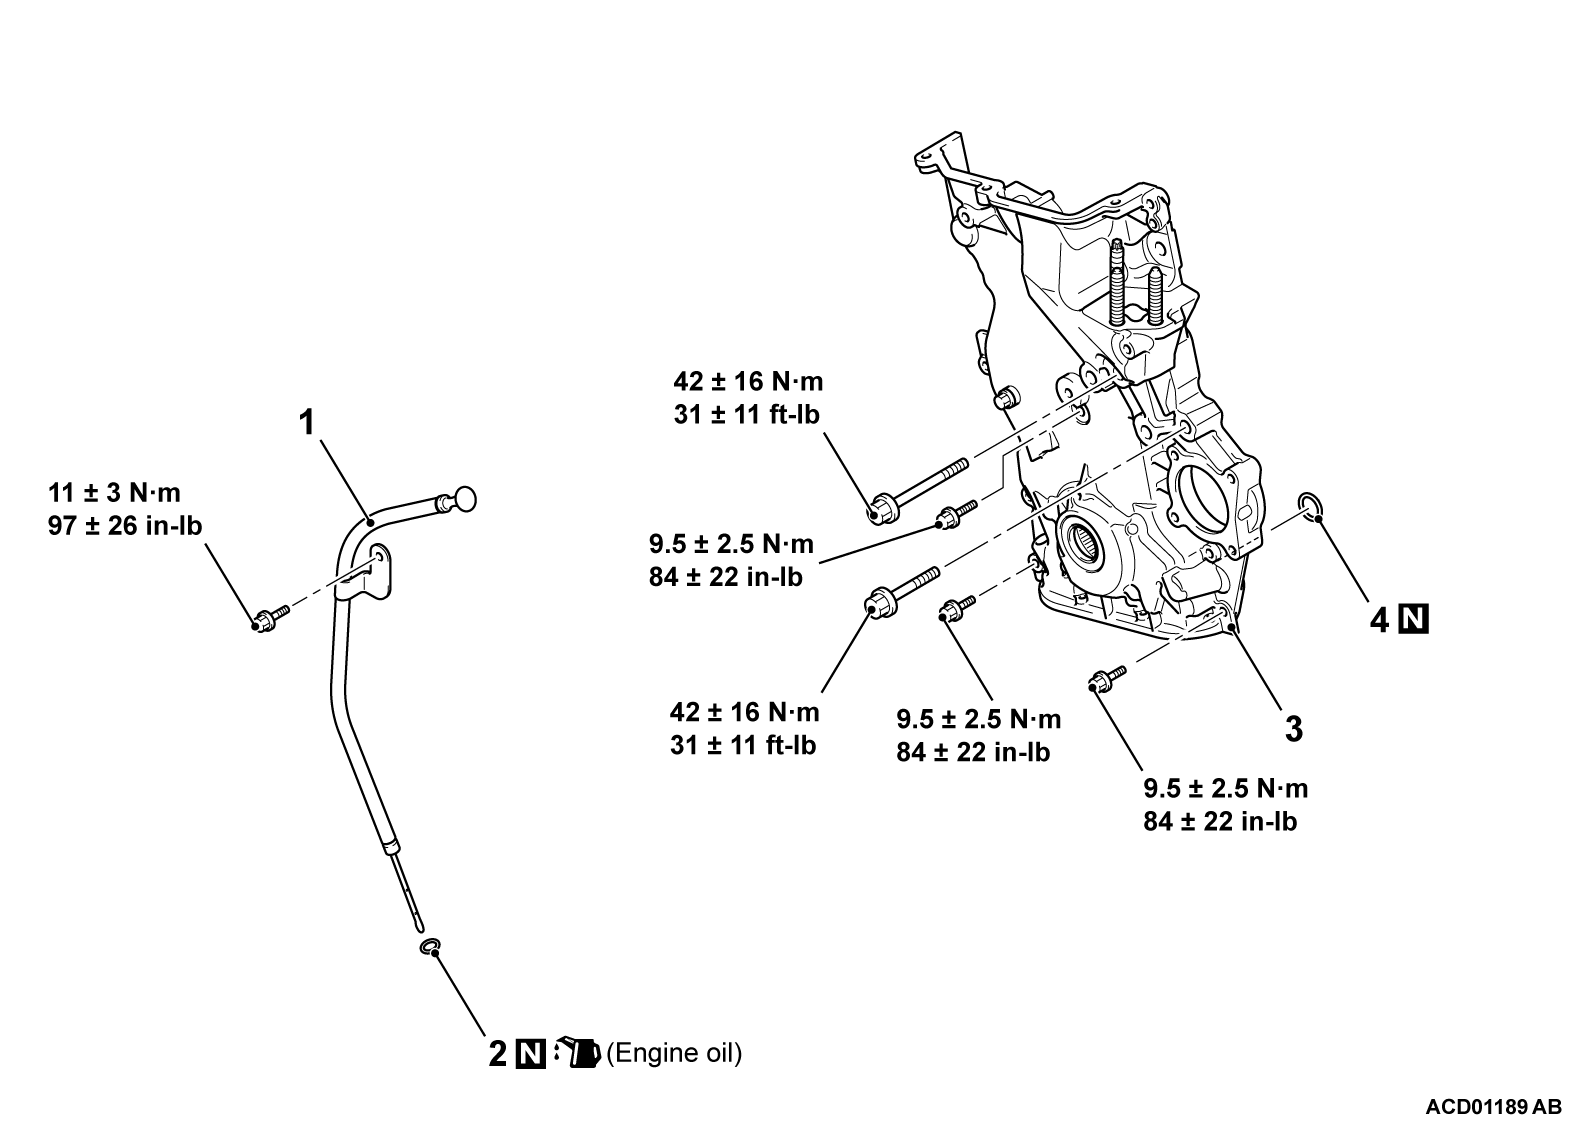
REMOVAL AND INSTALLATION
Pre-removal Operation | Post-installation Operation |
Required Special Tools:
- MB991928: Engine Hanger
- Slide Bracket (HI)
- MB991932: Foot (standard)
- MB991929: Joint (50)
- MB991895: Engine Hanger
- MB992906: Engine Hanger Attachment
REMOVAL SERVICE POINTS
<<A>> ENGINE MOUNTING INSULATOR REMOVAL
1. Secure special tool engine hanger (MB991928 or MB991895) for holding the engine assembly (Refer to GROUP 22A - Transaxle Assembly  ) <M/T> or (Refer to GROUP 23A - Transaxle Assembly
  ) <CVT>.
 ) <M/T> or (Refer to GROUP 23A - Transaxle Assembly
  ) <CVT>.
2. Adjust the engine hanger special tool (MB991928 or MB991895) not to allow the weight of the engine assembly to rest on the engine mounting insulator. Then remove the engine mounting insulator.
<<B>> TIMING CHAIN CASE ASSEMBLY REMOVAL
Remove the timing chain case assembly from above the vehicle.
INSTALLATION SERVICE POINTS
>>A<< TIMING CHAIN CASE ASSEMBLY INSTALLATION
>>B<< ENGINE MOUNTING INSULATOR INSTALLATION
Use special tool engine hanger (MB991928 or MB991895) as during removal to install the engine mounting insulator.
![[Previous]](../../../buttons/fprev.png)
![[Next]](../../../buttons/fnext.png)
