[Previous][Next]
REMOVAL AND INSTALLATION
 
 
Pre-removal operation
  • Under Cover Front Removal (Refer to GROUP 51 - Under Cover ).
  • Transmission Oil Draining (Refer to ).
  • Starter Motor Assembly Removal (Refer to GROUP 16 - Starter Motor Assembly ).
  • Drive Shaft Removal (Refer to GROUP 26 - Drive Shaft Assembly .)
  • Air Cleaner Assembly Removal (Refer to GROUP 15 - Air Cleaner ).
  • Battery and Battery Tray Removal (Refer to GROUP 54A - Battery ).
Post-installation operation
  • Clutch Pedal Check And Adjustment (Refer to ).
  • Battery and Battery Tray Installation (Refer to GROUP 54A - Battery ).
  • Air Cleaner Assembly Installation (Refer to GROUP 15 - Air Cleaner ).
  • Drive Shaft Installation (Refer to GROUP 26 - Drive Shaft Assembly .)
  • Starter Motor Assembly Installation (Refer to GROUP 16 - Starter Motor Assembly ).
  • Transmission Oil Refilling (Refer to ).
  • Under Cover Front Installation (Refer to GROUP 51 - Under Cover ).
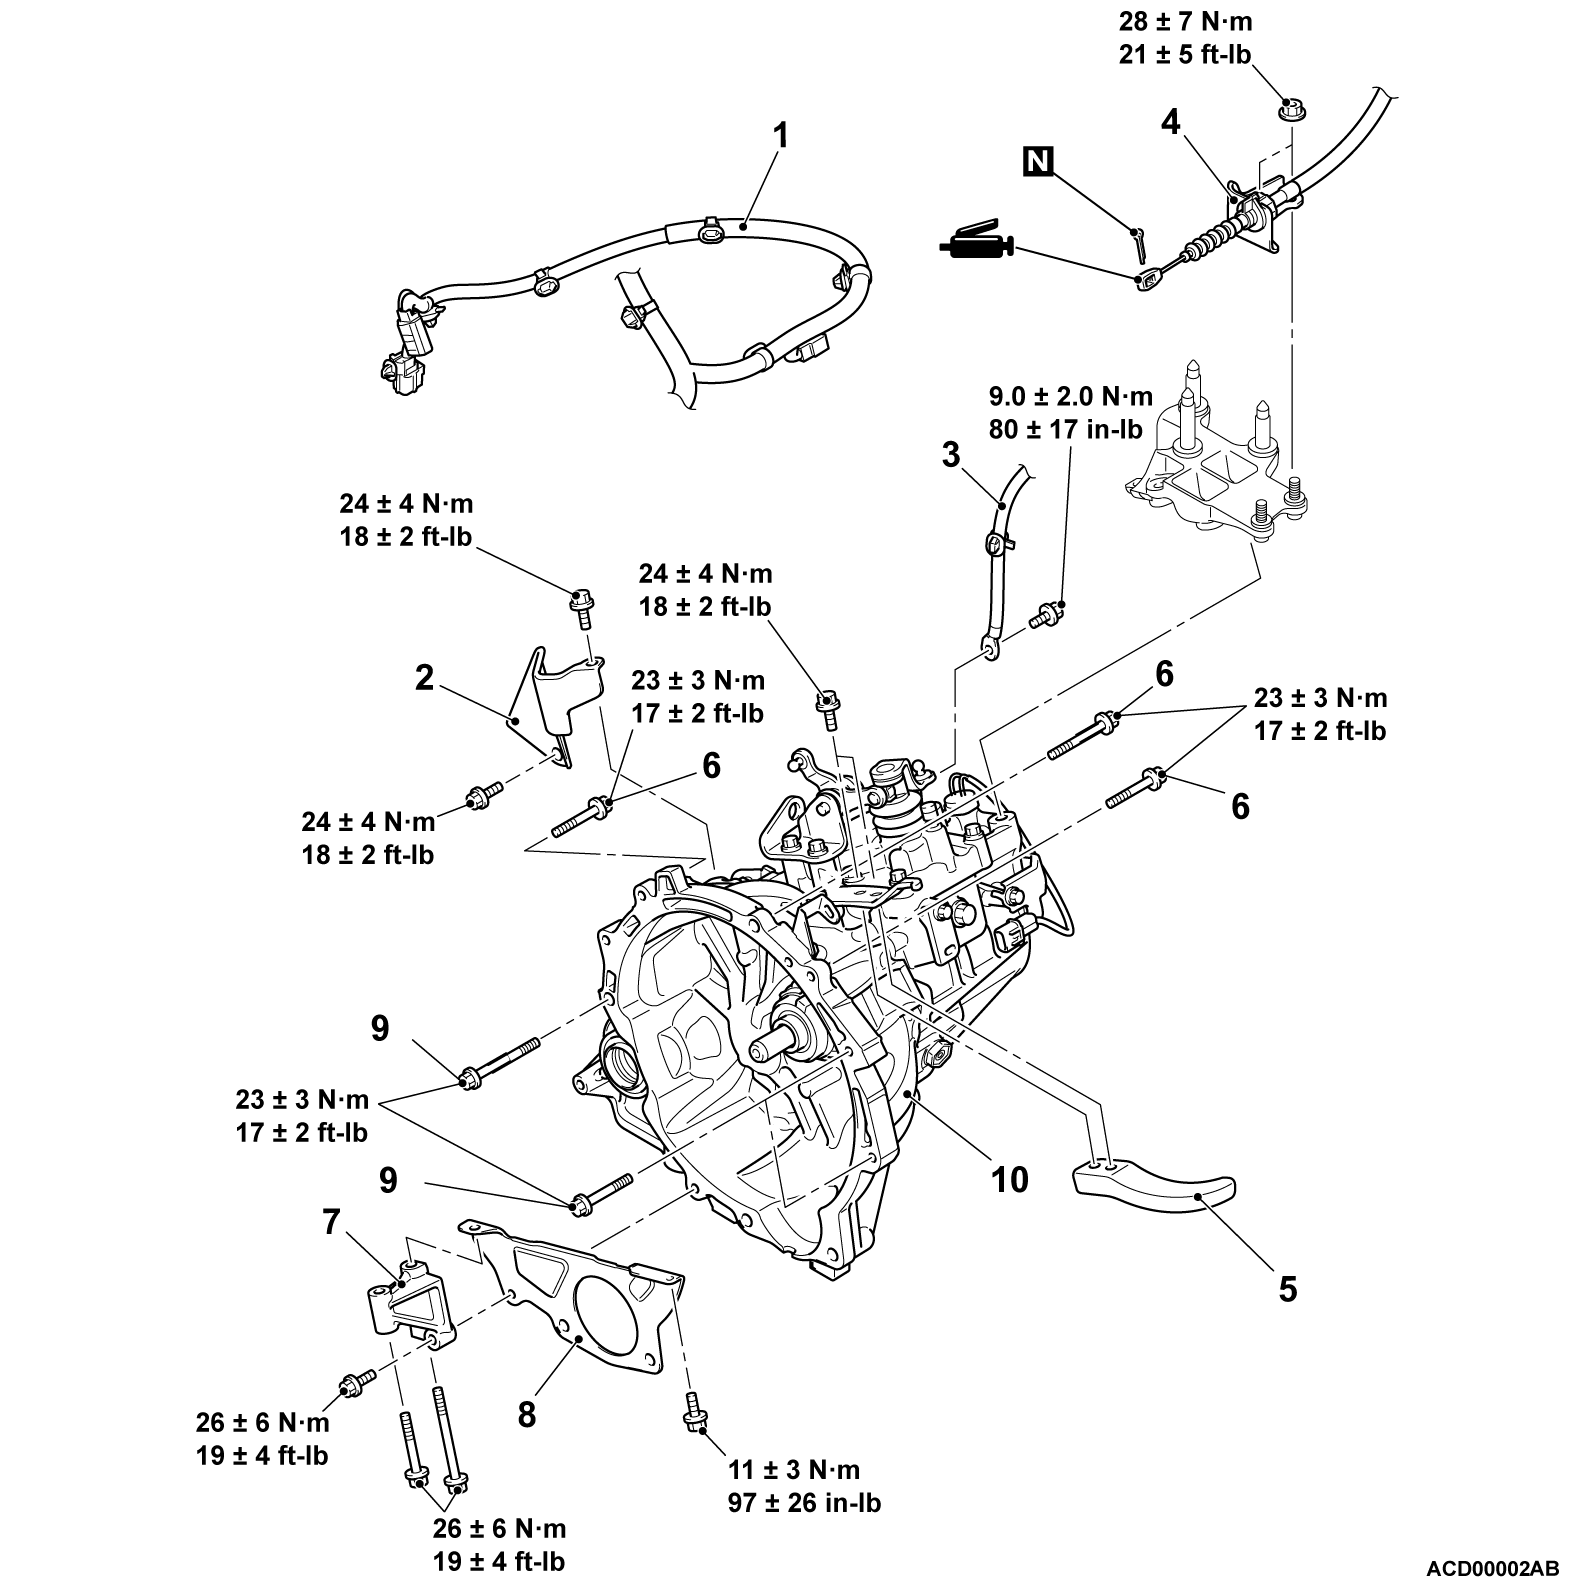
Removal steps
1.Connector and wiring harness connection
2.Heat protector bracket
3.Battery ground connection
4.Clutch cable connection
5.Impact support lever
Gearshift cable and select cable assembly connection <Transaxle side> (Refer to )
<<A>>6.Transaxle assembly upper part coupling bolts
7.Transaxle stay
8.Bell housing cover
Exhaust manifold and main muffler connection (Refer to GROUP 15 - Exhaust Pipe and Main Muffler )
Engine roll rod assembly (Refer to GROUP 32 - Engine Roll Stopper Rod )
While supporting the engine and transaxle assembly with a garage jack.
Transaxle mounting insulator and transaxle mounting bracket (Refer to GROUP 32 - Transaxle Mounting )
<<B>>Engine assembly supporting
9.Transaxle assembly lower part coupling bolts
>>A<<10.Transaxle assembly
Required Special Tools:
 
 
REMOVAL SERVICE POINTS
 
 
<<A>> TRANSAXLE ASSEMBLY UPPER PART COUPLING BOLTS REMOVAL
Only loosen the each bolt from the engine and transaxle assembly (do not remove).


<<B>> ENGINE ASSEMBLY SUPPORTING
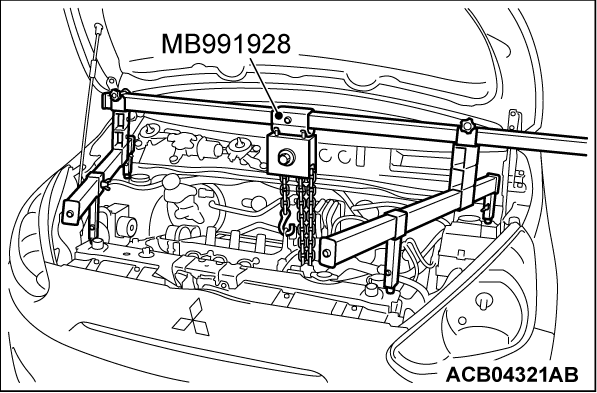
1. <When engine hanger (Special tool: MB991928) is used>
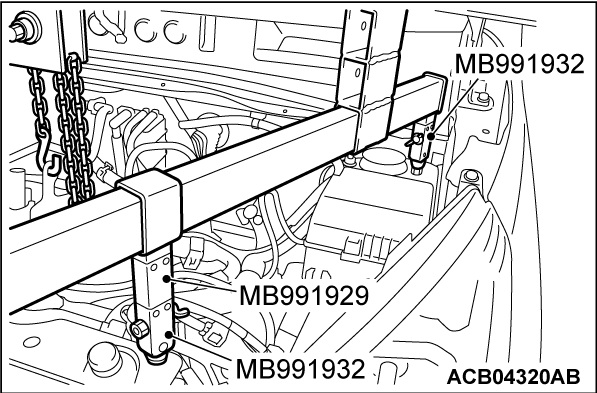
(1) Assemble the engine hanger (Special tool: MB991928). (Set the components below to the base hanger.)
  • Slide bracket (HI)
  • Foot x 4 (standard) (MB991932)
  • Joint x 2 (50) (MB991929)
(2) Set the foot of the engine hanger (Special tool: MB991928) as shown in the figure.
noteAdjust the engine hanger balance.
(3) Remove the garage jack and then remove the transaxle assembly upper part coupling bolts that have been loosened previously.

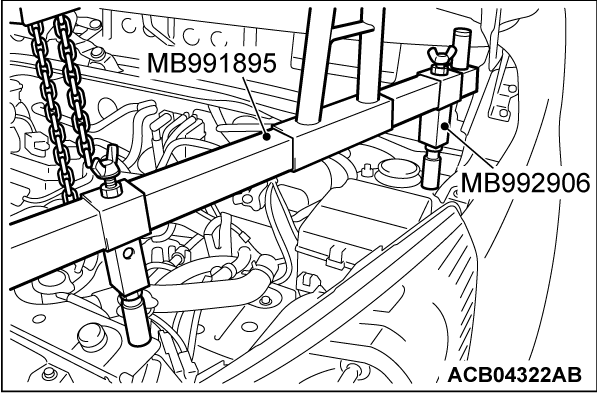
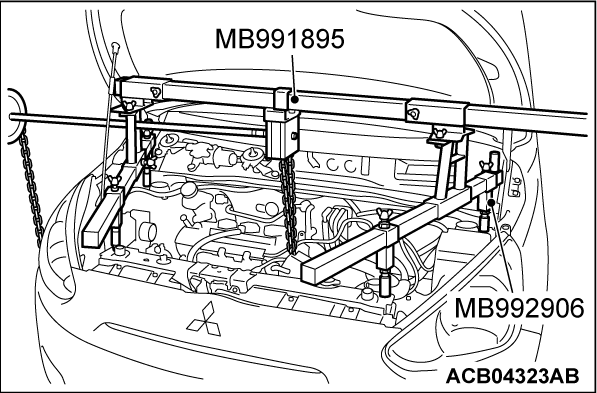
2. <When engine hanger (Special tool: MB991895) and engine hanger attachment (Special tool: MB992906) are used>
(1) Set the foot of the engine hanger (Special tool: MB991895) and engine hanger attachment (Special tool: MB992906) as shown in the figure.
noteAdjust the engine hanger balance.
(2) Remove the garage jack and then remove the transaxle assembly upper part coupling bolts that have been loosened previously.


INSTALLATION SERVICE POINT
 
 
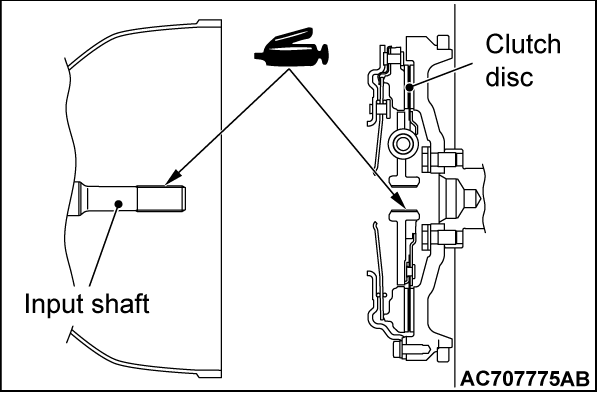
>>A<< TRANSAXLE ASSEMBLY INSTALLATION
When installing the transaxle assembly, apply the specified grease to the spline of clutch disc and input shaft.
Specified grease: Mitsubishi Part No.0101011 or equivalent