REMOVAL AND INSTALLATION
Required Special Tools:
- MB991396: Oil Filter Wrench
- MB991828: Oil Filter Wrench
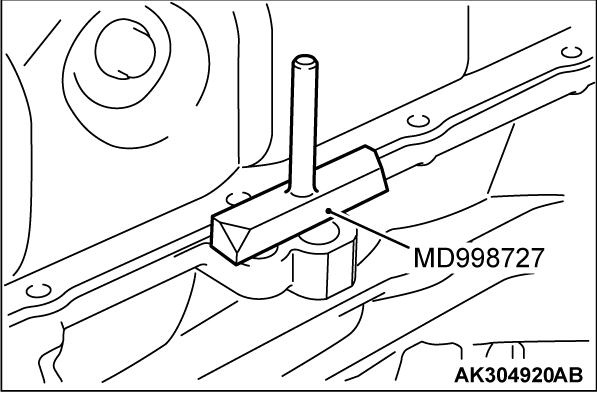
- MD998727: Oil Pan FIPG Cutter
- MB990699: Differential Oil Seal Installer
- MB991993: Crankshaft Front Oil Seal Guide
- MB992676: Oil Filter Stud Setter
REMOVAL SERVICE POINTS
<<A>> OIL FILTER REMOVAL
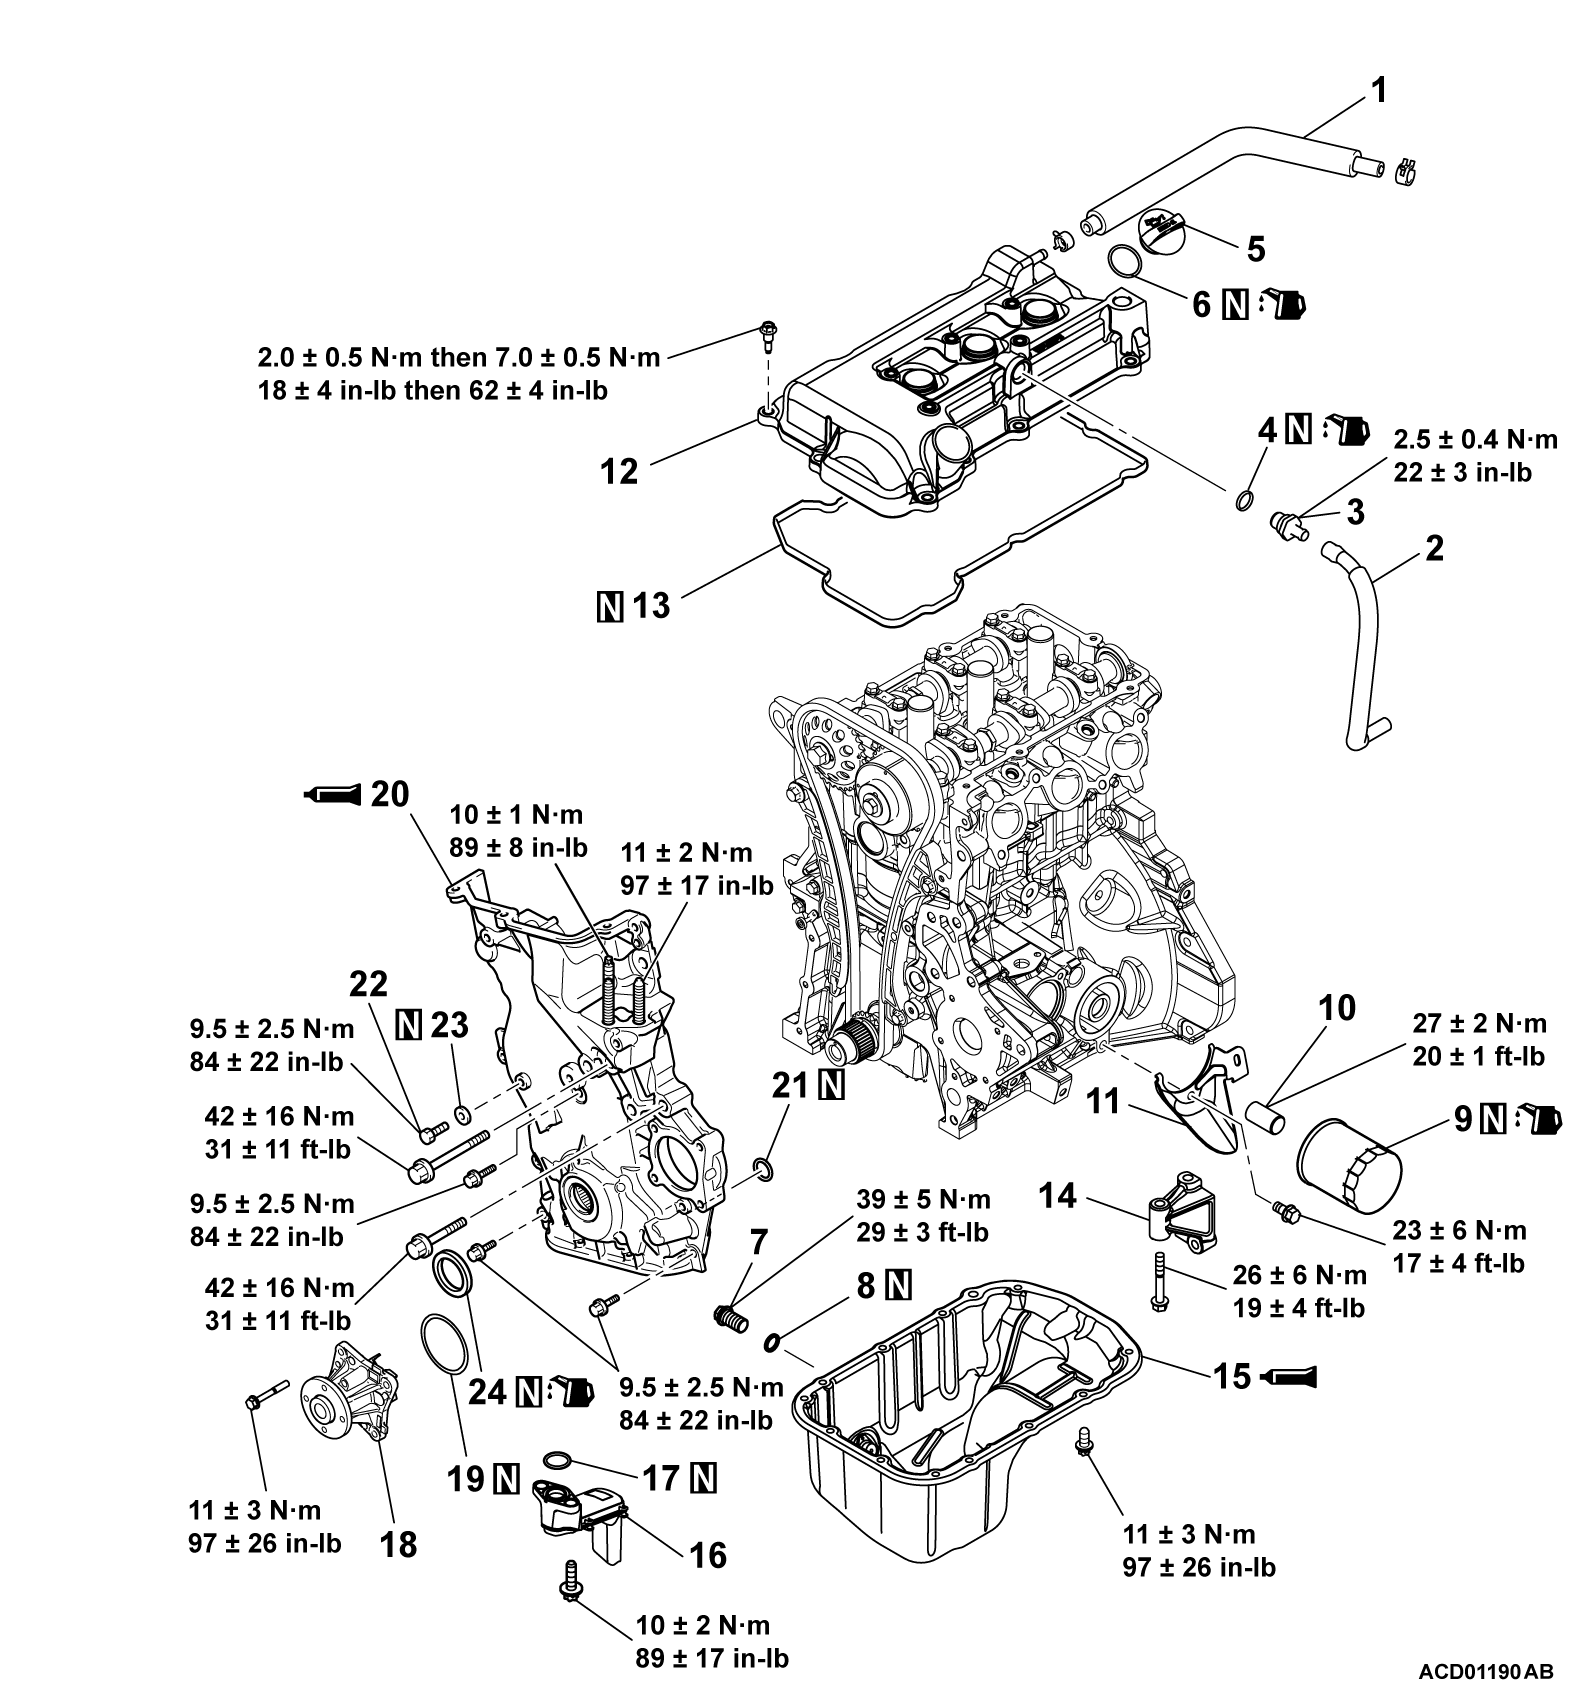
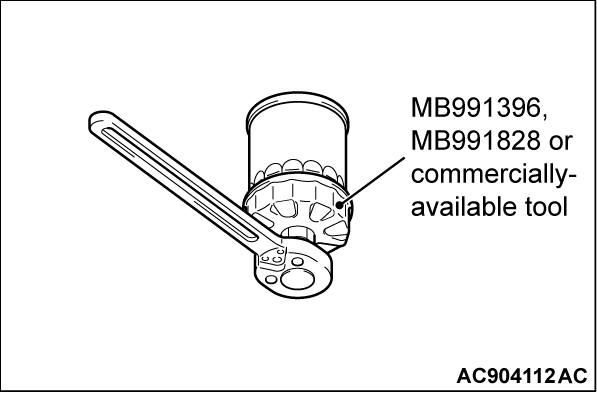
Use special tool oil filter wrench (MB991396, MB991828) or commercially-available tool to remove the oil filter.
<<B>> OIL FILTER STUD REMOVAL
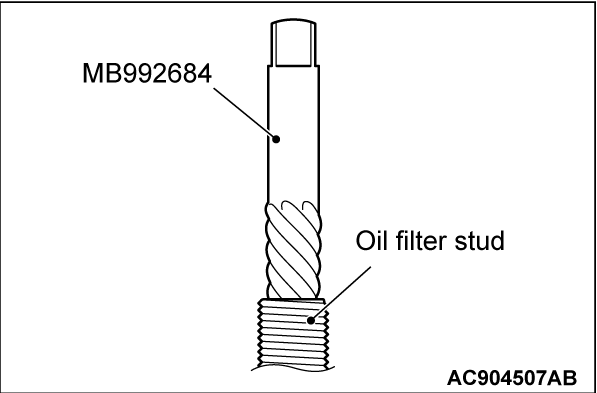
Remove the oil filter stud using recommended tool screw extractor (MB992684) or equivalent.
| note | This recommended tool is a component of screw extractor set (MB992678). |
INSTALLATION SERVICE POINTS
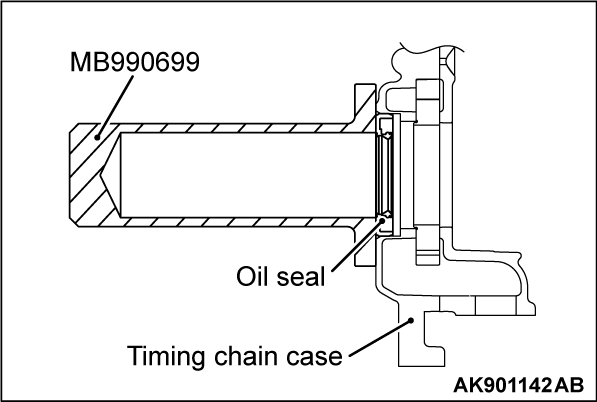
>>A<< FRONT OIL SEAL INSTALLATION
1.
Using special tool differential oil seal installer (MB990699), drive the oil seal so that it is flush with the timing chain case.
| caution | When installing the front oil seal, be careful to avoid damage to the front oil seal. |
2. Apply a small amount of engine oil to the entire inner circumference of the oil seal lip.
>>B<< SERVICE HOLE BOLT/TIMING CHAIN CASE INSTALLATION
1.
| caution | Sufficiently check that there is no residual oil on the place where degreasing is performed. If fingerprints are left, do not touch it with bare hands after the degreasing, since the oils from your fingers will harm the seal ability. |
Remove any liquid gasket remaining on the timing chain case, the cylinder block, and the cylinder head.
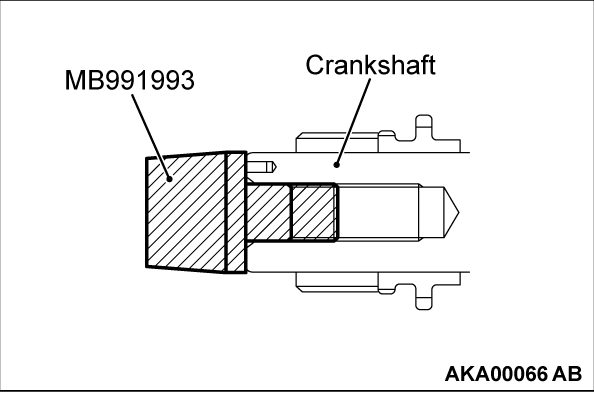
2. Install special tool crankshaft front oil seal guide (MB991993) onto the crankshaft.
3.
| caution | The timing chain case should be installed within 10 minutes of applying liquid gasket. |
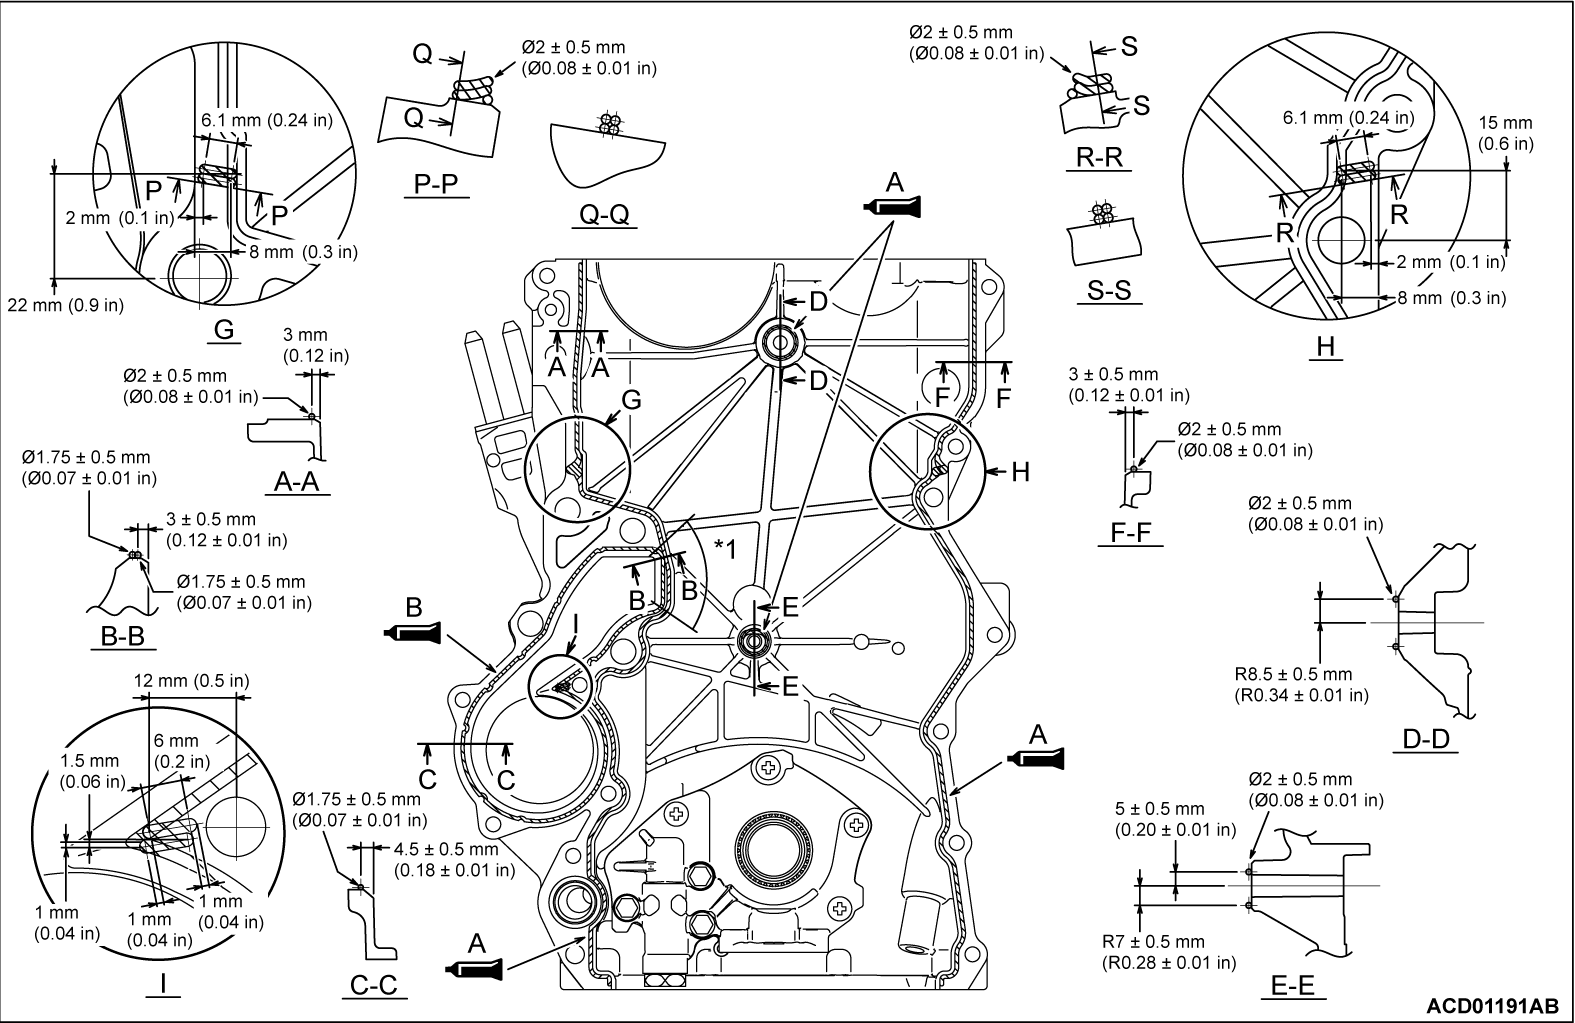
Apply a 2 ± 0.5 mm (0.08 ± 0.01 inch) bead of liquid gasket to location A on the timing chain case respectively as illustrated. [Apply a 1.75 ± 0.5 mm (0.07 ± 0.01 inch) wide bead in the area indicated by *1].
Apply a 1.75 ± 0.5 mm (0.07 ± 0.01 inch) bead of liquid gasket to location B on the timing chain case respectively as illustrated.
Specified sealant:
- A: ThreeBond 1217G or equivalent
- B: ThreeBond 1227D or equivalent
4. Install the timing chain case.
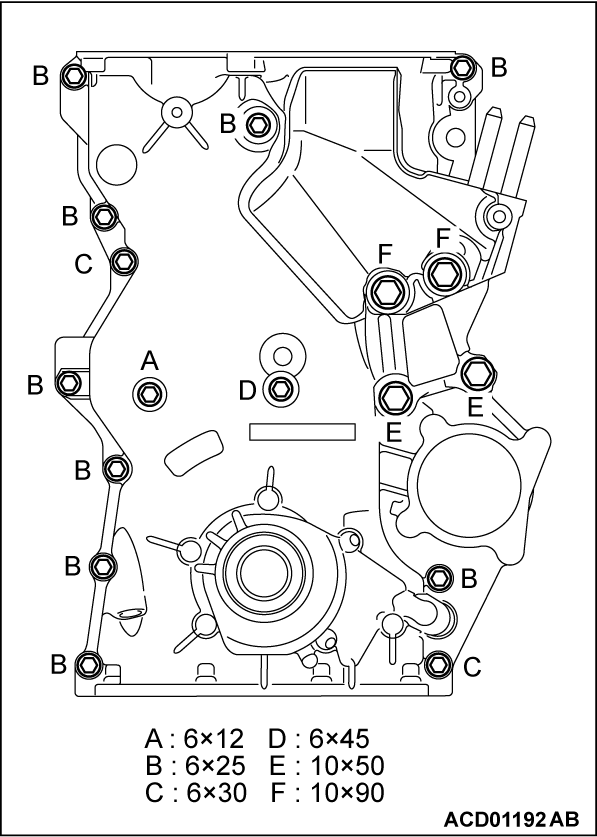
| note | The service hole bolt and timing chain case mounting bolts have different lengths. Be sure to use the correct bolt for each location. |
5. Tighten the service hole bolt and timing chain case mounting bolts to the specified torque.
Tightening torque
- M6: 9.5 ± 2.5 N·m (84 ± 22 in-lb)
- M10: 42 ± 16 N·m (31 ± 11 ft-lb)
>>C<< O-RING/WATER PUMP INSTALLATION
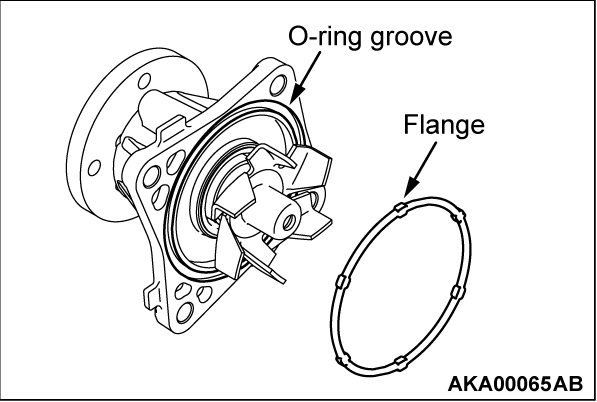
1. Carefully remove the coolant dry matters and the other foreign materials from the O-ring groove of the water pump. In the same way, clean the timing chain case side.
2. Push the flange of the new O-ring into the O-ring groove of the water pump to securely install the O-ring. Sufficiently apply water or the coolant to the O-ring with a brush so that the O-ring does not fall.
3. Gently inverting the water pump, check whether the O-ring does not fall.
4. Install the water pump to the timing chain case. At that time, be careful that the O-ring does not fall or the O-ring is not jammed.
>>D<< OIL PAN INSTALLATION
1. Remove any liquid gasket remaining on the cylinder block, the timing chain case, the oil seal case and the oil pan.
2.
| caution | The oil pan should be installed within 10 minutes of applying liquid gasket. |
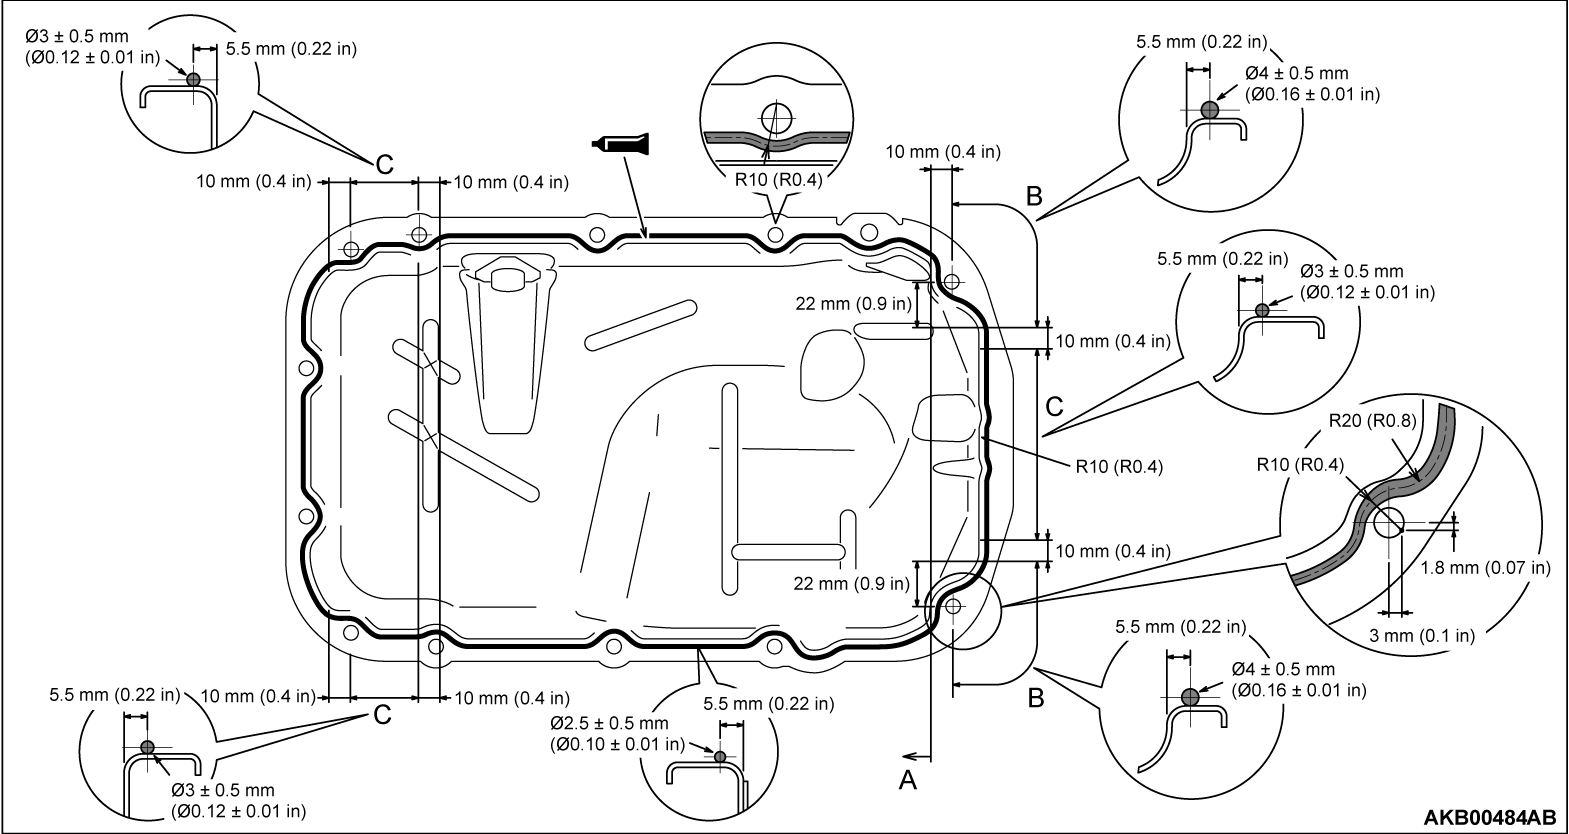
Apply a 2.5 ± 0.5 mm (0.10 ± 0.01 inch) bead of liquid gasket to location A, and a 4 ± 0.5 mm (0.16 ± 0.01 inch) bead of liquid gasket to location B, and a 3 ± 0.5 mm (0.12 ± 0.01 inch) bead of liquid gasket to location C on the oil pan respectively as illustrated.
Specified sealant:
- ThreeBond 1217G or equivalent
3. Install the oil pan by tightening the fittings to the specified torque of 11 ± 3 N·m (97 ± 26 in-lb).
>>E<< CYLINDER HEAD COVER INSTALLATION
1. Remove any liquid gasket remaining on the cylinder head cover, the timing chain case and the cylinder head.
2.
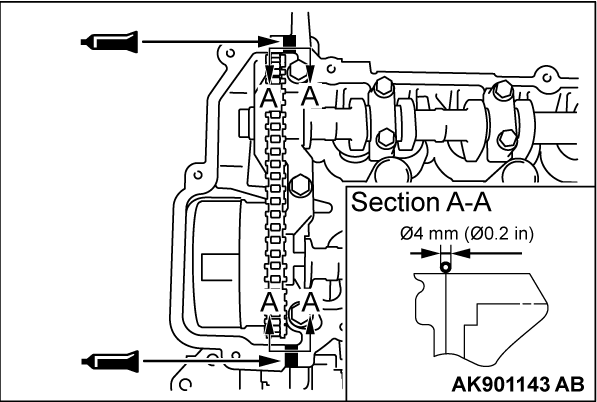
Apply a 4 mm (0.2 in) bead of liquid gasket as illustrated.
| caution | The timing chain should be installed within 3 minutes of applying liquid gasket. |
Specified sealant:
- ThreeBond 1217G or equivalent
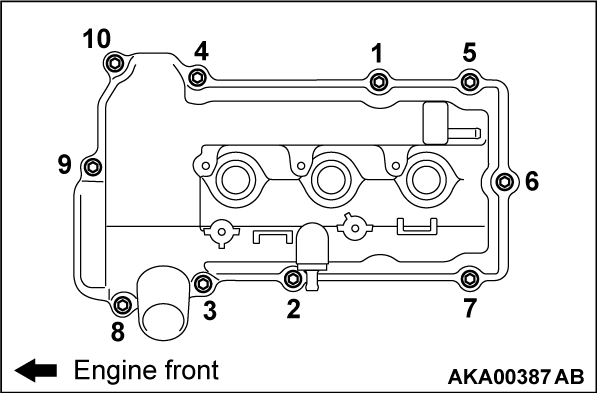
3. Tighten the bolts to the tightening torque of 2.0 ± 0.5 N·m (18 ± 4 in-lb) in the order shown in the illustration.
4. Next, tighten the bolts to the specified torque of 7.0 ± 0.5 N·m (62 ± 4 in-lb) in the same order.
>>F<< OIL FILTER COVER INSTALLATION
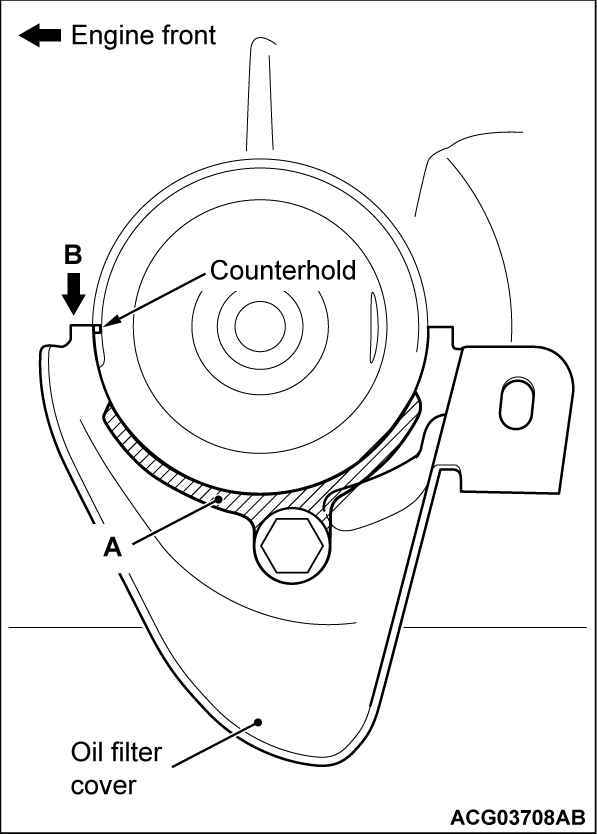
1. Install the oil filer cover so that its portion shown (A) should contact the cylinder block.
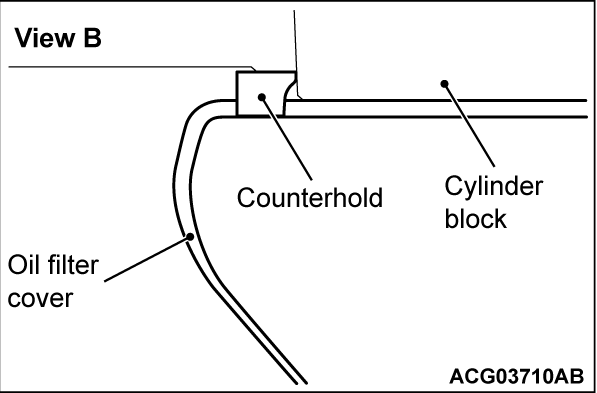
2. Depress the counterhold of oil filter cover in front of the engine towards the cylinder block, and tighten the mounting bolt to the specified torque.
Specified torque: 23 ± 6 N·m (17 ± 4 ft-lb)
>>G<< OIL FILTER STUD INSTALLATION
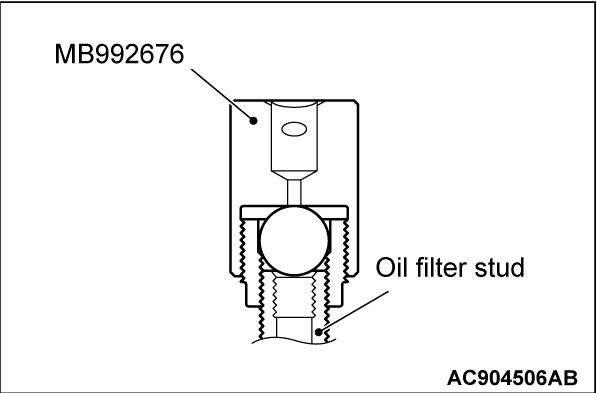
Using special tool oil filter stud setter (MB992676), install the new oil filter stud and tighten it to the specified torque.
Specified torque: 27 ± 2 N·m (20 ± 1 ft-lb)
>>H<< OIL FILTER INSTALLATION
1. Clean the oil filter installing surface on the cylinder block side.
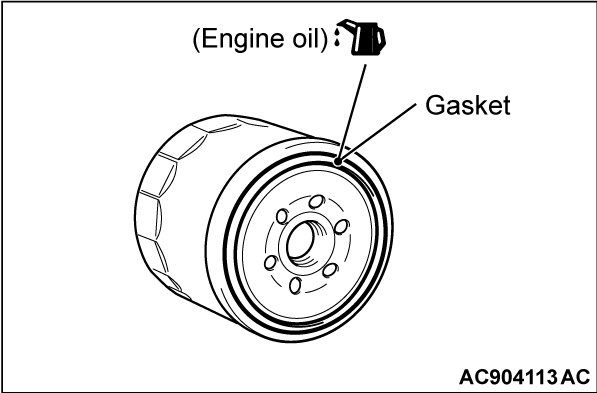
2. Apply a small amount of engine oil to the new oil filter gasket.
3. For the specified tightening torque, refer to the caution label attached on the oil filter.
4. Tighten the oil filter until the gasket contacts with the installation surface.
5. In the same manner as removal, use special tool oil filter wrench (MB991396, MB991828) or commercially-available tool to tighten the oil filter to the specified torque.
6. After installing the oil filter, check clearance between oil filter cover and it.
![[Previous]](../../../buttons/fprev.png)
![[Next]](../../../buttons/fnext.png)
