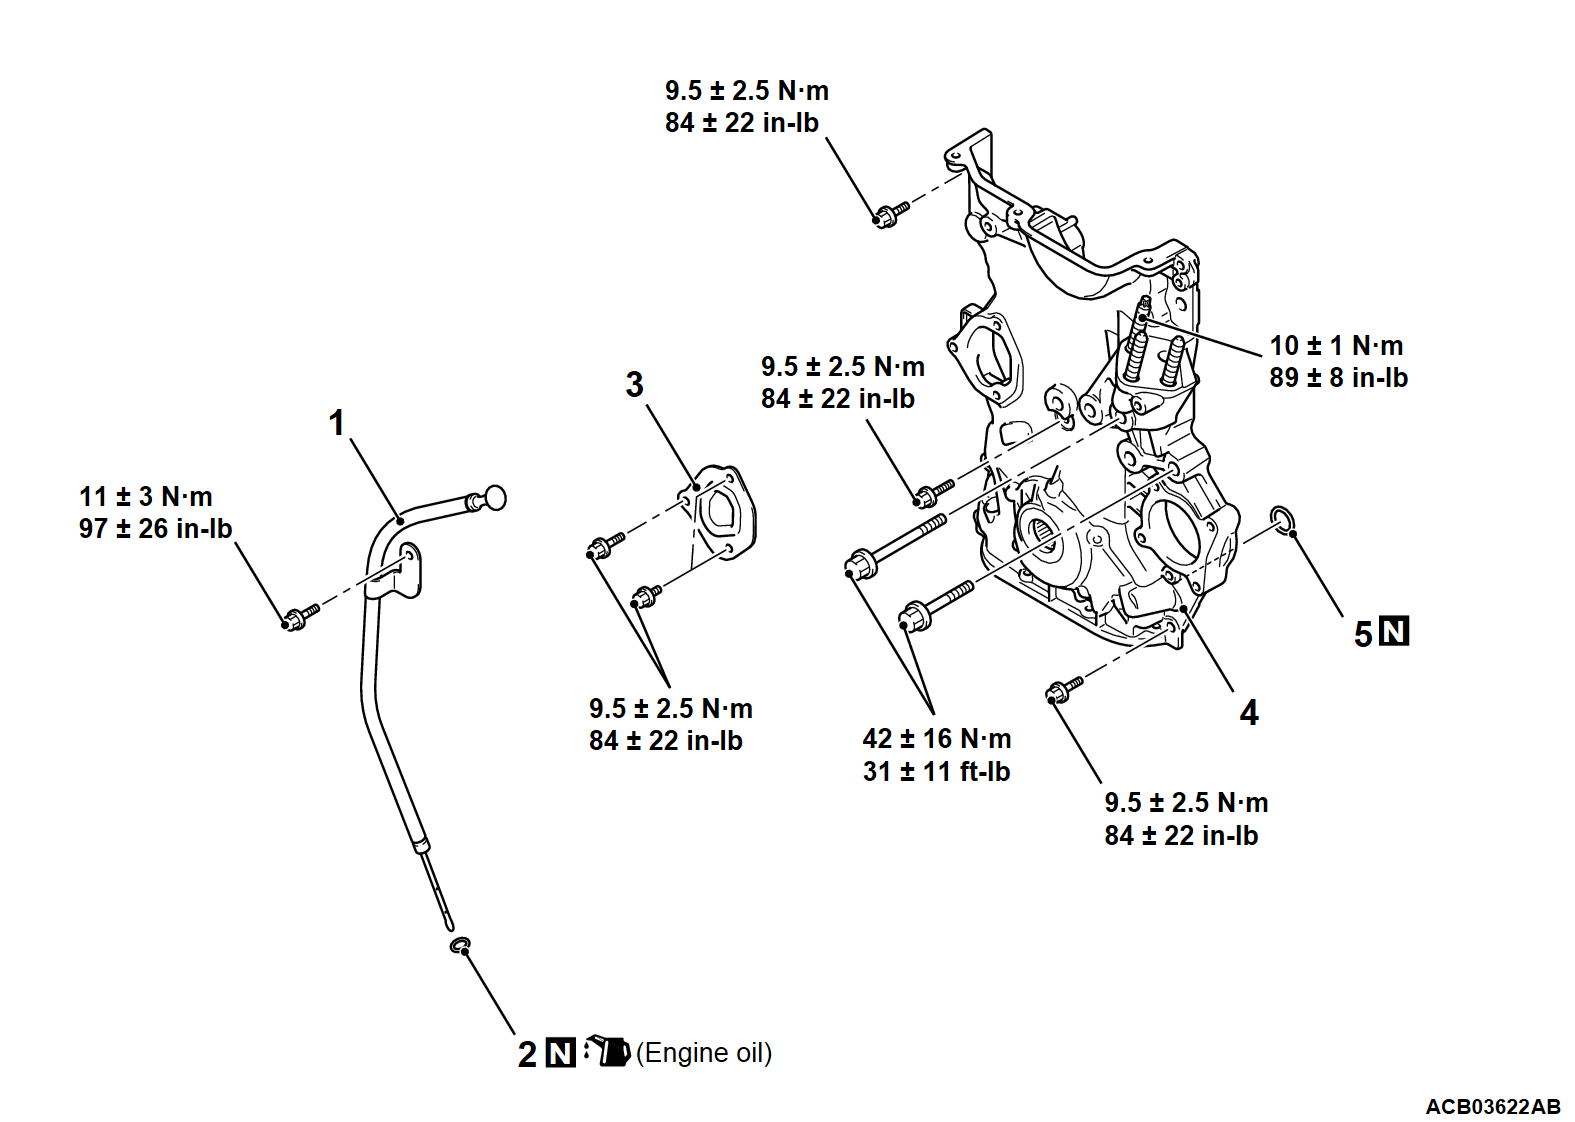
REMOVAL AND INSTALLATION
Pre-removal Operation | Post-installation Operation |
REMOVAL SERVICE POINTS
<<A>> ENGINE MOUNTING INSULATOR REMOVAL
1. Secure special tool engine hanger (MB991928 or MB991895) for holding the engine assembly (Refer to GROUP 22A -Transaxle Assembly  ) <M/T> or (Refer to GROUP 23A -Transaxle Assembly
  ) <CVT>.
 ) <M/T> or (Refer to GROUP 23A -Transaxle Assembly
  ) <CVT>.
2. Adjust the special tool not to allow the weight of the engine assembly to rest on the engine mounting insulator. Then remove the engine mounting insulator.
<<B>> TIMING CHAIN CASE ASSEMBLY REMOVAL
Remove the timing chain case assembly from above the vehicle.
INSTALLATION SERVICE POINTS
>>A<< TIMING CHAIN CASE ASSEMBLY INSTALLATION
>>B<< ENGINE MOUNTING INSULATOR INSTALLATION
Use special tool engine hanger (MB991928 or MB991895) as during removal to install the engine mounting insulator.
![[Previous]](../../../buttons/fprev.png)
![[Next]](../../../buttons/fnext.png)
