[Previous][Next]
REMOVAL AND INSTALLATION
 
 
Pre-removal Operation
  • Engine Oil Draining (Refer to GROUP 12 - On-vehicle Service, Engine Oil Replacement ).
  • Drive Belt Removal (Refer to ) <Vehicles with A/C>.
  • Starter Assembly Removal (Refer to GROUP 16 - Starting System, Starter Assembly ).
  • Oil Dipstick Removal (Refer to GROUP 11B - Generator and Ignition System ).
Post-installation Operation
  • Oil Dipstick Installation (Refer to GROUP 11B - Generator and Ignition System ).
  • Starter Assembly Installation (Refer to GROUP 16 - Starting System, Starter Assembly ).
  • Drive Belt Installation (Refer to ) <Vehicles with A/C>.
  • Engine Oil Refilling (Refer to GROUP 12 - On-vehicle Service, Engine Oil Replacement ).
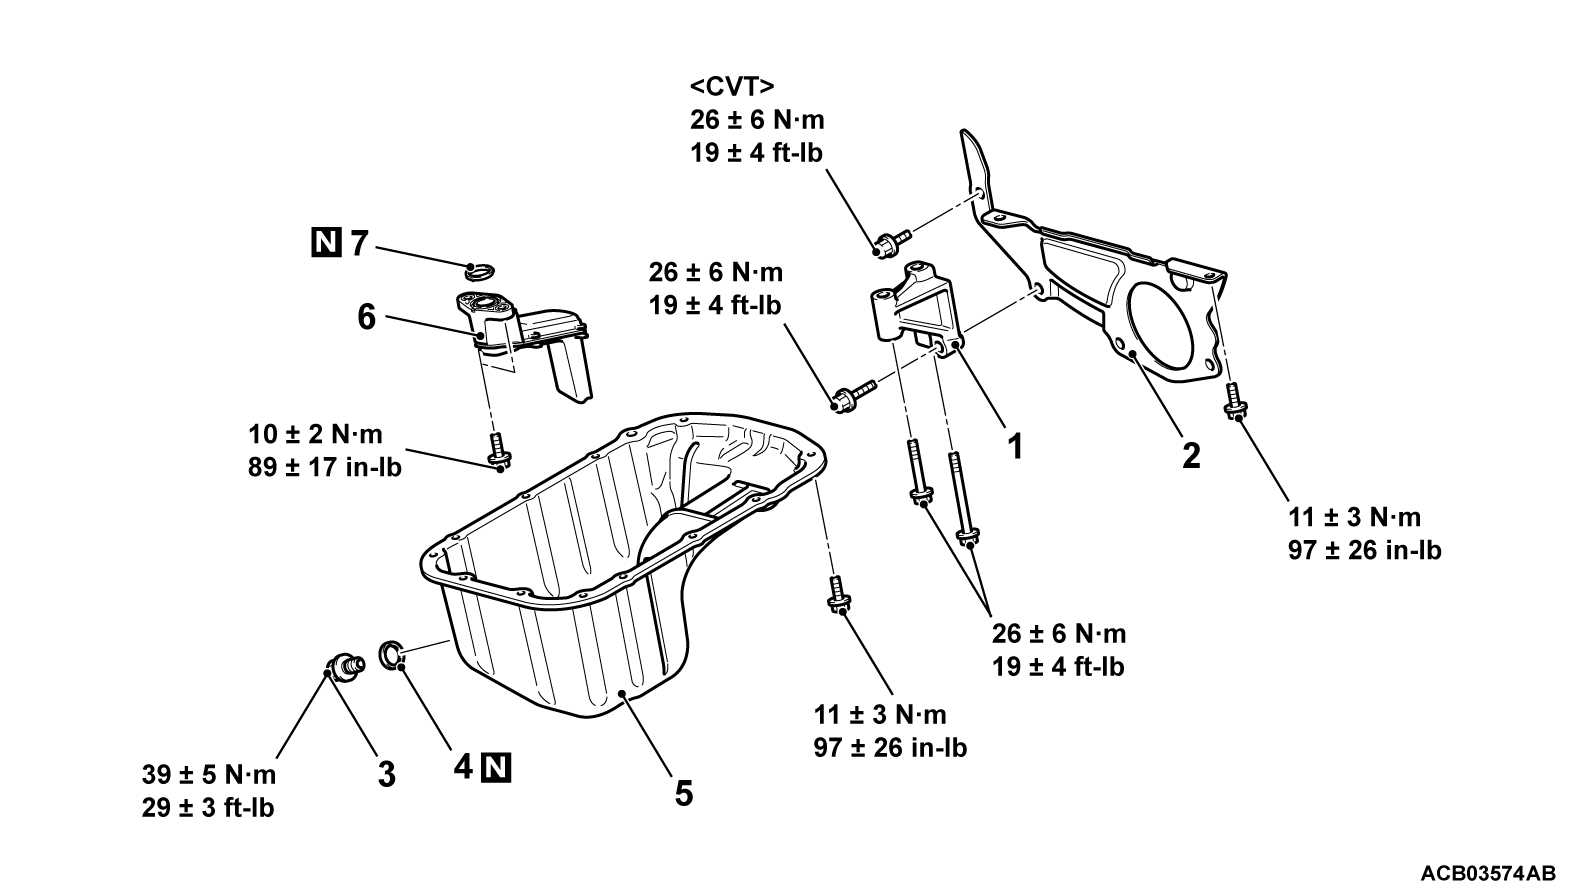
Removal steps
<<A>>A/C compressor and clutch assembly, A/C compressor bracket (Refer to GROUP 55A - Compressor Assembly ) <Vehicles with A/C>.
1.Transaxle stay
2.Bell housing cover
3.Oil drain plug
4.Oil drain plug gasket
<<B>>>>A<<5.Oil pan
6.Oil strainer
7.Oil strainer gasket
Stiffener plate (Refer to GROUP 11B - Crankshaft and Cylinder Block ).
 
 
REMOVAL SERVICE POINTS
 
 
<<A>> A/C COMPRESSOR AND CLUTCH ASSEMBLY/A/C COMPRESSOR BRACKET REMOVAL
1. Remove the A/C compressor and clutch assembly together with the hose from the bracket.
2. Tie the removed A/C compressor and clutch assembly with a string at a position where they will not interfere with the removal and installation of oil pan.
3. Remove the A/C compressor bracket.


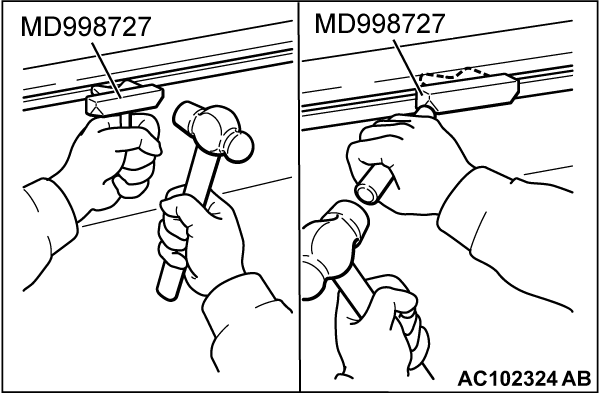
<<B>> OIL PAN REMOVAL
1. Remove the oil pan mounting bolts.
2. Use special tool oil pan FIPG cutter (MD998727) to remove the oil pan.


INSTALLATION SERVICE POINT
 
 
>>A<< OIL PAN INSTALLATION
For the installation procedure, refer to GROUP 11B - Oil Pan and Timing Chain Case .