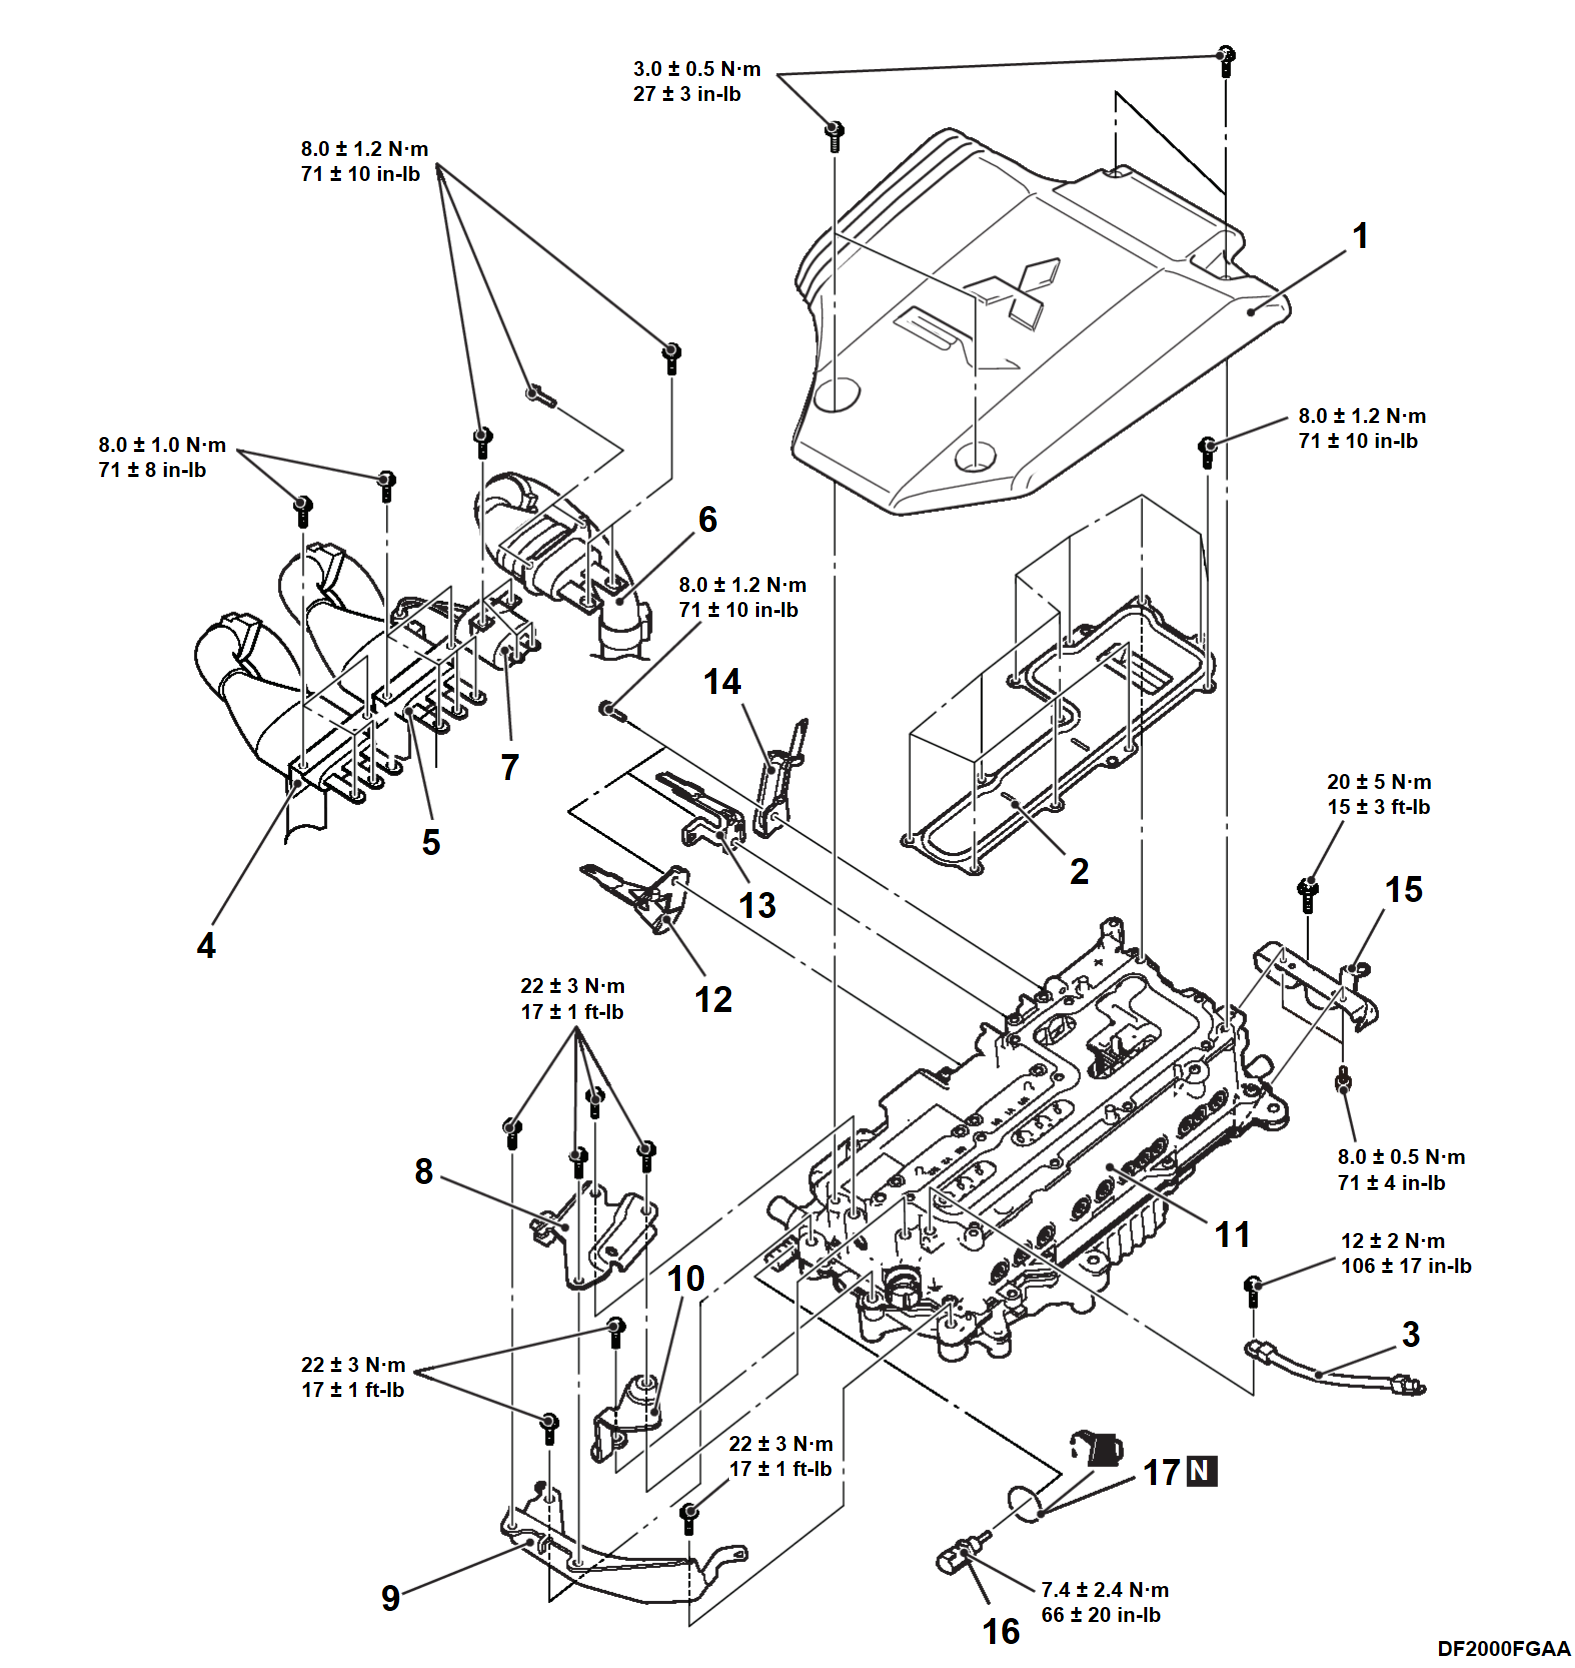
REMOVAL AND INSTALLATION
| danger | When servicing the high-voltage system parts, always wear the protective equipment or armour and always shut off the high-voltage by removing the service plug (Refer to PRECAUTIONS ON HOW TO USE THE HIGH-VOLTAGE VEHICLE ). ). |
| caution | When the power drive unit is replaced, perform the vehicle specification writing (Refer to VEHICLE SPECIFICATION WRITING ). ). |
Pre-removal Operation
| Post-installation Operation
|
REMOVAL SERVICE POINT
<<A>> FRONT MOTOR CABLE, GENERATOR CABLE, DRIVE BATTERY FRONT CABLE, AND A/C COMPRESSOR CABLE DISCONNECTION
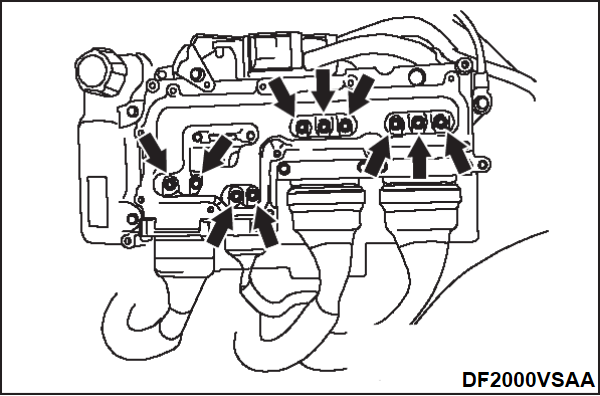
1. Remove the 10 inner cable mounting bolts.
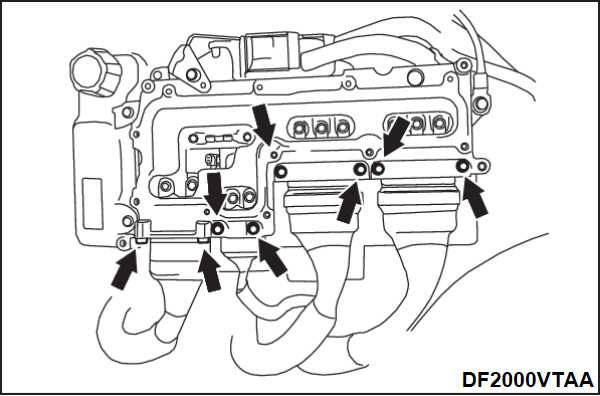
2. Remove the 8 outer cable mounting bolts.
3. Pull out the cables from the power drive unit.
INSTALLATION SERVICE POINT
>>A<< RADIATOR PIPING HOSE CONNECTION
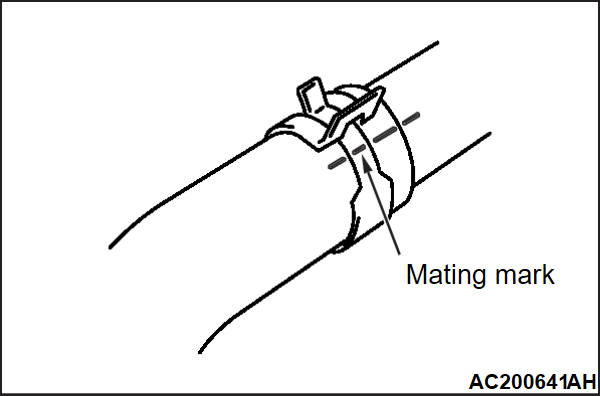
1. Insert the hose to each pipe up to the convex portion.
2. Align the mating marks on the hose and hose clips and install the hose without twisting the hose.
>>B<< A/C COMPRESSOR CABLE AND DRIVE BATTERY CABLE CONNECTION
1. Connect A/C compressor cable and drive battery front cable into the power drive unit.
2. Install the outer cable mounting bolts and inner cable mounting bolts in this order and tighten them to the specified torque.
Tightening torque: 8.0 ± 1.2 N·m
>>C<< GENERATOR CABLE AND FRONT MOTOR CABLE CONNECTION
1. Connect generator cable and front motor cable into the power drive unit.
2. Install the outer cable mounting bolts and inner cable mounting bolts in this order and tighten them to the specified torque.
Tightening torque: 8.0 ± 1.0 N·m
>>D<< SERVICE LID INSTALLATION
| caution | When reusing the service lid, check that the sealing surface on the service lid is free of damage (scratch or cracks) and install it. |
![[Previous]](../../../buttons/fprev.png)
![[Next]](../../../buttons/fnext.png)


