FUEL TANK PUMP AND GAUGE ASSEMBLY REPLACEMENT
1. Perform work to prevent leakage of fuel [Refer to Multiport fuel injection (MFI) - On-Vehicle service, Fuel Pump Connector Disconnection (How to Reduce Pressurized Fuel Pressure) FUEL PUMP CONNECTOR DISCONNECTION (HOW TO REDUCE PRESSURIZED FUEL PRESSURE) .]
.]
 .]
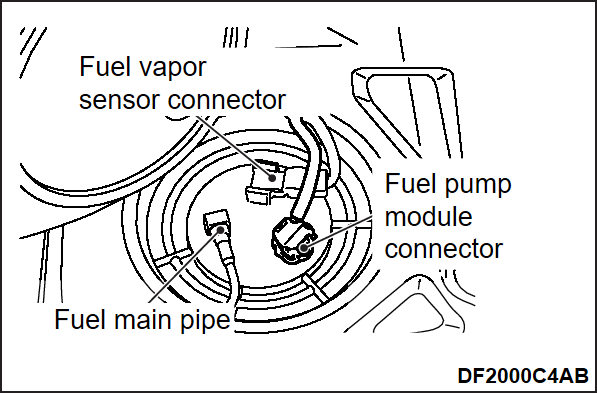
.]2. Disconnect the fuel vapor sensor connector.
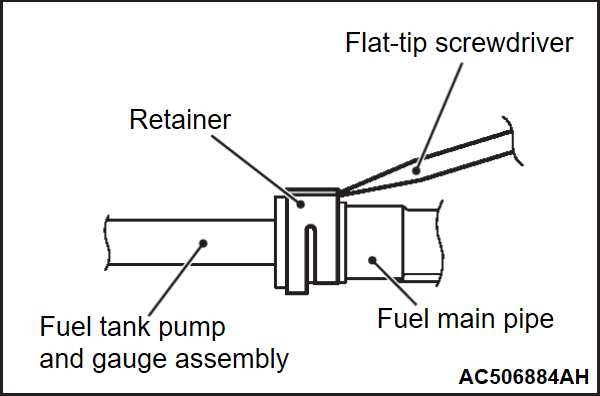
3. Insert a flat-tip screwdriver [6 mm (0.23 inch) wide and 1 mm (0.03 inch) thick] into the retainer of the fuel main pipe.
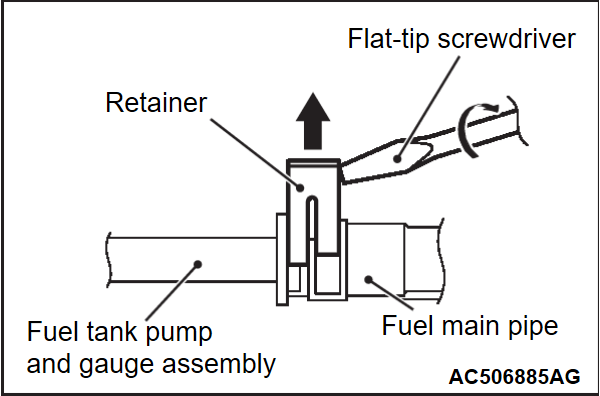
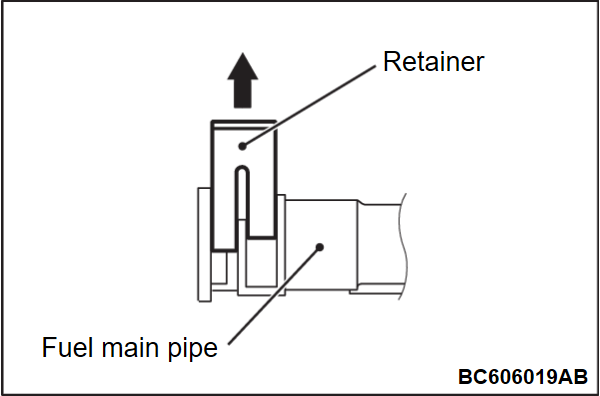
4. Turn the flat-tip screwdriver inserted into the retainer by 90 degrees to push up the retainer and unlock the fuel main pipe connector.
| caution | When pushing up the retainer of the fuel main pipe connector, pay attention to avoid damage to the retainer. |
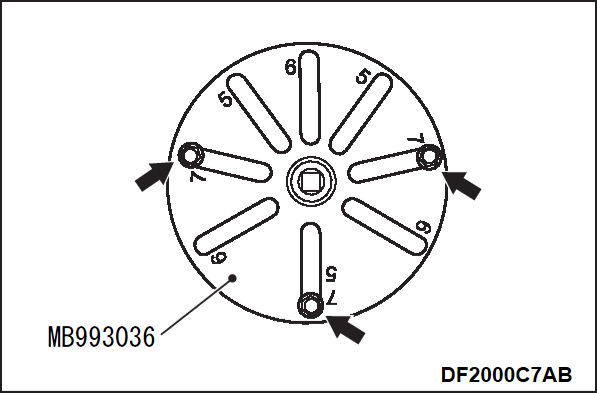
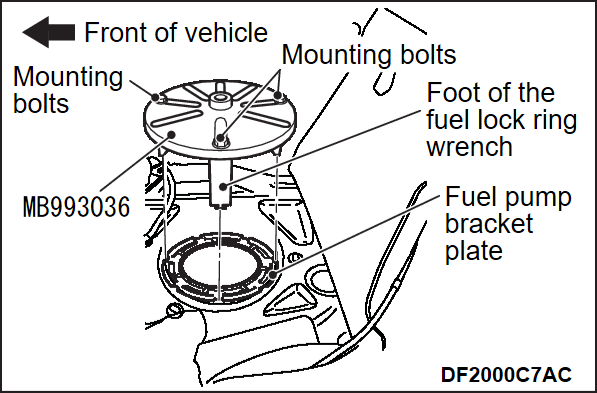
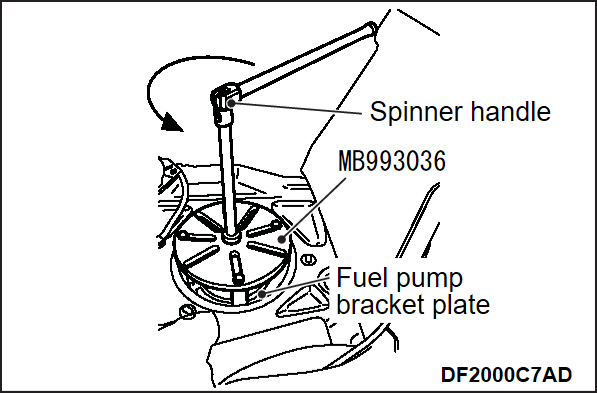
5. Use the special tool fuel lock ring wrench (MB993036) to remove the fuel pump bracket plate special tool by the procedure stated below.
- Attach the foot of the special tool (MB993036) at the location marked by 7.
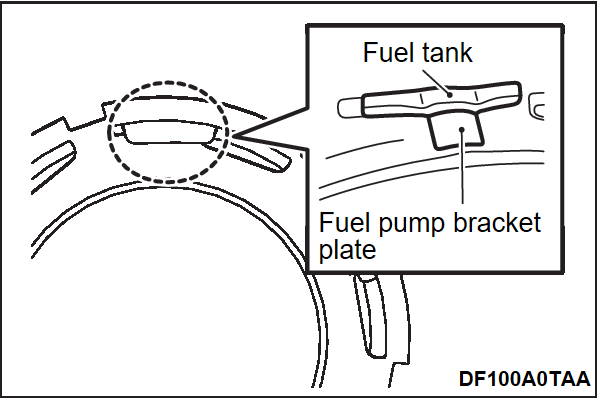
caution The fuel lock ring wrench must be attached at the specified position, to avoid interfering with the floor pan. - Align the hook of the foot of the special tool (MB993036) with the notch in the fuel pump bracket plate, then temporarily tighten the mounting bolt of the foot of the fuel lock ring wrench.
- Set the special tool (MB993036) into the fuel pump bracket plate, then fully tighten the foot mounting bolt.
- Rotate the spinner handle counterclockwise and detach the fuel pump bracket plate.
caution - Hold the spinner handle down securely with your hand, so the special tool (MB993036) cannot come off.
- To reduce impacts in the course of the removal work, use a long spinner handle and turn it slowly counterclockwise.
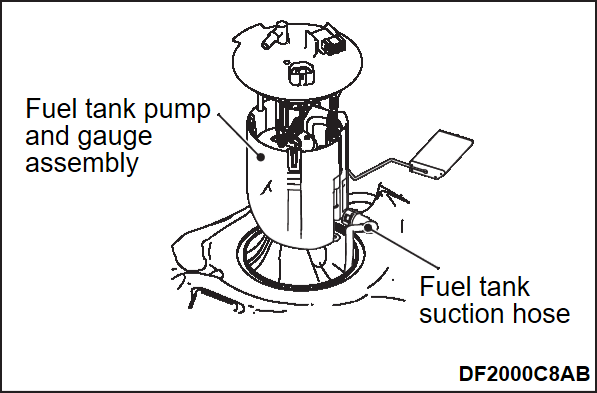
6. While with drawing the fuel pump and gauge assembly from the service hole, disconnect the suction hose from the fuel pump and gauge assembly to remove the fuel pump and gauge assembly from the service hole completely. (Refer to FUEL TANK REMOVAL AND INSTALLATION on how to detach the fuel tank suction hose.)
 on how to detach the fuel tank suction hose.)
| caution |
|
7. Replace the fuel tank pump and gauge assembly. (Refer to FUEL TANK REMOVAL AND INSTALLATION ).
).
 ).
).8. Replace the fuel tank pump gasket with a new one.
9. While inserting the fuel tank pump and gauge assembly into the fuel tank from the service hole, connect the suction hose to the fuel tank pump and gauge assembly to install the fuel tank pump and gauge assembly to the fuel tank.
| caution |
|
10. Use the special tool (MB993036) to turn the fuel pump bracket plate clockwise to attach it.
| caution |
|
11. Pull up the retainer of fuel main pipe to unlock before installing.
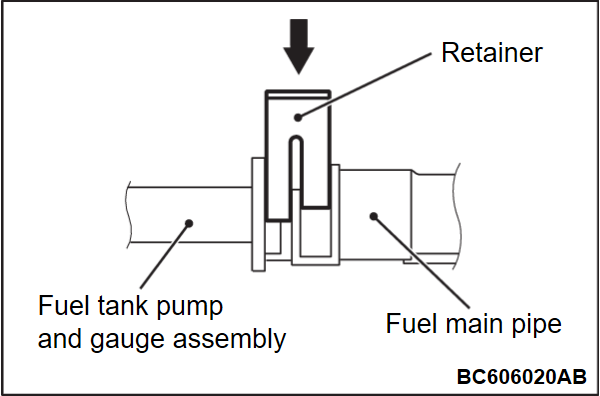
12. Install the fuel main pipe to the fuel tank pump and gauge assembly securely and push in the retainer of the fuel main pipe connector to lock the fuel main pipe and fuel tank pump and gauge assembly.
| caution |
|
13. Connect the fuel tank pump & gauge assembly connector and the fuel vapor sensor connector.
14. Inspect the fuel tank for leakage [Fuel Supply - On-Vehicle Service, Fuel Leak Check of Fuel Tank (FUEL LEAK CHECK OF FUEL TANK ).]
).]
 ).]
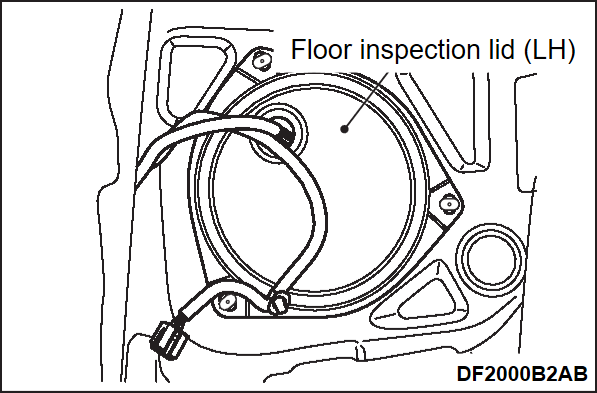
).]15. Install the floor inspection lid (LH).
16. Install the second seat assembly (Refer to Body Interior - Seat, Removal and Installation, Second Seat Assembly, Removal and Installation Removal and Installation ).
).
 ).
).![[Previous]](../../../buttons/fprev.png)
![[Next]](../../../buttons/fnext.png)
