REMOVAL AND INSTALLATION
Pre-removal Operation
- Rear Seat Assembly Removal (Refer to Body Interior - Seat, Removal and Installation, Second Seat Assembly, Removal and Installation Removal and Installation
 ).
). - Fuel Line Pressure Reduction [Refer to Multiport fuel injection (MFI) - On-Vehicle service, Fuel Pump Connector Disconnection (How to Reduce Pressurized Fuel Pressure) FUEL PUMP CONNECTOR DISCONNECTION (HOW TO REDUCE PRESSURIZED FUEL PRESSURE)
 ]
] - Fuel Draining
Post-installation Operation
- Fuel Refilling
- Rear Seat Assembly Installation (Refer to Body Interior - Seat, Removal and Installation, Second Seat Assembly, Removal and Installation Removal and Installation
 ).
).
REMOVAL SERVICE POINTS
<<A>> FUEL MAIN PIPE DISCONNECTION
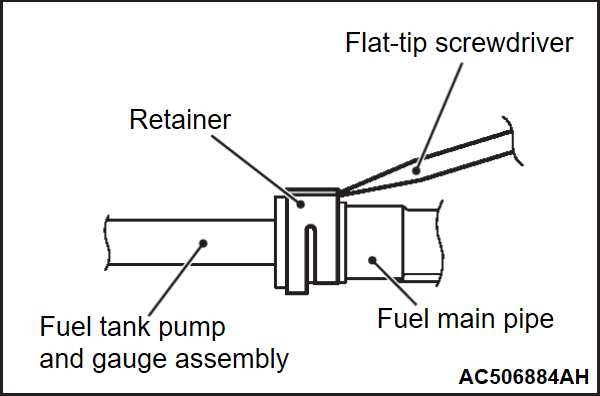
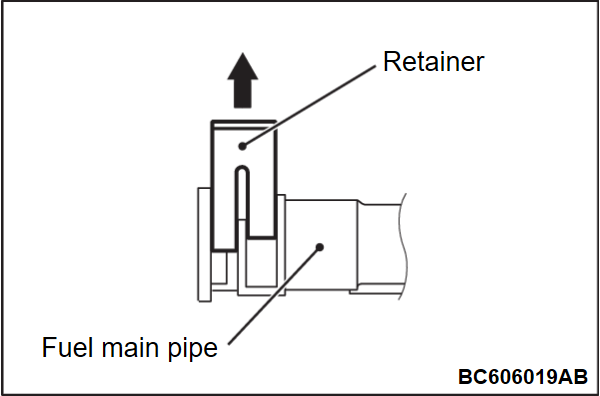
1. Insert a flat-tip screwdriver [6 mm (0.23 inch) wide and 1 mm (0.03 inch) thick] into the retainer of the fuel main pipe connector.
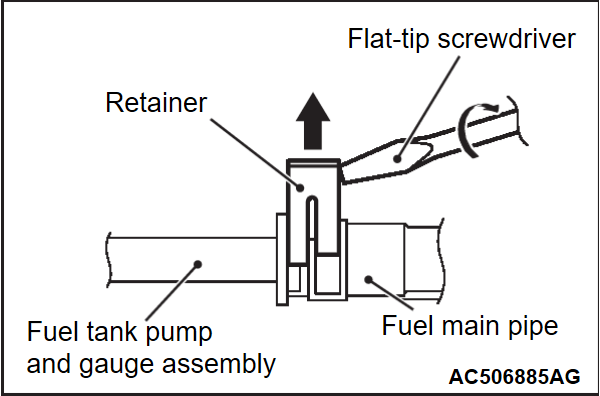
2. Turn the flat-tip screwdriver inserted into the retainer by 90 degrees to push up the retainer and unlock the fuel main pipe connector.
| caution | When pushing up the retainer of the fuel main pipe connector, pay attention to avoid damage to the retainer. |
<<B>> FUEL FILLER TUBE DISCONNECTION
Detach the connection with the fuel filler tube. (Refer to Fuel Supply - Fuel Tank Filler Tube Assembly Removal and Installation FUEL TANK FILLER TUBE ASSEMBLY REMOVAL AND INSTALLATION )
)
 )
)<<C>> FUEL VAPOR PIPE DISCONNECTION
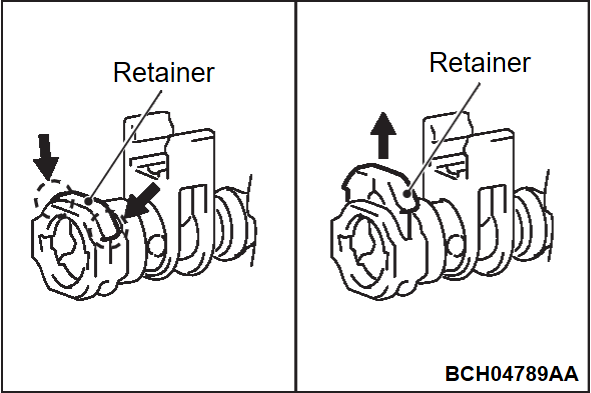
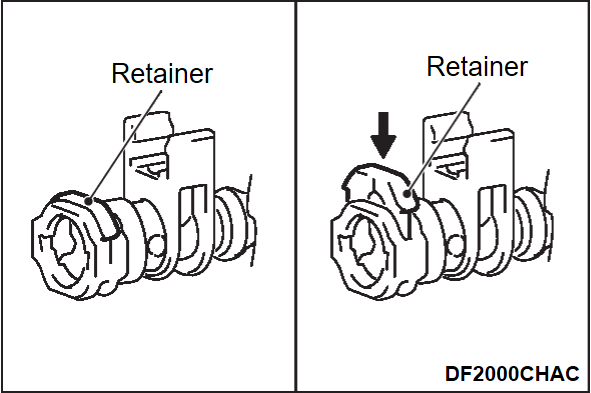
While pushing the arrow part of the illustration, pull up on the retainer.
<<D>> FUEL VAPOR TUBE REMOVAL
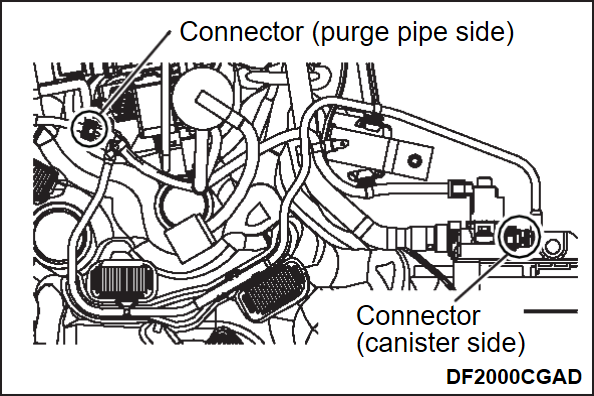
Remove the connector on the canister side and the connector on the purge pipe side and remove the fuel vapor tube.
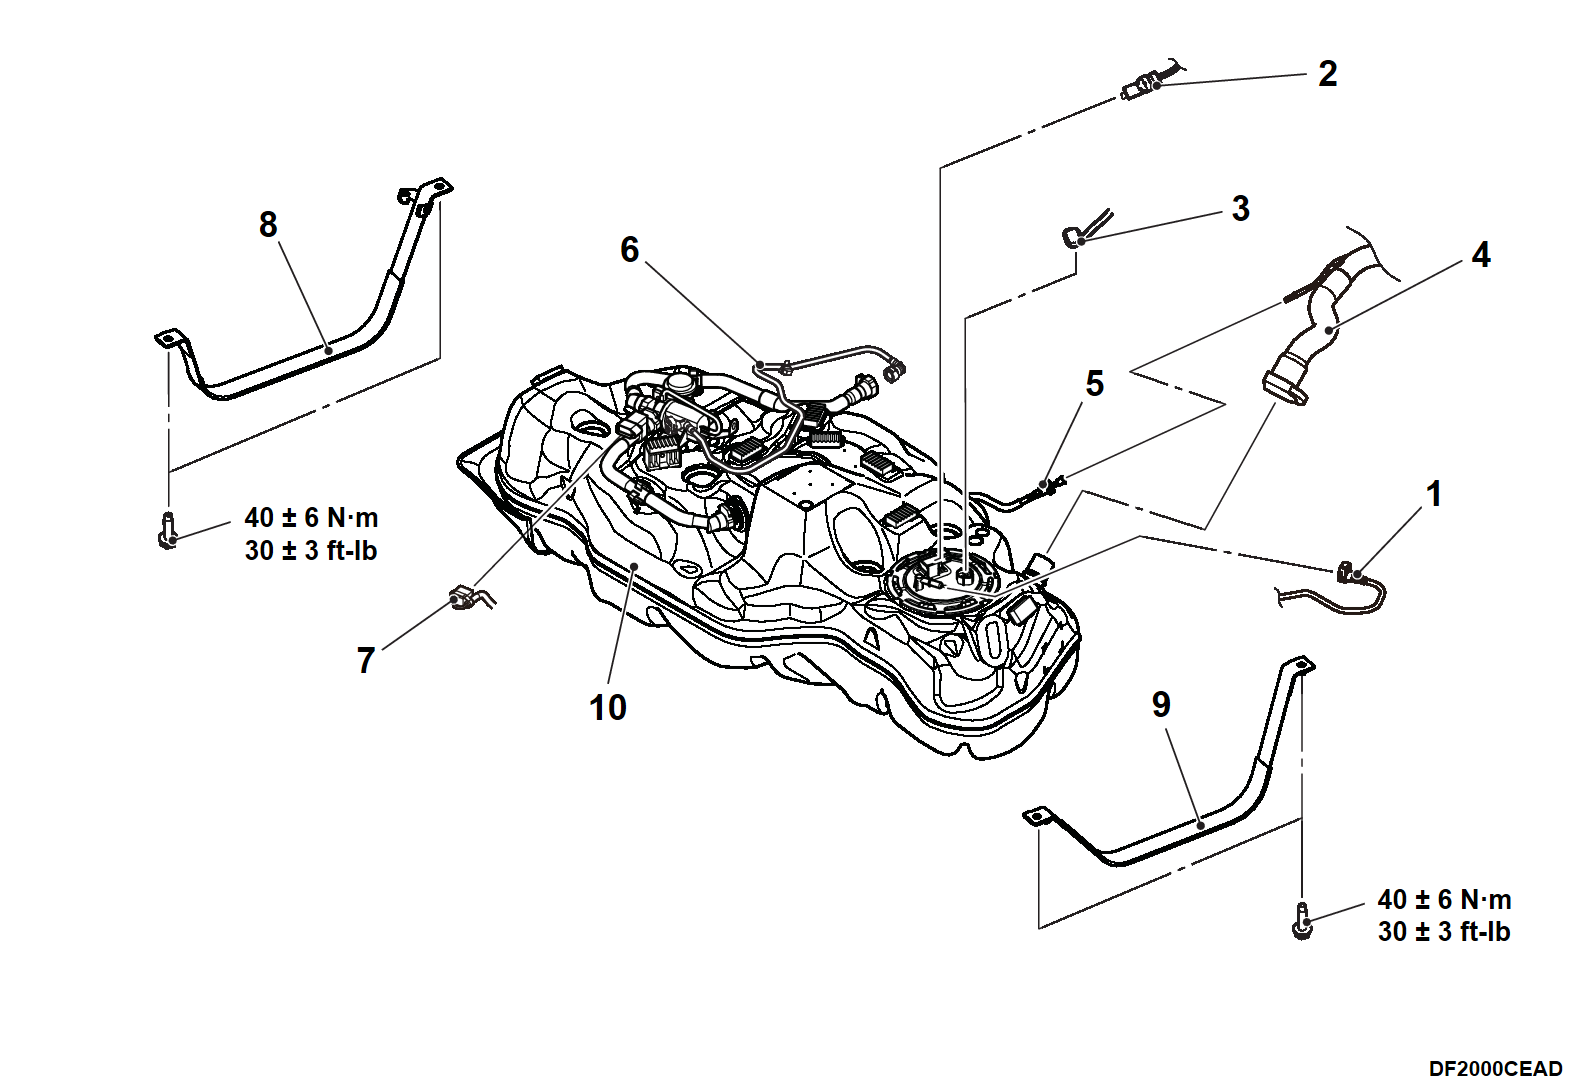
<Fuel tank view from above>
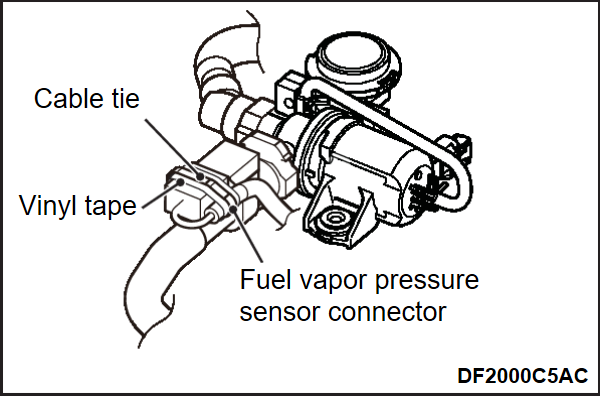
<<E>> FUEL VAPOR PRESSURE SENSOR CONNECTOR DISCONNECTION
Before removing the fuel vapor pressure sensor connector, remove its cable tie, then wrap vinyl tape around it.
<<F>> FUEL TANK BAND/FUEL TANK REMOVAL
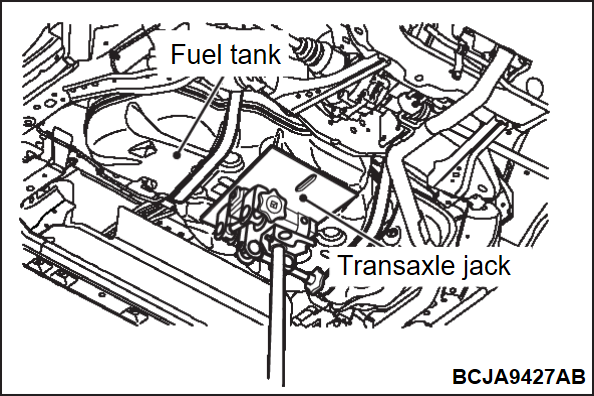
1. Hold the fuel tank with a transaxle jack, and remove the connecting bolts of the fuel tank band.
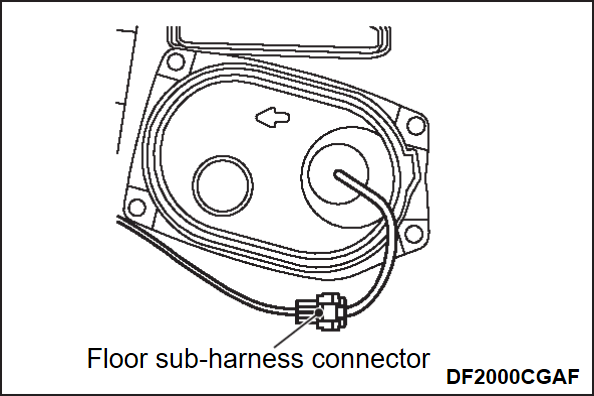
2. Disconnect the connection of the floor sub-harness connector sticking out from the floor inspection lid (RH).
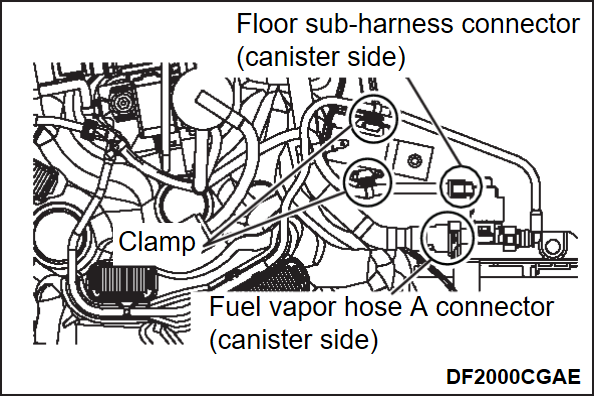
3. Disconnect the connection of the floor sub-harness connector (canister side) and the fuel vapor hose A connector (canister side), and then remove the clamp indicated in the illustration.
<Fuel tank view from above>
4. Remove the fuel tank assembly.
INSTALLATION SERVICE POINTS
>>A<< FUEL VAPOR PRESSURE SENSOR CONNECTION
After securing the fuel vapor pressure sensor connector and harness as before with vinyl tape and a cable tie as before, connect the connector of the fuel vapor pressure sensor.
>>B<< FUEL VAPOR PIPE CONNECTION
1. Pull up the retainer of fuel tube to unlock before installing.
2. Push the retainer in the direction of the arrow and connect the fuel vapor pipe. After the installation of the fuel tube, slightly pull the fuel tube to check that it is connected securely.
| caution | After the installation of the fuel vapor tube, slightly pull the fuel vapor tube to check that it is connected securely. At this time, also check that there is approximately 1 mm (0.03 inch) play. |
>>C<< FUEL FILLER TUBE CONNECTION
Connect the fuel filler tube. (Refer to Fuel supply - Fuel Tank Filler Tube Assembly Removal and Installation FUEL TANK FILLER TUBE ASSEMBLY REMOVAL AND INSTALLATION )
)
 )
)>>D<< FUEL MAIN PIPE CONNECTION
1. Pull up the retainer of fuel main pipe to unlock before installing.
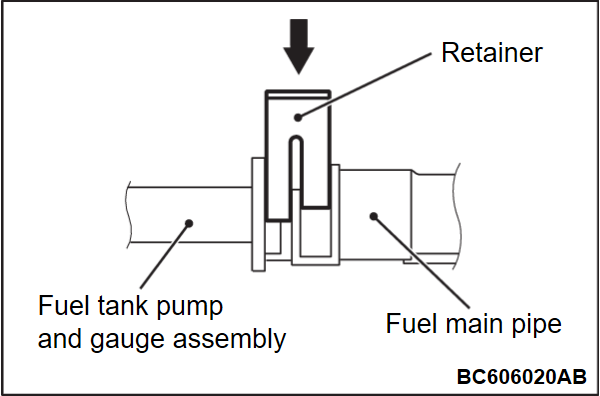
2. Install the fuel main pipe to the fuel pump module securely and push in the retainer of the fuel main pipe connector to lock the fuel main pipe and fuel tank pump and gauge assembly.
| caution |
|
![[Previous]](../../../buttons/fprev.png)
![[Next]](../../../buttons/fnext.png)
