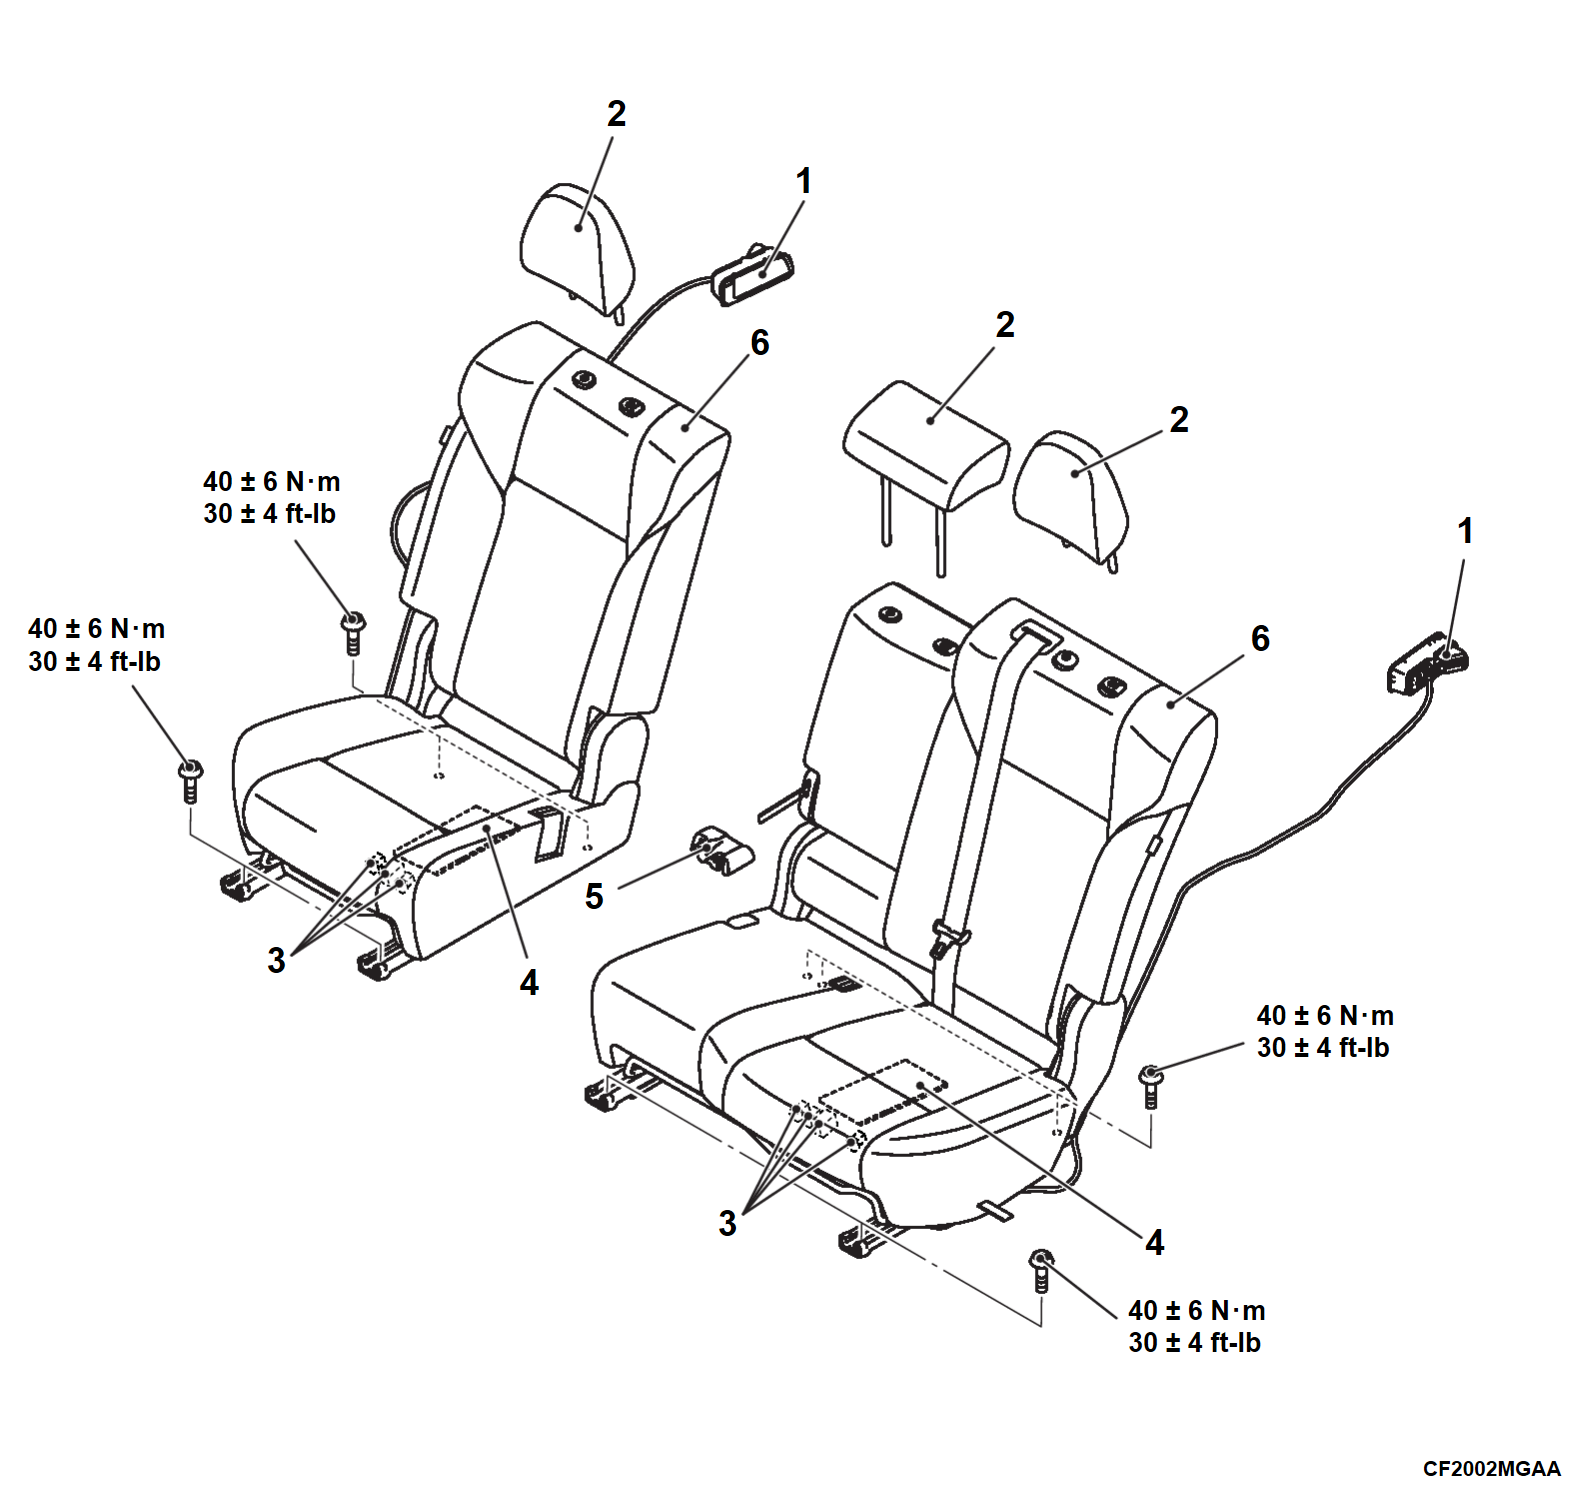
Removal and Installation
Pre-removal and Post-installation Operation Luggage side lower finisher assembly (Refer to Removal and Installation  ). ). |
|
INSTALLATION SERVICE POINT
>>A<< SECOND SEAT ASSEMBLY INSTALLATION
1. Insert the seat pins to holes of the body securely.
2. Confirm that both the seat slides are locked, and then temporarily tighten the front side bolts so that no load is applied to the seat cushion.
3. Tighten the front inner side bolts to the specified torque.
Tightening torque: 40 ± 6 N·m (30 ± 4 ft-lb)
4. Tighten the front outer side bolt to the specified torque.
Tightening torque: 40 ± 6 N·m (30 ± 4 ft-lb)
5. Move the seat forward.
6. Confirm that both the seat slides are locked, and then temporarily tighten the rear side bolts so that no load is applied to the seat cushion.
7. Tighten the rear side bolts to the specified torque.
Tightening torque: 40 ± 6 N·m (30 ± 4 ft-lb)
8. Tighten the rear outer side bolt to the specified torque.
Tightening torque: 40 ± 6 N·m (30 ± 4 ft-lb)
![[Previous]](../../../buttons/fprev.png)
![[Next]](../../../buttons/fnext.png)
