Removal and Installation
REMOVAL
| warning | To avoid the danger of being scalded, never drain the engine oil when the engine is hot. |
1. Remove engine under cover front. Refer to Removal and Installation .
.
 .
.2. Drain engine coolant. Refer to Draining .
.
 .
.3. Drain engine oil. Refer to DrainingDraining .
.
 .
.4. Remove oil pan (lower). Refer to Removal and Installation .
.
 .
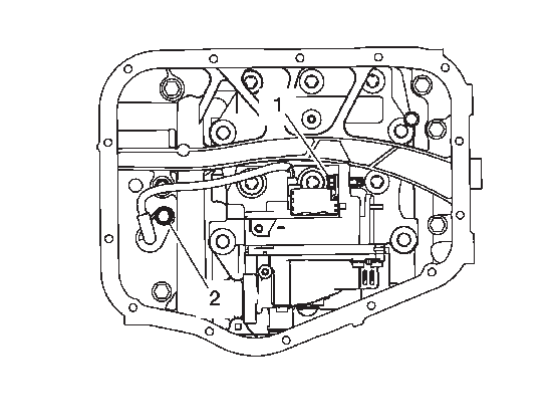
.5. Remove oil strainer.
7. Disconnect the harness connector from engine oil pressure control solenoid valve.
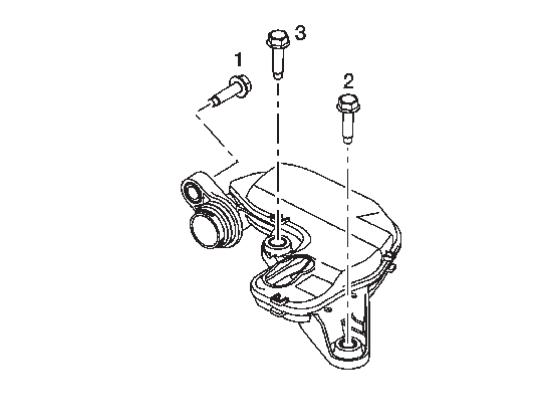
8. Remove the engine oil pressure control solenoid valve.
| caution | Do not reuse O-rings. |
9. Remove water hose A and water hose B from oil cooler. Refer to Exploded View.Exploded View

10. Remove rear torque rod to rear torque rod bracket. Refer to Removal and Installation.Removal and Installation

11. Remove support bearing bracket to oil pan (upper). Refer to Removal and Installation.Removal and Installation (2WD models), Removal and Installation.Removal and Installation
 (AWD models)
 (2WD models), Removal and Installation.Removal and Installation
 (AWD models)
12. Remove the rear plate cover.
13. Remove A/C compressor. Refer to Removal and Installation.Removal and Installation

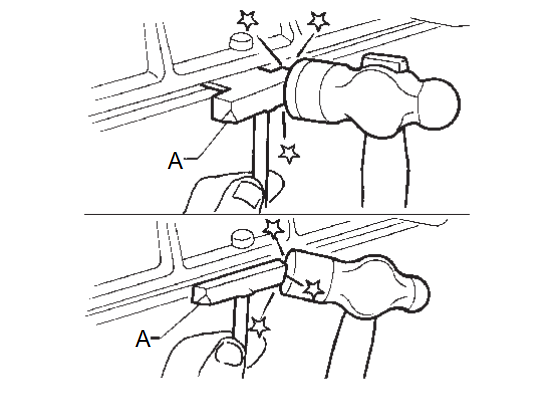
14. Remove oil pan (upper) with the following procedure:
15. Remove O-rings between cylinder block and oil pan (upper)
| caution | Do not reuse O-rings. |
16. Remove the oil cooler if necessary. Refer to Removal and Installation .
.
 .
.17. Remove the oil filter if necessary.
18. Remove the rear torque rod bracket if necessary. Refer to Removal and Installation .
.
 .
.19. Remove the engine oil temperature sensor if necessary.
| caution | Do not reuse copper sealing washer. |
INSTALLATION
2. Install oil pan (upper) with the following procedure:
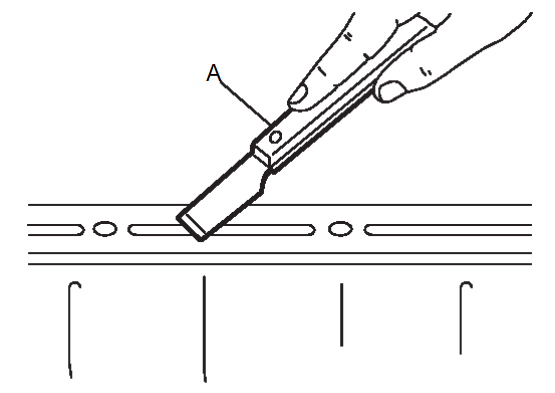
(1) Use a scraper (A) to remove old liquid gasket from mating surfaces.
- Also remove the old liquid gasket from mating surface of cylinder block.
- Remove old liquid gasket from the bolt holes and threads.
| caution | Never scratch or damage the mating surfaces when cleaning off old liquid gasket. |
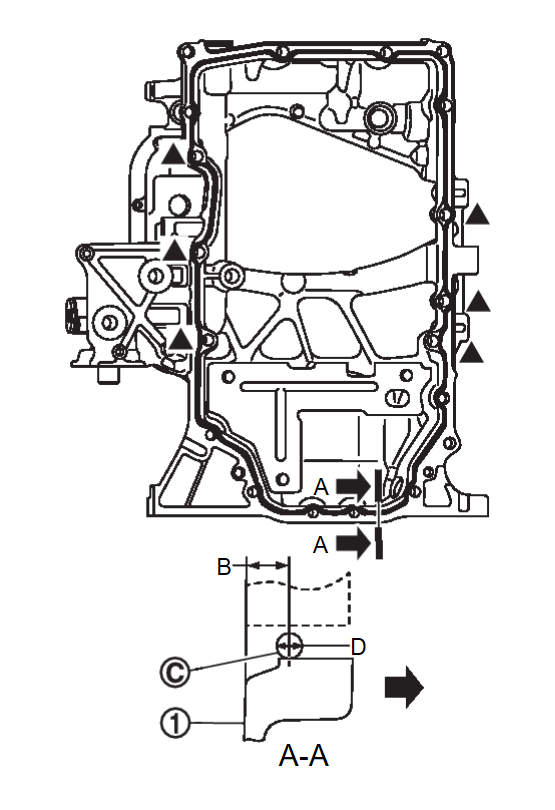
(2) Apply a continuous bead of liquid gasket  with a tube presser (commercial service tool) as shown in the figure.
 with a tube presser (commercial service tool) as shown in the figure.
 | : Oil pan (upper) |
| B | : 5.5 - 7.5mm (0.216 - 0.295 in) |
| D | : φ 3.4 - 4.4 mm (0.134 - 0.197 in) |
 | : Engine outside |
Use Genuine RTV Silicone Sealant or an equivalent. Refer to Recommended Chemical Products and SealantsRecommended Chemical Products and Sealants .
.
 .
.| caution |
|
(3) Install new O-rings at oil pan (upper) side.
| caution |
|
3. Install the rear plate cover.
4. Install support bearing bracket to oil pan (upper).
5. Install rear torque rod to rear torque rod bracket.
6. Install water hose A and water hose B from oil cooler.
7. Install the engine oil pressure control solenoid valve and tighten bolts to the specified torque in the sequence shown.
| Bolts | : 9.0 N·m (0.92 kg-m, 80 in-lb) |
| caution |
|
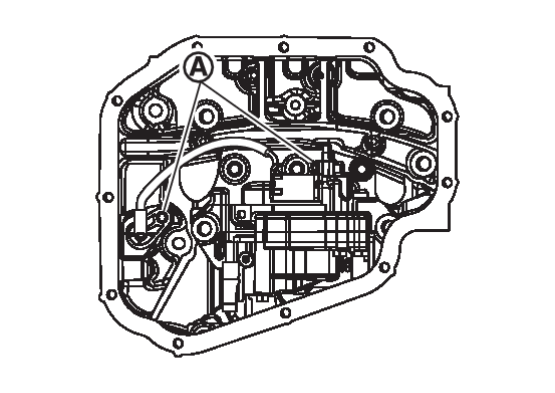
8. Install the oil strainer and tighten bolts to the specified torque in the sequence shown.
| caution | Do not reuse O-ring. |
| Bolts | : 9.0 N·m (0.92 kg-m, 80 in-lb) |
9. Install oil pan (lower). Refer to Removal and Installation .
.
 .
.10. Install drain plug.
- Refer to the figure of components of former page for installation direction of washer. Refer to Exploded View
 .
.
11. Install in the reverse order of removal after this step.
| note | Pour engine oil at least 30 minutes after oil pan is installed. |
![[Previous]](../../../buttons/fprev.png)
![[Next]](../../../buttons/fnext.png)
 from engine oil pressure control solenoid valve.
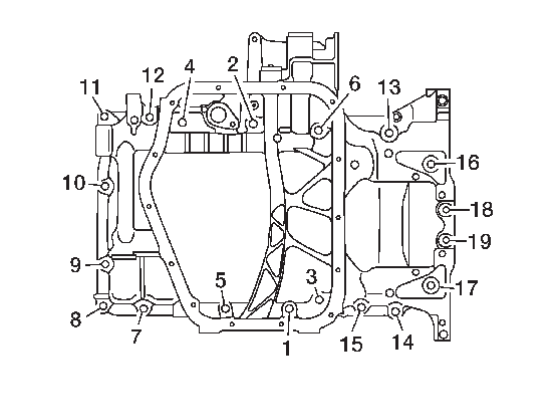
 " marks.