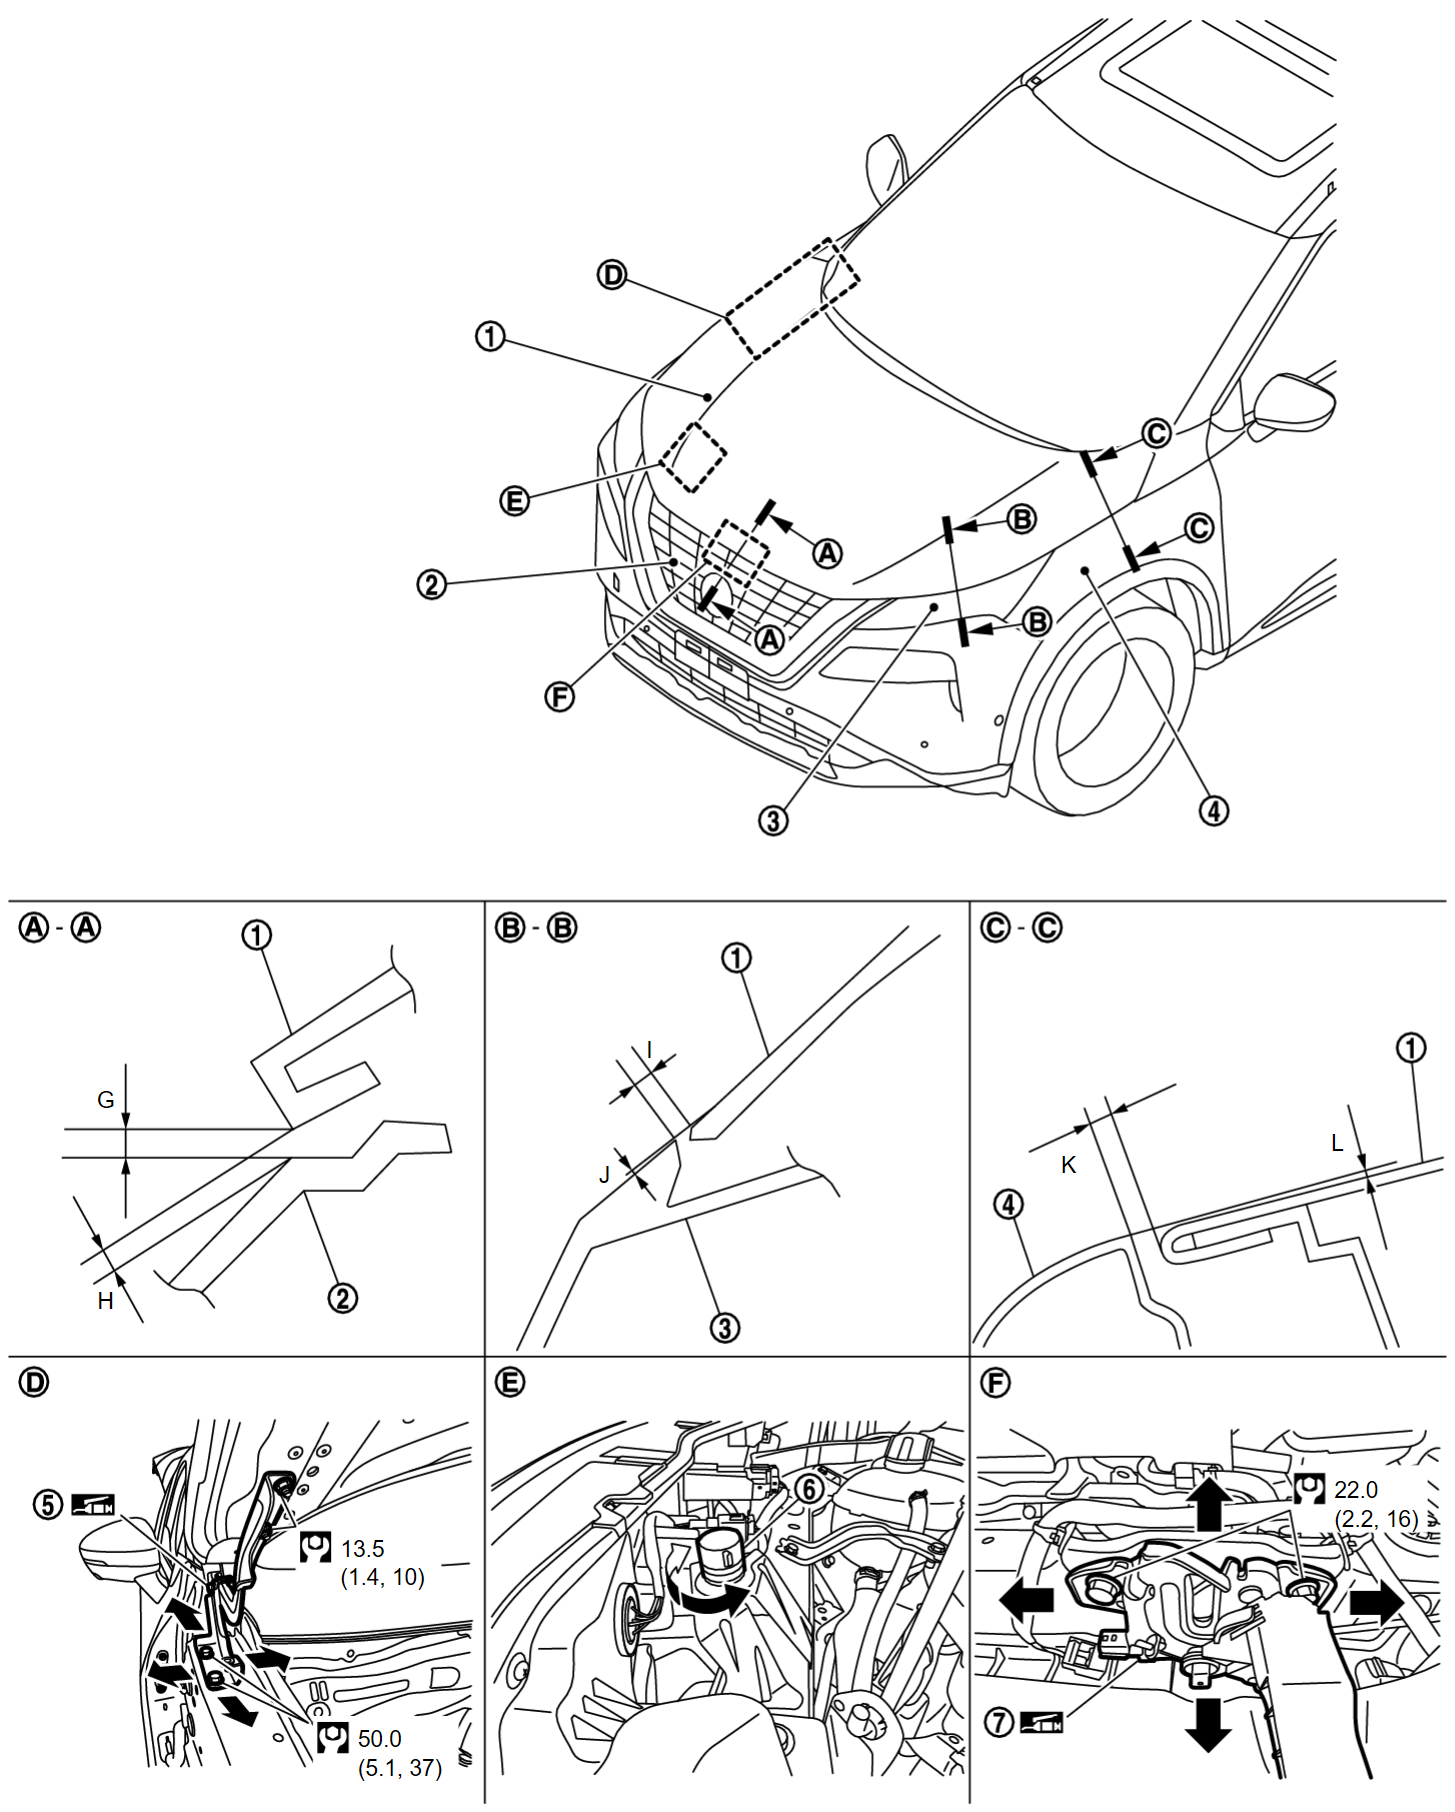
Adjustment
FITTING ADJUSTMENT
Fitting Adjustment Standard Dimension
| |||||||||||||||||||||||||||||||
Check the clearance and the surface height between hood assembly and each part by visually and touching.
If the clearance and the surface height are out of specification, adjust them according to the procedures shown below.
Unit: mm [in]
| Portion | Standard | Difference (RH/LH, MAX) | |||
| Hood assembly – Front grille |  – – | G | Clearance | 2.0 – 6.0 [0.079 – 0.236] | < 3.0 [0.118] |
| H | Surface height | (−1.6) – (+2.6) [(−0.063) – (+0.102)] | < 2.0 [0.079] | ||
| Hood assembly – Front combination light |  – – | I | Clearance | 1.5 – 6.5 [0.059 – 0.256] | < 3.0 [0.118] |
| J | Surface height | (−2.3) – (+2.3) [(−0.091) – (+0.091)] | < 2.0 [0.079] | ||
| Hood assembly – Front fender assembly |  – – | K | Clearance | 3.0 – 5.0 [0.118 – 0.197] | < 1.5 [0.059] |
| L | Surface height | (−1.0) – (+1.0) [(−0.039) – (+0.039)] | < 1.5 [0.059] | ||
Fitting Adjustment Procedure
1. Remove front grille cover. Refer to Removal and Installation .
.
 .
.2. Remove hood lock assembly mounting bolts, and then remove hood lock assembly. Refer to Removal and Installation .
.
 .
.3. Adjust the surface height of hood assembly according to the fitting adjustment standard dimension by rotating hood bumper rubber.
4. Remove front fender assembly. Refer to Removal and Installation .
.
 .
.5. Loosen hood hinge mounting bolts.
6. Temporary install front fender assembly, front combination light and front bumper fascia, and then adjustment clearance of hood assembly according to the specified value by moving hood assembly.
7. Remove temporary installed parts, and then tighten hood hinge mounting bolts to the specified torque.
| caution | After tightening, apply touch-up paint (the body color) if the paint around hinge and mounting bolts are peeled off during adjustment. |
8. Install front fender assembly. Refer to Removal and Installation .
.
 .
.9. Install front combination light. Refer to Removal and Installation .
.
 .
.10. Install front bumper fascia. Refer to Removal and Installation .
.
 .
.11. Install hood lock assembly and temporary tighten hood lock assembly mounting bolts, and then position hood lock assembly and engage hood striker. Check hood lock assembly and hood striker for looseness.
12. Move hood lock assembly laterally until the center of striker and hood lock assembly are vertical when viewed from the front.
13. Tighten hood lock assembly mounting bolts to the specified torque.
14. Install front grille cover. Refer to Removal and Installation .
.
 .
.15. After adjusting, check the open/close operation. Refer to Inspection .
.
 .
.![[Previous]](../../../buttons/fprev.png)
![[Next]](../../../buttons/fnext.png)


