REMOVAL AND INSTALLATION
| caution | Whenever you removal the windshield, calibrate its sensor (Refer to GROUP 54A - FCM/LDW/AHB-ECU - On Vehicle Service, FCM/LDW/AHB-ECU Sensor Calibration  ). <Vehicles with FCM/LDW/AHB> ). <Vehicles with FCM/LDW/AHB> |
REMOVAL SERVICE POINT
<<A>> WINDSHIELD GLASS REMOVAL
1. In order to protect the body paint surface, apply protective tapes to the body area around the windshield glass.
| caution | For vehicles with roof glass, do not damage the roof molding front when separating adhesive using a piano wire. Remove the molding if necessary (Refer to  ). ). |
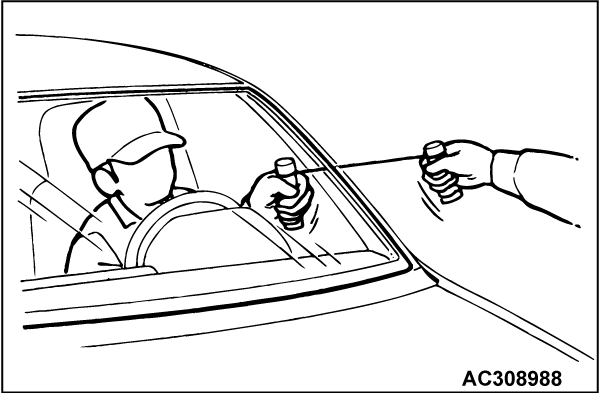
2. When separating adhesive using a piano wire
(1) Use a knife to cut away the windshield molding.
(2) Use a sharp-point drill to make a hole in the windshield adhesive.
(3) Pass the piano wire from the inside to outside of the vehicle through the hole.
(4)
Pull the piano wire alternately from the inside and outside along the windshield glass to cut the adhesive.
| caution | Do not let the piano wire touch the edge of the windshield glass. |
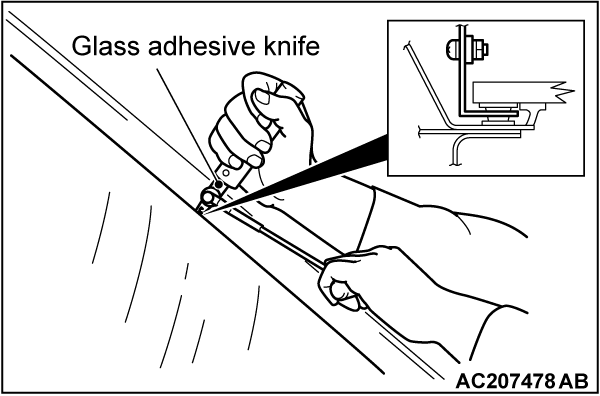
3. When separating adhesive using a glass adhesive knife:
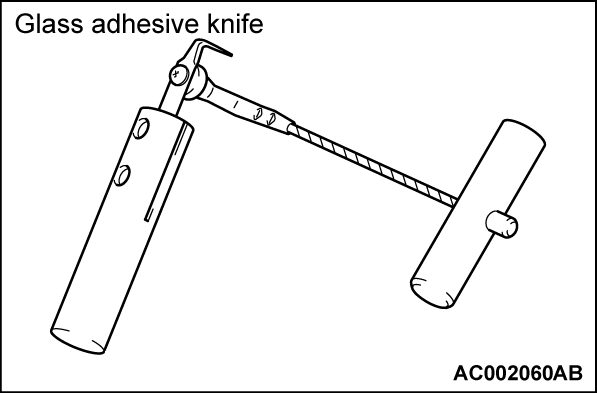
(1) Prepare the following recommended tool:Tool name: Glass adhesive knife [with blade length of 25 mm (0.98 in) or more]
(2)
Holding the tip of the glass adhesive knife and the windshield glass edge at right angles, align the blade of the glass adhesive knife with the windshield glass surface and edge, and pull the blade parallel to the edge to separate the adhesive.
| caution | If you lever the glass adhesive knife, the windshield glass may be damaged. |
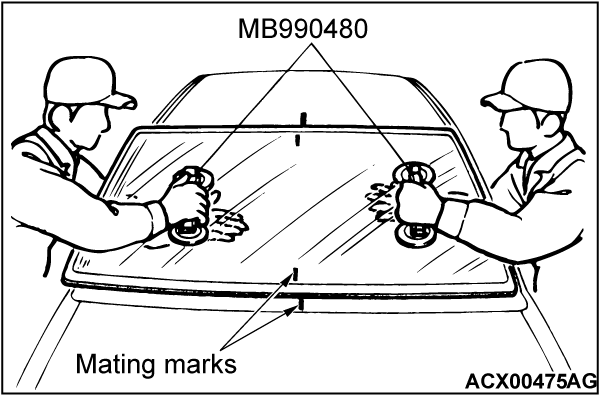
4. Make mating marks on the windshield glass and body. Use the window glass holder (Special tool: MB990480) to remove the windshield glass.
5.
| caution |
|
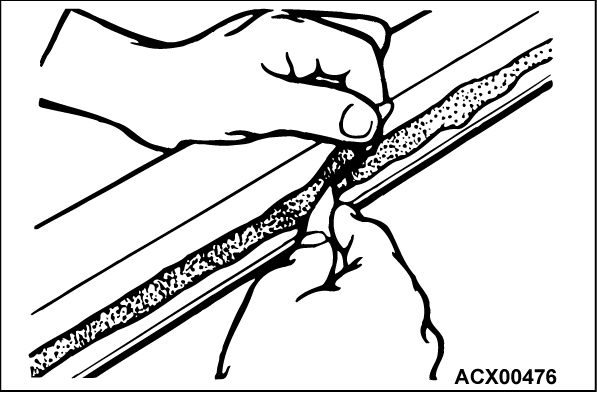
Use a knife to cut away the remaining adhesive so that the adhesive thickness is within 2 mm (0.08 in) around the entire circumference of the body flange.
6. Finish the flange surfaces so that they are smooth.
7. If the windshield glass is reused, scrape away all traces of old adhesive, the glass stopper and the windshield spacer.
INSTALLATION SERVICE POINTS
>>A<< WINDSHIELD SPACER/ GLASS STOPPER/ PIN INSTALLATION
1.
| caution | Before proceeding to the next operation, leave the decreased parts for 3 minutes or more to dry. Do not touch the coated surface. |
Use the parts cleaner (MZ100387 or equivalent) to degrease the inside circumference of the windshield glass and the body flanges.
2.
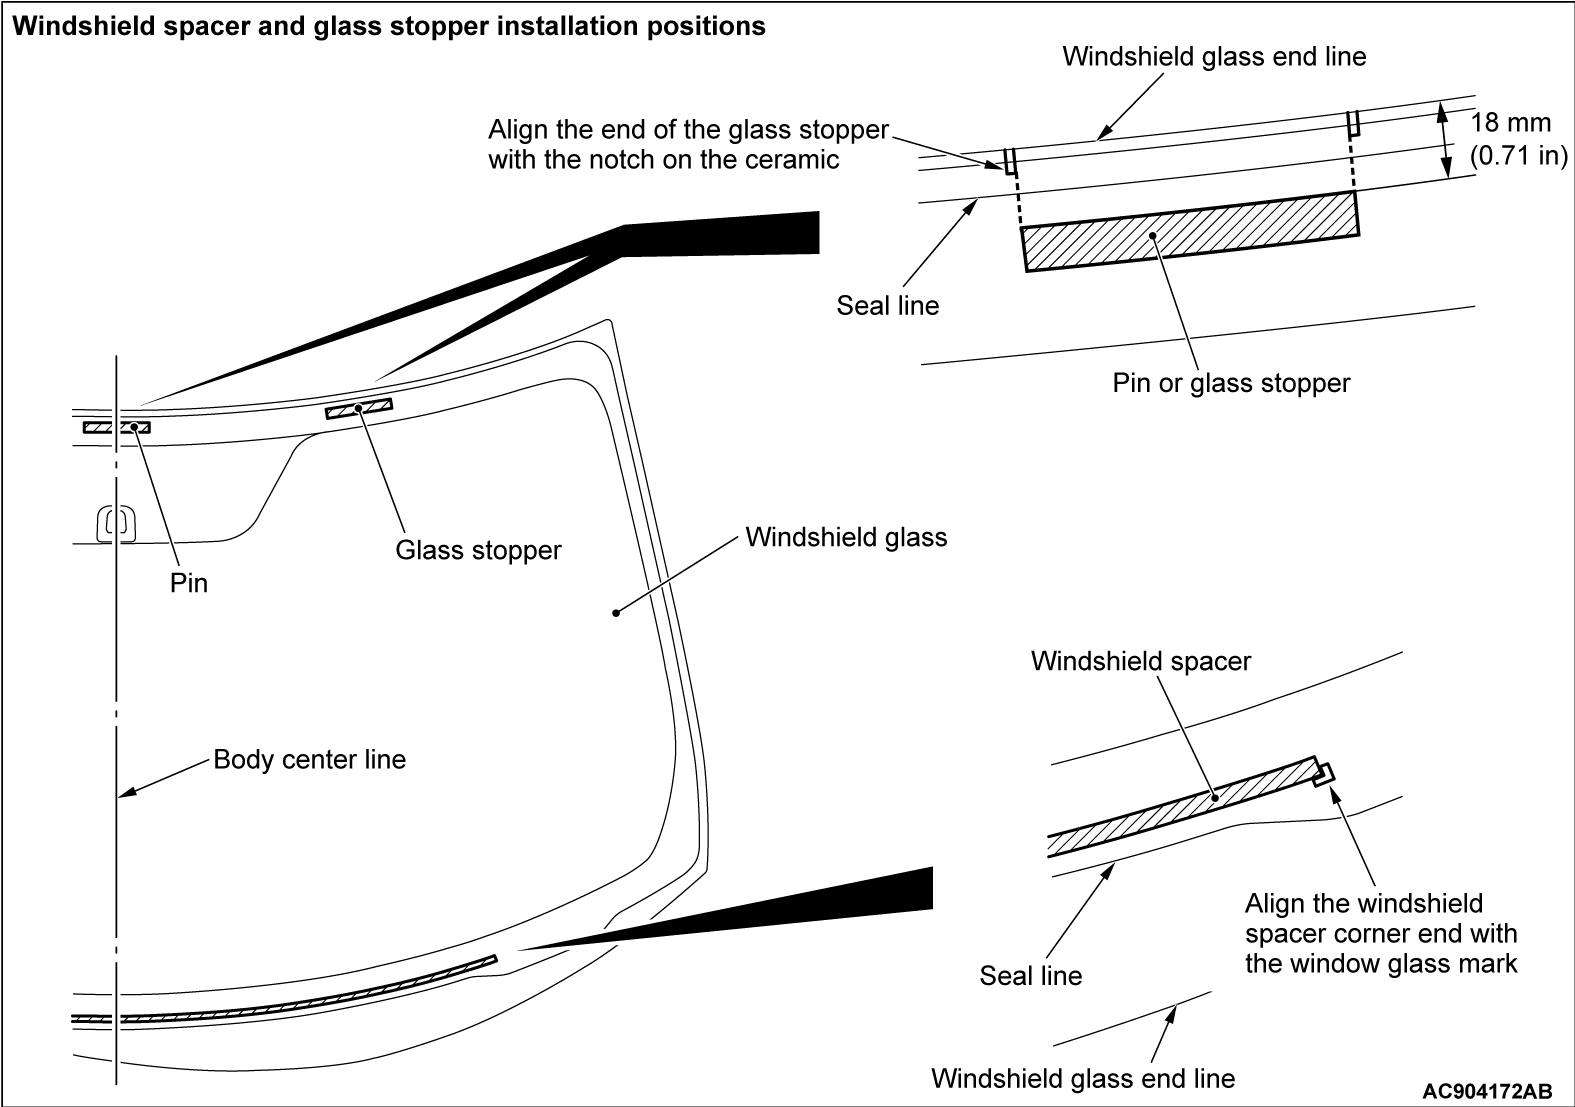
Position the windshield spacer to the specified position of the windshield glass so that there is no adrift or warped surface inside the windshield glass.
3. Install the glass stoppers and pin to the specified position of the windshield glass.
>>B<< WINDSHIELD MOLDING/ WINDSHIELD GLASS INSTALLATION
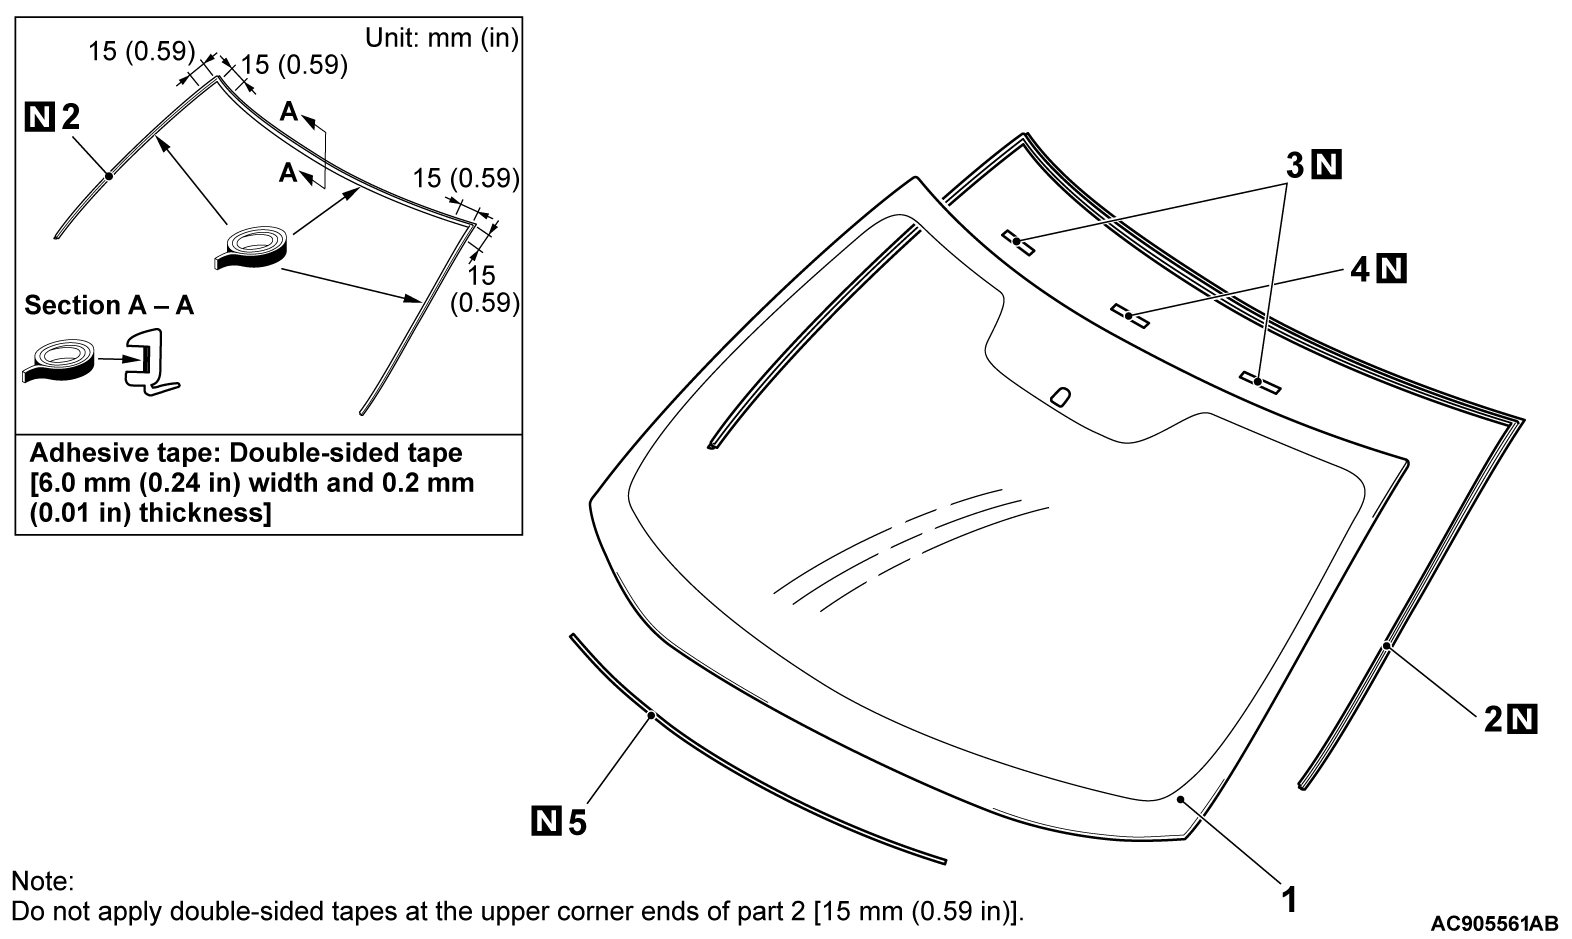
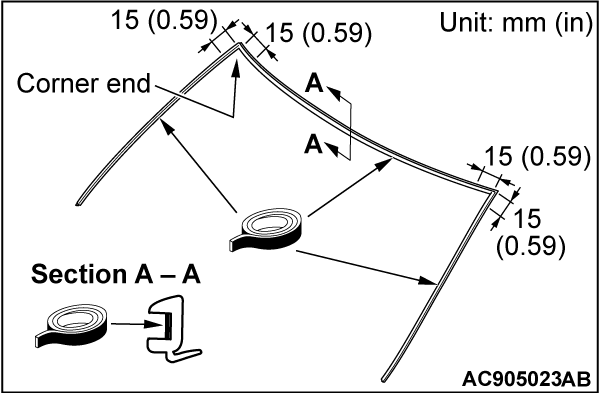
| caution | Do not apply double-sided tape at the corner ends of the windshield molding [15 mm (0.59 in)] as shown in the illustration. |
1. Apply double-sided tapes to the concaved part of the windshield molding.
2. Install the windshield molding to the specified position of the windshield glass.
3. When replacing the windshield glass, temporarily set the windshield glass against the body, and make a mating marks on the windshield glass and body.
4.
| caution |
|
Soak a sponge in the primer, and apply evenly to the windshield glass and the body in the specified places.
5. After applying the primer, let it dry for 3 minutes or more.
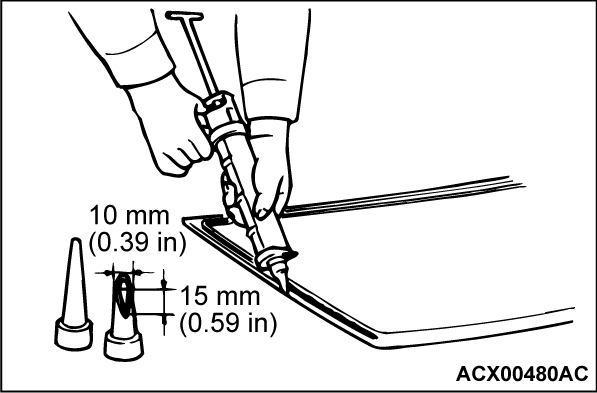
6. Fill a sealant gun with adhesive. Then apply the adhesive evenly around the windshield glass within 30 minutes after the primer application.
| note | Cut the tip of the sealant gun nozzle into a V-shape to simplify adhesive application. |
7. After applying the adhesive, align the mating marks on the windshield glass and the body, and then press the windshield glass gently to seat it.
8. Use a spatula or the like to remove any excessive adhesive. Then clean the surface with the parts cleaner (MZ100387 or equivalent). Leave the vehicle stationary until the adhesive sets.
9.
| caution |
|
Wait 30 minutes or more, and then test for water leakage.
![[Previous]](../../../buttons/fprev.png)
![[Next]](../../../buttons/fnext.png)
