REMOVAL AND INSTALLATION
REMOVAL SERVICE POINTS
<<A>>FRONT PILLAR TRIM ASSEMBLY REMOVAL
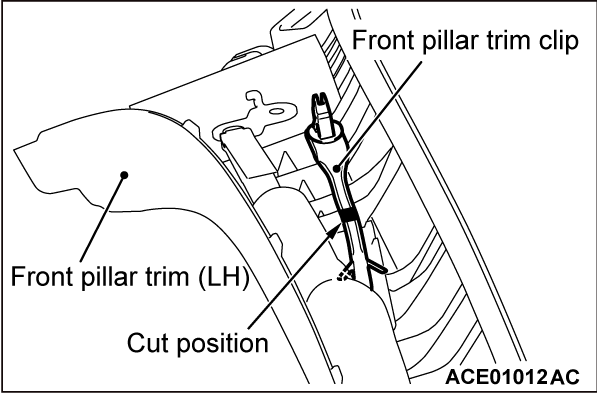
1. Pull down the front pillar trim as shown in the figure.
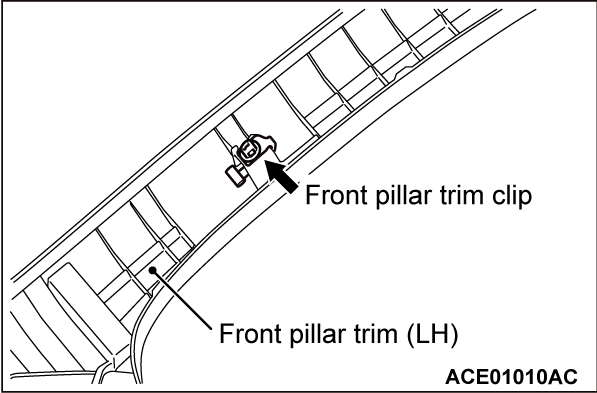
2. Cut the front pillar trim clip at the cutting position shown in the figure, taking care not to damage the other components.
3. Remove the front pillar trim clip remaining on the front pillar trim, taking care not to scratch the trim.
4. Remove the front pillar trim clip remaining on the vehicle side by breaking it to prevent damage to the flange of the clip mounting hole.
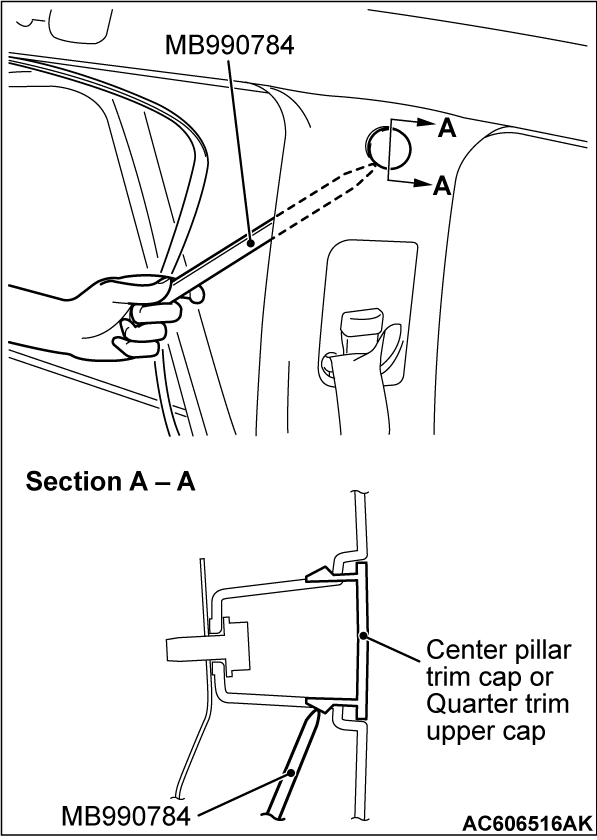
<<B>> CENTER PILLAR TRIM CAP/QUARTER TRIM UPPER CAP REMOVAL
Remove the opening trim. Remove the trim cap by inserting the special tool ornament remover (MB990784) between the trim and body as shown in the illustration.
INSTALLATION SERVICE POINT
>>A<< FRONT PILLAR TRIM ASSEMBLY INSTALLATION
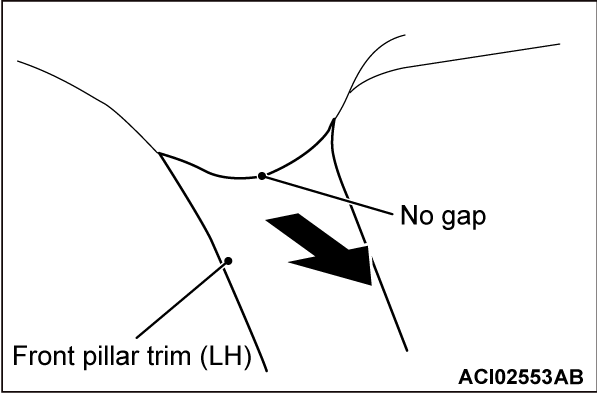
| caution | After installing the front pillar trim, make sure that the front pillar trim can not be detached by pulling it in the direction of the arrow shown in the illustration, and check that there is no gap between the upper side of the front pillar trim and the headlining. |
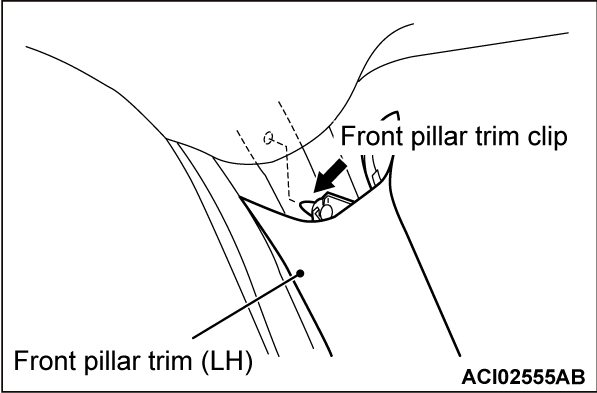
1. Install the front pillar trim clip in the direction shown.
2. Make sure to insert the front pillar trim clip on the upper part of the front pillar trim to the hole on the body.
![[Previous]](../../../buttons/fprev.png)
![[Next]](../../../buttons/fnext.png)
