REMOVAL AND INSTALLATION
REMOVAL SERVICE POINT
<<A>> ROOF GLASS REMOVAL
1. In order to protect the body paint surface, apply protective tapes to the body area around the roof glass.
2. Cut away the roof glass adhesive by using a piano wire in the following procedures:
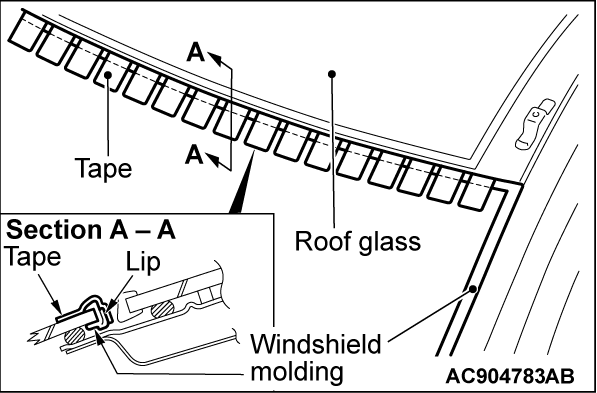
| caution | When cutting away the front part of the adhesive, roll up the windshield molding lip as shown in the illustration and secure it by tapes to prevent the lip from damaging. |
(1) To make the adhesive cut away easier, use a knife to cut away the lip part of the roof molding front (left and right sides) and roof molding rear.
(2) Use a sharp-point drill to make a hole in the roof glass adhesive.
(3) Pass a piano wire from the inside to outside of the vehicle through the hole.
(4)
| caution | Do not let the piano wire touch the edge of the roof glass. |
Pull the piano wire alternately from the inside and outside along the roof glass to cut away the adhesive.
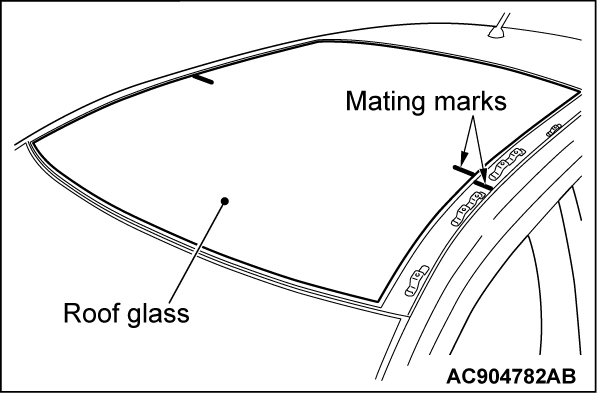
3. Make mating marks on the roof glass and body. Use the window glass holder (Special tool: MB990480) to remove the roof glass.
4.
| caution |
|
Use a knife to cut away the remaining adhesive so that the adhesive thickness is within 2 mm (0.08 in) around the entire circumference of the body flange.
5. Finish the flange surfaces so that they are smooth.
INSTALLATION SERVICE POINTS
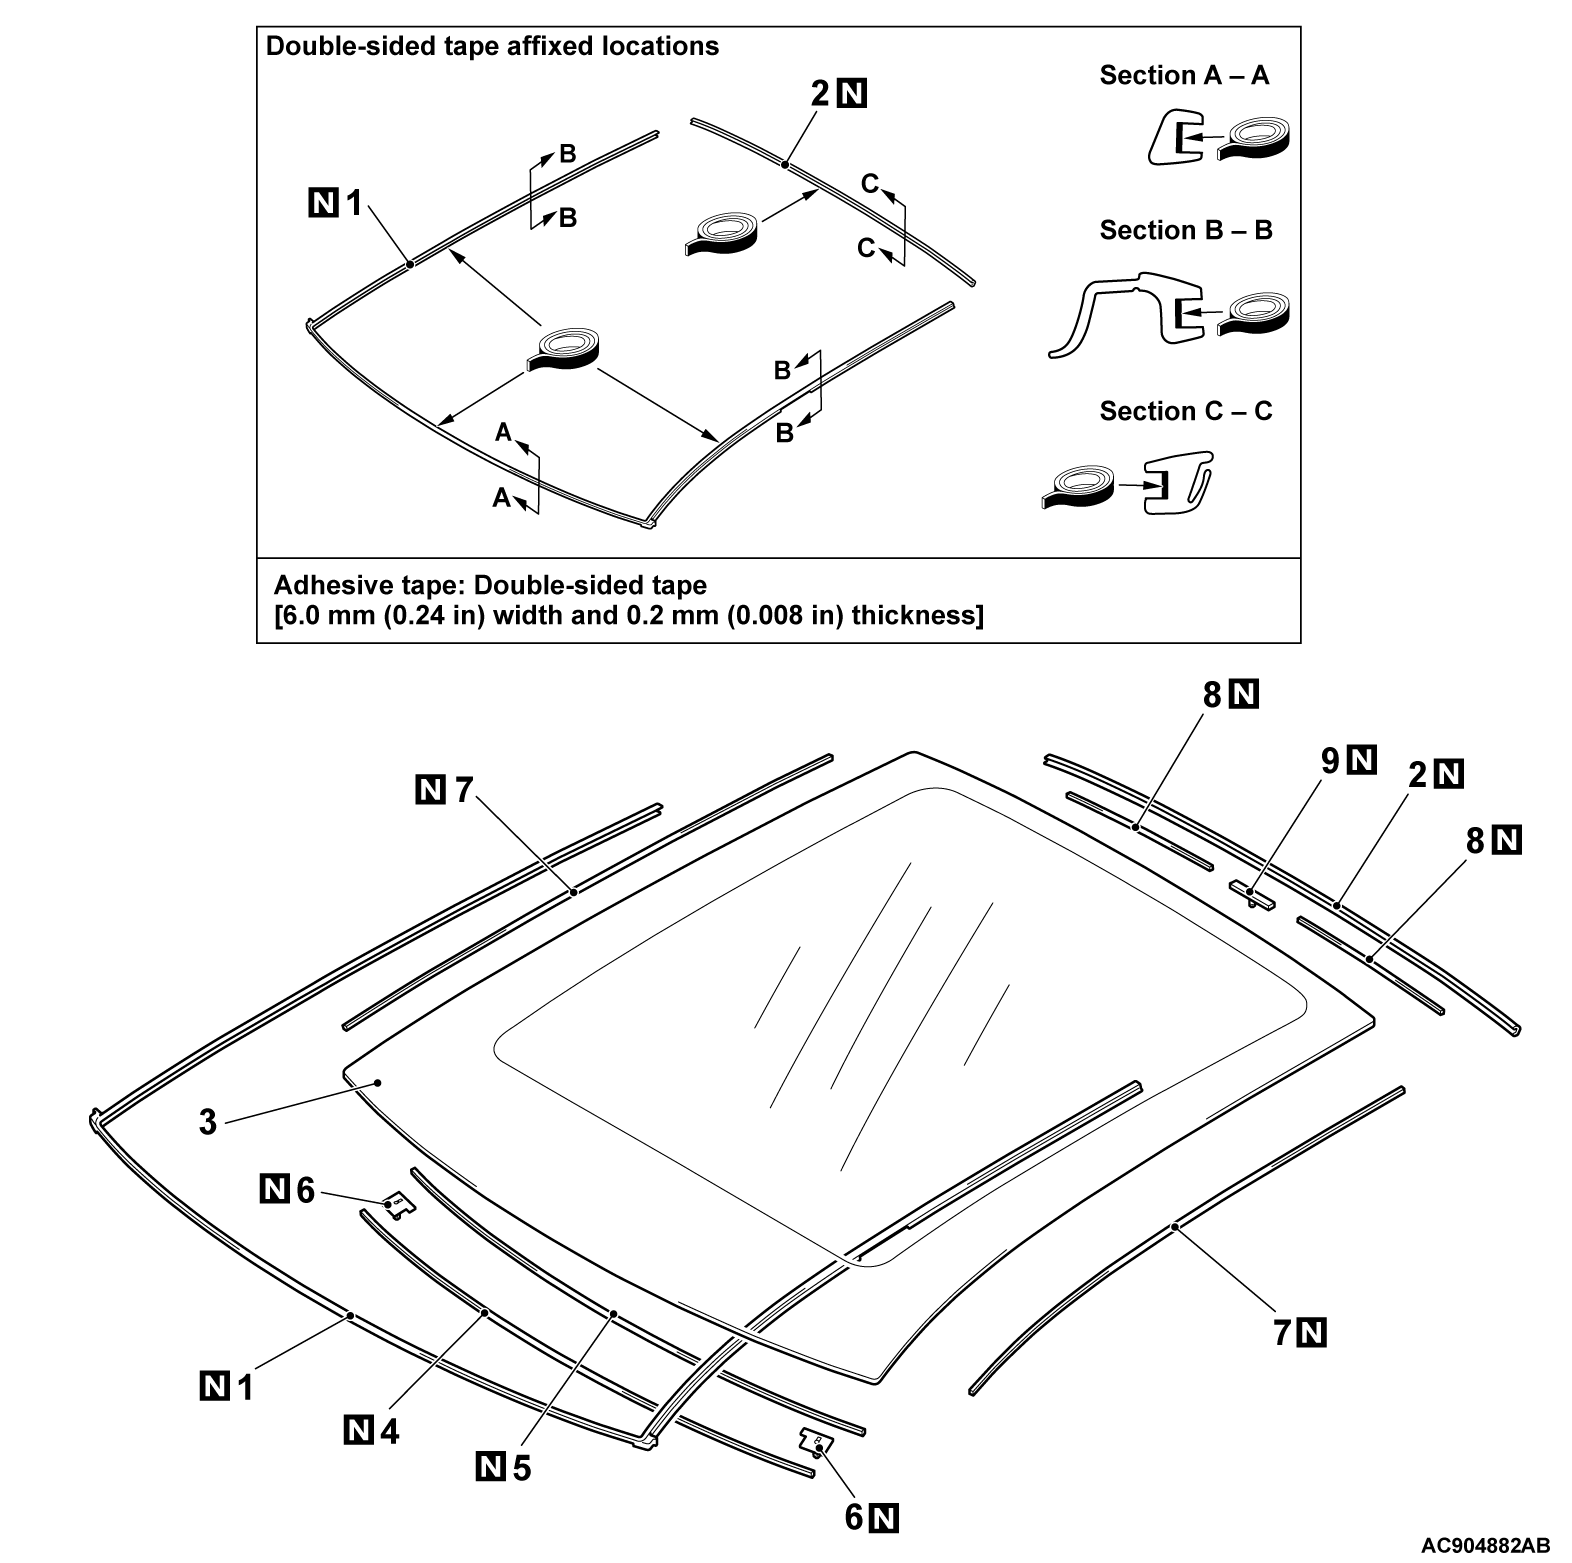
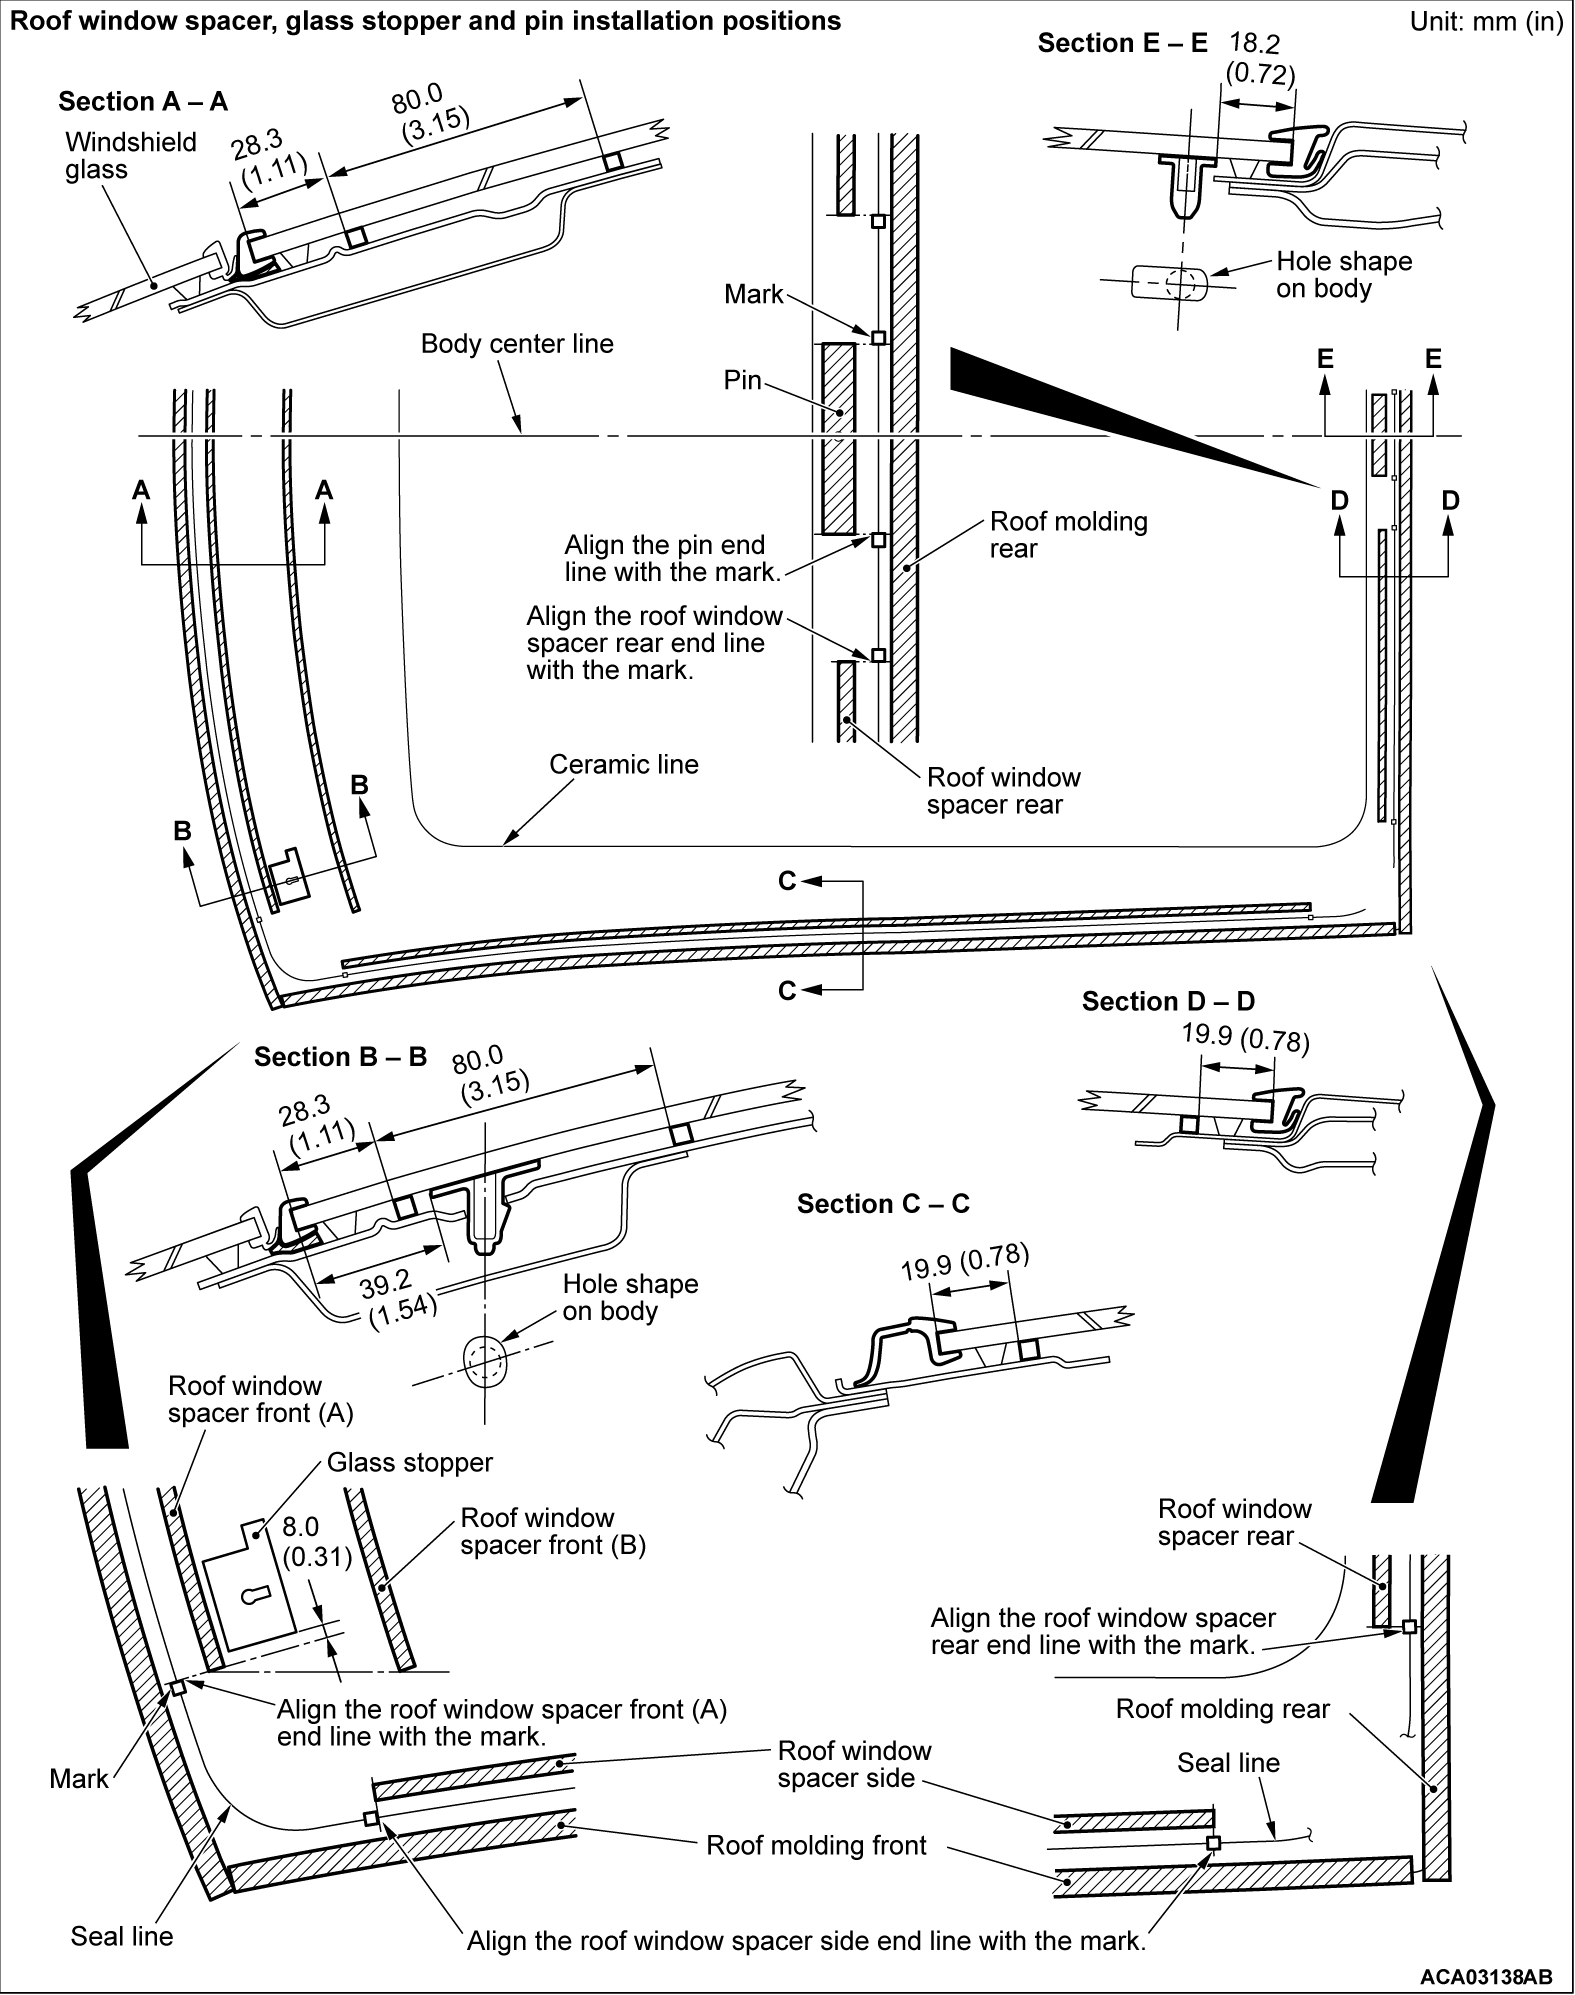
>>A<< ROOF MOLDING FRONT AND REAR/ROOF WINDOW SPACER/GLASS STOPPER/PIN INSTALLATION
1.
| caution | Before proceeding to the next operation, leave the decreased parts for 3 minutes or more to dry. Do not touch the coated surface. |
Use the parts cleaner (MZ100387 or equivalent) to degrease the inside circumference of the roof glass and the body flanges.
2.
Install the roof molding front and rear with double-sided tapes to the outer circumference of the roof glass.
3. Position the roof window spacer front (A/B) and roof window spacer side/rear to the specified positions of the roof glass so that there is no adrift or warped surface inside the roof glass.
4. Install the glass stoppers to the front corner ends of the roof glass.
5. Install the pin to the rear center part of the roof glass.
>>B<< ROOF GLASS INSTALLATION
| caution | When installing the roof glass, roll up the windshield molding lip as shown in the illustration and secure it by tapes to prevent the lip from trapping. |
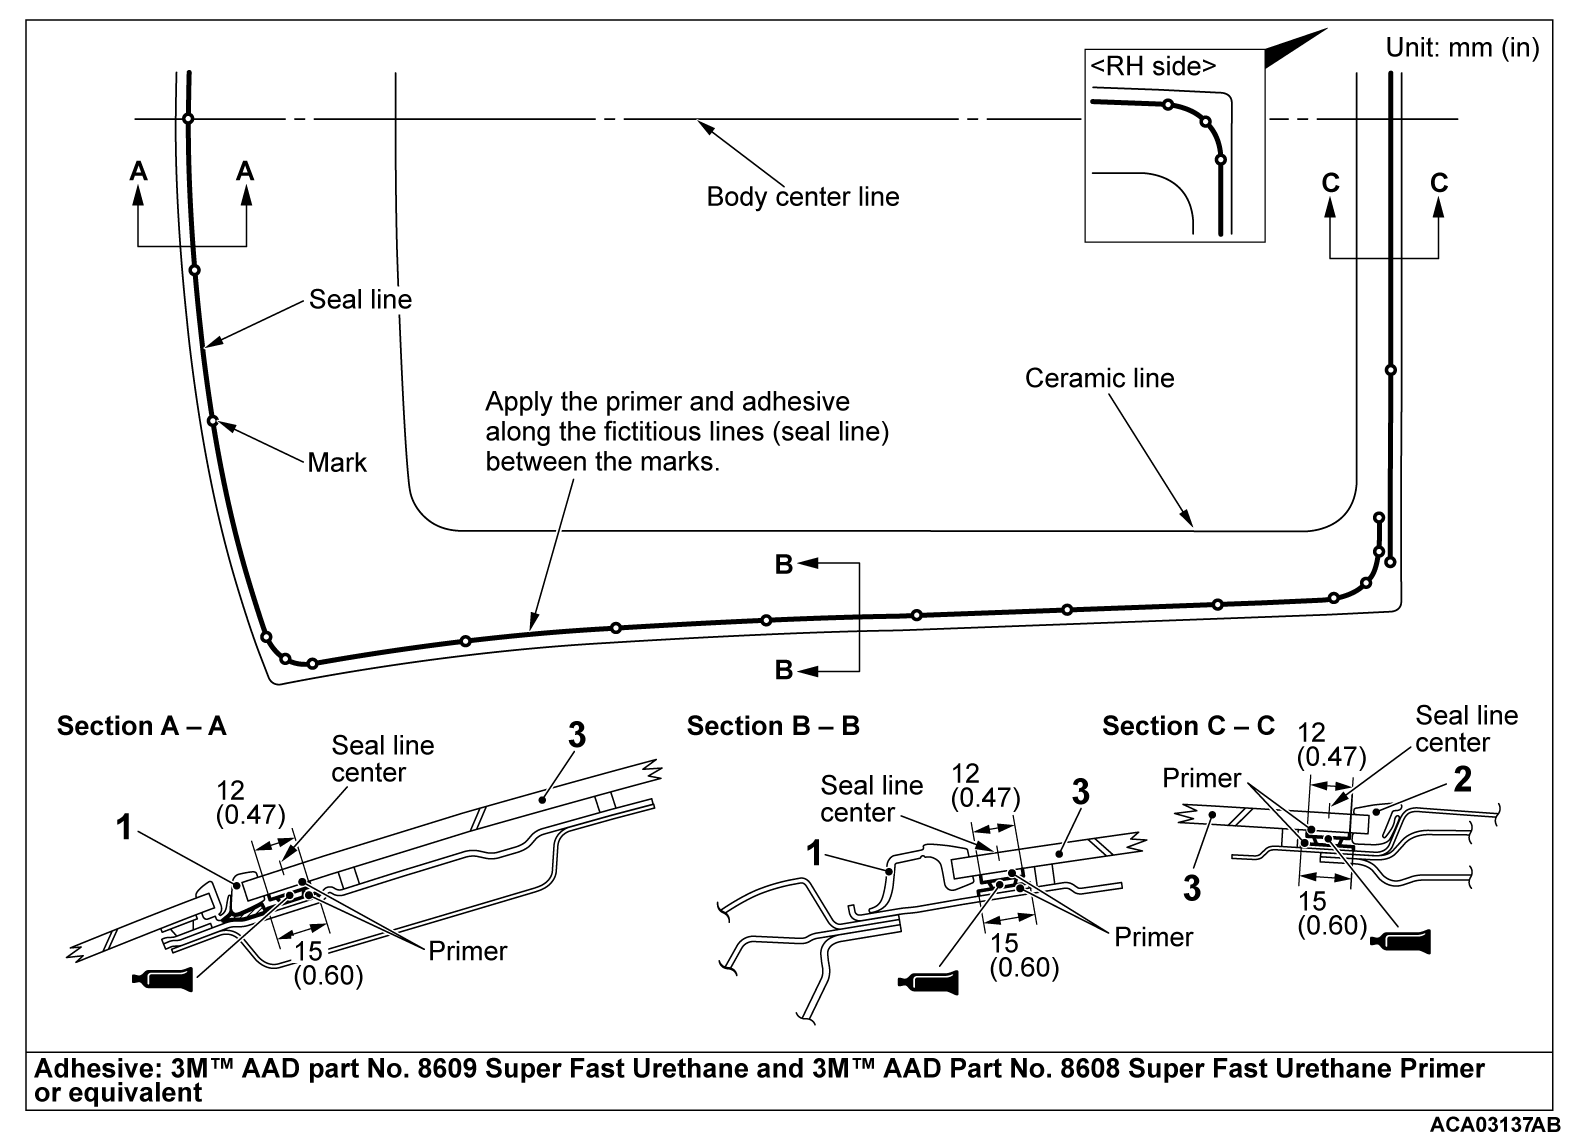
1. Apply the primer and adhesive.
![[Previous]](../../../buttons/fprev.png)
![[Next]](../../../buttons/fnext.png)

