DTC P1167: Inverter gate driver fails
| danger |
DESCRIPTIONS OF MONITOR METHODS
- Overcurrent of the IGBT drive circuit or power supply voltage reduction of the IGBT drive circuit.
MONITOR EXECUTION
- Continuous
MONITOR EXECUTION CONDITIONS (Other monitor and Sensor)
Other Monitor (There is no temporary DTC stored in memory for the item monitored below)
- Not applicable
Sensor (The sensor below is determined to be normal)
- Not applicable
DTC SET CONDITIONS
Check Conditions
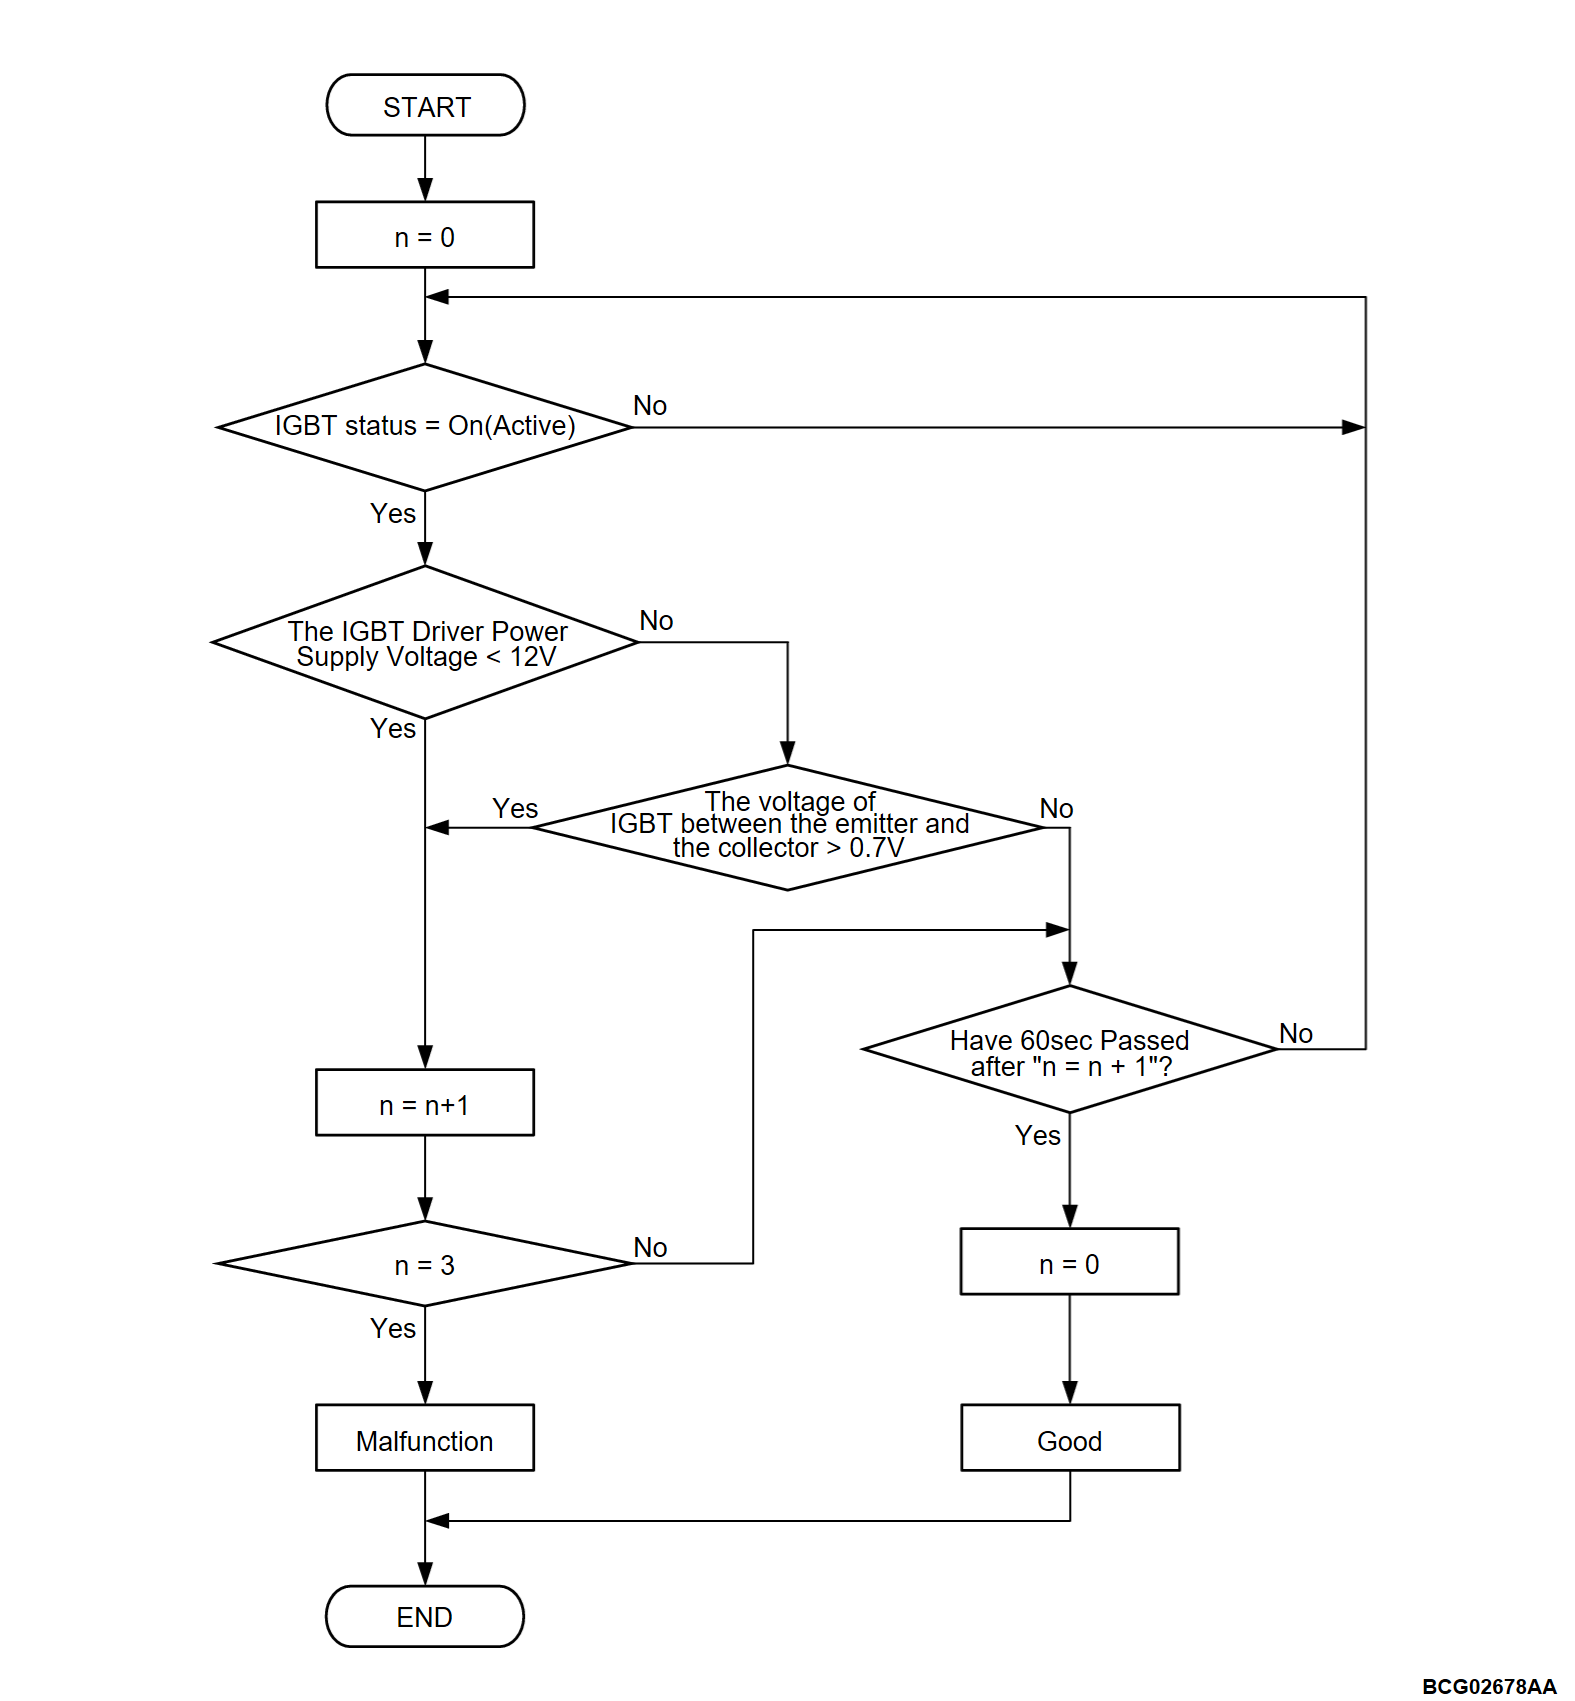
- The IGBT status of power drive unit (FEMCU) is on (Active).
Judgment Criterion
- IGBT driver power supply voltage less than 12 volts occurs 3 times within 60 seconds.
- A voltage excess of 0.7 volts between the collector and the emitter occurs 3 times within 60 seconds.
DTC SET CONDITIONS
Check Conditions
- Power drive unit (FEMCU) power supply voltage is 8 volts to 16 volts.
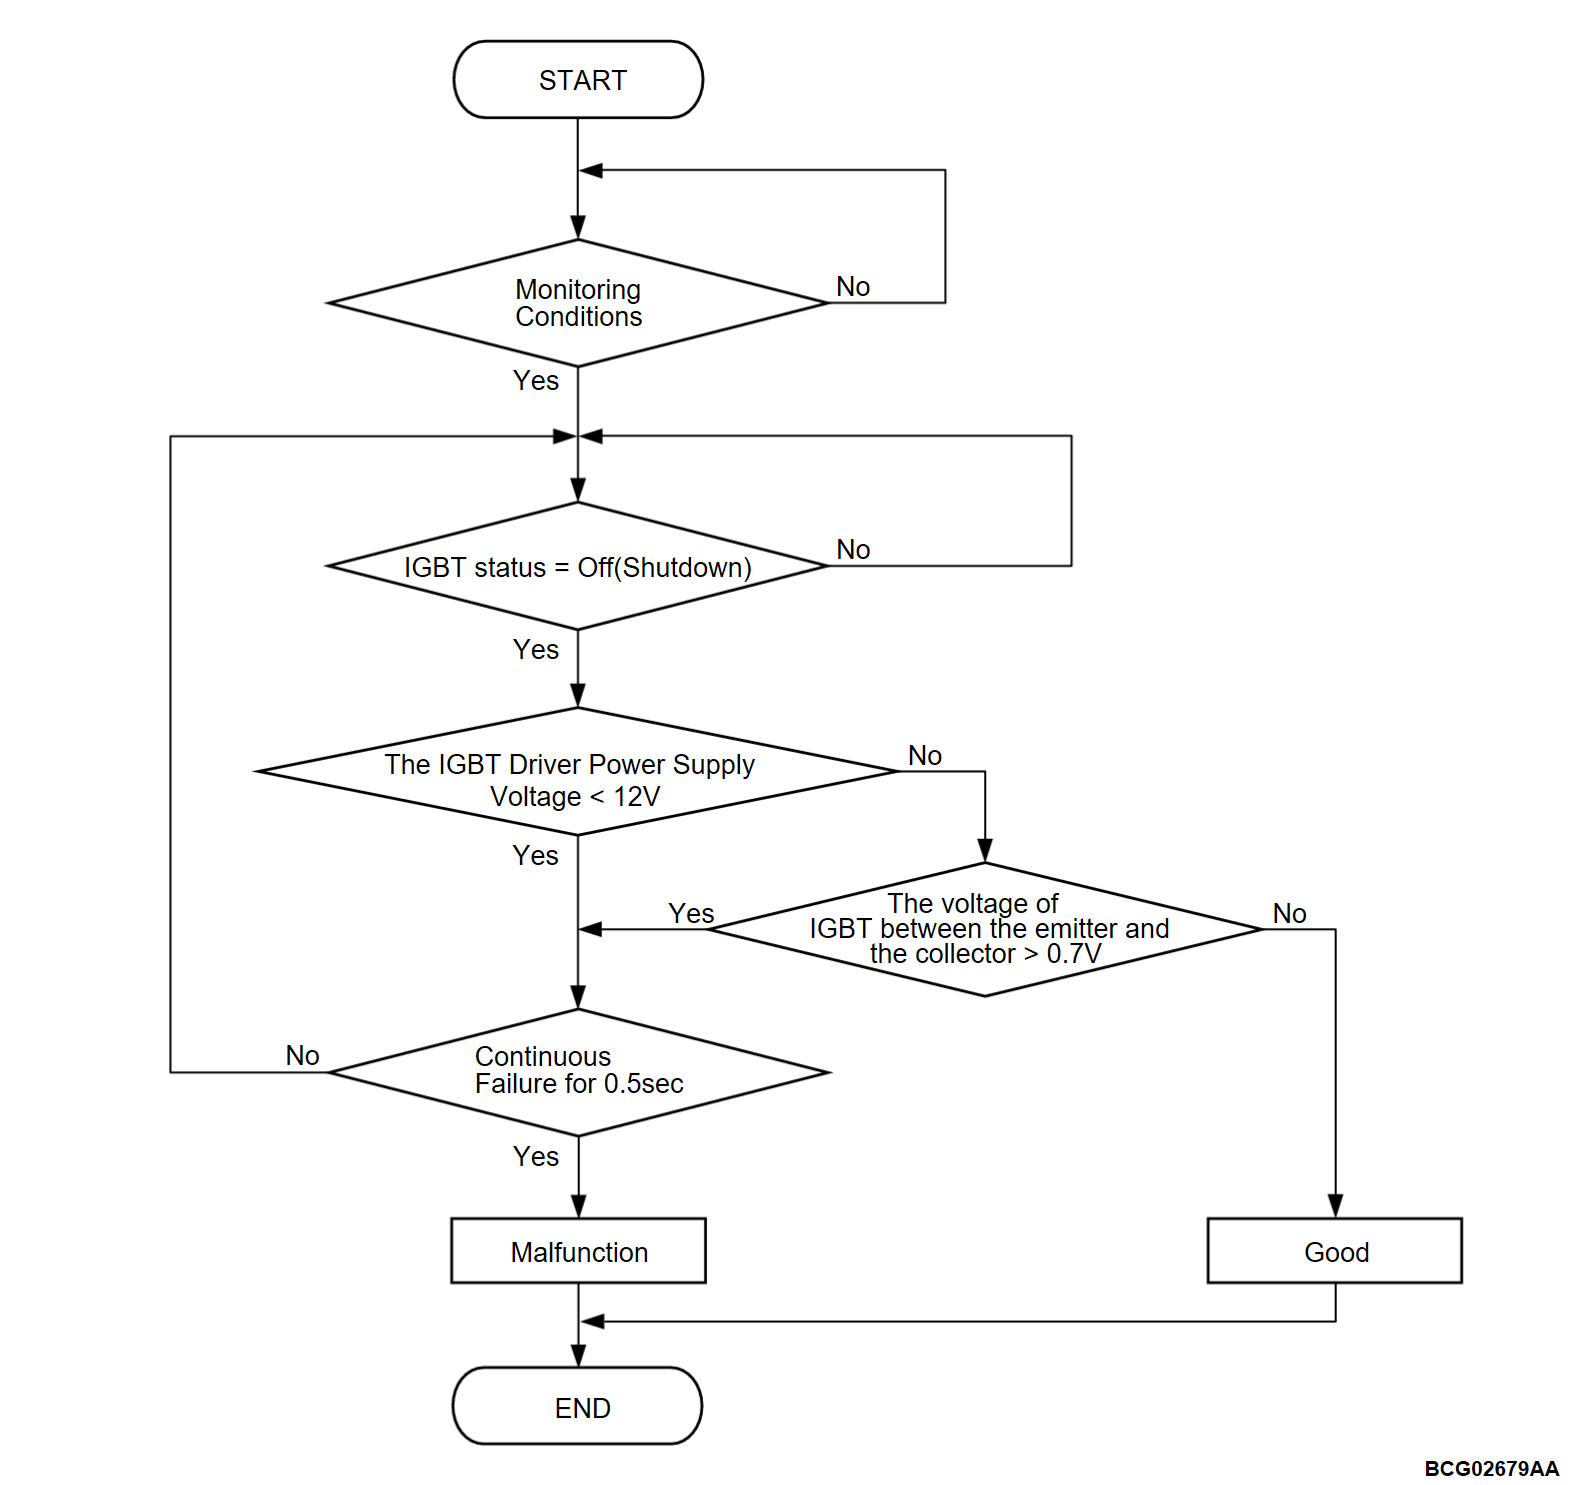
- The IGBT status of power drive unit (FEMCU) is off (Shutdown).
Judgment Criterion
- IGBT driver power supply voltage is less than 12 volts for 0.5 seconds.
- The voltage between the collector and the emitter is exceeded by 0.7 volts for 0.5 seconds.
PROBABLE CAUSES
- Malfunction of the power drive unit (FEMCU)
- Malfunction of the front motor high-voltage terminal
- Malfunction of the front motor assembly
DIAGNOSIS
STEP 1. Check the high-voltage terminal.
| danger |
|
(2) Check that the following cable is tightened to the specified torque.
Is the check result normal?
![[Previous]](../../../buttons/fprev.png)
![[Next]](../../../buttons/fnext.png)


