[Previous][Next]
REMOVAL AND INSTALLATION
 
 
cautionBefore removing and installing the headlining, refer to GROUP 52B - SRS Service Precautions and Curtain Air Bag Module .
Pre-removal and Post-installation Operation
  • Front Pillar Trim, Center Pillar Trim Upper, Quarter Trim Upper Removal and Installation (Refer to ).
  • Inside Rear View Mirror Removal and Installation (Refer to ).
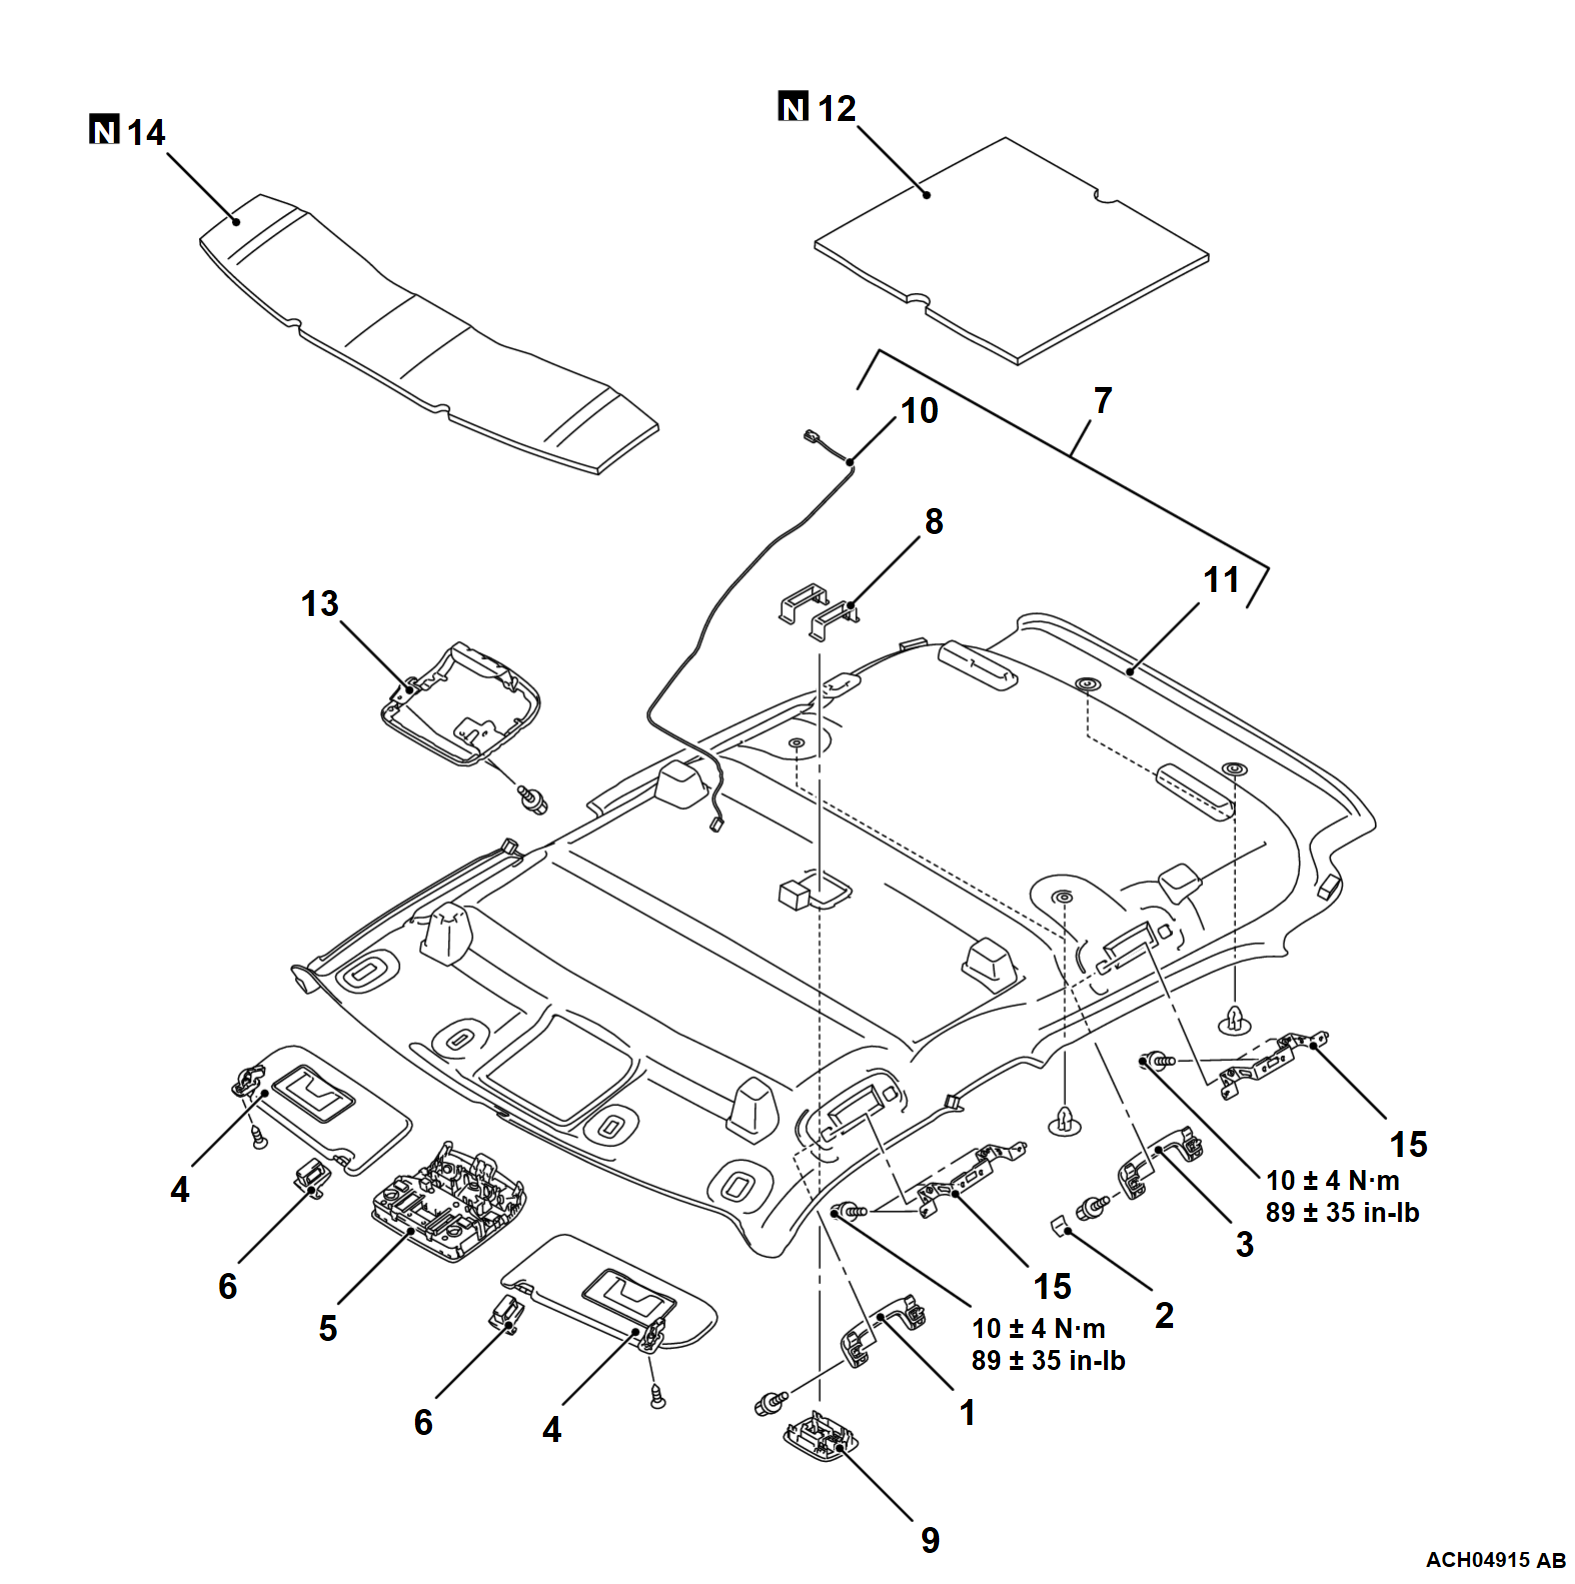
<Standard roof>
Removal steps
1.Assist grip
2.Assist grip cover <driver's side>
3.Assist grip
4.Sunvisor assembly
5.Front dome light assembly (Refer to GROUP 54A, Dome Light )
<<A>>6.Sunvisor holder
<<B>>7.Headlining assembly
8.Dome light clip
9.Rear dome light assembly (Refer to GROUP 54A, Dome Light )
10.Roof sub wiring harness
11.Headlining
>>A<<12.Headlining pad
13.Dome light bracket
>>A<<14.Headlining pad
Curtain air bag module (Refer to GROUP 52B - Curtain Air Bag Module ).
15.Assist grip bracket
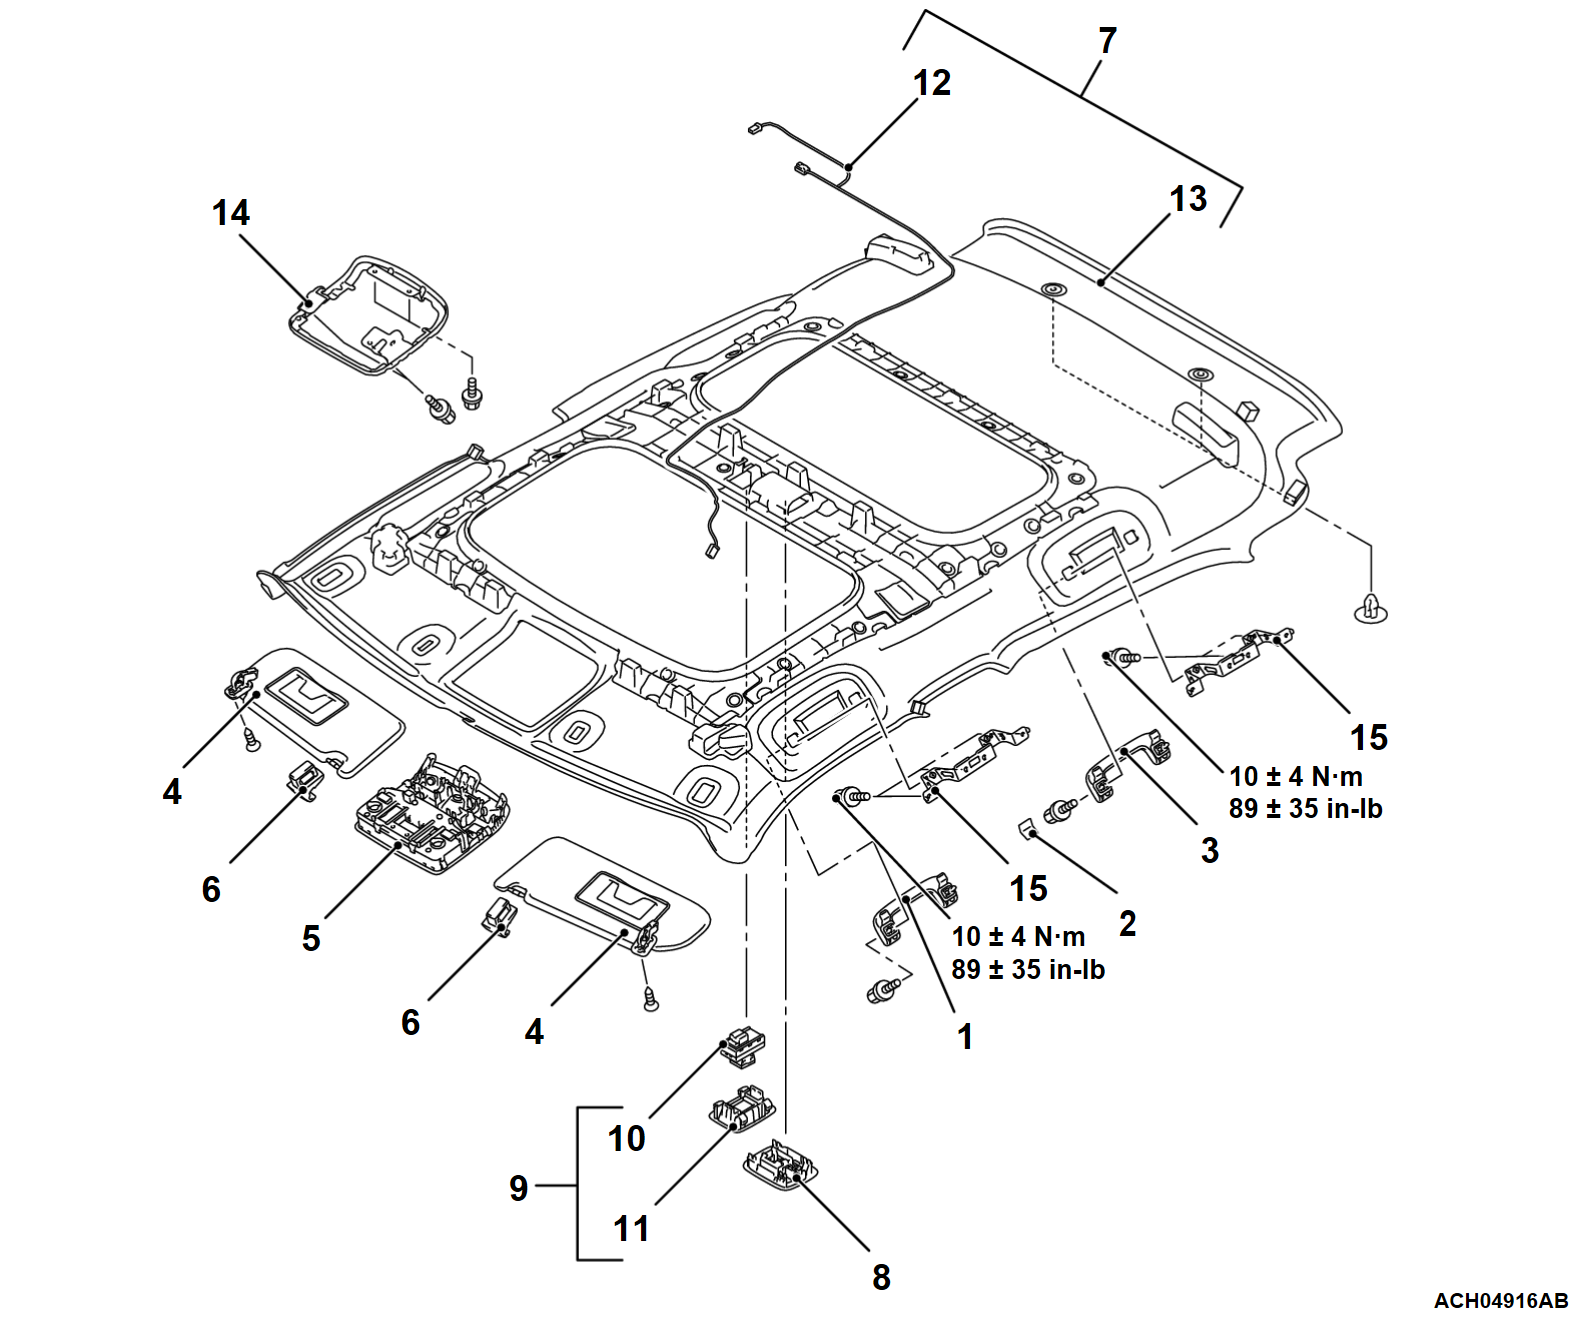
<Power panoramic sunroof>
Removal steps
1.Assist grip
2.Assist grip cover <Driver's side>
3.Assist grip
4.Sunvisor assembly
5.Front dome light assembly (Refer to GROUP 54A, Dome Light )
<<A>>6.Sunvisor holder
<<B>>7.Headlining assembly
8.Rear dome light assembly (Refer to GROUP 54A, Dome Light )
9.Rear shade switch assembly
10.Rear shade switch
11.Rear shade switch cover
12.Roof sub wiring harness
13.Headlining
14.Dome light bracket
Curtain air bag module (Refer to GROUP 52B - Curtain Air Bag Module ).
15.Assist grip bracket

Required Special Tool:
  • MB990784: Ornament Remover
 
 
REMOVAL SERVICE POINTS
 
 
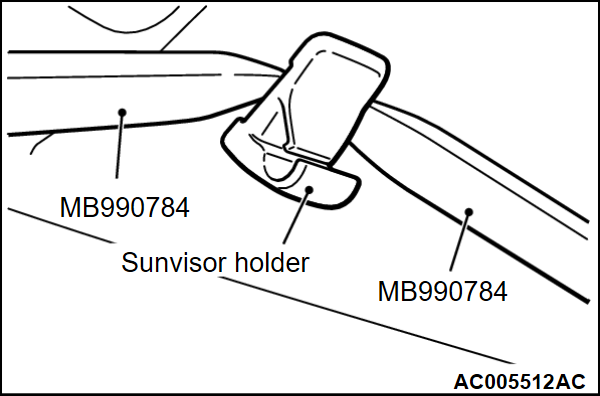
<<A>> SUNVISOR HOLDER REMOVAL
Insert the special tools MB990784 into the sunvisor holder from its left and right sides to disengage the claws on the sunvisor holder sides.


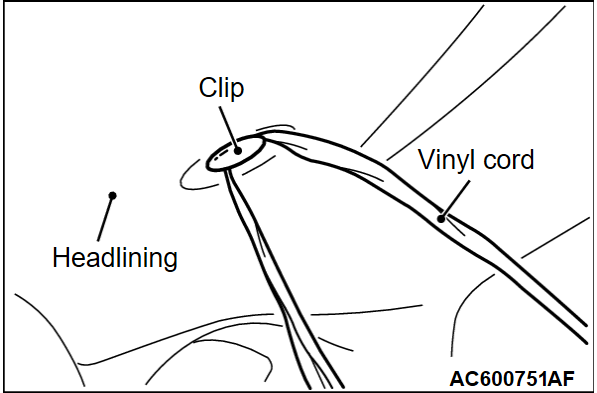
<<B>> HEADLINING ASSEMBLY REMOVAL
1. To remove the clip, insert a vinyl cord into a clearance between the clip and the headlining, and pass it around the clip. Then, pull out the clip downwards while pulling the vinyl cord.
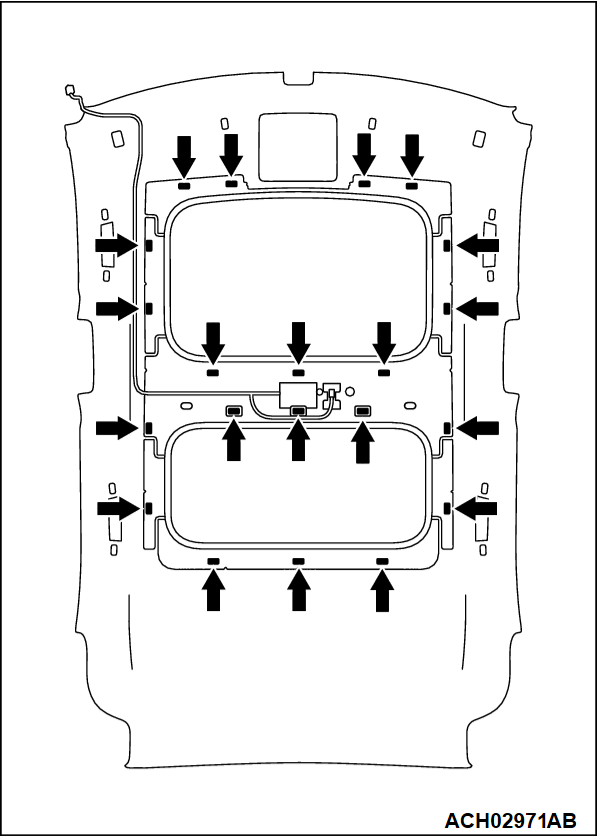
2. For the power panoramic sunroof-equipped car, use the special tool MB990784 to separate each dual lock fastener fixing the headlining and body.
3. Carry out the headlining assembly from the liftgate opening while deflecting the headlining.


INSTALLATION SERVICE POINT
 
 
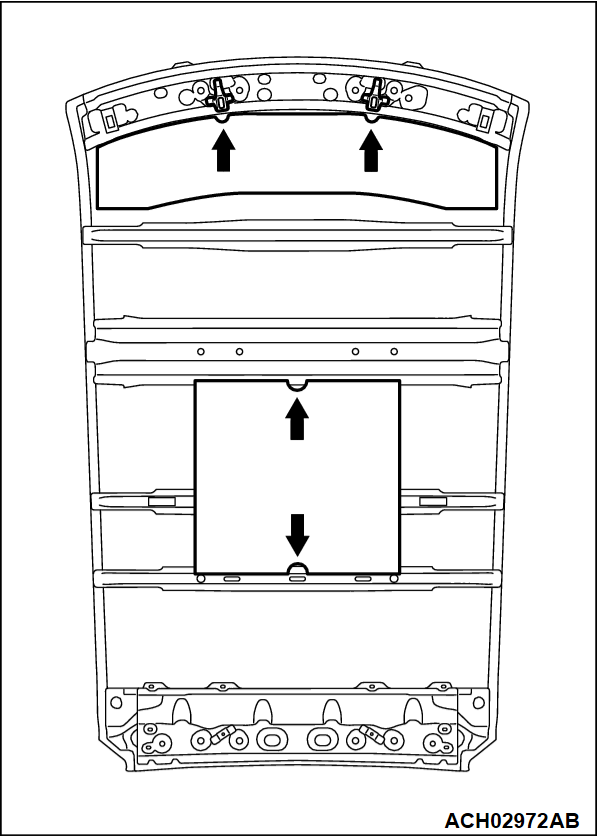
>>A<< HEADLINING PAD INSTALLATION
Install the headlining pad so that the notched section will fit the illustrated position.