[Previous][Next]
REMOVAL AND INSTALLATION
 
 
Post-installation Operation
  • Sunroof Alignment (Refer to ).
  • Sunroof Leakage Check (Refer to ).
  • Learning Procedures for Sunroof Fully Closed Position (Refer to ).
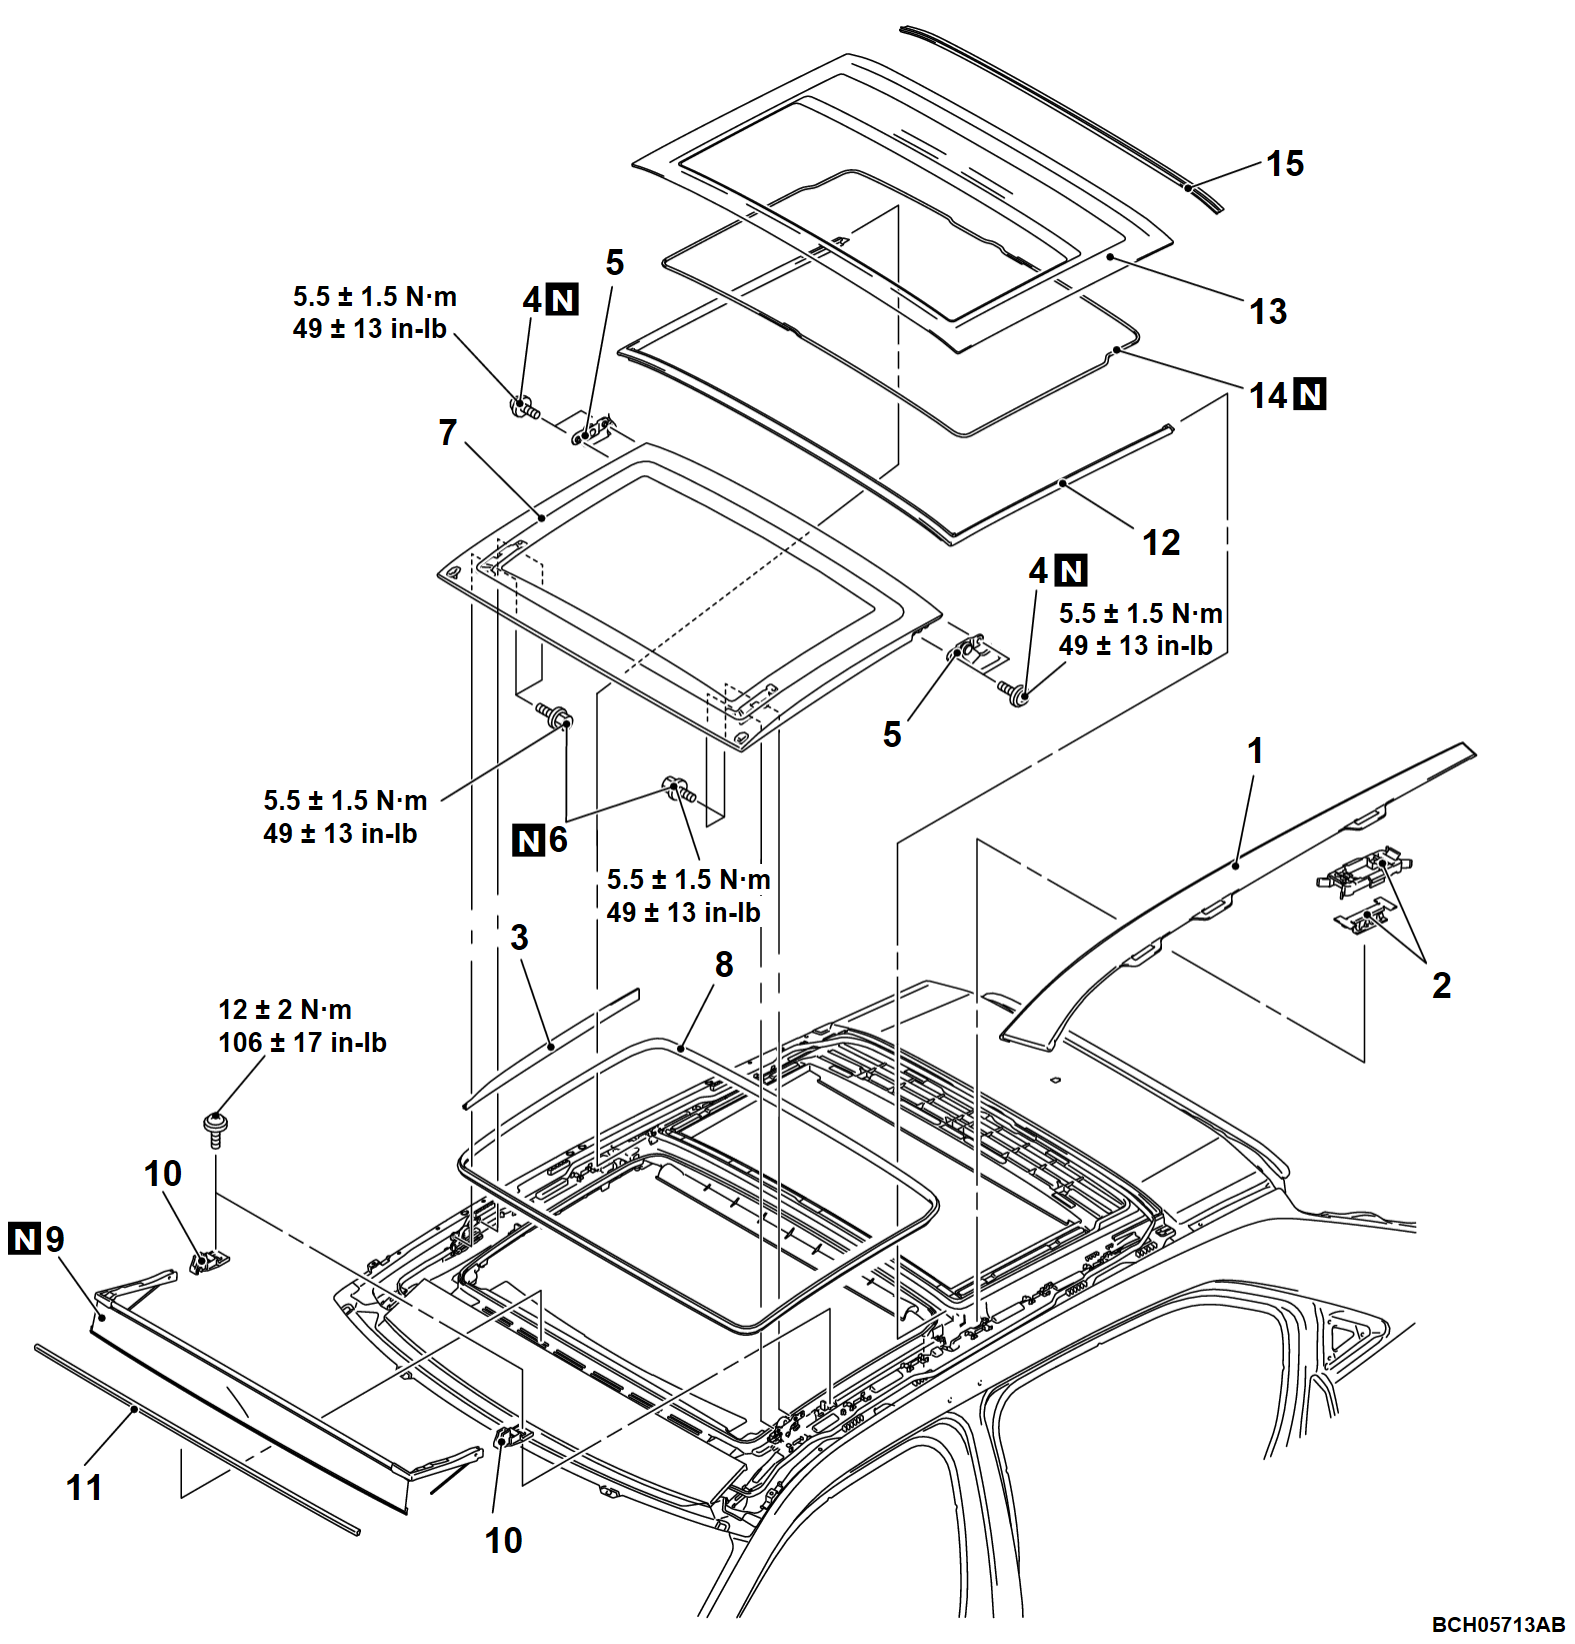
Roof side fin assembly/Side fin clip assembly removal steps
Roof rack (Refer to GROUP 51, Roof Rack ).
<<A>>1.Roof side fin assembly
2.Side fin clip assembly
Slide glass panel assembly/Slide weatherstrip removal steps
Roof rack (Refer to GROUP 51, Roof Rack ).
<<A>>1.Roof side fin assembly
3.Front inner blind
4.Bolt
5.Rear link assembly
6.Bolt
7.Slide glass panel assembly
8.Slide glass panel weatherstrip
Deflector assembly removal
<<B>>9.Deflector assembly
Deflector fastener/Front fix weatherstrip removal steps
10.Deflector fastener
11.Front fix weatherstrip
Rear fix weatherstrip removal steps
Roof rack (Refer to GROUP 51, Roof Rack ).
<<A>>1.Roof side fin assembly
3.Front inner blind
4.Bolt
5.Rear link assembly
6.Bolt
7.Slide glass panel assembly
12.Rear fix weatherstrip
Rear fix glass panel assembly removal steps
<<C>>>>B<<13.Rear fix glass panel assembly
14.Seal tape
15.Molding
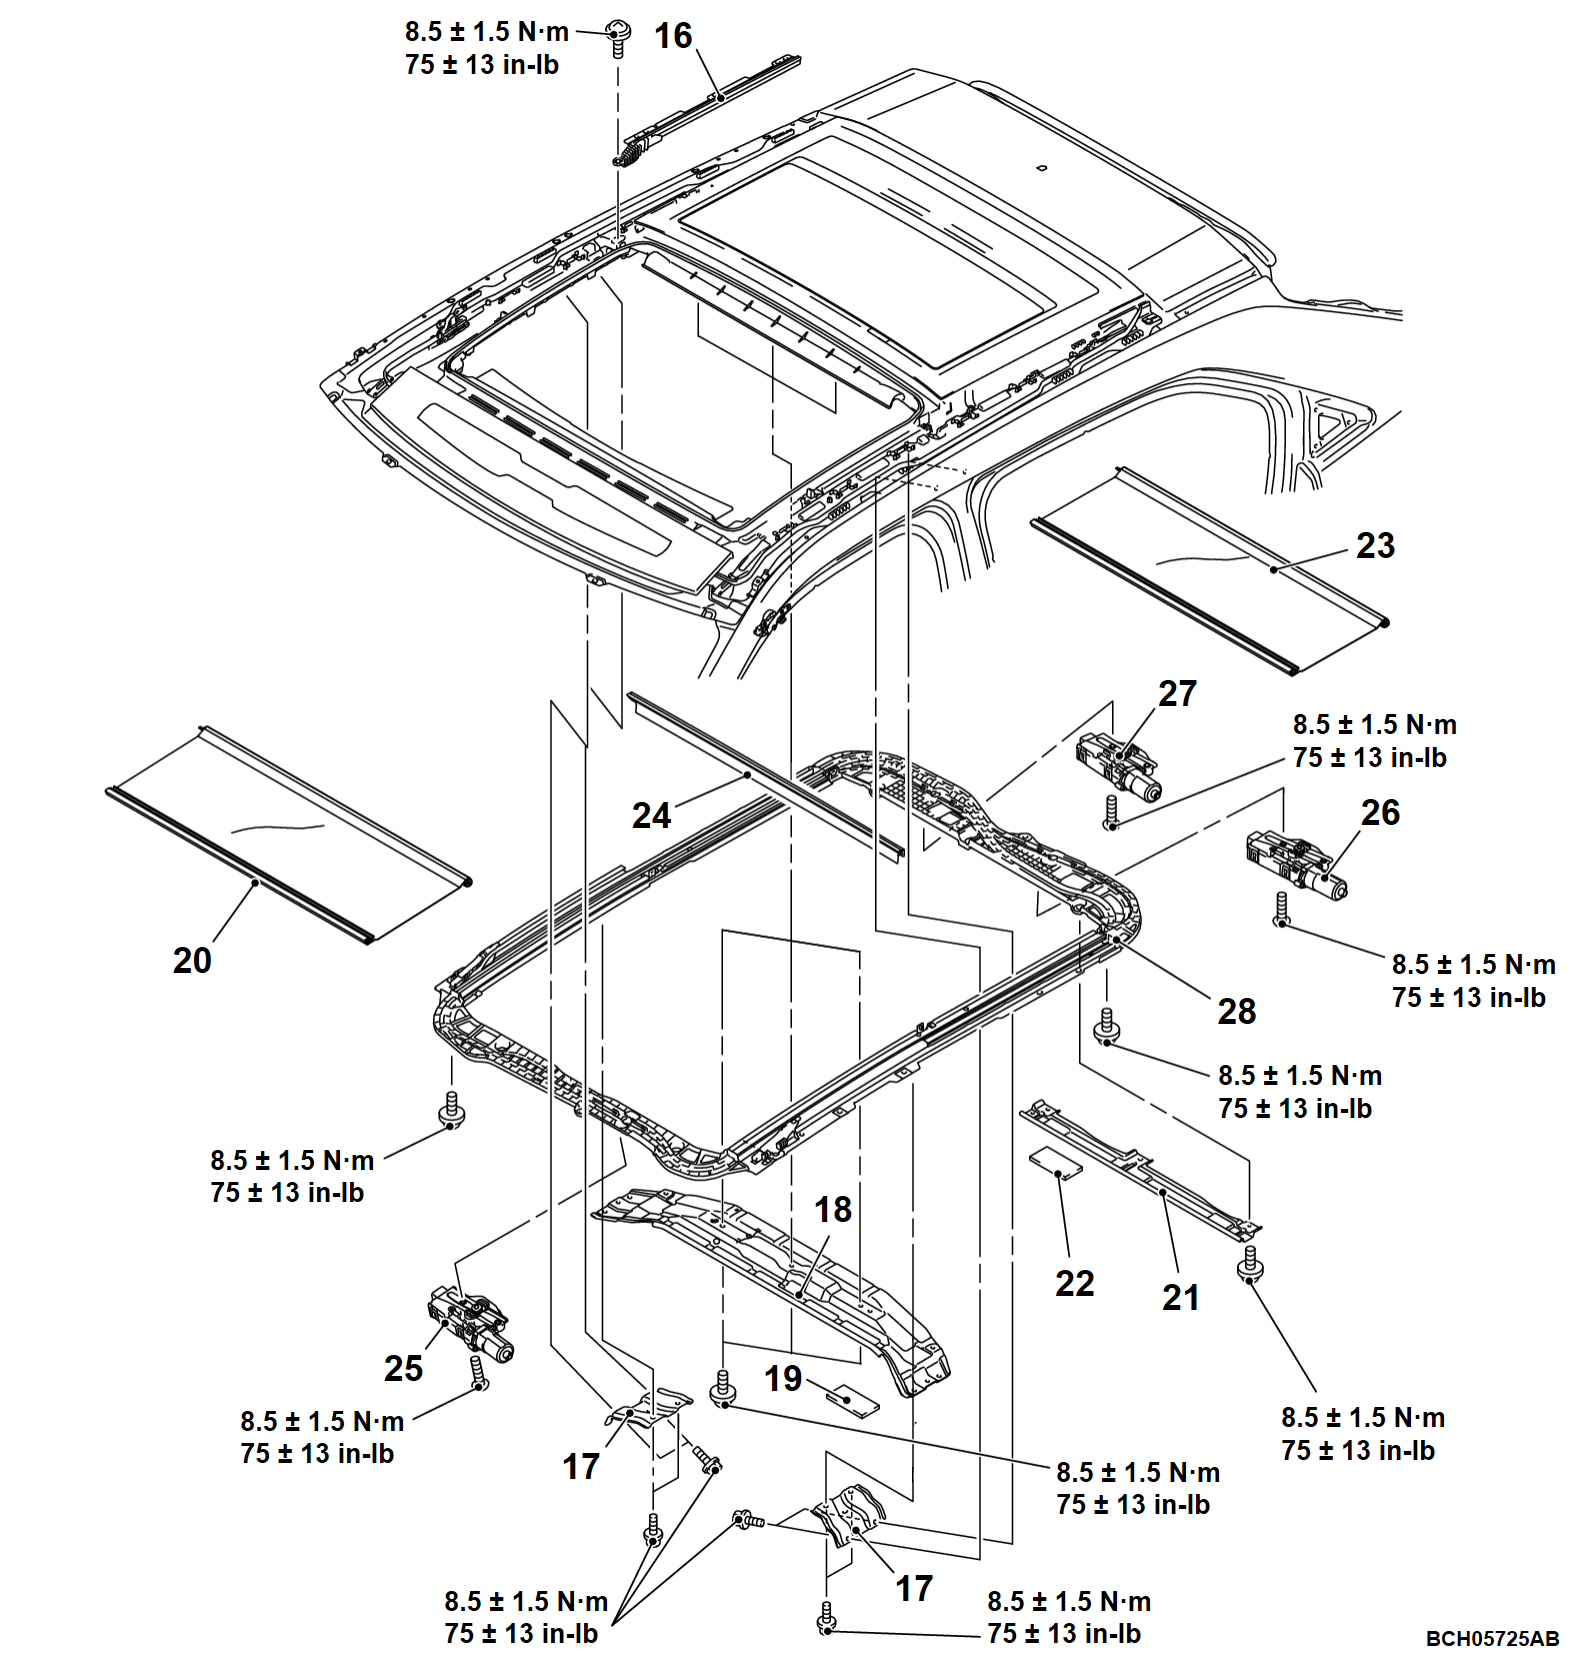
Outer rail removal steps
Roof rack (Refer to GROUP 51, Roof Rack ).
<<A>>1.Roof side fin assembly
3.Front inner blind
4.Bolt
5.Rear link assembly
6.Bolt
7.Slide glass panel assembly
16.Outer rail
Center pillar bracket/Center pillar reinforcement removal steps
Headlining (Refer to GROUP 52A, Headlining )
>>A<<17.Center pillar bracket
18.Center pillar reinforce assembly
19.Roof clip
Clip bracket removal steps
Headlining (Refer to GROUP 52A, Headlining )
<<D>>20.Front roll shade
21.Clip bracket assembly
22.Roof clip
Front roll shade removal steps
Headlining (Refer to GROUP 52A, Headlining )
>>A<<17.Center pillar bracket
18.Center pillar reinforce assembly
<<D>>20.Front roll shade
Rear roll shade removal steps
Headlining (Refer to GROUP 52A, Headlining )
21.Clip bracket assembly
<<D>>23.Rear roll shade
Shade screen removal steps
Headlining (Refer to GROUP 52A, Headlining )
>>A<<17.Center pillar bracket
18.Center pillar reinforce assembly
24.Shade screen
Front shade motor assembly removal steps
Headlining (Refer to GROUP 52A, Headlining )
Front dome light bracket (Refer to GROUP 54A, Dome Light )
25.Front shade motor assembly
Sunroof motor assembly removal steps
Headlining (Refer to GROUP 52A, Headlining )
26.Sunroof motor assembly
Rear shade motor assembly removal steps
Headlining (Refer to GROUP 52A, Headlining )
27.Rear shade motor assembly
Mechanism assembly removal steps
Roof rack (Refer to GROUP 51, Roof Rack ).
<<A>>1.Roof side fin assembly
3.Front inner blind
4.Bolt
5.Rear link assembly
6.Bolt
7.Slide glass panel assembly
<<B>>9.Deflector assembly
16.Outer rail
Headlining (Refer to GROUP 52A, Headlining )
>>A<<17.Center pillar bracket
18.Center pillar reinforce assembly
<<D>>20.Front roll shade
21.Clip bracket assembly
<<D>>23.Rear roll shade
24.Shade screen
Front dome light bracket (Refer to GROUP 54A, Dome Light )
Connection connector
25.Front shade motor assembly
Connection connector
26.Sunroof motor assembly
27.Rear shade motor assembly
28.Mechanism assembly


REMOVAL SERVICE POINTS
 
 
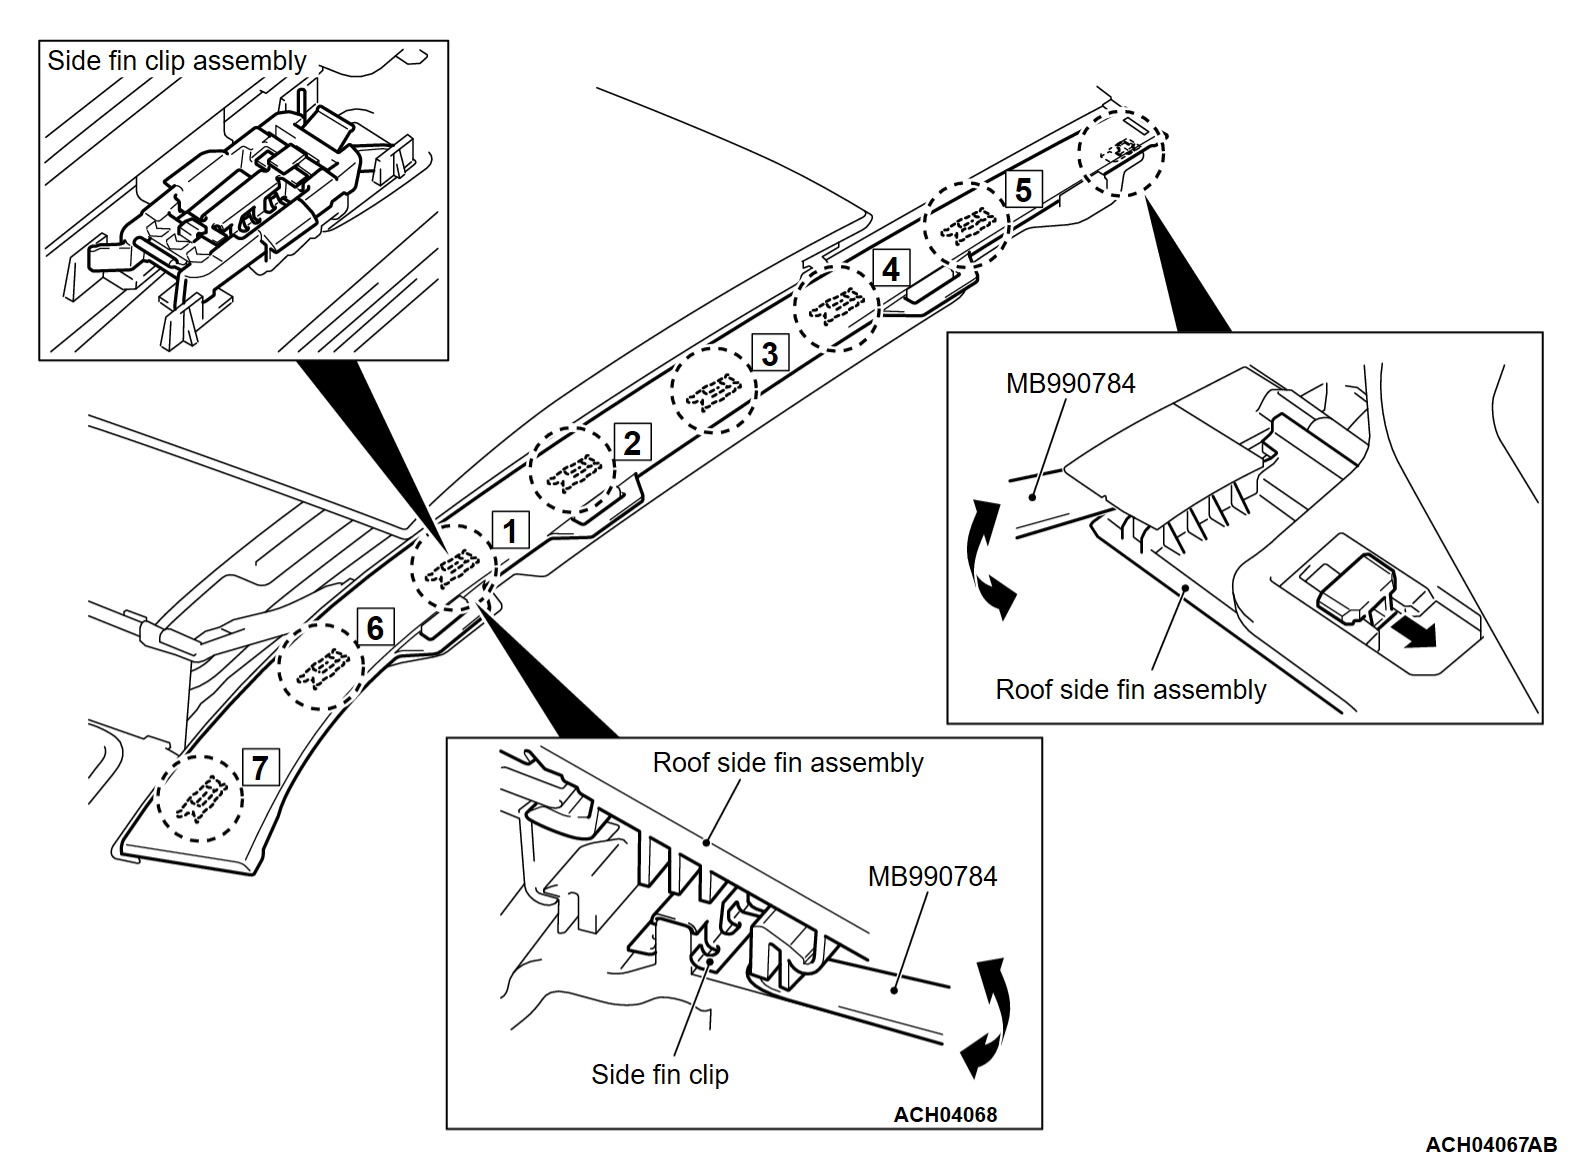
<<A>> ROOF SIDE FIN ASSEMBLY REMOVAL
1.
Insert the special tool ornament remover (MB990784) in the gap between the roof side fin assembly and the housing assembly, and remove the seven clips.
noteIt is easier to work by removing clips from near the center in the order as shown figure.
2. Remove the rearmost clip of roof side fin assembly to slide out the roof side fin assembly forward.
 
 
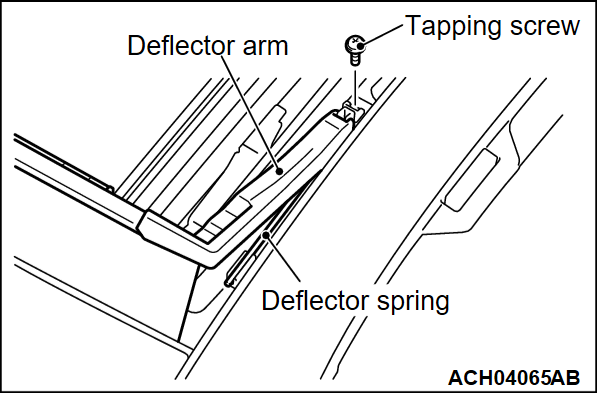
<<B>> DEFLECTOR ASSEMBLY REMOVAL
1.
cautionRemove the deflector while holding it with your hand to prevent the deflector is rapidly coming off by its spring reaction.
Remove the tapping screw.
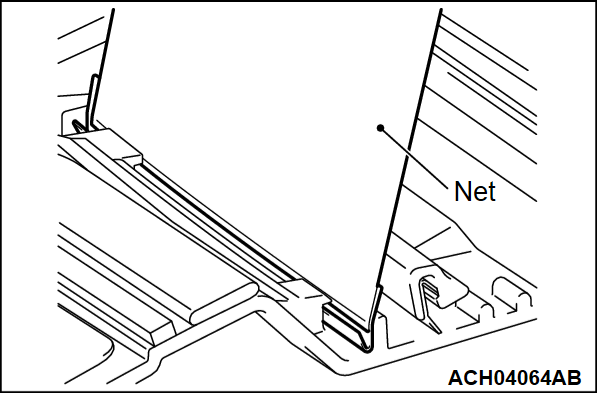
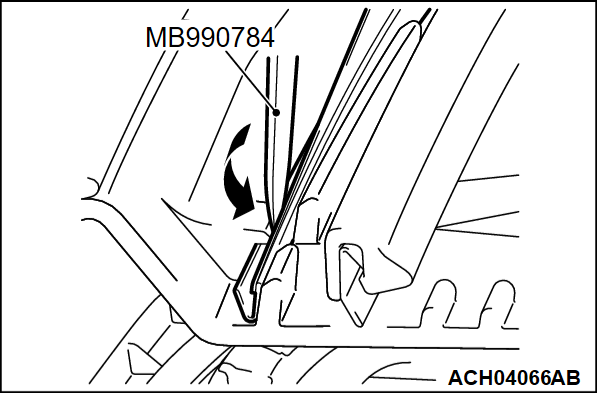
2. Remove the net of deflector from the housing using the special tool ornament remover (MB990784).


<<C>> REAR FIX GLASS PANEL ASSEMBLY REMOVAL
Remove the rear fix glass panel assembly in the same way as the window shield (Refer to ).


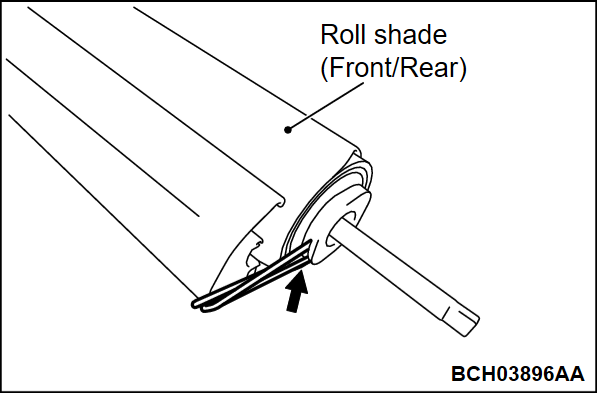
<<D>> FRONT ROLL SHADE/REAR ROLL SHADE REMOVAL
As the backlash occurs when removing the roll shade, pass a wire through the stopper hole to support the roll shade.


INSTALLATION SERVICE POINTS
 
 
>>A<< CENTER PILLAR BRACKET INSTALLATION
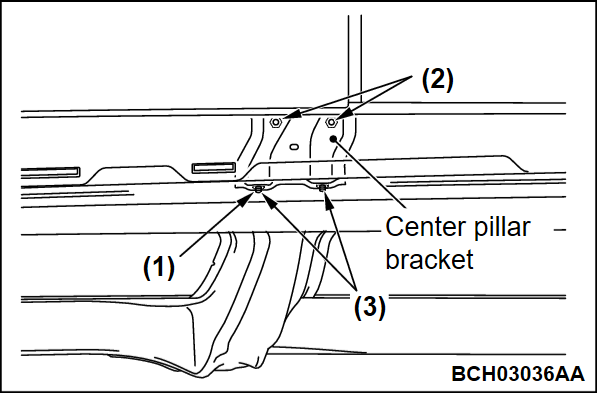
1. Temporarily fix the center pillar bracket with the bolt (1) shown in the figure.
2. Tighten the roof side bolts (2) first, and then tighten the pillar side bolts (3).


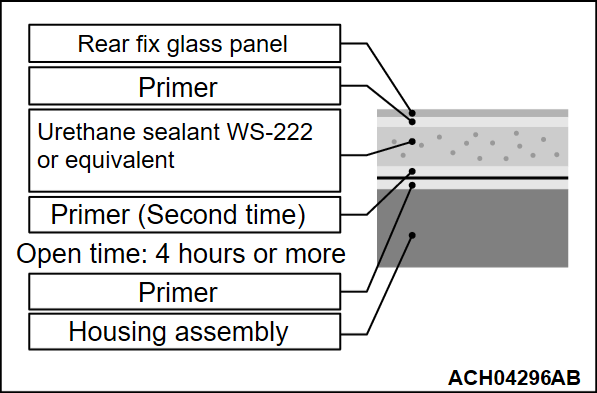
>>B<< REAR FIX GLASS PANEL ASSEMBLY INSTALLATION
1. With commercial IPA (Isopropyl alcohol), remove grease from the joining surface of the rear fix glass panel assembly.
2. Apply THE YOKOHAMA RUBBER CO., LTD. glass primer PC-3 or equivalent to the rear fix glass panel and the housing assembly.
3. Leave the sunroof housing assembly for more than 4 hours until the primer is completely dry because the primer is applied 2 times to avoid peeling the adhesive off. Open time is necessary.
Open time: 4 hours or more
4. For the second time, apply THE YOKOHAMA RUBBER CO., LTD. glass primer PC-3 or equivalent to the housing assembly.
5. After the primer is applied for the second time, leave the rear fix glass panel assembly for approximately 3 minutes. Apply THE YOKOHAMA RUBBER CO., LTD. urethane sealant WS-222 or equivalent to the joining surface of the housing assembly. And then install the rear fix glass panel assembly.
Open time: About 3 minutes