[Previous][Next]
REMOVAL AND INSTALLATION
 
 
caution
  • Before removing the steering wheel assembly and driver's air bag module assembly, refer to GROUP 52B - Service Precautions and Air Bag Module(s) and Clock Spring . Position the steering wheel in the straight-ahead position, and remove the ignition key. If you fail to do this, clock spring for SRS may get damage not to operate the SRS (air bag), and it may cause the serious injury of the driver.
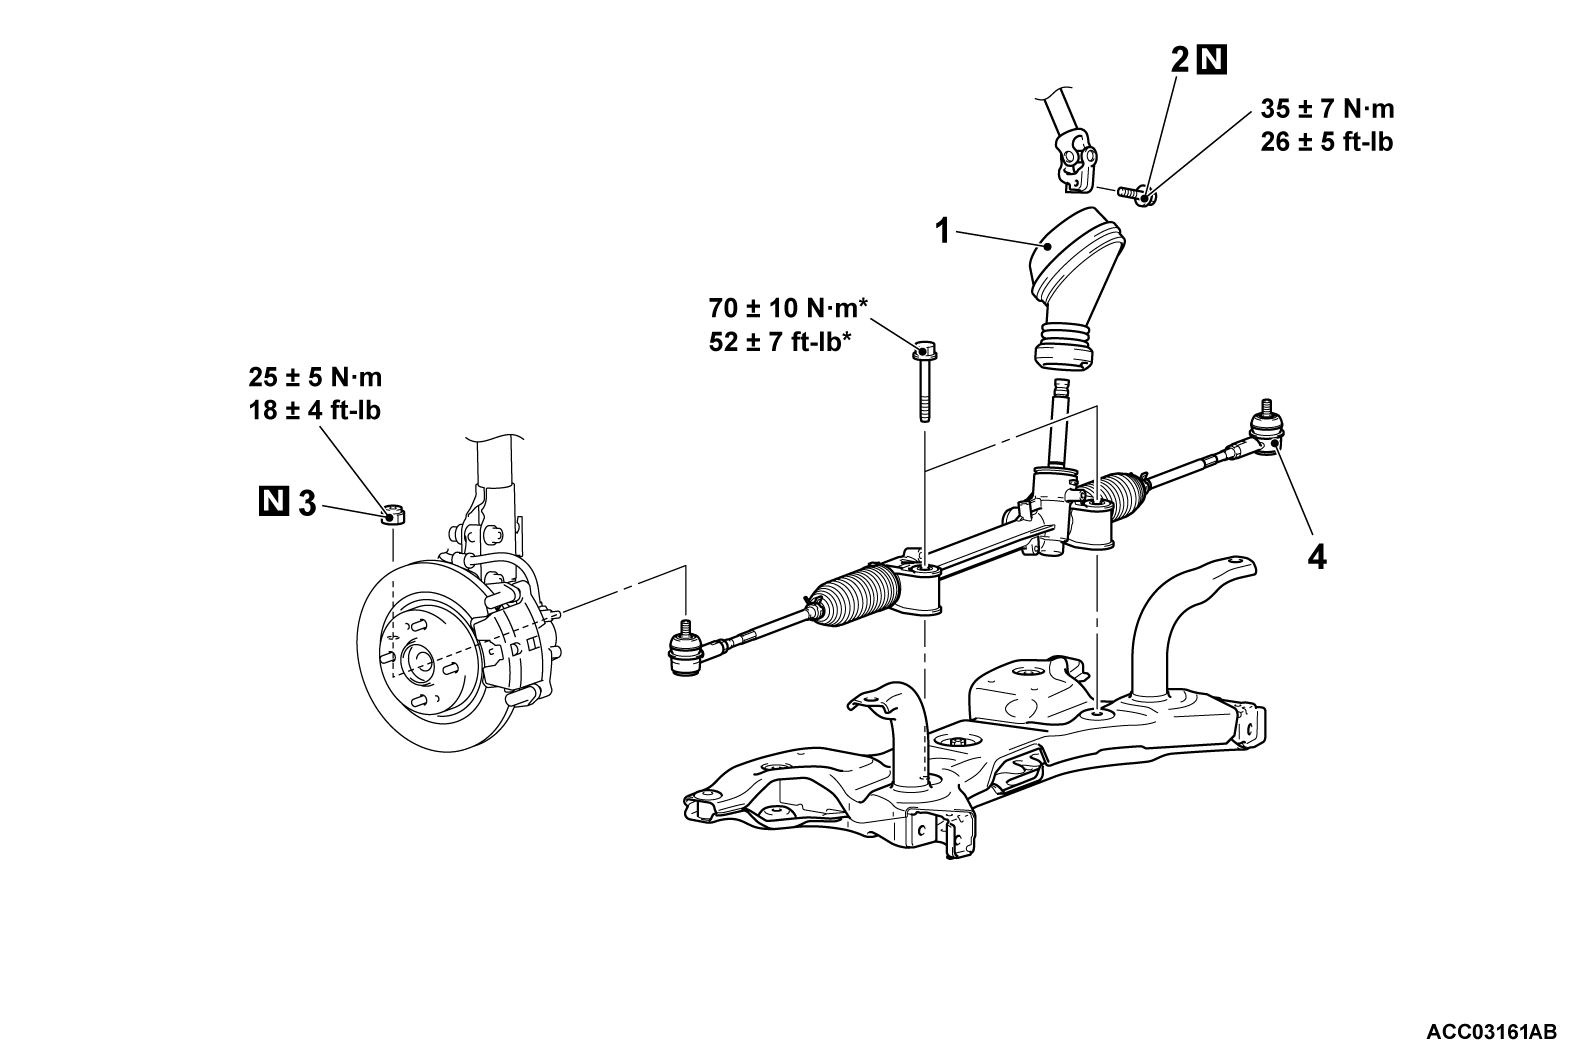
  • The parts indicated by * are the bolts with friction coefficient stabilizer. In removal, ensure there is no damage, clean dust and soiling from the bearing and thread surfaces, and tighten them to the specified torque.
Pre-removal Operation
  • Steering Wheel Assembly Removal (Refer to ).
  • Front Under Cover Removal (Refer to GROUP 51 - Under Cover ).
  • Lower Arm Assembly Removal (Refer to GROUP 33 - Lower Arm ).
Post-installation Operation
  • Lower Arm Assembly Installation (Refer to GROUP 33 - Lower Arm ).
  • Front Under Cover Installation (Refer to GROUP 51 - Under Cover ).
  • Clock Spring Centering (Refer to GROUP 52B - Driver's Air Bag Module ).
  • Steering Wheel Assembly Installation (Refer to ).
  • Using your fingers, press the dust cover to check for a crack or damage (Refer to GROUP 37 - On-vehicle Service ).
  • Front Wheel Alignment Check and Adjustment (Refer to GROUP 33 - On-vehicle Service, Front Wheel Alignment Check and Adjustment ).
Removal steps
>>B<<1.Steering shaft joint dust cover
>>A<<2.Steering column bolt (Intermediate shaft assembly and steering gear & linkage connection)
<<A>>3.Self-locking nut (Tie-rod end and knuckle connection)
Front suspension assembly (Refer to GROUP 32 - Front Axle Crossmember )
4.Steering gear and linkage assembly
 
 
REMOVAL SERVICE POINT
 
 
<<A>> SELF-LOCK NUT (TIE-ROD END AND KNUCKLE CONNECTION) REMOVAL
1.
caution
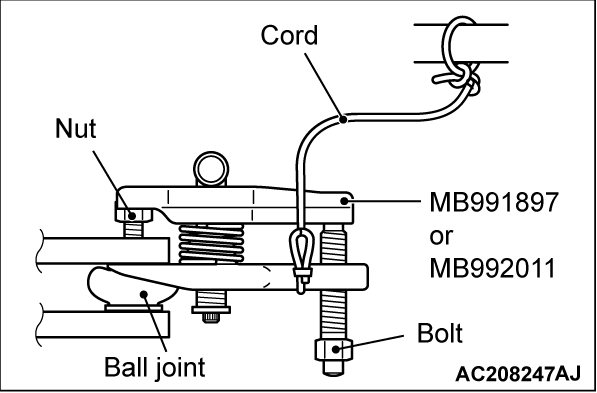
  • Loosen the self-locking nut (tie-rod end connection) from the ball joint, but do not remove here. Use the special tool.
  • To prevent the special tool from dropping off, suspend it with a cord.
Install special tool ball joint remover (MB991897 or MB992011) as shown in the figure.
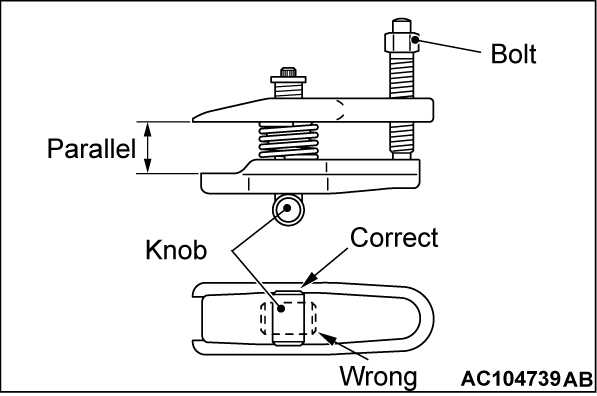
2. Turn the bolt and knob to make the special tool jaws parallel, then hand-tighten the bolt. After tightening, check that the jaws are still parallel.
noteTo adjust the special tool jaws to be parallel, set the orientation of the knob as shown in the figure.
3. Unscrew the bolt to disconnect the ball joint.


INSTALLATION SERVICE POINTS
 
 
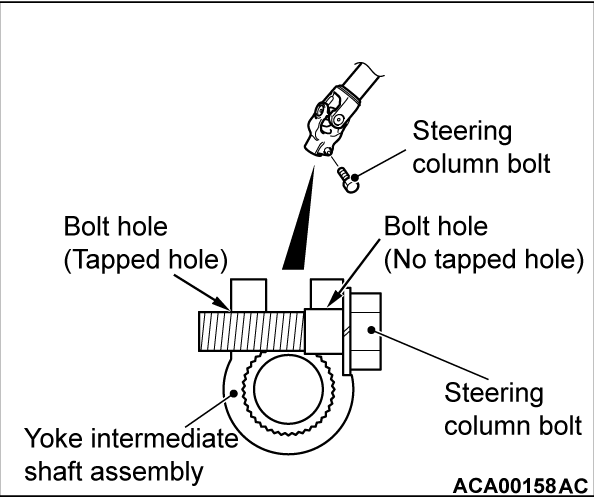
>>A<< STEERING COLUMN BOLT (INTERMEDIATE SHAFT ASSEMBLY AND STEERING GEAR & LINKAGE CONNECTION) INSTALLATION
Insert the steering column bolt into the no-tapped bolt hole, and tighten it to the specified torque.
Tightening torque: 35 ± 7 N·m (26 ± 5 ft-lb)


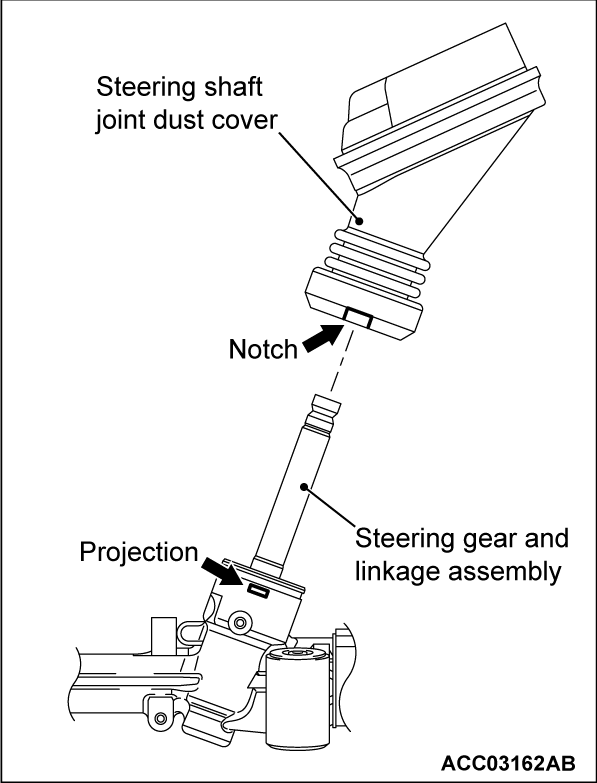
>>B<< STEERING SHAFT JOINT DUST COVER INSTALLATION
Install the steering shaft joint dust cover so that the cover notch is aligned with the projection of the steering gear and linkage assembly.
Shall fit the steering shaft joint dust cover in steering gear and linkage assembly cater-corner, then fit in all round until the lip shall be fitted into groove of steering gear and linkage assembly.
Shall pull the steering shaft joint dust cover to confirm that the steering shaft joint dust cover is fitted into steering gear and linkage assembly securely.