[Previous][Next]
REMOVAL AND INSTALLATION
 
 
caution
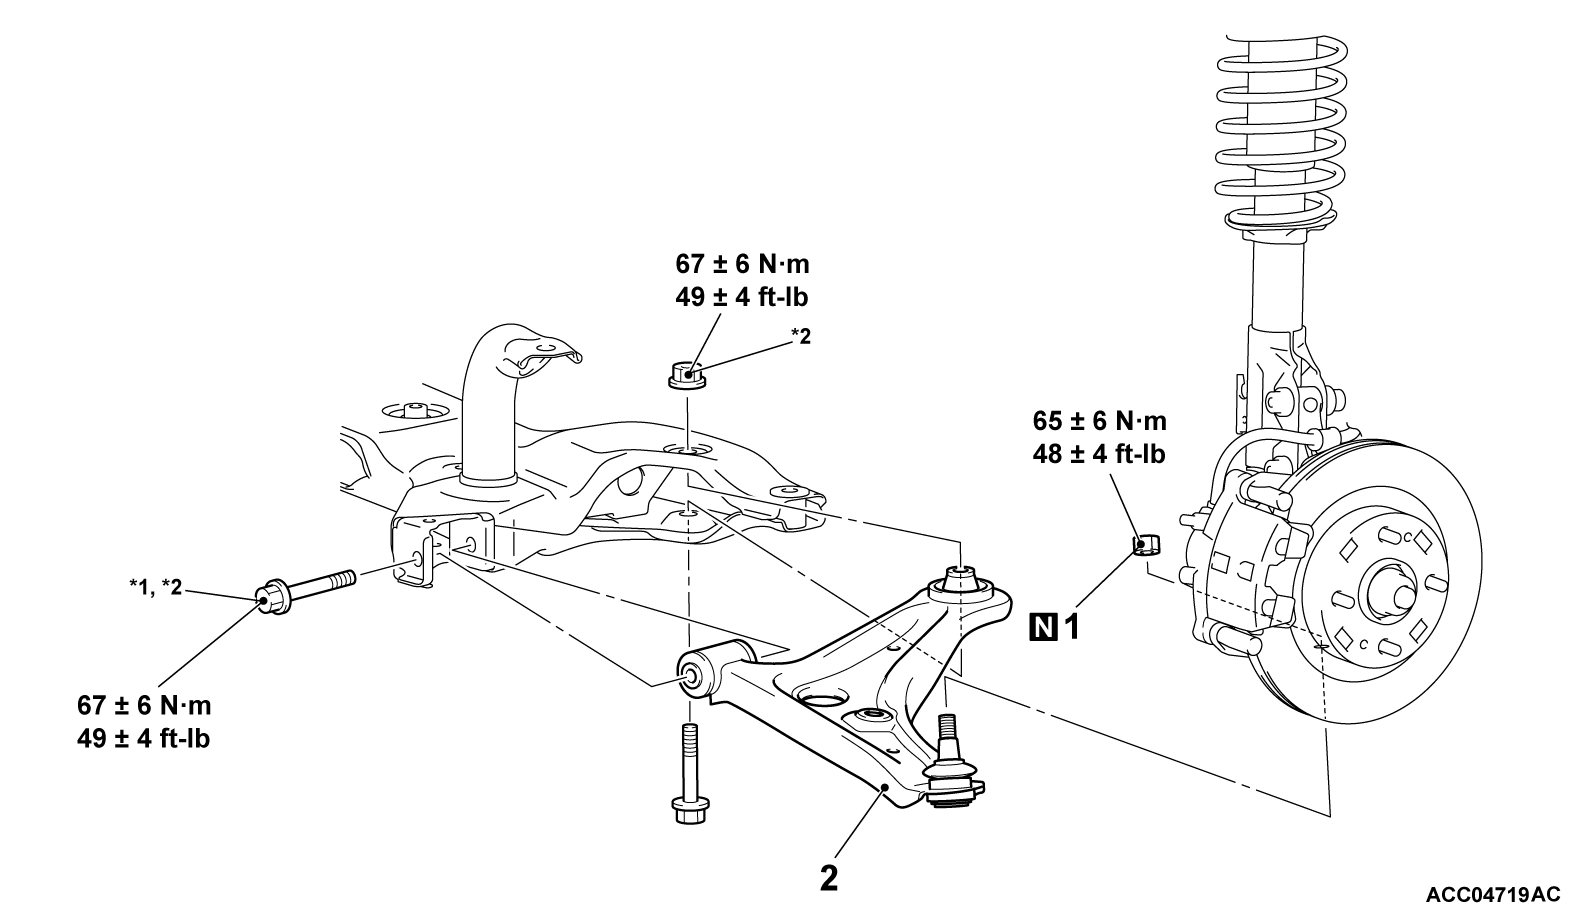
  • The parts indicated by *1 should be temporarily tightened, and then fully tightened with the vehicle standing on the ground at curb weight.
  • The parts indicated by *2 are the bolts/nuts with friction coefficient stabilizer. Prior to reinstallation, ensure there is no damage, clean dust and soiling from the bearing and thread surfaces, and tighten them to the specified torque.
Pre-removal operation
  • Front under cover removal (Refer to GROUP 51, Under Cover Removal and Installation ).
  • Lower arm assembly and Stabilizer bar Connection Removal (Refer to GROUP 33, Stabilizer Bar Removal and Installation ).
Post-installation operation
  • Using your fingers, press the Ball Joint Dust Cover to check for a crack or damage.
  • Front wheel alignment check and adjustment (Refer to ).
  • Lower arm assembly and Stabilizer bar Connection Installation (Refer to GROUP 33, Stabilizer Bar Removal and Installation ).
  • Front under cover installation (Refer to GROUP 51, Under Cover Removal and Installation ).
  • Check the beam direction of the headlight (Low beam) (Refer to GROUP 54A, Headlight Aiming ).
Removal steps
<<A>>1.Self-locking nut (Lower arm and knuckle connection)
2.Lower arm assembly
Required Special Tools:
  • MB991897 or MB992011: Ball Joint Remover
  • MB991006: preload socket
  • MB990800: Ball joint remover and installer
  • MB991389: Bush remover base
  • MD998375: Crankshaft front oil seal installer
  • MB992868: Base spacer
  • MB990643: Base
 
 
REMOVAL SERVICE POINT
 
 
<<A>> SELF-LOCKING NUT REMOVAL (LOWER ARM BALL JOINT DISCONNECTION)
1.
caution
  • The self-locking nut must be only loosened but not removed from the ball joint. Be sure to use the special tool.
  • To prevent the special tool from dropping off, suspend it with a cord.
Install the special tool ball joint remover (MB991897 or MB992011) as shown in the figure.
2. Turn the bolt and knob to make the special tool insert horizontal, then hand-tighten the bolt. After tightening, verify that the insert is still horizontal.
noteWhen adjusting the special tool wedge horizontally, position the knob as shown.
3. Turn the bolt to disengage the lower arm ball joint from the knuckle.