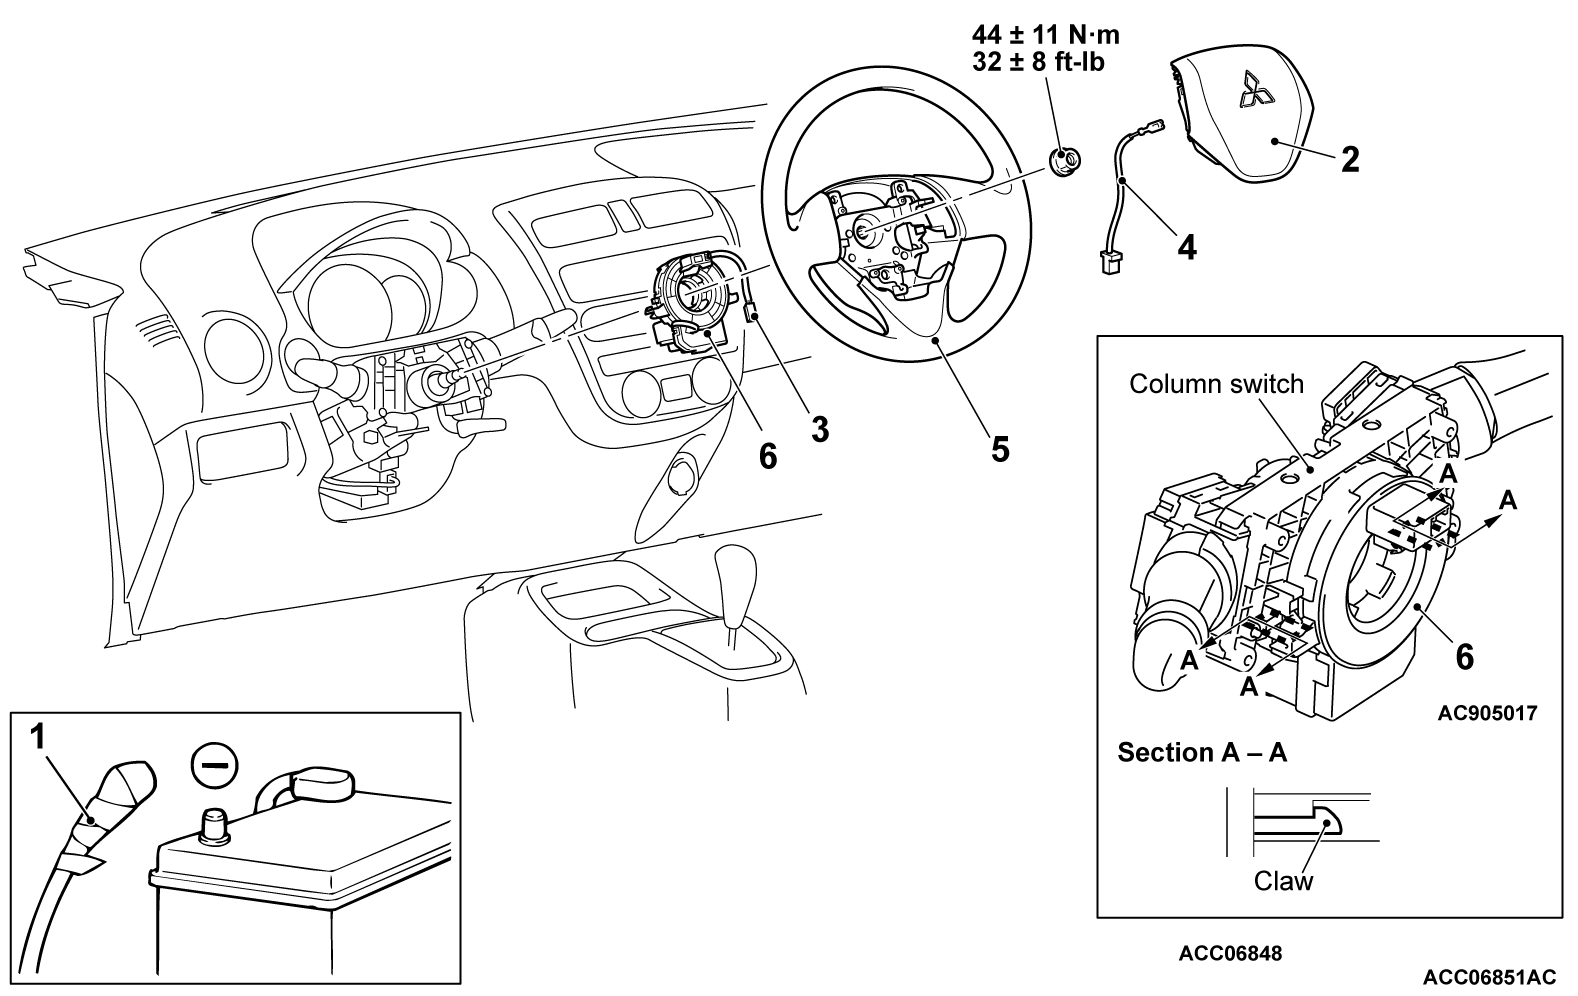
REMOVAL AND INSTALLATION
Pre-removal operation
|
REMOVAL SERVICE POINTS
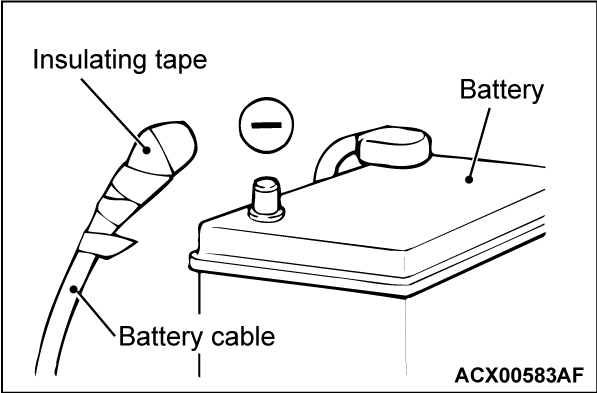
<<A>> NEGATIVE (-) BATTERY CABLE DISCONNECTION
| danger | Wait at least 60 seconds after disconnecting the battery cable before doing any further work (Refer to  ). ). |
| warning | Battery posts, terminals and related accessories contain lead and lead compounds. WASH HANDS AFTER HANDLING. |
Disconnect the negative (-) battery cable from the battery and tape the terminal to prevent accidental connection and air bag(s) deployment.
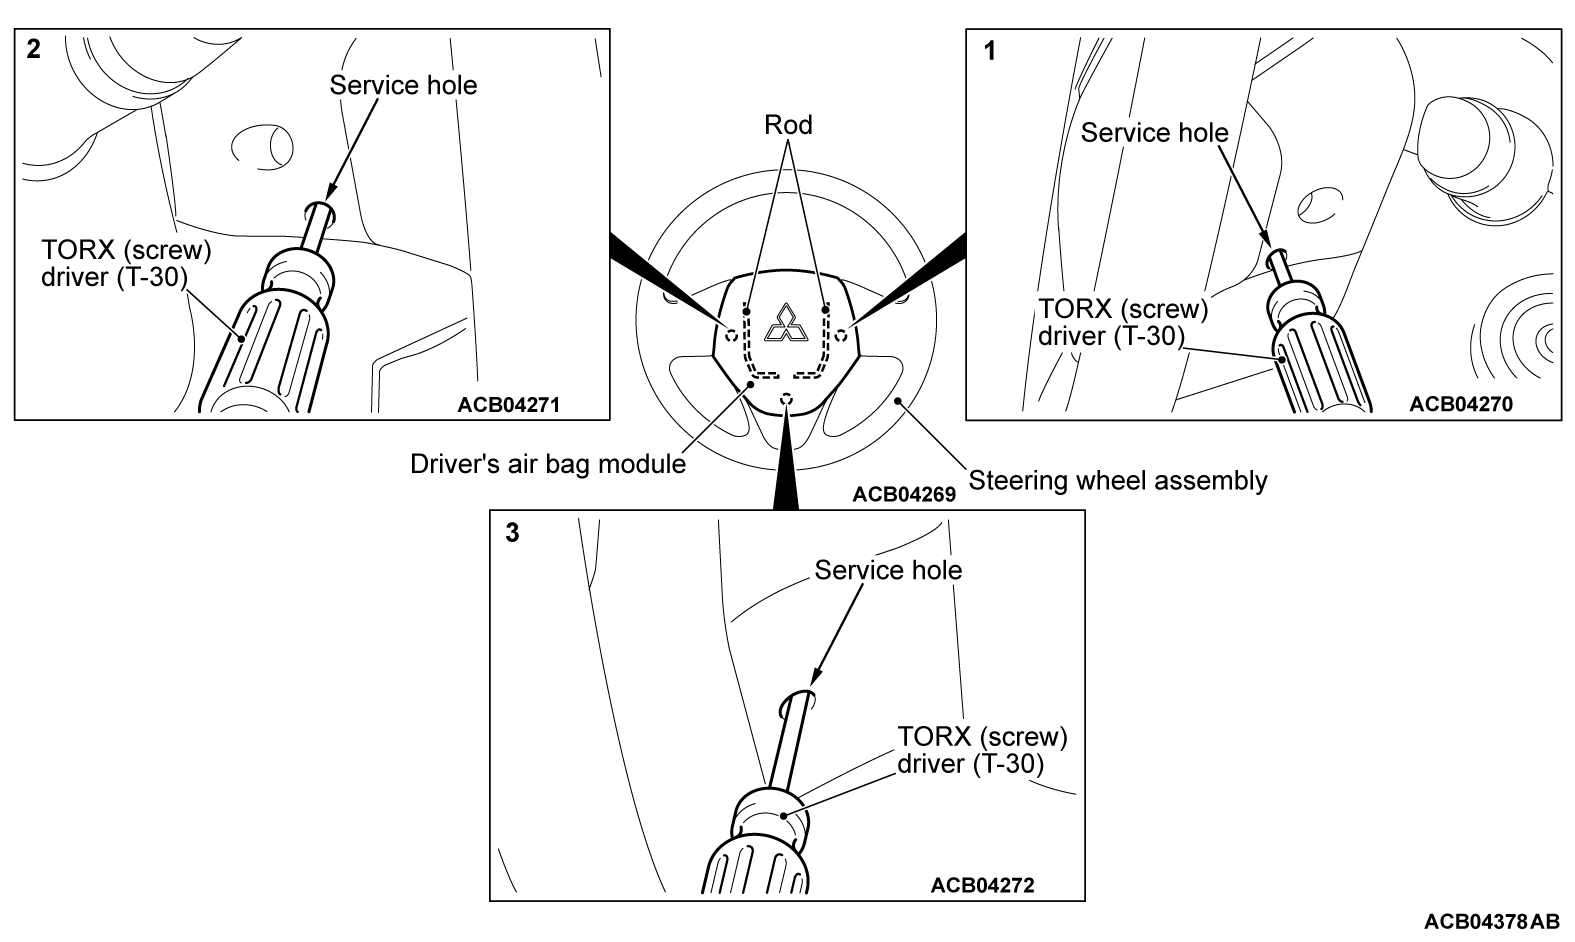
<<B>> DRIVER'S AIR BAG MODULE REMOVAL
| caution |
|
Follow the procedure below according to the item numbers in the illustration.
1. Insert a TORX (screw)driver (T-30) into the service hole on the steering wheel assembly.
2. Use the TORX (screw)driver (T-30) to press the rod in driver’s air bag module.
3. When the driver’s air bag module is disengaged, the driver’s air bag module will be released.
4. Repeat for the other service hole end then remove the driver’s air bag module.
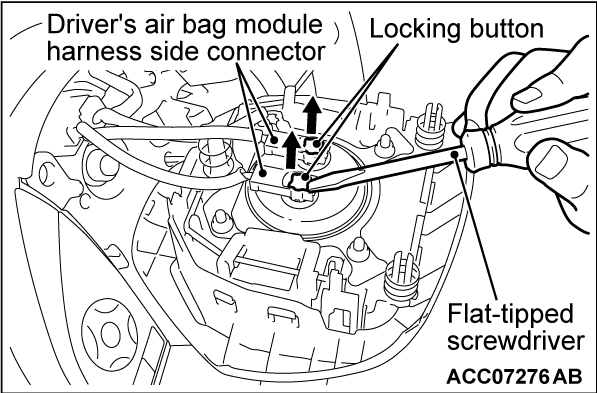
<<C>> DRIVER'S AIR BAG MODULE CONNECTOR REMOVAL
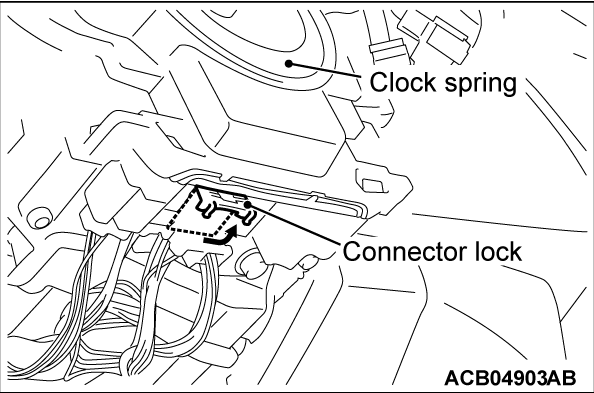
1. Use the flat-tipped screwdriver to pull out the locking button of wiring harness side connector, and release the lock.
<<D>> STEERING WHEEL ASSEMBLY REMOVAL
1.
| caution | Use the special tool to remove the steering wheel since the steering column collision absorbing mechanism may be damaged. |
Position the steering wheel in a straight ahead direction.
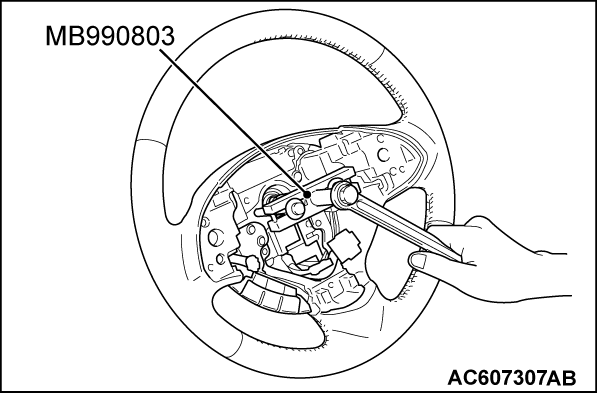
2. Using special tool steering wheel puller (MB990803), remove the steering wheel assembly as shown in the figure.
INSTALLATION SERVICE POINTS
>>A<< PRE-INSTALLATION INSPECTION
2. Connect the negative (-) battery cable.
3.
| caution | To prevent damage to scan tool (M.U.T.-III), always turn the ignition switch to the "LOCK" (OFF) position before connecting or disconnecting scan tool (M.U.T.-III). |
Connect scan tool (M.U.T.-III) to the data link connector.
4. Turn the ignition switch to the “ON” position.
5. Check DTCs using scan tool (M.U.T.-III) to ensure entire SRS operates properly.
6.
| danger | Wait at least 60 seconds after disconnecting the battery cable before doing any further work (Refer to  ). ). |
| warning | Battery posts, terminals and related accessories contain lead and lead compounds. WASH HANDS AFTER HANDLING. |
Turn the ignition switch to the "LOCK" (OFF) position. Disconnect the negative (-) battery cable and tape the terminal to prevent accidental connection and air bags deployment.
>>B<< CLOCK SPRING INSTALLATION
1.
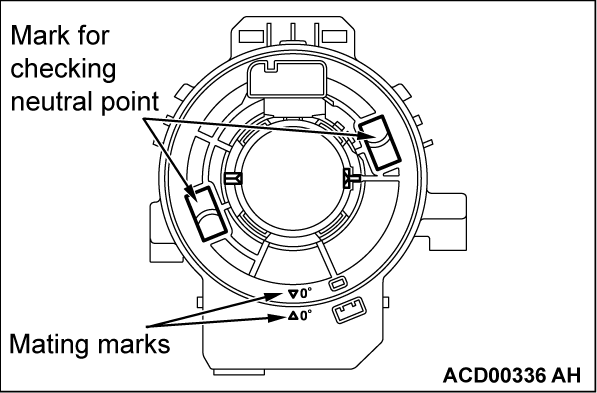
Align the mating marks of the clock spring.
| caution |
|
<Alignment of mating marks>
(1)
| caution | Do not rotate the clock spring 2.5 turns or more clockwise from the neutral position, or a malfunction may occur. |
Turn the clock spring counterclockwise fully.
(2) Rotate the clock spring approximately 3.6 turns clockwise to align the mating marks.
(3) Check that the white cable can be seen from the both window for checking the neutral point when the mating marks are aligned.
| note | If the white or black cable can be seen from either window, the neutral point is not aligned correctly. |
(4) Install the clock spring to the column switch.
>>C<< STEERING WHEEL ASSEMBLY INSTALLATION
1.
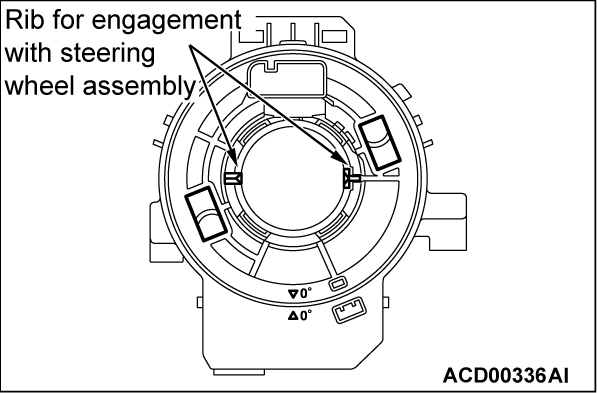
After checking that the clock spring center alignment is already performed, install the steering wheel assembly so that its boss part is aligned with the rib of the clock spring slowly.
| caution | When installing the steering wheel assembly, do not trap the clock spring harness. |
2. After the installation, check that there is no abnormality when the steering wheel is fully turned to left and right.
>>D<< POST-INSTALLATION INSPECTION
1. Connect the negative (-) battery cable.
2. Turn the ignition switch to the "ON" position.
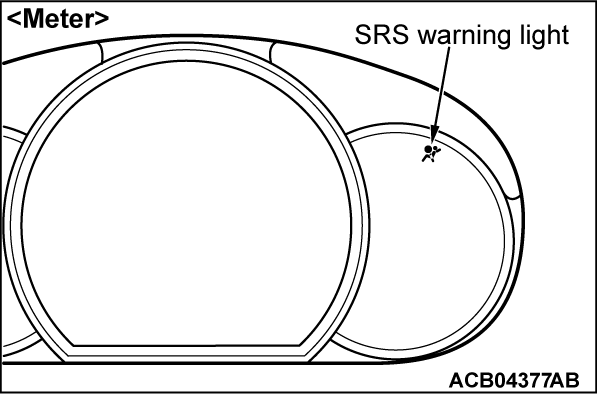
3. Check that the SRS warning light is illuminated for 6 to 8 seconds, and extinguished afterward.
![[Previous]](../../../buttons/fprev.png)
![[Next]](../../../buttons/fnext.png)
