DTC B1079: A/C refrigerant leak
DTC SET CONDITION
DTC B1079 will be set when the A/C pressure sensor detects the refrigerant pressure of specified level or less.
| note | When DTC B1079 is set, the A/C indicator of A/C control panel flashes. |
TECHNICAL DESCRIPTION (COMMENT)
Current trouble
- The refrigerant amount is not at the specified level, or the wiring harness or connector between the A/C control panel and A/C pressure sensor, and the A/C control panel itself or A/C pressure sensor itself may have failed.
Past trouble
- If DTC B1079 is stored as a past trouble, carry out diagnosis with particular emphasis on wiring and connector(s) between the A/C control panel and the A/C pressure sensor. If the connectors and wiring are normal, and obviously the ECU is the cause of the trouble, replace the ECU. If in doubt, do not replace the ECU.
TROUBLESHOOTING HINT
- Malfunction of connector.
- Malfunction of the harness.
- Malfunction of the A/C pressure sensor.
- Malfunction of the A/C control panel.
DIAGNOSIS
Required Special Tool:
- MB991658: Test harness set
- MB991223: Harness Set
- MB992006: Extra Fine Probe
STEP 1. Using scan tool MB991958, diagnose the CAN bus line
(1)
| caution | To prevent damage to scan tool MB991958, always turn the ignition switch to the "LOCK" (OFF) position before connecting or disconnecting scan tool MB991958. |
(2) Turn the ignition switch to the "ON" position.
(3) Diagnose the CAN bus line.
(4) Turn the ignition switch to the "LOCK" (OFF) position.
Is the CAN bus line found to be normal?
STEP 2. Recheck for diagnostic trouble code.
Recheck if the DTC is set.
(1) Erase the DTC.
(2) Turn the ignition switch to "ON" position.
(3) Check if the DTC is set.
Is the DTC set?
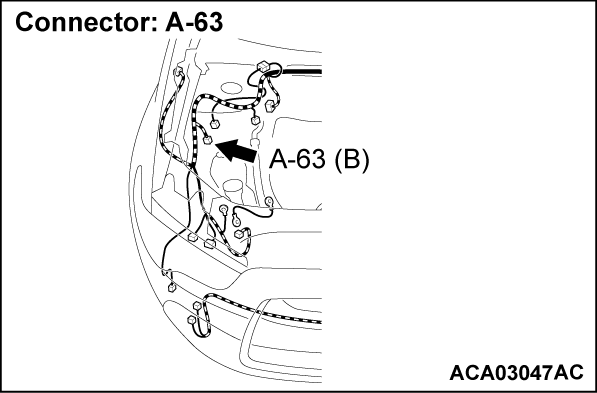
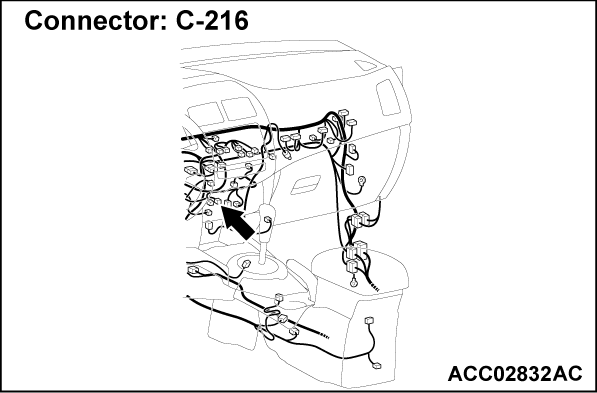
STEP 3. Check A/C pressure sensor connector A-63 and A/C control panel connector C-216 for loose, corroded or damaged terminals, or terminals pushed back in the connector.
Are air A/C pressure sensor connector A-63 and A/C control panel connector C-216 in good condition?
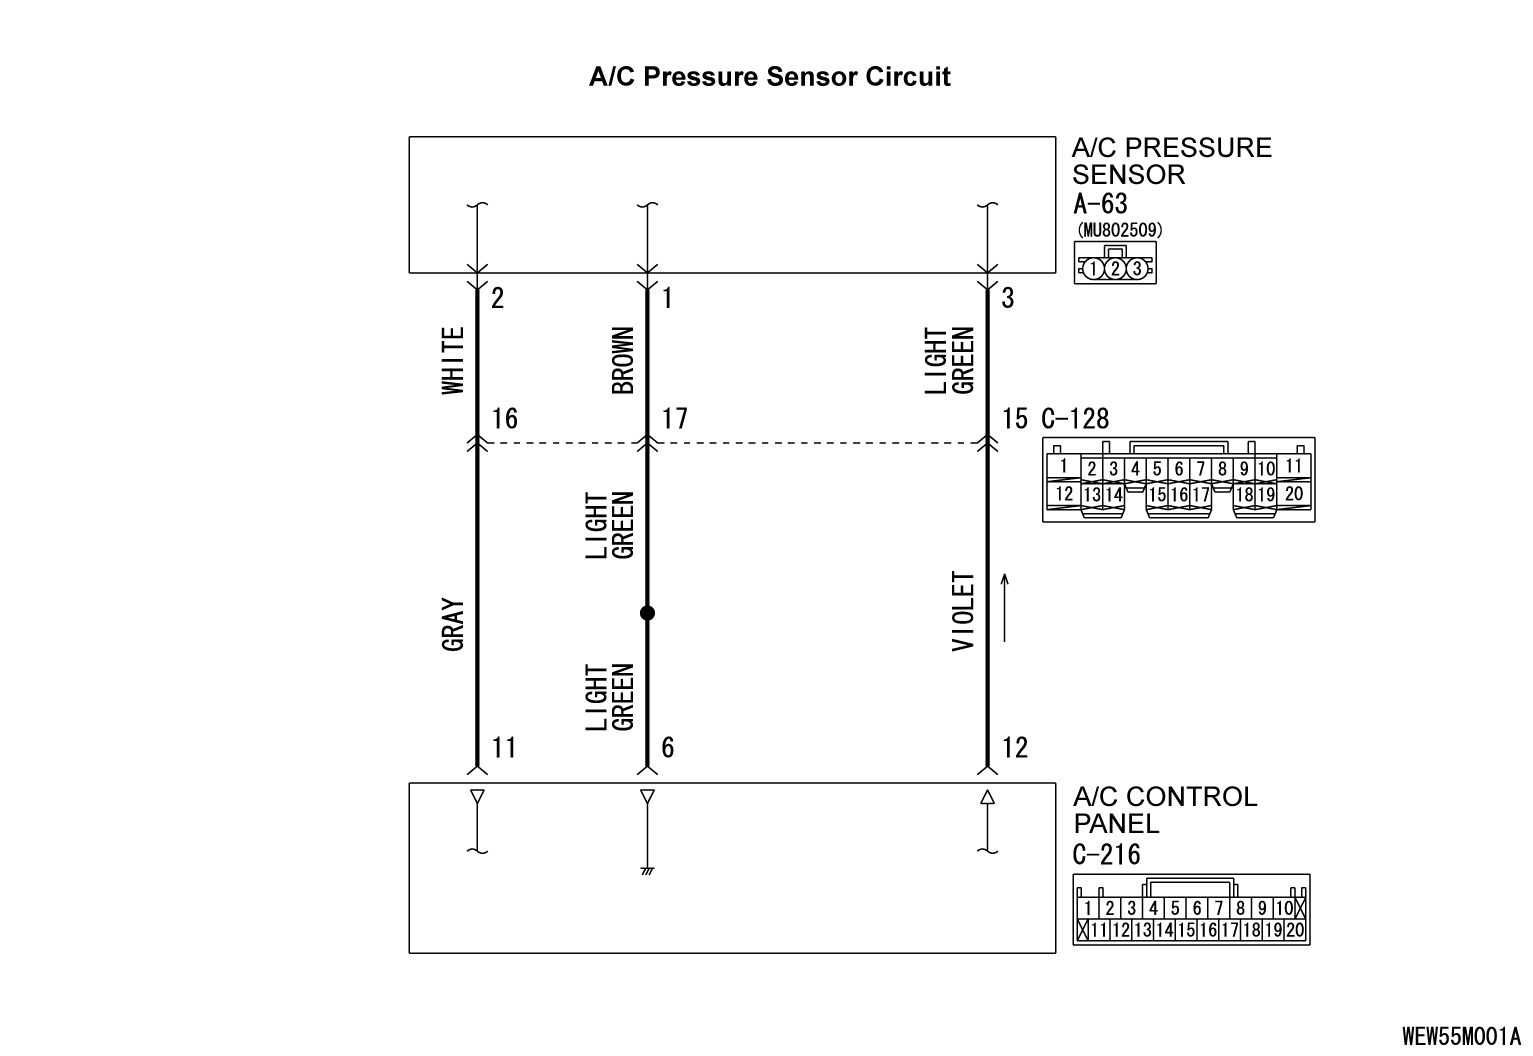
STEP 4. Check the wiring harness between A/C control panel connector C-216 (terminals 12, 11 and 6) and A/C pressure sensor connector A-63 (terminals 3, 2 and 1).
- Check the sensor signal line and ground line for open or short circuit.
Is the wiring harness between A/C control panel connector C-216 (terminals 12, 11 and 6) and A/C pressure sensor connector A-63 (terminals 3, 2 and 1) in good condition?
 Repair the wiring harness.
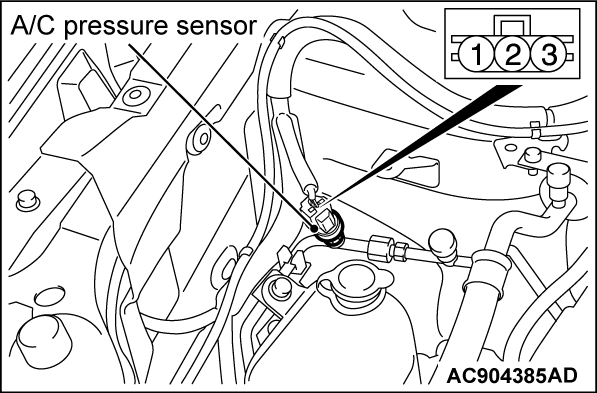
STEP 5. Check the A/C pressure sensor operation.
(1) Assemble a gauge manifold on the high pressure service valve.
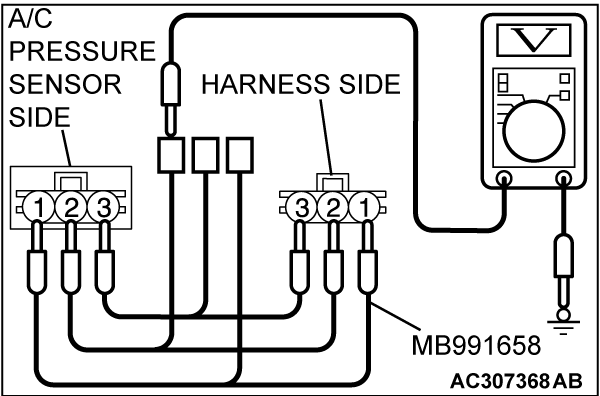
(2) Disconnect the A/C pressure sensor connector and connect special tool test harness MB991658 as shown in the illustration.
(3) Turn ON the engine and then turn ON the A/C switch.
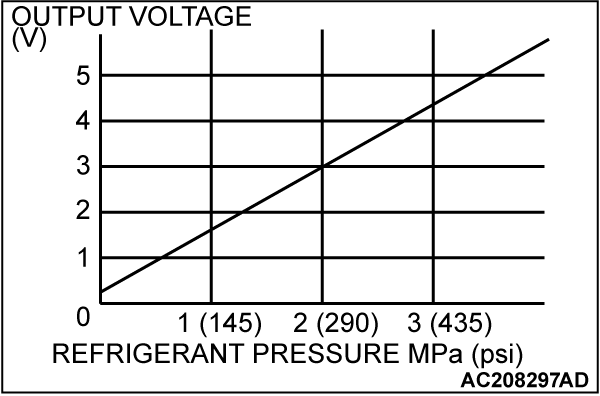
(4) At this time, check to see that the voltage of A/C pressure sensor terminal No. 2 reflects the specifications of the figure.
| note | The allowance shall be defined as ±5%. |
Is the A/C pressure sensor operating properly?
STEP 6. Check the refrigerant level.
Use the refrigerant recovery station to remove all of the refrigerant, and then calculate the amount of the refrigerant and charge it.
Is the refrigerant level correct?
STEP 7. Recheck for diagnostic trouble code.
Check again if the DTC is set. The procedure is complete.
(1) Connect scan tool MB991958 to the data link connector
(2) Turn the ignition switch to the "ON" position.
(3) Check if the DTC is set.
(4) Turn the ignition switch to the "LOCK" (OFF) position.
Is the DTC set?
 The procedure is complete.
![[Previous]](../../../buttons/fprev.png)
![[Next]](../../../buttons/fnext.png)
