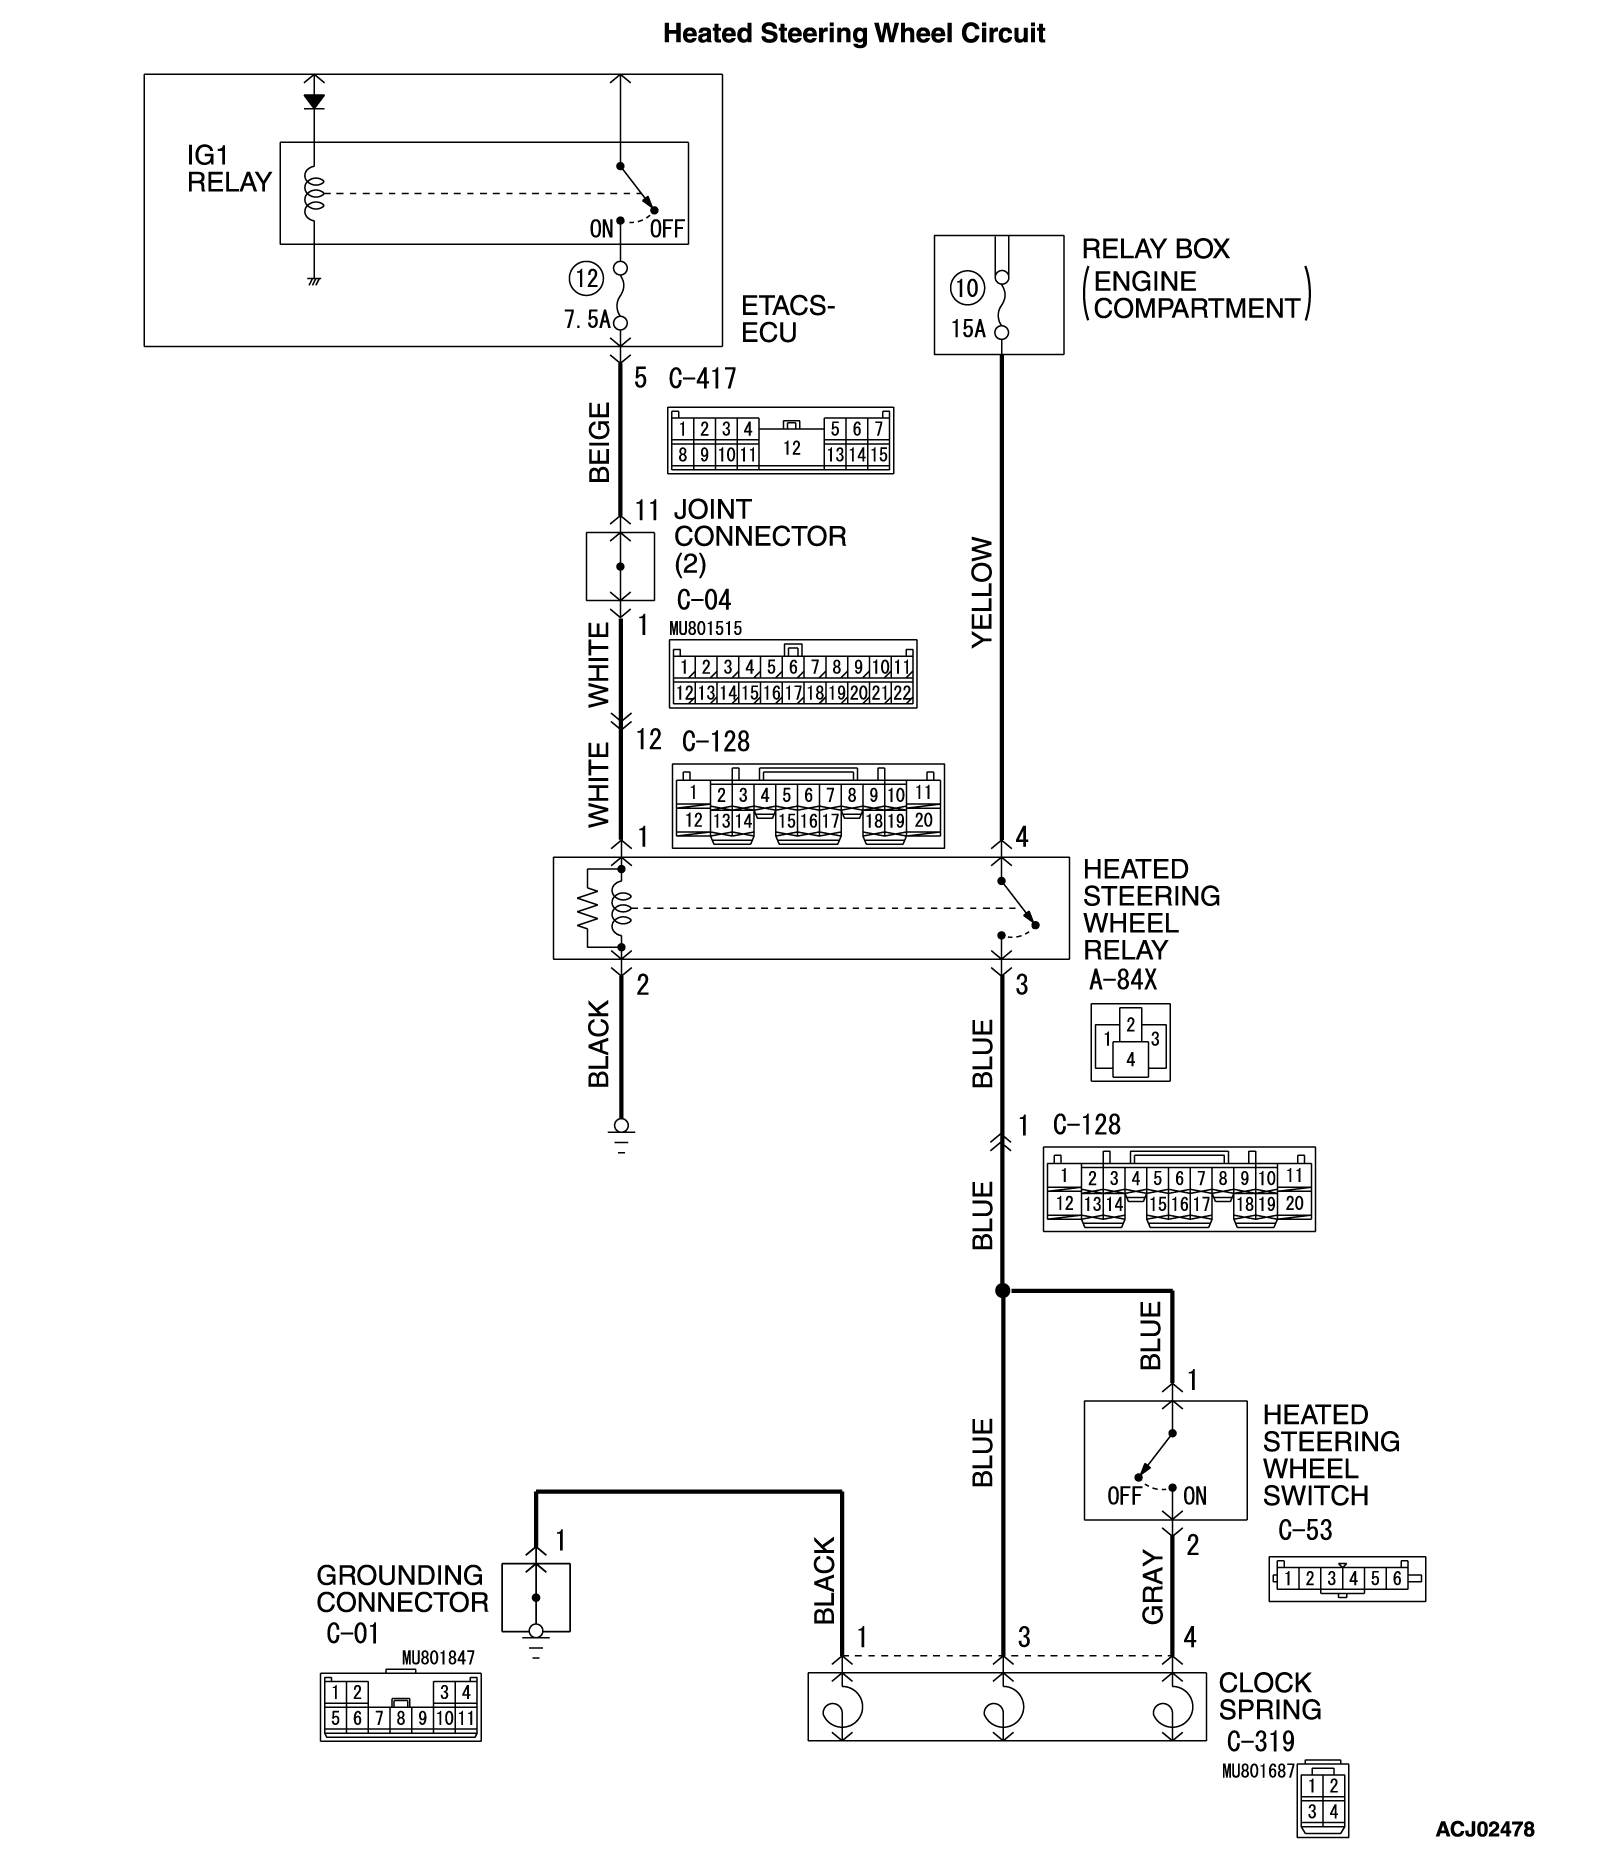
Inspection Procedure 4: When the heated steering wheel switch is turned on, the heated steering wheel is not activated. <Vehicles with heated steering wheel>
COMMENTS ON TROUBLE SYMPTOM
If the heated steering wheel cannot be activated when the heated steering wheel switch is turned on with the heated steering wheel deactivated, a component of the heated steering wheel, the ETACS-ECU or the power supply lines to the heated steering wheel may be defective.
TROUBLESHOOTING HINTS
- Malfunction of the ETACS-ECU
- Malfunction of heated steering wheel switch
- Malfunction of clock spring
- Malfunction of heated steering wheel relay
- Defective steering wheel (incorporating heated steering wheel-ECU and heater element)
- Defective harness wire(s) or connector(s)
- Short or open circuit between the ETACS-ECU and the heated steering wheel-ECU, the fusible link or loose connector contact
- Open circuit between the ground and the heated steering wheel relay or loose connector contact
- Open circuit between the ground and the heated steering wheel-ECU or loose connector contact
DIAGNOSIS
Required Special Tools:
- MB991223: Harness Set
- MB992006: Extra Fine Probe
STEP 1. Check for DTCs of other systems.
(1)
| caution | To prevent damage to scan tool (M.U.T.-III), always turn the ignition switch to the "LOCK" (OFF) position before connecting or disconnecting scan tool (M.U.T.-III). |
(2) Turn the ignition switch to the "ON" position.
(3) Check that the ETACS-ECU has not set a DTC.
Is the DTC set?
STEP 2. Check the heated steering wheel switch.
STEP 3. Check the clock spring.
Check whether the clock spring is in good condition (Refer to GROUP 52B - Air Bag Module and Clock Spring  ).
).
 ).
).Is the check result normal?
STEP 4. Check the heated steering wheel relay.
Check the heated steering wheel relay (Refer to  ).
). Replace the heated steering wheel relay.
 ).
).Is the check result normal?
 Replace the heated steering wheel relay.
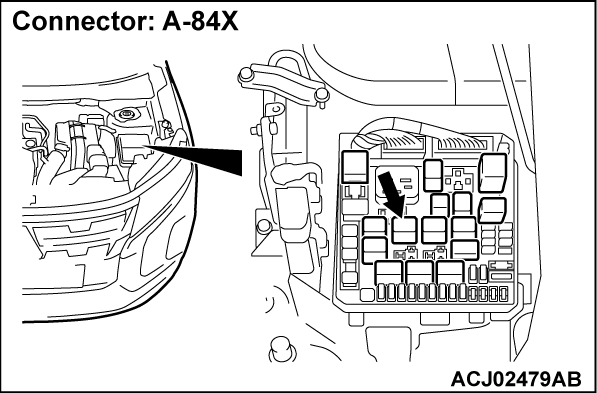
STEP 5. Resistance measurement at the A-84X heated steering wheel relay connector (ground terminal).
(1) Disconnect the relay, and measure at the wiring harness side.
(2) Resistance between the A-84X heated steering wheel relay connector (terminal No.2) and ground.
OK: The resistance should be 2 ohms or less
Is the check result normal?
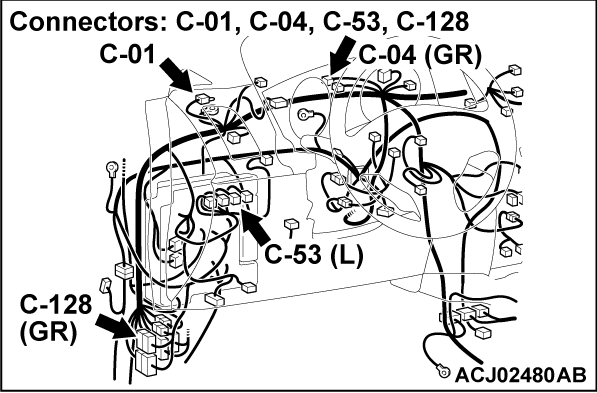
STEP 6. Check of open circuit in ground line between A-84X heated steering wheel relay connector (terminal No.2) and ground.
Is the check result normal?
 Repair the connector(s) or wiring harness.
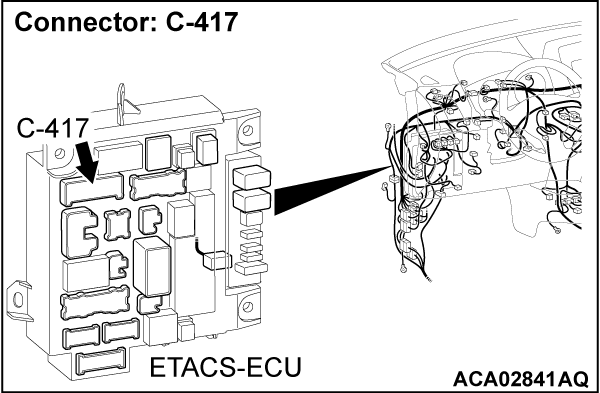
STEP 7. Check of short to power supply, short to ground, and open circuit in power supply circuit between C-417 ETACS-ECU (terminal No.5) and A-84X heated steering wheel relay connector (terminal No.1).
STEP 8. Voltage measurement at the between A-84X heated steering wheel relay connector (power supply terminal)
(1) Disconnect the relay, and measure at the wiring harness side.
(2) Measure the voltage between the A-84X heated steering wheel relay connector (terminal No.4) and ground.
OK: The voltage should measure approximately 12 volts (battery positive voltage).
Is the check result normal?
STEP 9. Check the fusible link and relay box.
STEP 10. Check of short to power supply, short to ground, and open circuit in power supply line between fusible link and A-84X heated steering wheel relay connector (terminal No.4) connector.
Is the check result normal?
 Repair the connector(s) or wiring harness.
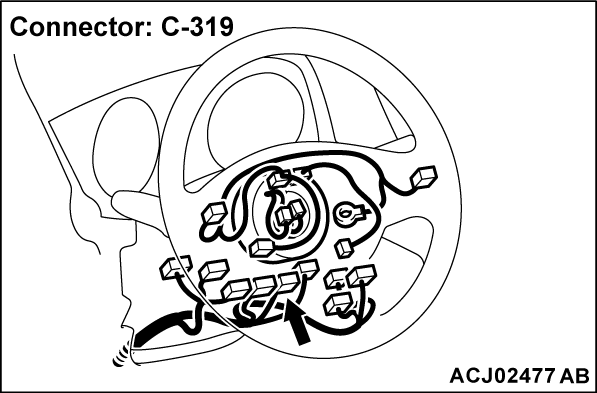
STEP 11. Resistance measurement at the C-319 clock spring connector (ground terminal).
(1) Disconnect the connector, and measure at the wiring harness side.
(2) Resistance between the C-319 clock spring connector (terminal No.1) and ground.
OK: The resistance should be 2 ohms or less
Is the check result normal?
STEP 12. Check of open circuit in ground line between C-319 clock spring connector (terminal No.1) and ground.
Is the check result normal?
 Repair the connector(s) or wiring harness.
STEP 13. Check of short to power supply, short to ground, and open circuit in power supply line between A-84X heated steering wheel relay connector and C-319 clock spring connector (terminal No.3)
STEP 14. Check of short to power supply, short to ground, and open circuit in input line between heated steering wheel relay connector and C-319 clock spring connector (terminal No.4)
![[Previous]](../../../buttons/fprev.png)
![[Next]](../../../buttons/fnext.png)
