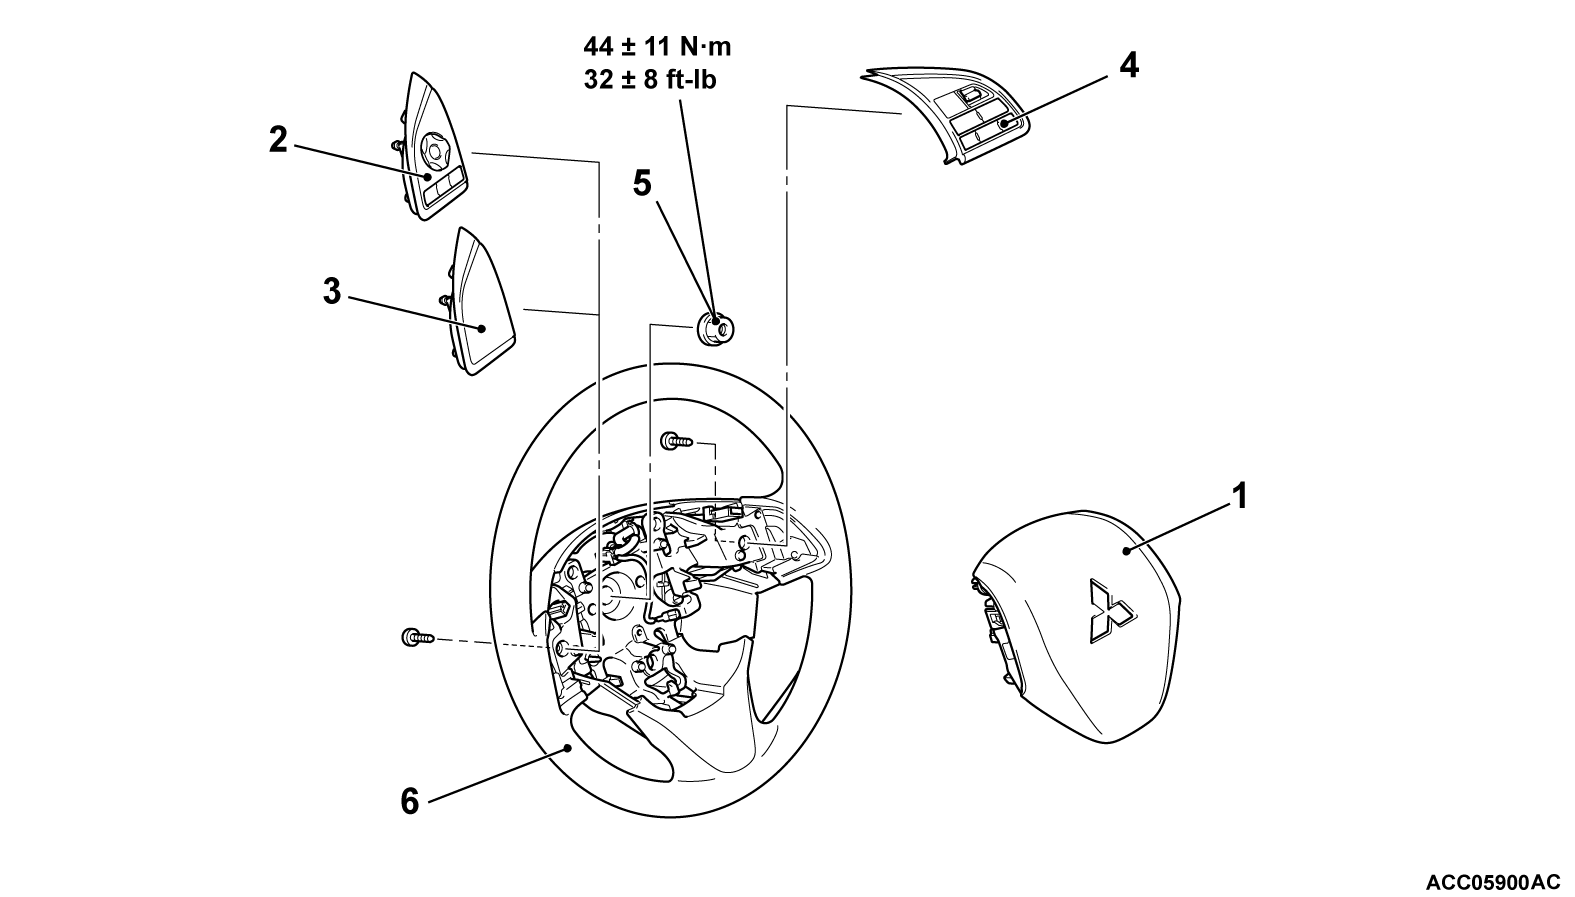
REMOVAL AND INSTALLATION
Pre-removal Operation Steering Wheel Straight-ahead Position Check | Post-installation Operation
|
Required Special Tools:
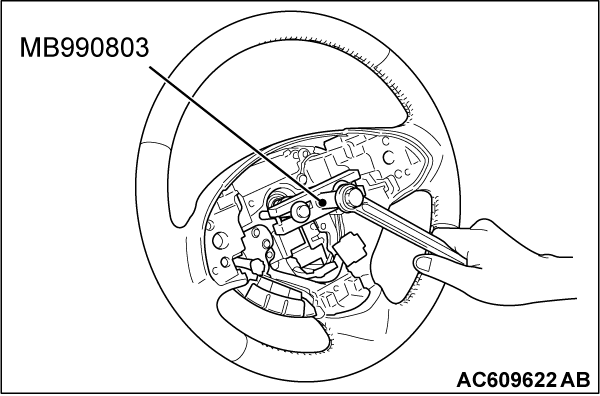
- MB990803: Steering wheel puller
REMOVAL SERVICE POINTS
<<A>> STEERING WHEEL ASSEMBLY REMOVAL
1. Position the steering wheel in a straight ahead position.
2.
Use special tool steering wheel puller (MB990803) to remove the steering wheel.
| caution | Use the special tool to remove the steering wheel since the steering column collision adsorbing mechanism may be damaged. |
INSTALLATION SERVICE POINT
>>A<< STEERING WHEEL ASSEMBLY INSTALLATION
1.
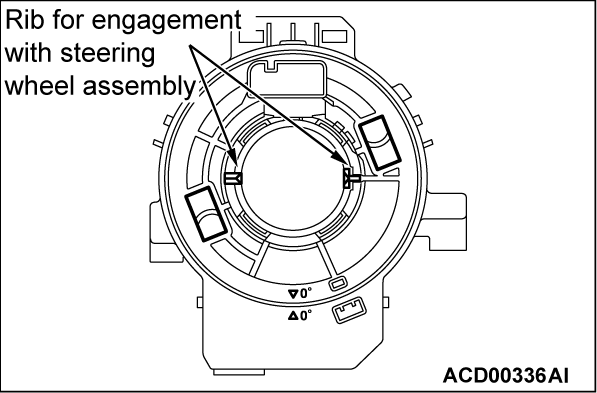
After checking that the clock spring center alignment is already performed, install the steering wheel assembly so that its boss part is aligned with the rib of the clock spring slowly.
| caution | When installing the steering wheel assembly, do not trap the clock spring harness. |
2. After the installation, check that there is no abnormality when the steering wheel is fully turned to left and right.
![[Previous]](../../../buttons/fprev.png)
![[Next]](../../../buttons/fnext.png)


