DTC P10DB: Clutch slip fail
| caution | Before replacing the ECU, ensure that the communication circuit is normal. |
DESCRIPTIONS OF MONITOR METHODS
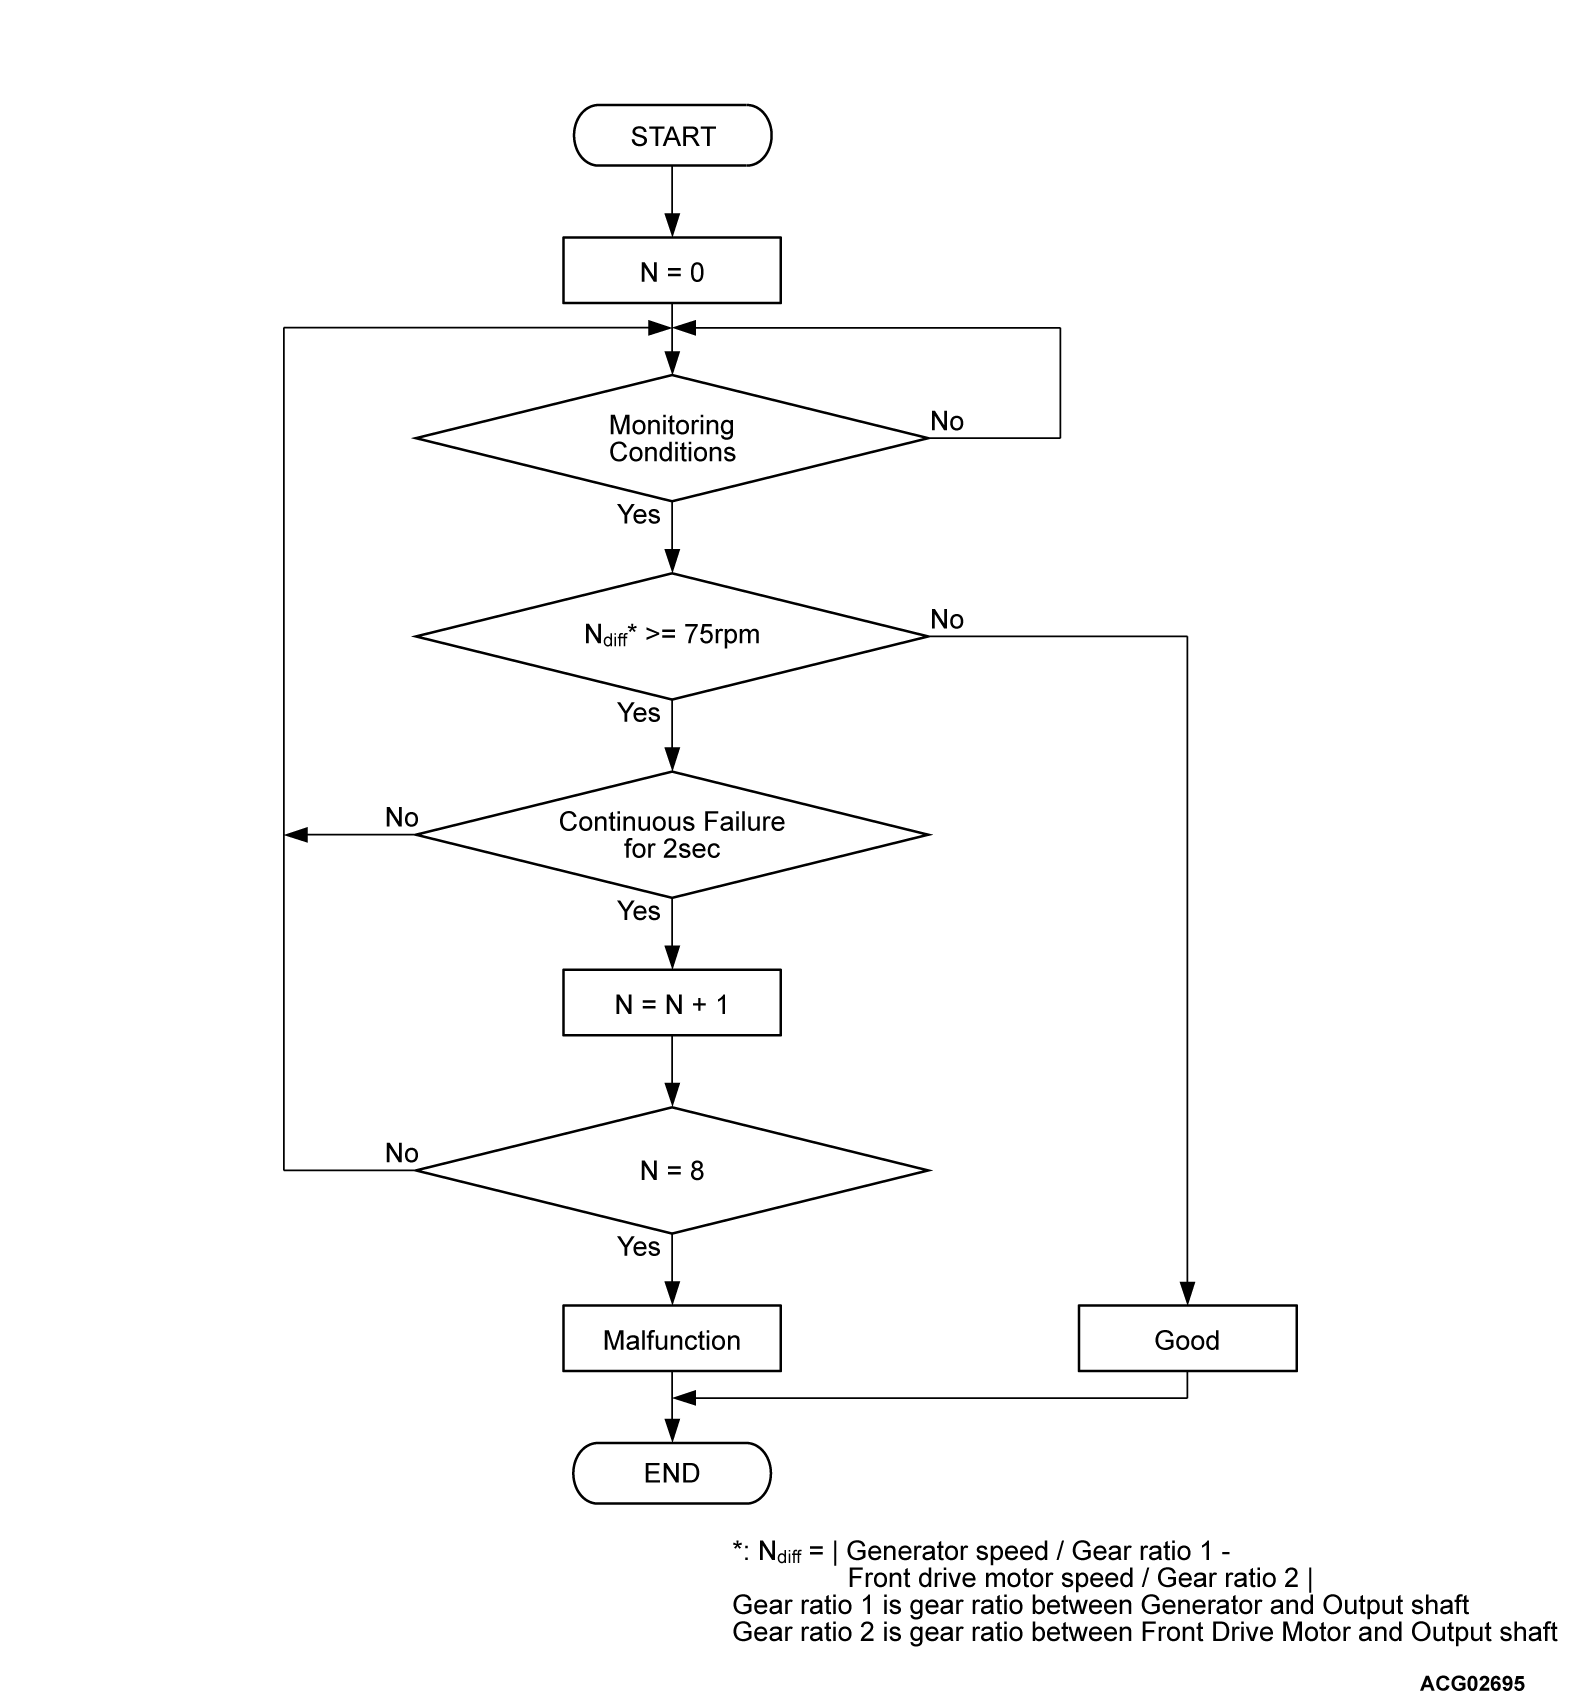
- The PHEV-ECU monitors if the clutch is OFF when the driving mode is the parallel driving mode.
MONITOR EXECUTION
Continuous
MONITOR EXECUTION CONDITIONS (Other monitor and Sensor)
Other Monitor (There is no temporary DTC stored in memory for the item monitored below)
- Clutch solenoid valve monitor
Sensor (The sensor below is determined to be normal)
- Not applicable
TROUBLE JUDGMENT
Check Conditions
- The parallel driving mode continues for 2 seconds or more.
Judgment Criterion
- When the following conditions occur 8 times
- When a state where the difference between the input shaft rotation speed and the output shaft rotation speed is 75 rpm or more continues for 2 seconds
PROBABLE CAUSES
- The front transaxle fails (clutch worn).
- Insufficient fluid level.
- The valve body assembly fails [fluid leakage, defective oil pump, defective pressure regulator, defective relief valve, restricted oil strainer, foreign material trapped in proportional valve (clutch)].
- Malfunction of the PHEV-ECU.
- The ambient temperature is extremely low.
- Damaged harness or connector.
DIAGNOSIS
STEP 1. Using scan tool (M.U.T.-IIISE), check whether the other DTC is set.
Check if DTC P10C5 or P10C6 is set in the PHEV-ECU.
Is the DTC set?
STEP 2. Fluid leaks and fluid level check.
Visually check the fluid leaks around the front transaxle assembly, and check the fluid level (Refer to GROUP 22A - On-vehicle Service  ).
).
 ).
).Is the check result normal?
STEP 3. Test the OBD-II drive cycle.
(1) Carry out a test drive with the drive cycle pattern. Refer to Diagnostic Function - OBD-II Drive Cycle - Pattern 11  .
.
 .
.(2) Check the DTC.
Is the DTC set?
![[Previous]](../../../buttons/fprev.png)
![[Next]](../../../buttons/fnext.png)


