[Previous][Next]
REMOVAL AND INSTALLATION
 
 
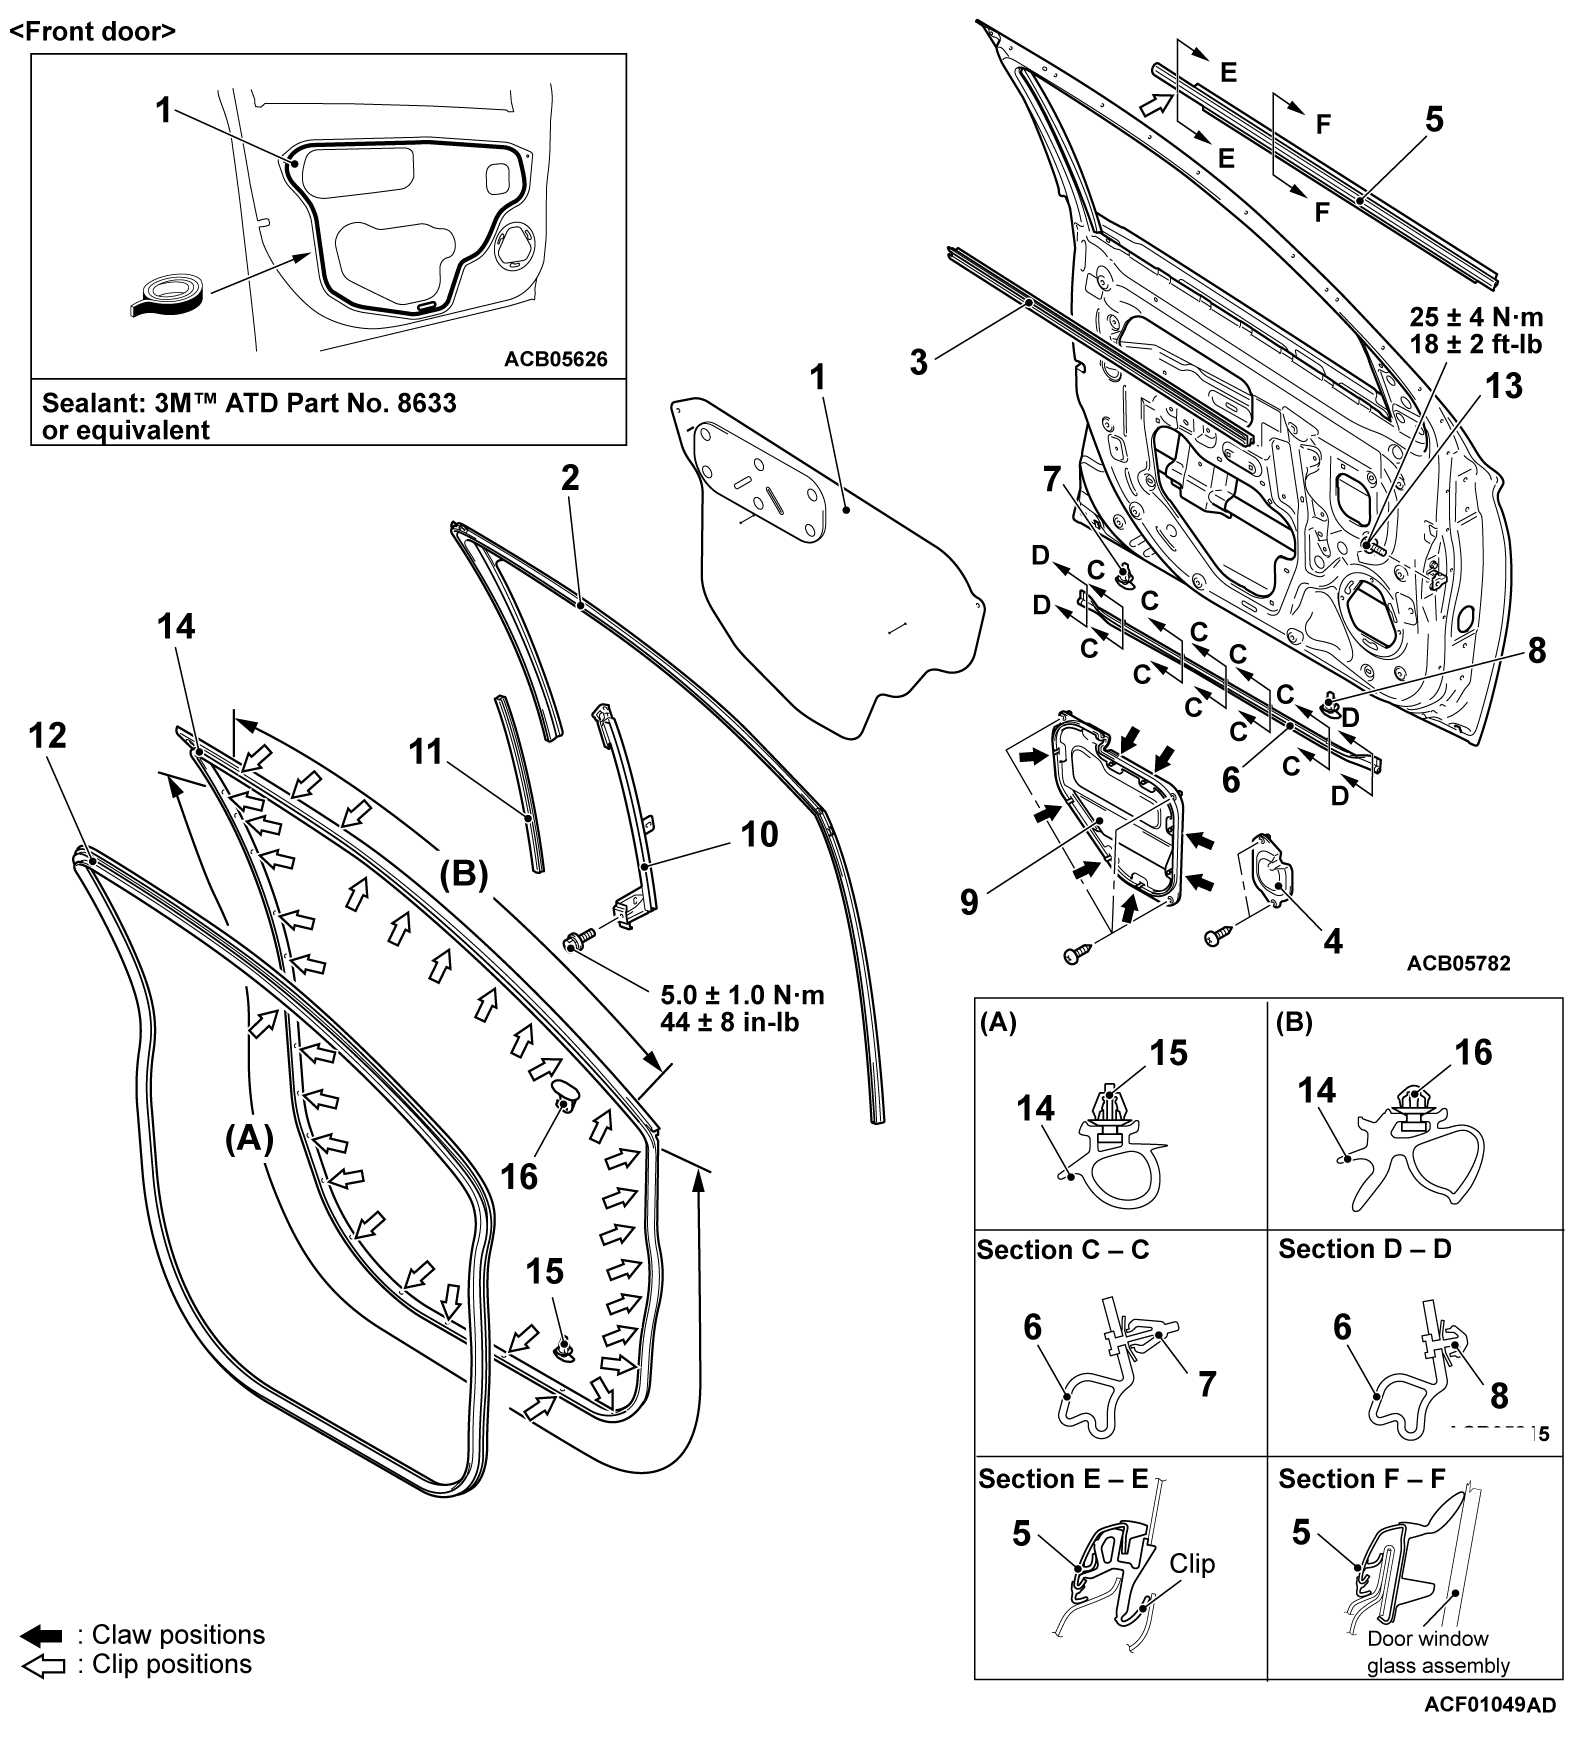
Waterproof film removal steps 
Door trim assembly (Refer to GROUP 52A - Door Trim .)
>>B<<1.Waterproof film
Door window glass runchannel removal
2.Door window glass runchannel
Door beltline weatherstrip inner removal steps
Door trim assembly (Refer to GROUP 52A - Door Trim .)
3.Door beltline weatherstrip inner
Door speaker cover removal steps <Vehicles with audio amplifier> 
Door trim assembly (Refer to GROUP 52A - Door Trim .)
>>B<<1.Waterproof film
4.Door speaker cover
Door beltline molding removal steps
Door mirror assembly (Refer to GROUP 51 - Door Mirror .)
<<A>>5.Door beltline molding
Door opening weatherstrip lower removal steps
6.Door opening weatherstrip lower
7.Door clip A
8.Door clip B
Door speaker bracket removal steps <Vehicles with audio amplifier> 
Door trim assembly (Refer to GROUP 52A - Door Trim .)
>>B<<1.Waterproof film
9.Door speaker bracket
Front lower sash removal steps
Door trim assembly (Refer to GROUP 52A - Door Trim .)
>>B<<1.Waterproof film
9.Door speaker bracket <Vehicles with audio amplifier>
10.Front lower sash
11.Door window glass runchannel rear
Door opening weatherstrip inner removal steps
Cowl side trim and front scuff plate (Refer to GROUP 52A - Interior Trim .)
>>A<<12.Door opening weatherstrip inner
Door opening weatherstrip outer removal steps
13.Door check connecting bolt
<<B>>14.Door opening weatherstrip outer
15.Door clip C
16.Door clip D
 
 
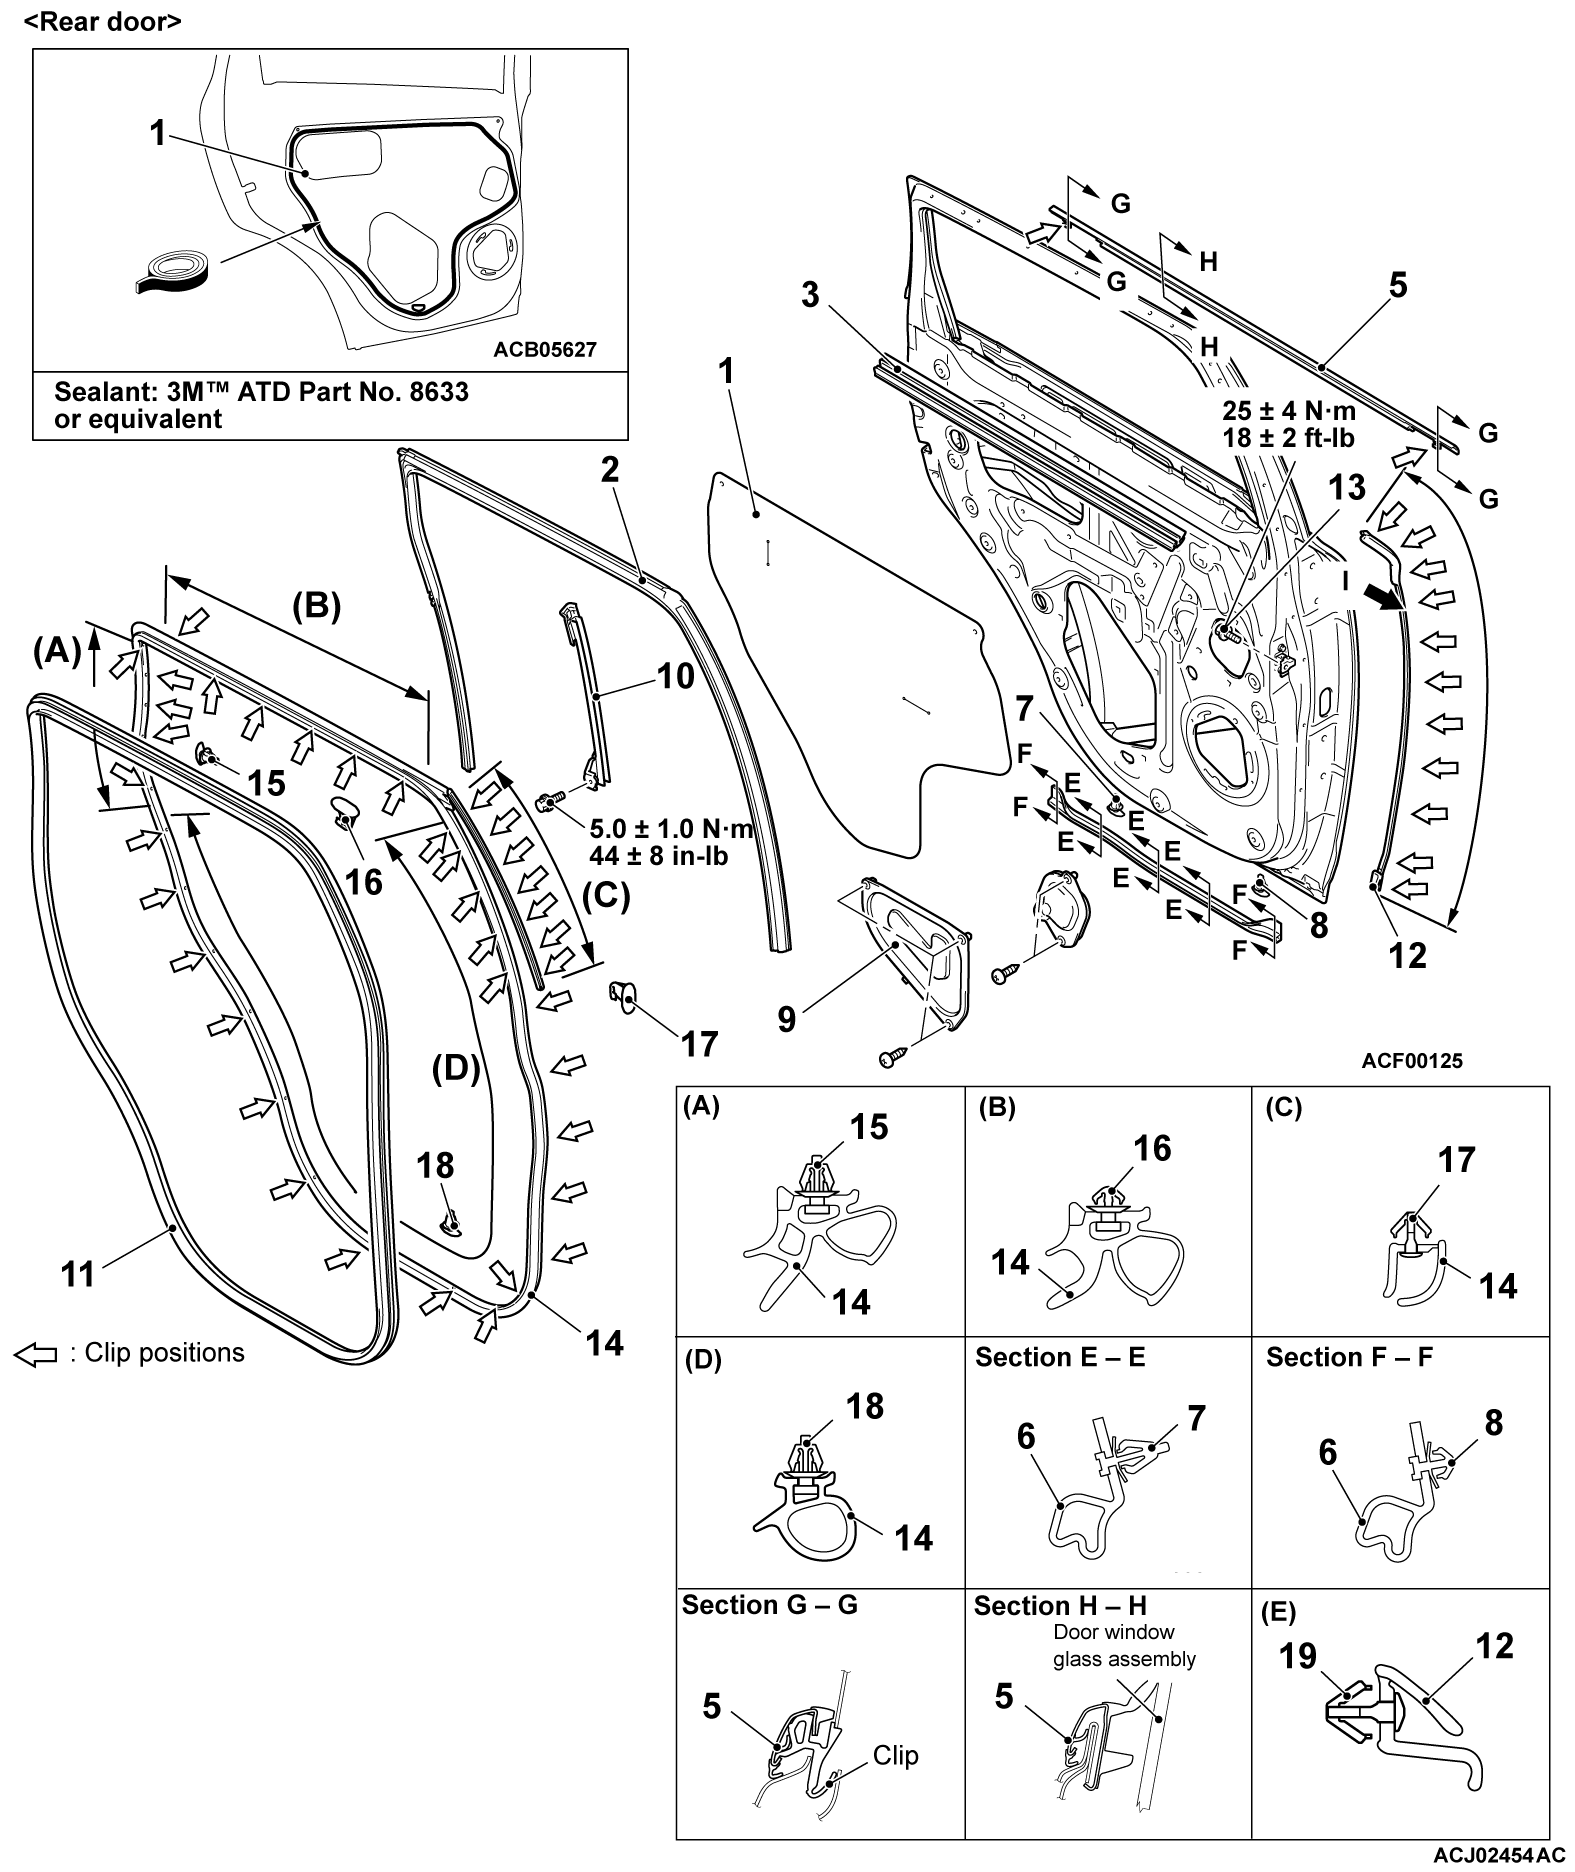
Waterproof film removal steps 
Door trim assembly (Refer to GROUP 52A - Door Trim .)
>>B<<1.Waterproof film
Door window glass runchannel removal
2.Door window glass runchannel
Door beltline weatherstrip inner removal steps
Door trim assembly (Refer to GROUP 52A - Door Trim .)
3.Door beltline weatherstrip inner
Door speaker cover A removal steps <Vehicles with audio amplifier>
Door trim assembly (Refer to GROUP 52A - Door Trim .)
>>B<<1.Waterproof film
4.Door speaker cover A
Door beltline molding removal
<<A>>5.Door beltline molding
Door opening weatherstrip lower removal steps
6.Door opening weatherstrip lower
7.Door clip A
8.Door clip B
Door speaker cover B removal steps <Vehicles with audio amplifier>
Door trim assembly (Refer to GROUP 52A - Door Trim .)
>>B<<1.Waterproof film
9.Door speaker cover B
Rear lower sash removal steps
Door trim assembly (Refer to GROUP 52A - Door Trim .)
>>B<<1.Waterproof film
9.Door speaker cover B <Vehicles with audio amplifier>
10.Rear lower sash
Door opening weatherstrip inner removal steps
Rear scuff plate (Refer to GROUP 52A - Interior Trim .)
>>A<<11.Door opening weatherstrip inner
Door opening front weatherstrip removal
12.Door opening front weatherstrip
Door opening weatherstrip outer removal steps
13.Door check connecting bolt
<<B>>14.Door opening weatherstrip outer
15.Door clip C
16.Door clip D
17.Door clip E
18.Door clip F
19.Door clip G
 
 
REMOVAL SERVICE POINTS
 
 
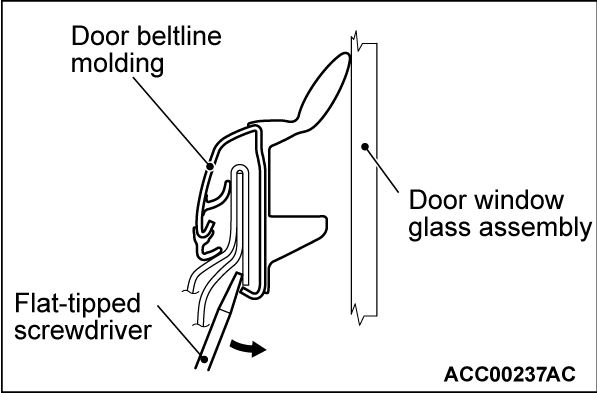
<<A>> DOOR BELTLINE MOLDING REMOVAL
Insert a flat-tipped screwdriver as shown, and pry it in the direction shown to remove the door beltline molding.


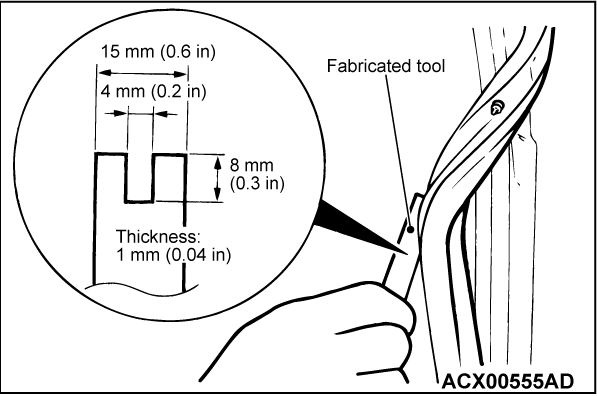
<<B>> DOOR OPENING WEATHERSTRIP OUTER REMOVAL
Make the tool as shown in the figure, and remove the weatherstrip from the door panel.


INSTALLATION SERVICE POINTS
 
 
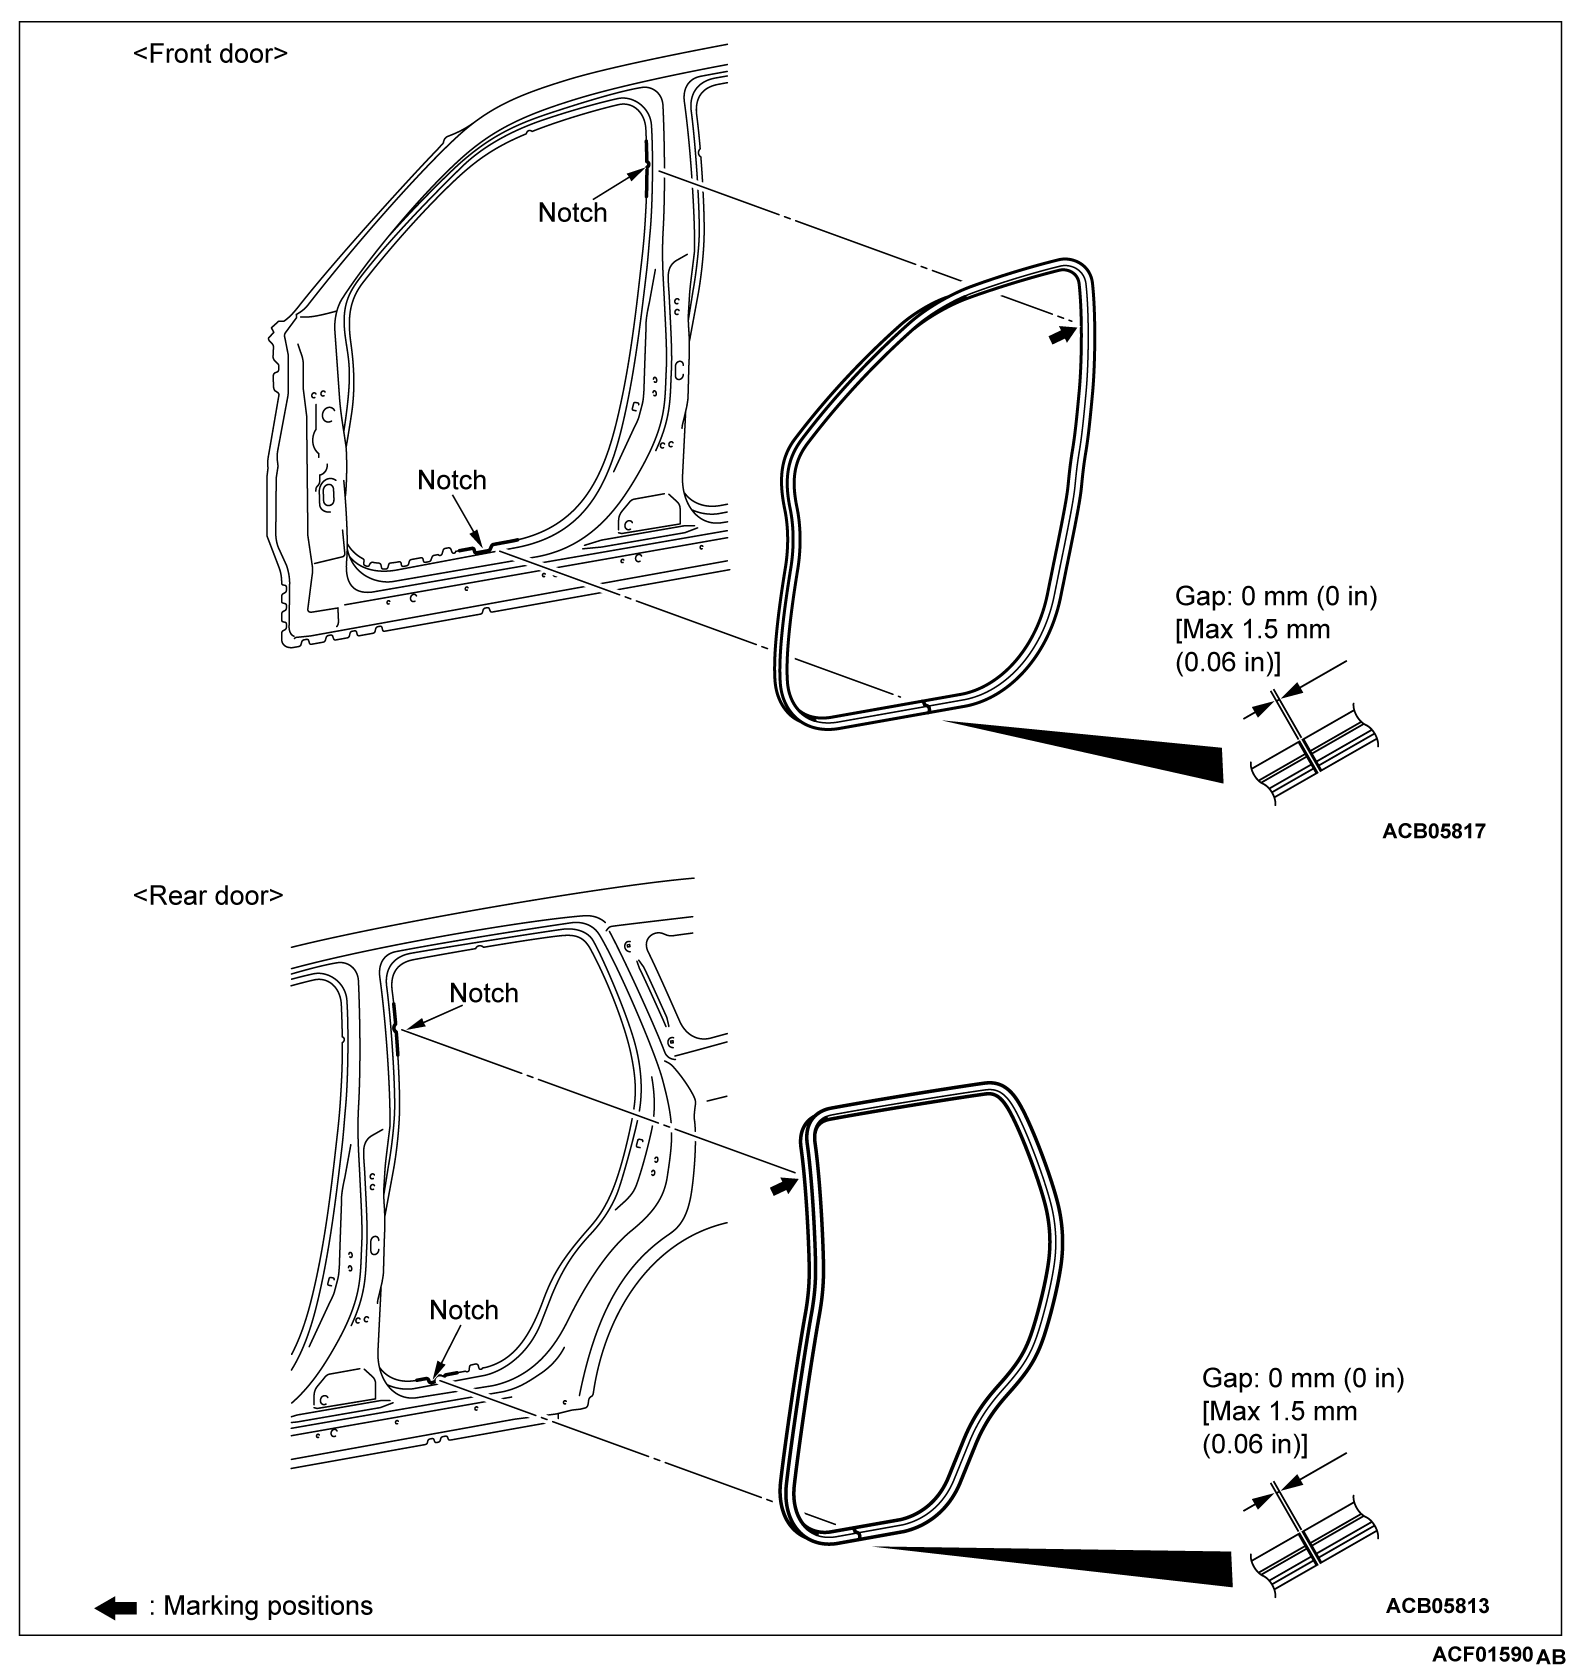
>>A<< DOOR OPENING WEATHERSTRIP INNER INSTALLATION
Align the mark on the door opening weatherstrip inner with the notch at the vehicle body side as shown.


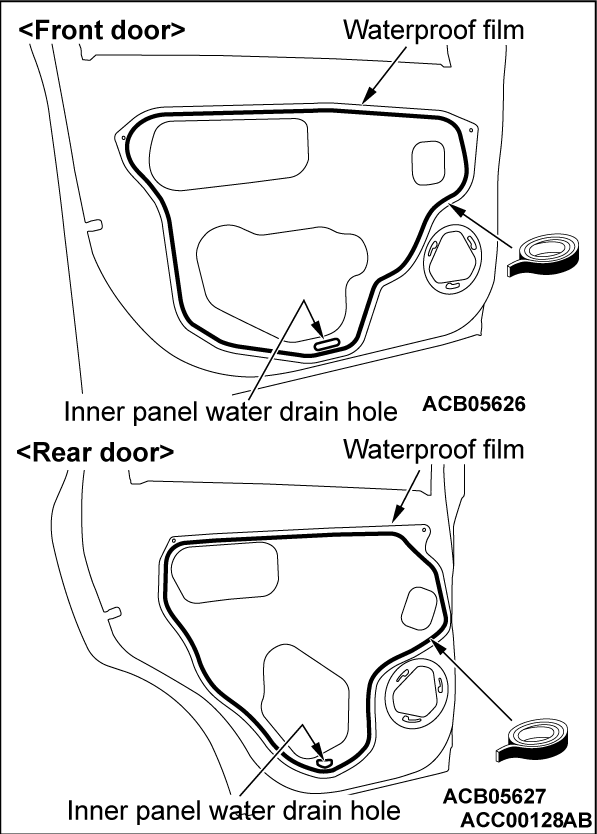
>>B<< WATERPROOF FILM INSTALLATION
cautionWhen a waterproof film is applied, guide the butyl rubber tape under the inner panel drain hole.
Apply the specified adhesive to the water-proof film as shown in the figure and stick the film.
Specified sealant: 3M™ ATD Part No. 8633 or equivalent