[Previous][Next]
REMOVAL AND INSTALLATION
 
 
Pre-removal and Post-installation Operation
  • Refrigerant draining and Refilling (Refer to Charging and Discharging ).
  • Engine coolant change (Refer to GROUP 14 - On-vehicle Service <2.4L Engine> or <3.0L Engine>).
  • Dash panel heat protector (Refer to GROUP 42A - Loose Panel ).
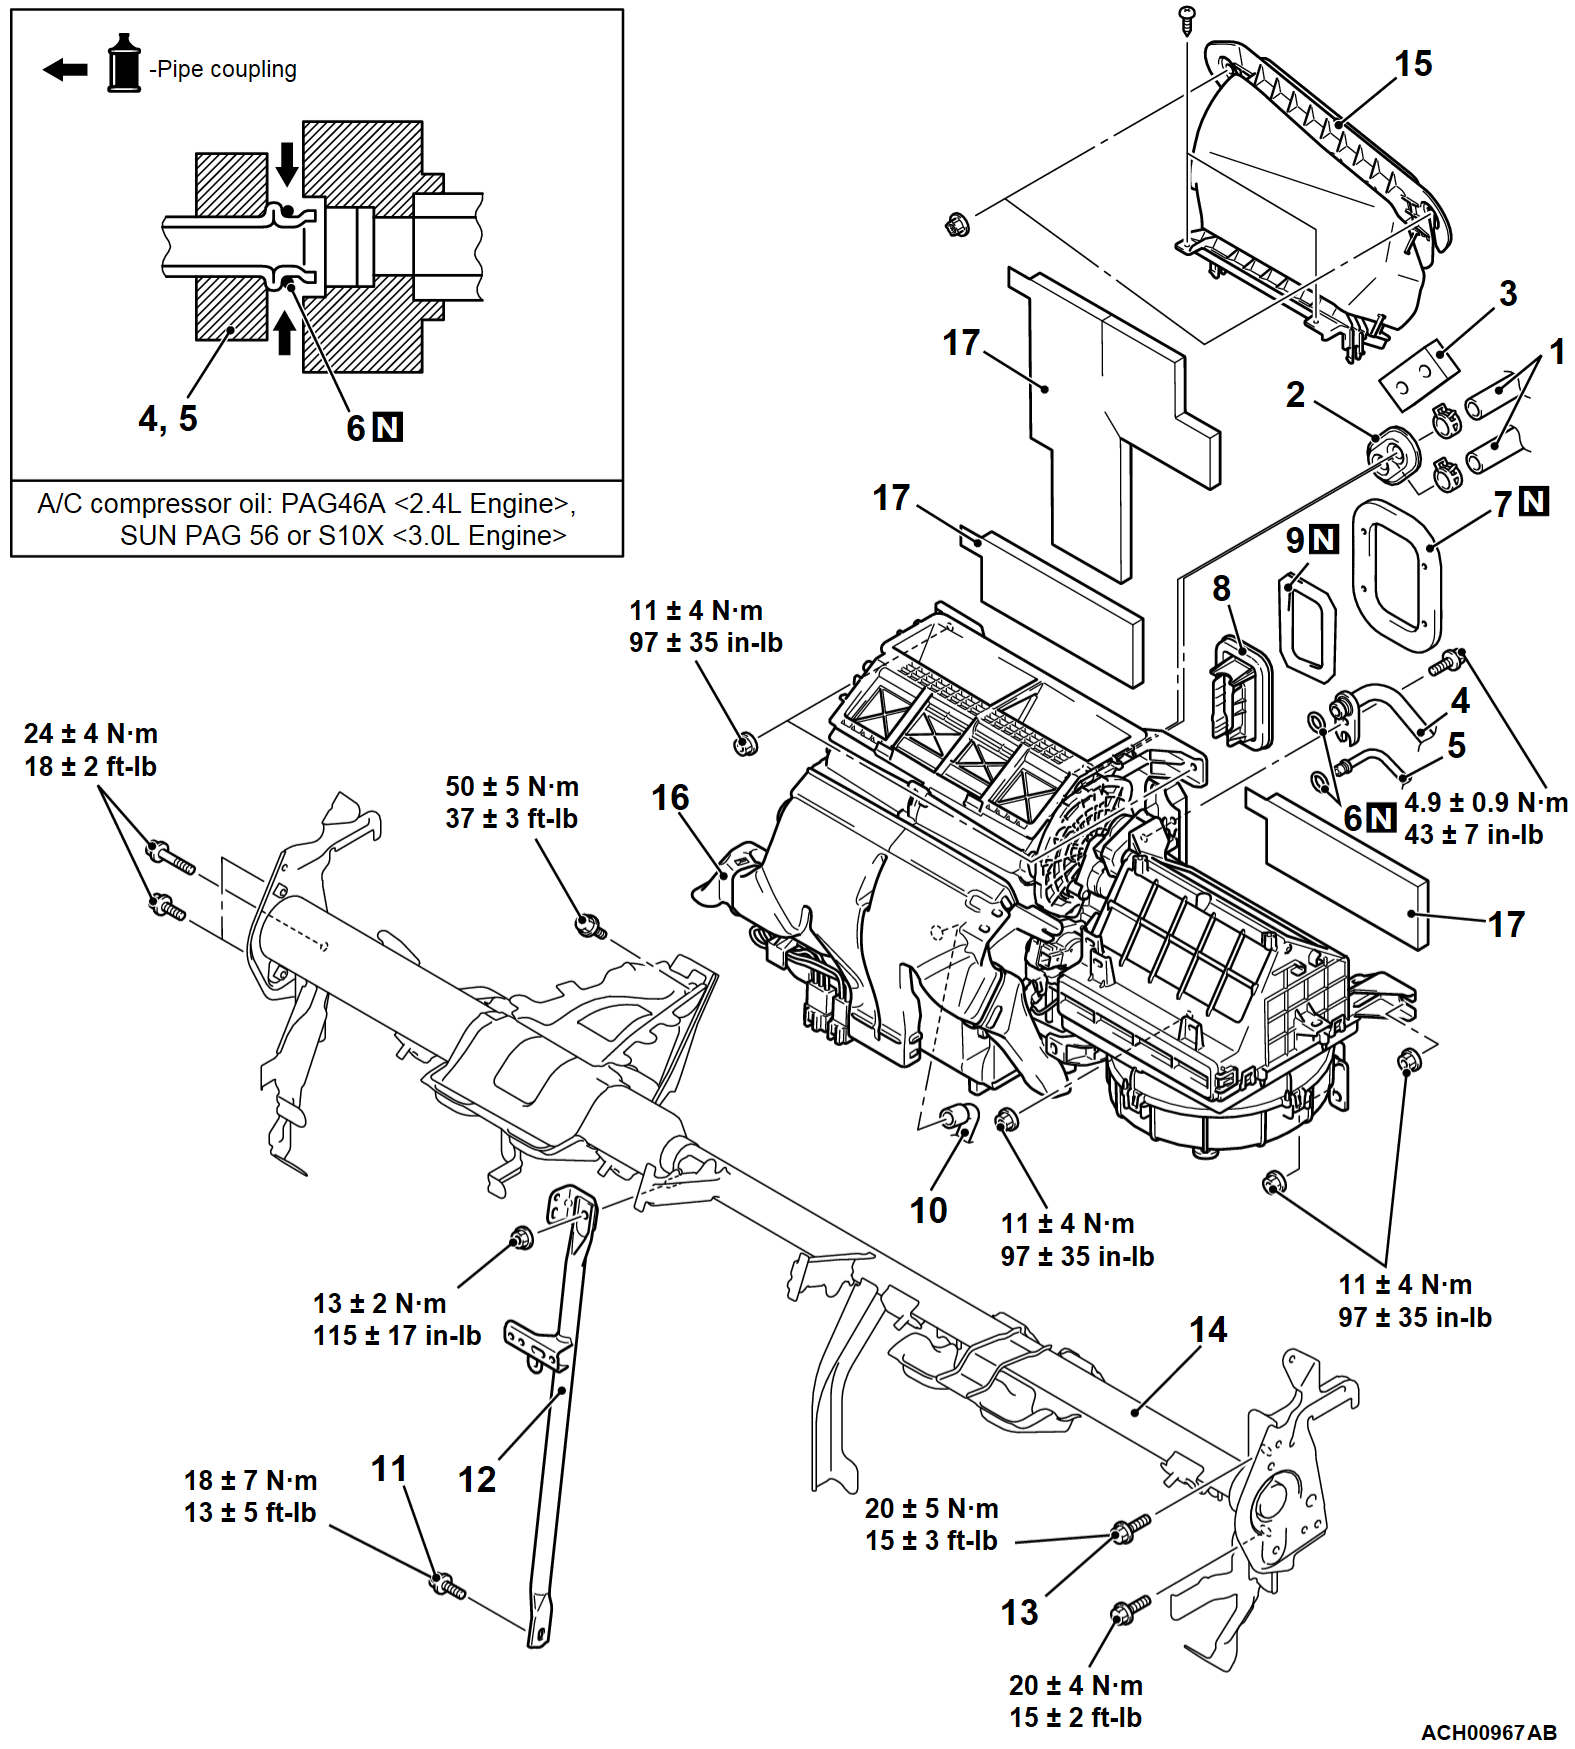
Removal steps
1.Heater piping hose connection
2.Grommet
3.Insulator A
<<A>>4.A/C compressor suction hose connection
<<A>>5.A/C condenser outlet pipe connection
6.O-ring
7.Insulator B
8.Expansion valve cover
9.Insulator
10.A/C evaporator drain hose
Instrument panel removal and Installation (Refer to GROUP 52A - Instrument Panel ).
Instrument panel wiring harness connector disconnection
11.Ground bolt
12.Center flame assembly
13.Ground bolt
14.Front deck crossmember
15.Heater air intake duct
16.Heater assembly
17.Felt
 
 
REMOVAL SERVICE POINTS
 
 
<<A>> A/C COMPRESSOR SUCTION HOSE CONNECTION AND LIQUID PIPE CONNECTION DISCONNECTION
cautionAs the compressor oil and receiver are highly moisture absorbent, use a non-porous material to plug the hose and nipples.
To prevent the entry of dust or other foreign bodies, plug the dismantled hose and the nipples of the expansion valves.