[Previous][Next]
REMOVAL AND INSTALLATION
 
 
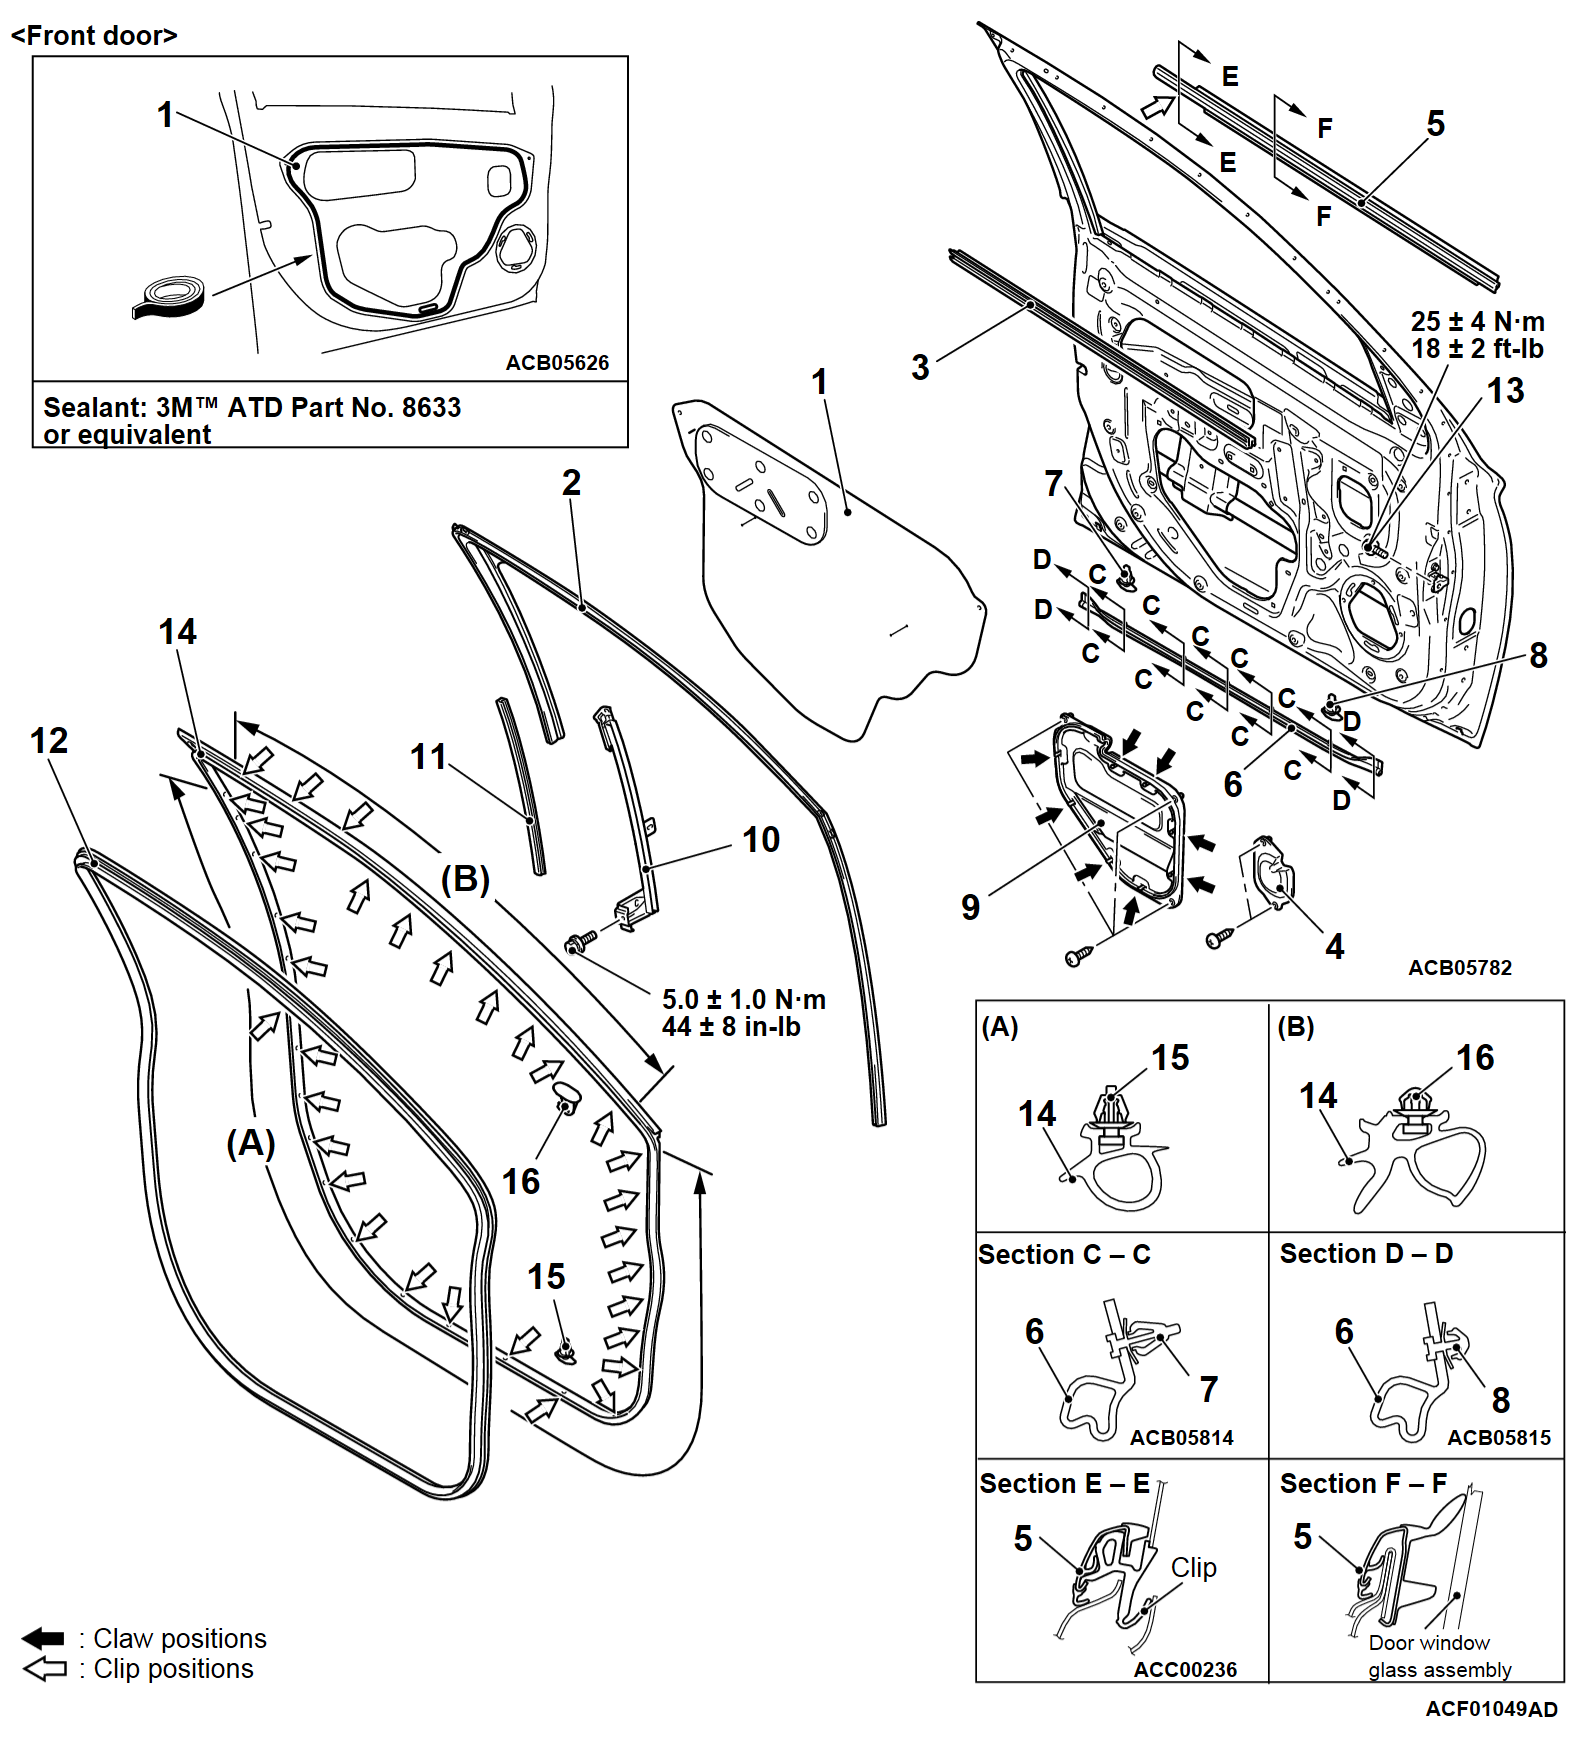
Waterproof film removal steps 
Door trim assembly (Refer to GROUP 52A - Door Trim .)
>>B<<1.Waterproof film
Door window glass runchannel removal
2.Door window glass runchannel
Door beltline weatherstrip inner removal steps
Door trim assembly (Refer to GROUP 52A - Door Trim .)
3.Door beltline weatherstrip inner
Door speaker cover removal steps <Vehicles with audio amplifier> 
Door trim assembly (Refer to GROUP 52A - Door Trim .)
>>B<<1.Waterproof film
4.Door speaker cover
Door beltline molding removal steps
Door mirror assembly (Refer to GROUP 51 - Door Mirror .)
<<A>>5.Door beltline molding
Door opening weatherstrip lower removal steps
6.Door opening weatherstrip lower
7.Door clip A
8.Door clip B
Door speaker bracket removal steps <Vehicles with audio amplifier> 
Door trim assembly (Refer to GROUP 52A - Door Trim .)
>>B<<1.Waterproof film
9.Door speaker bracket
Front lower sash removal steps
Door trim assembly (Refer to GROUP 52A - Door Trim .)
>>B<<1.Waterproof film
9.Door speaker bracket <Vehicles with audio amplifier>
10.Front lower sash
11.Door window glass runchannel rear
Door opening weatherstrip inner removal steps
Cowl side trim and front scuff plate (Refer to GROUP 52A - Interior Trim .)
>>A<<12.Door opening weatherstrip inner
Door opening weatherstrip outer removal steps
13.Door check connecting bolt
<<B>>14.Door opening weatherstrip outer
15.Door clip C
16.Door clip D
 
 
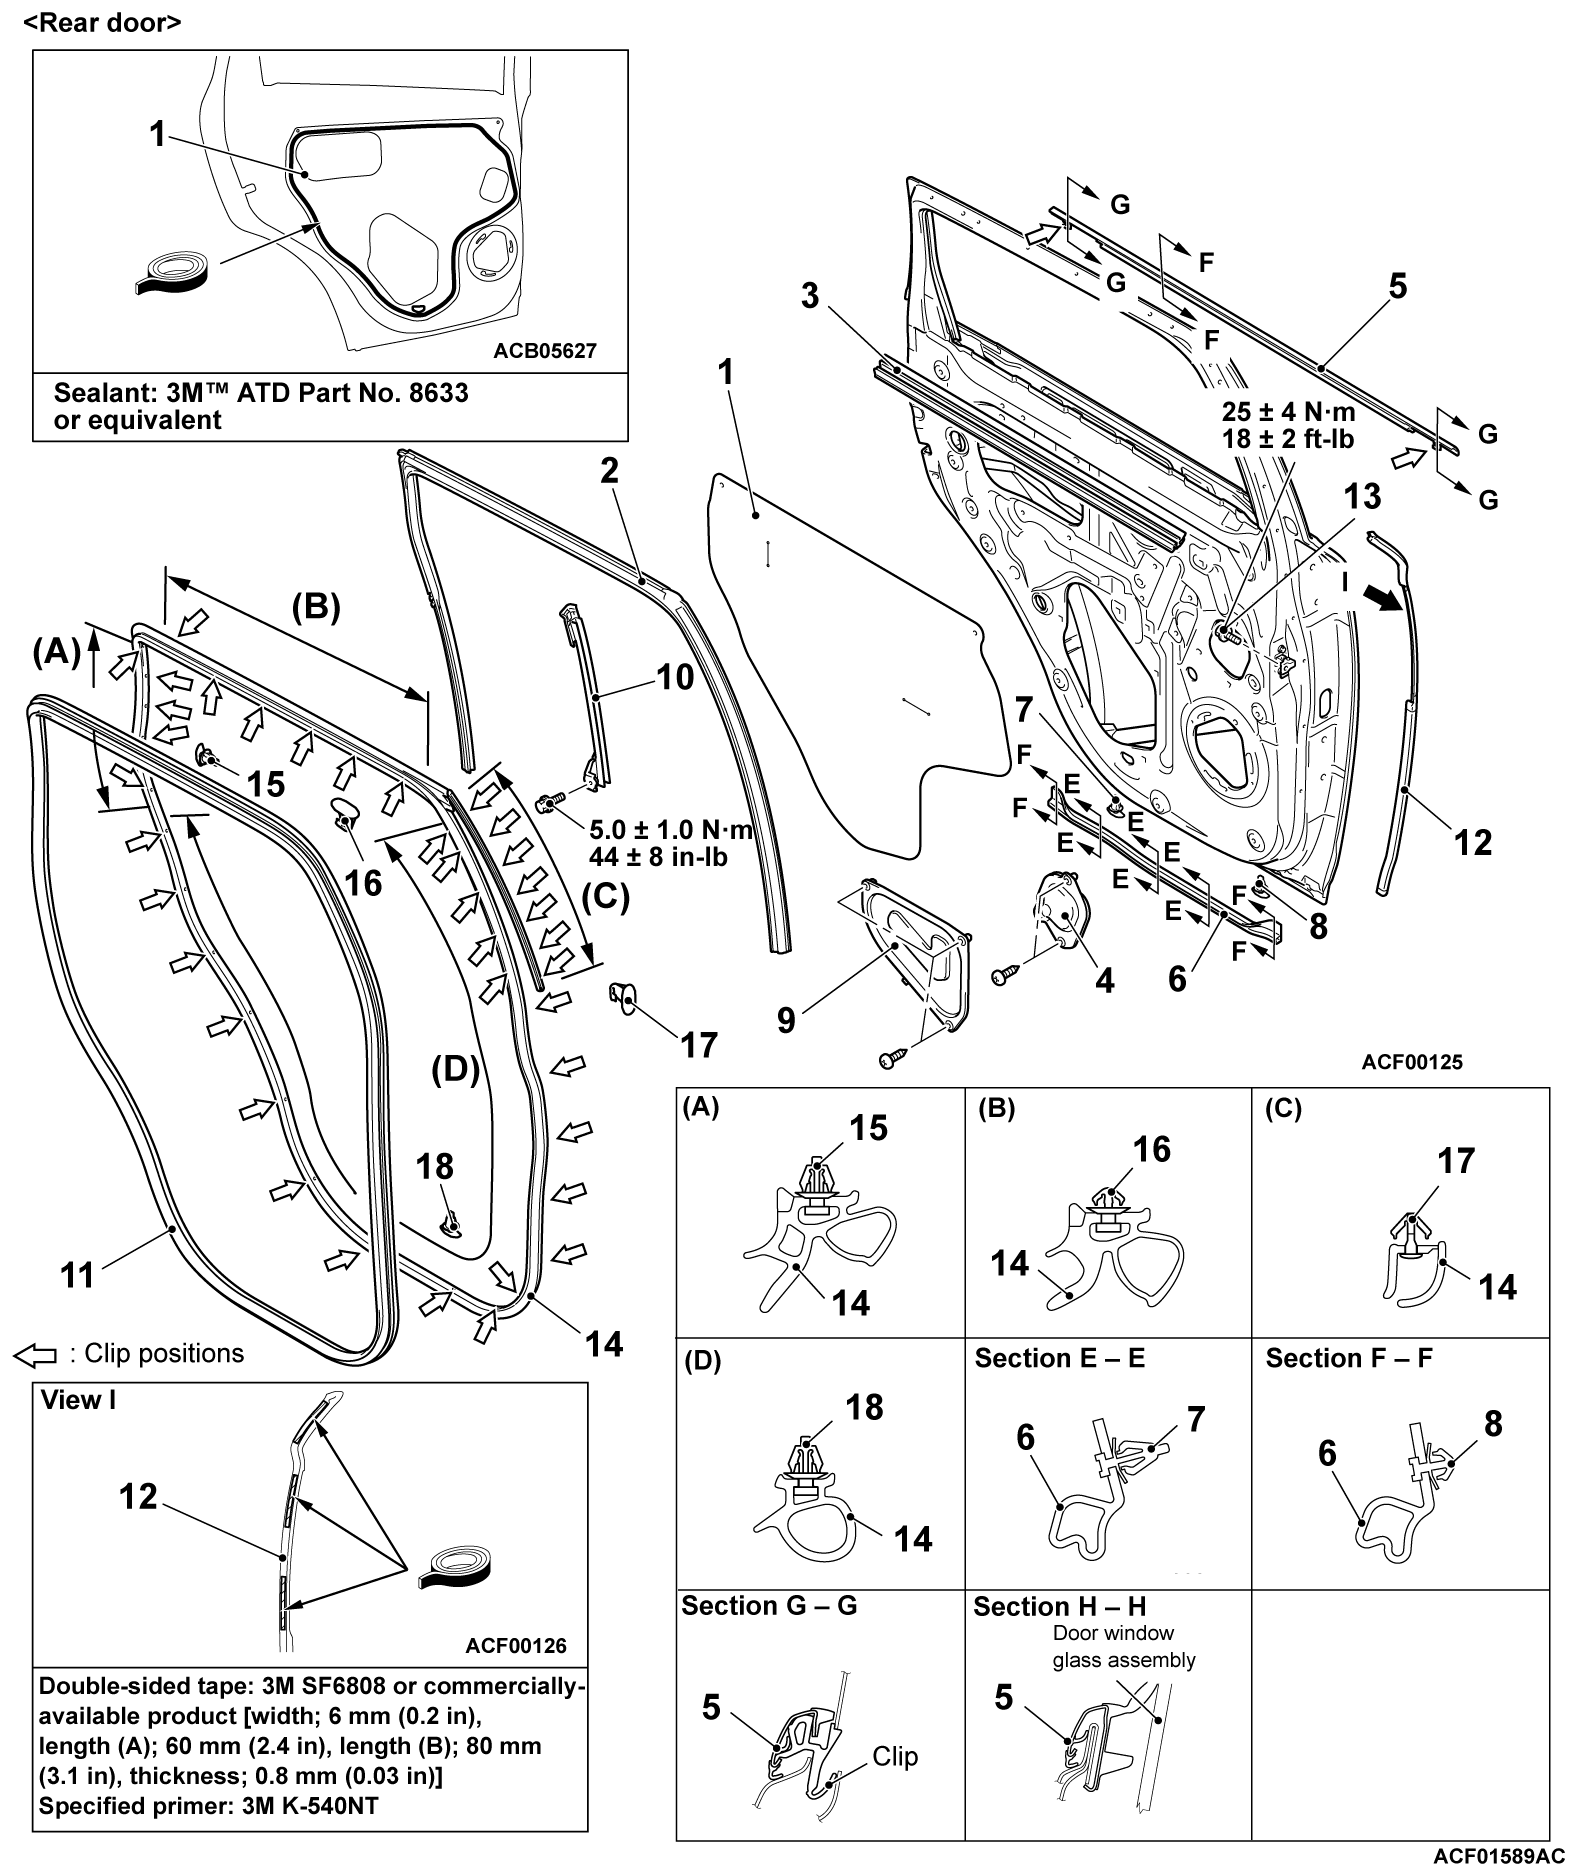
Waterproof film removal steps 
Door trim assembly (Refer to GROUP 52A - Door Trim .)
>>B<<1.Waterproof film
Door window glass runchannel removal
2.Door window glass runchannel
Door beltline weatherstrip inner removal steps
Door trim assembly (Refer to GROUP 52A - Door Trim .)
3.Door beltline weatherstrip inner
Door speaker cover A removal steps <Vehicles with audio amplifier>
Door trim assembly (Refer to GROUP 52A - Door Trim .)
>>B<<1.Waterproof film
4.Door speaker cover A
Door beltline molding removal
<<A>>5.Door beltline molding
Door opening weatherstrip lower removal steps
6.Door opening weatherstrip lower
7.Door clip A
8.Door clip B
Door speaker cover B removal steps <Vehicles with audio amplifier>
Door trim assembly (Refer to GROUP 52A - Door Trim .)
>>B<<1.Waterproof film
9.Door speaker cover B
Rear lower sash removal steps
Door trim assembly (Refer to GROUP 52A - Door Trim .)
>>B<<1.Waterproof film
9.Door speaker cover B <Vehicles with audio amplifier>
10.Rear lower sash
Door opening weatherstrip inner removal steps
Rear scuff plate (Refer to GROUP 52A - Interior Trim .)
>>A<<11.Door opening weatherstrip inner
Door opening front weatherstrip removal
>>C<<12.Door opening front weatherstrip
Door opening weatherstrip outer removal steps
13.Door check connecting bolt
<<B>>14.Door opening weatherstrip outer
15.Door clip C
16.Door clip D
17.Door clip E
18.Door clip F
 
 
REMOVAL SERVICE POINTS
 
 
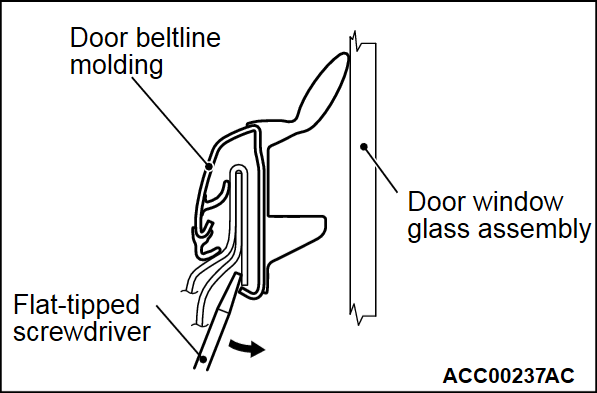
<<A>> DOOR BELTLINE MOLDING REMOVAL
Insert a flat-tipped screwdriver as shown, and pry it in the direction shown to remove the door beltline molding.


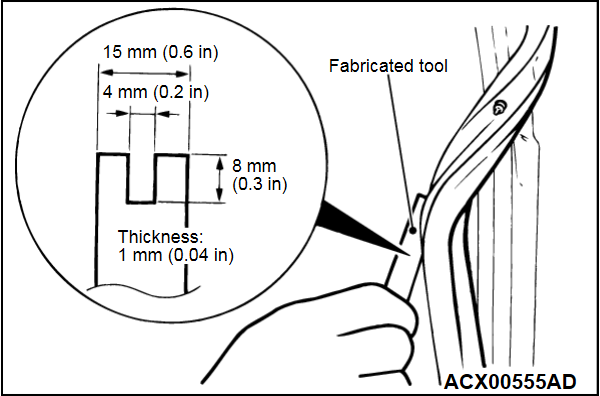
<<B>> DOOR OPENING WEATHERSTRIP OUTER REMOVAL
Make the tool as shown in the figure, and remove the weatherstrip from the door panel.


INSTALLATION SERVICE POINTS
 
 
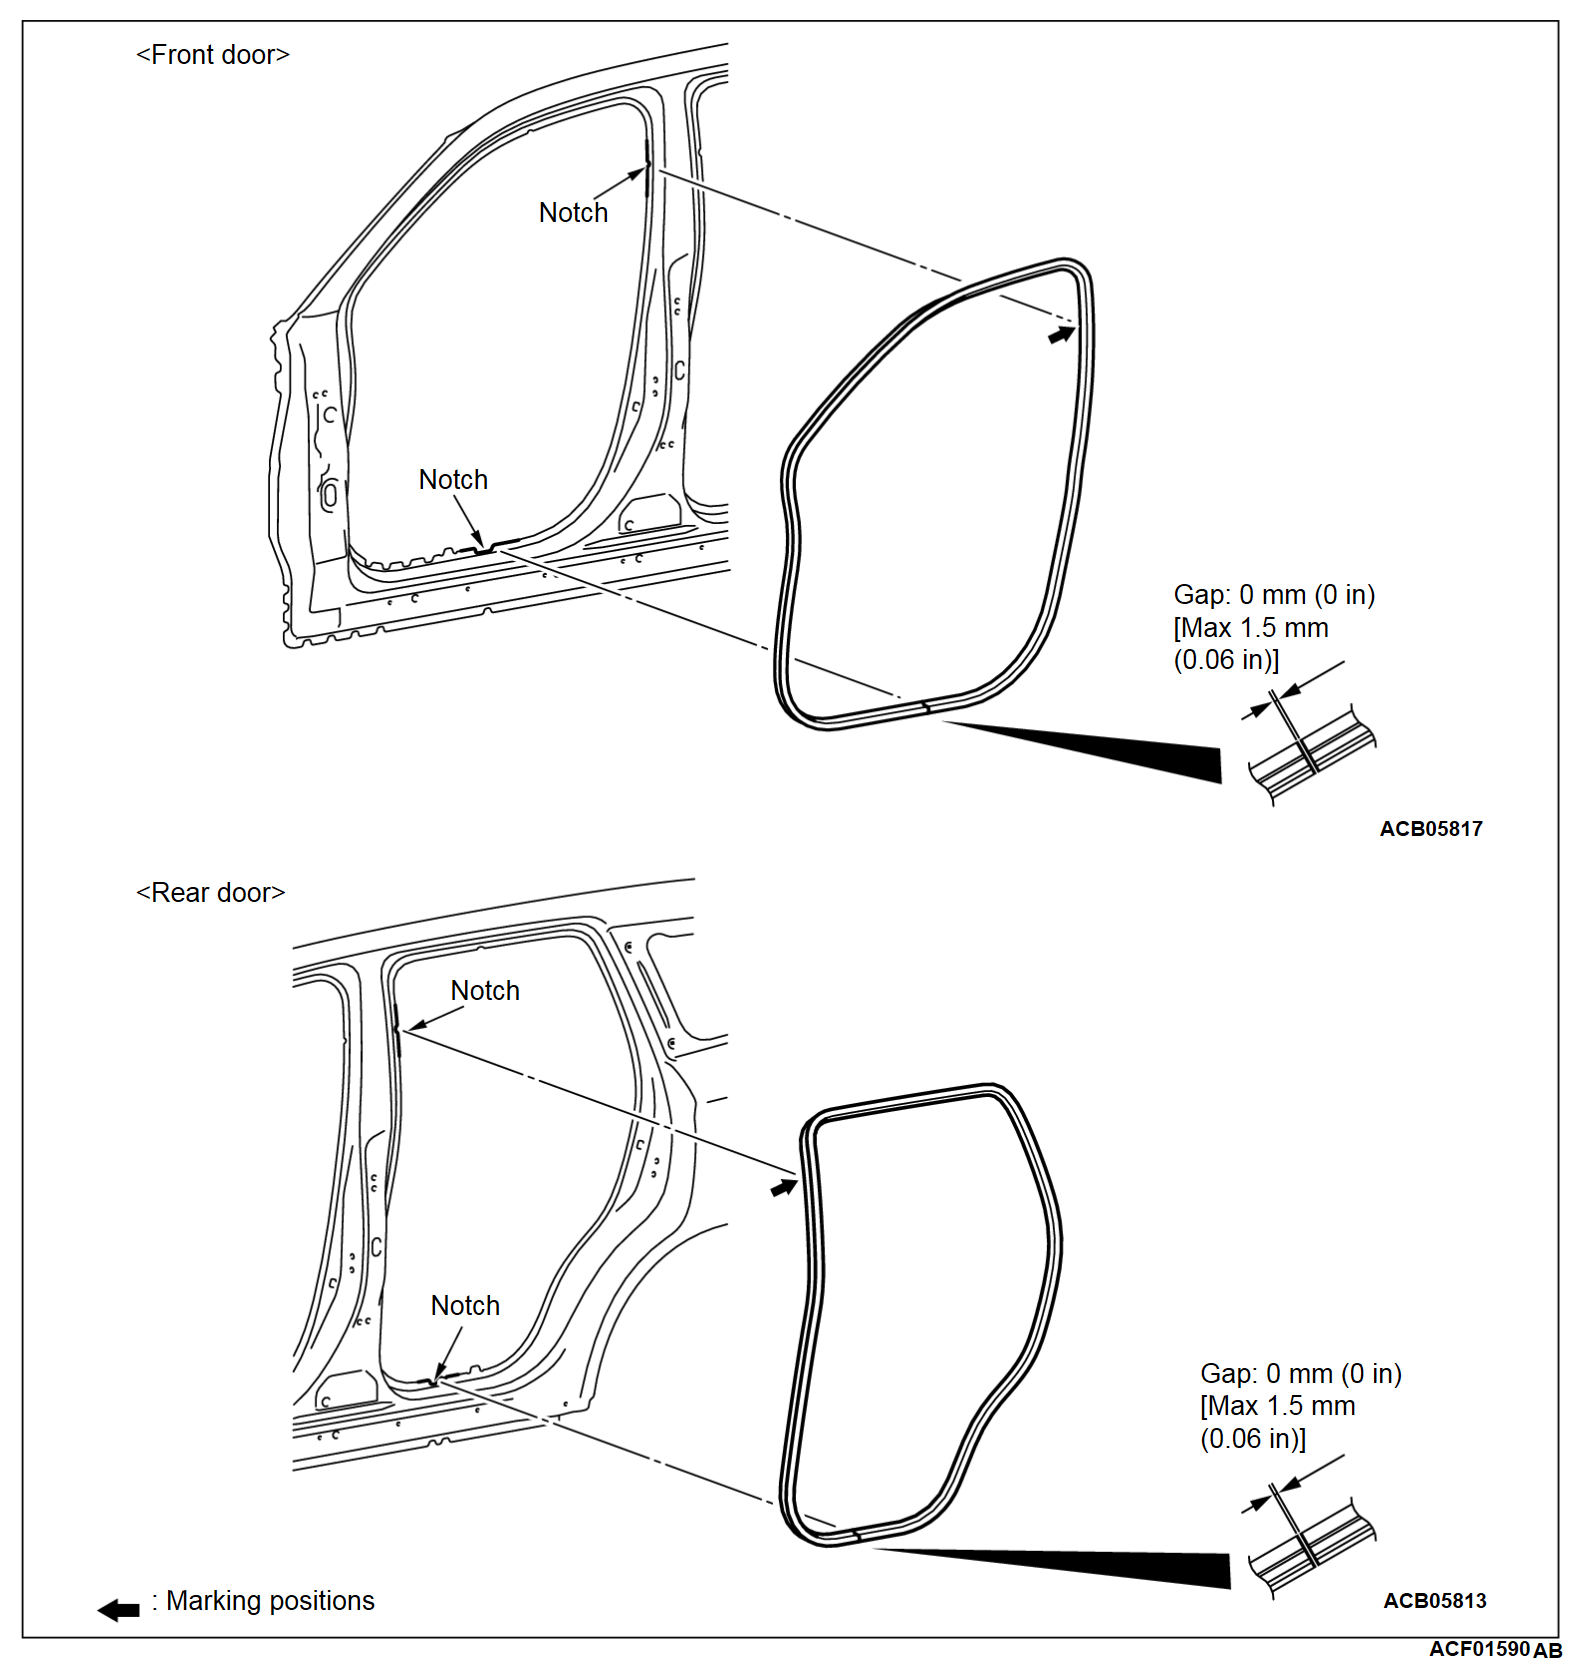
>>A<< DOOR OPENING WEATHERSTRIP INNER INSTALLATION
Align the mark on the door opening weatherstrip inner with the notch at the vehicle body side as shown.


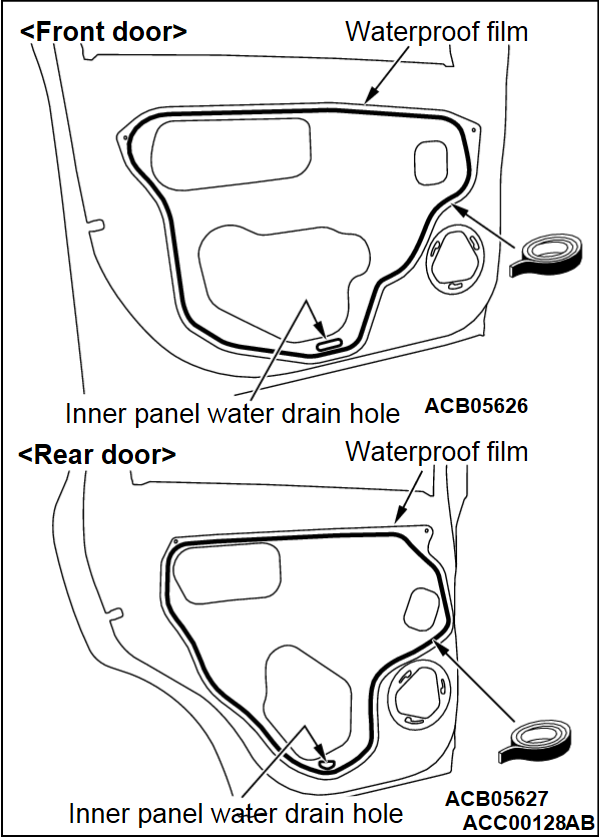
>>B<< WATERPROOF FILM INSTALLATION
cautionWhen a waterproof film is applied, guide the butyl rubber tape under the inner panel drain hole.
Apply the specified adhesive to the water-proof film as shown in the figure and stick the film.
Specified sealant: 3M ATD Part No. 8633 or equivalent


>>C<< DOOR OPENING FRONT WEATHERSTRIP INSTALLATION
1. Remove remnants of double-sided adhesive tape from the weatherstrip and the body thoroughly.
2. Use the part cleaner (MZ100387 or equivalent) to degrease the affected area.
3. Apply the specified primer to the affected area and then dry it completely.
Specified primer: 3M K-540NT
Flash-off time: Approximately 15 minutes at 0°C (32°F), approximately 10 minutes at 25°C (77°F).
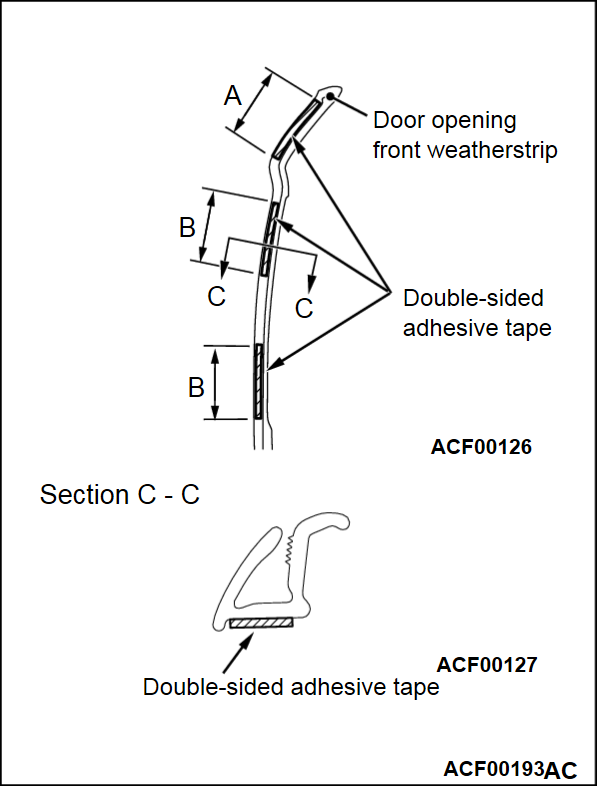
4. Apply a double-sided adhesive tape to the door opening weatherstrip as shown.
Double-sided adhesive tape: 3M SF6808 or commercially-available product [width; 6 mm (0.2 in), length (A); 60 mm (2.4 in), length (B); 80 mm (3.1 in), thickness; 0.8 mm (0.03 in)]
5. Tear off the backing paper from the double-sided tape.
noteIf the adhesive tape is attached to the edge of the backing paper, it will be easy to tear off.
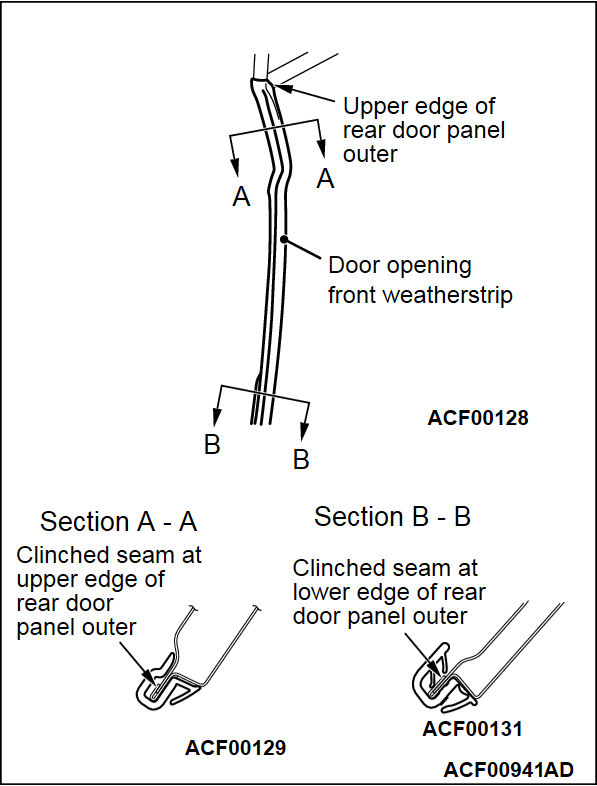
6. Align the upper edge of the door opening front weatherstrip with that of the door panel outer.
7. Engage the door opening front weatherstrip with the upper and lower clinched seams on the door panel outer.
8. Ensure that the weatherstrip is seated on the door panel outer.
noteIf the double-sided tape is difficult to affix in cold temperature, etc., warm the bonding surfaces before affixing the tape.
Body: 40 - 60°C (104 - 140°F)
Door opening front weatherstrip: 20 - 30°C (68 - 86°F)