[Previous][Next]
REMOVAL AND INSTALLATION
 
 
Pre-removal and Post-installation Operation
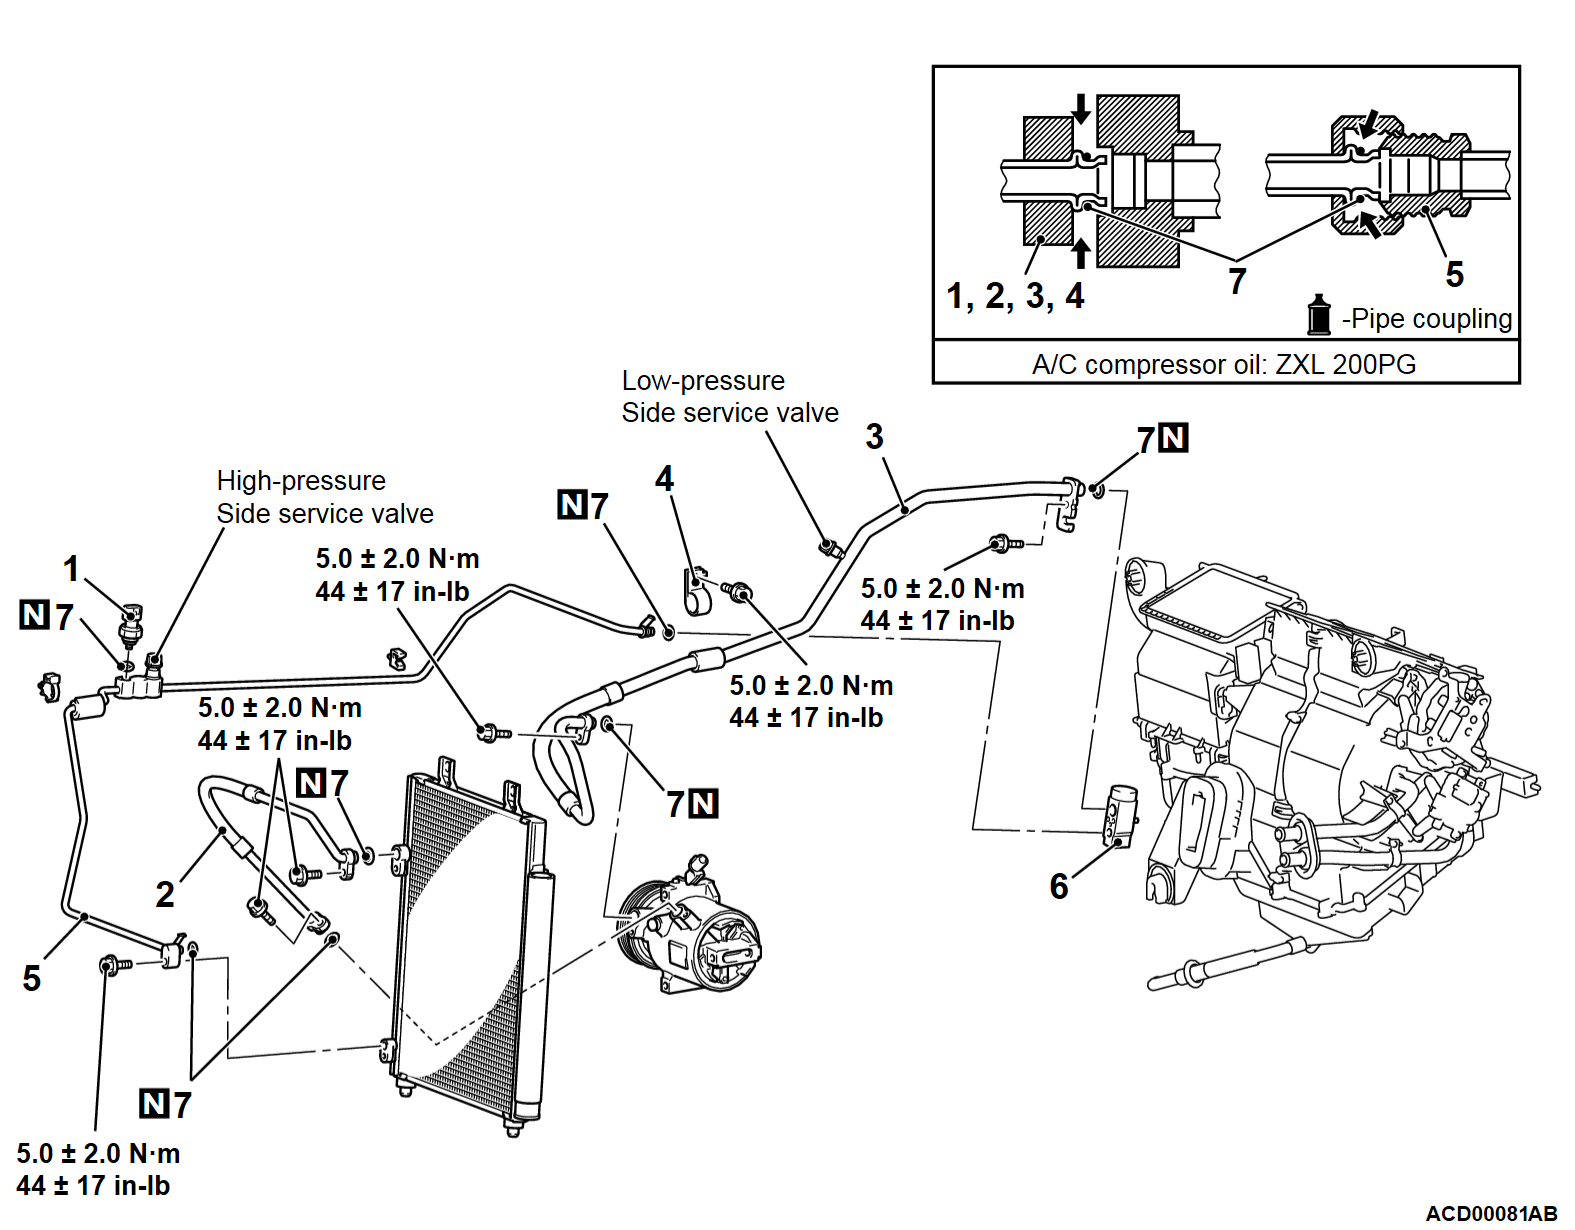
  • Discharging and Recharging refrigerant (Refer to .)
A/C pressure sensor removal steps
1.A/C pressure sensor
7.O-ring
A/C compressor discharge hose removal steps
Front bumper removal and installation (Refer to GROUP 51 - Front Bumper ).
Air guide side panel removal and installation (Refer to GROUP 42A - Loose Panel ).
<<A>>2.A/C compressor discharge hose
7.O-ring
A/C compressor suction hose removal steps
Air cleaner case removal and installation (Refer to GROUP 15 - Air Cleaner ).
Front wheelhouse splash shield removal and installation (Refer to GROUP 42A, Splash Shield ).
<<A>>3.A/C compressor suction hose
7.O-ring
A/C condenser outlet pipe removal steps
Air cleaner case removal and installation (Refer to GROUP 15 - Air Cleaner ).
Front bumper removal and installation (Refer to GROUP 51 - Front Bumper ).
Air guide side panel removal and installation (Refer to GROUP 42A - Loose Panel ).
Front wheelhouse splash shield removal and installation (Refer to GROUP 42A, Splash Shield ).
<<B>>4Clip securing the A/C compressor suction hose to the side member
<<A>>5.A/C condenser outlet pipe
7.O-ring
Expansion valve removal steps
Air cleaner case removal and installation (Refer to GROUP 15 - Air Cleaner ).
<<A>>3.A/C compressor suction hose (heater side)
7.O-ring
<<A>>5.A/C condenser outlet pipe (heater side)
7.O-ring
<<A>>6.Expansion valve
7.O-ring
 
 
REMOVAL SERVICE POINT
 
 
<<A>> HOSE, PIPE AND EXPANSION VALVE REMOVAL
cautionUse the plug which is not breathable because A/C compressor oil or receiver have high hygroscopicity.
Plug the nipple of condenser, compressor, and expansion valve to prevent the entry of dust and dirt.


<<B>> CLIP SECURING A/C CONDENSER SUCTION HOSE TO SIDEMEMBER REMOVAL
If the A/C condenser outlet pipe must be removed individually, remove the clip securing the A/C compressor suction hose to the side member in order to create sufficient clearance.