[Previous][Next]
REMOVAL AND INSTALLATION
 
 
Pre-removal operation
Post-installation operation
Door inside handle removal
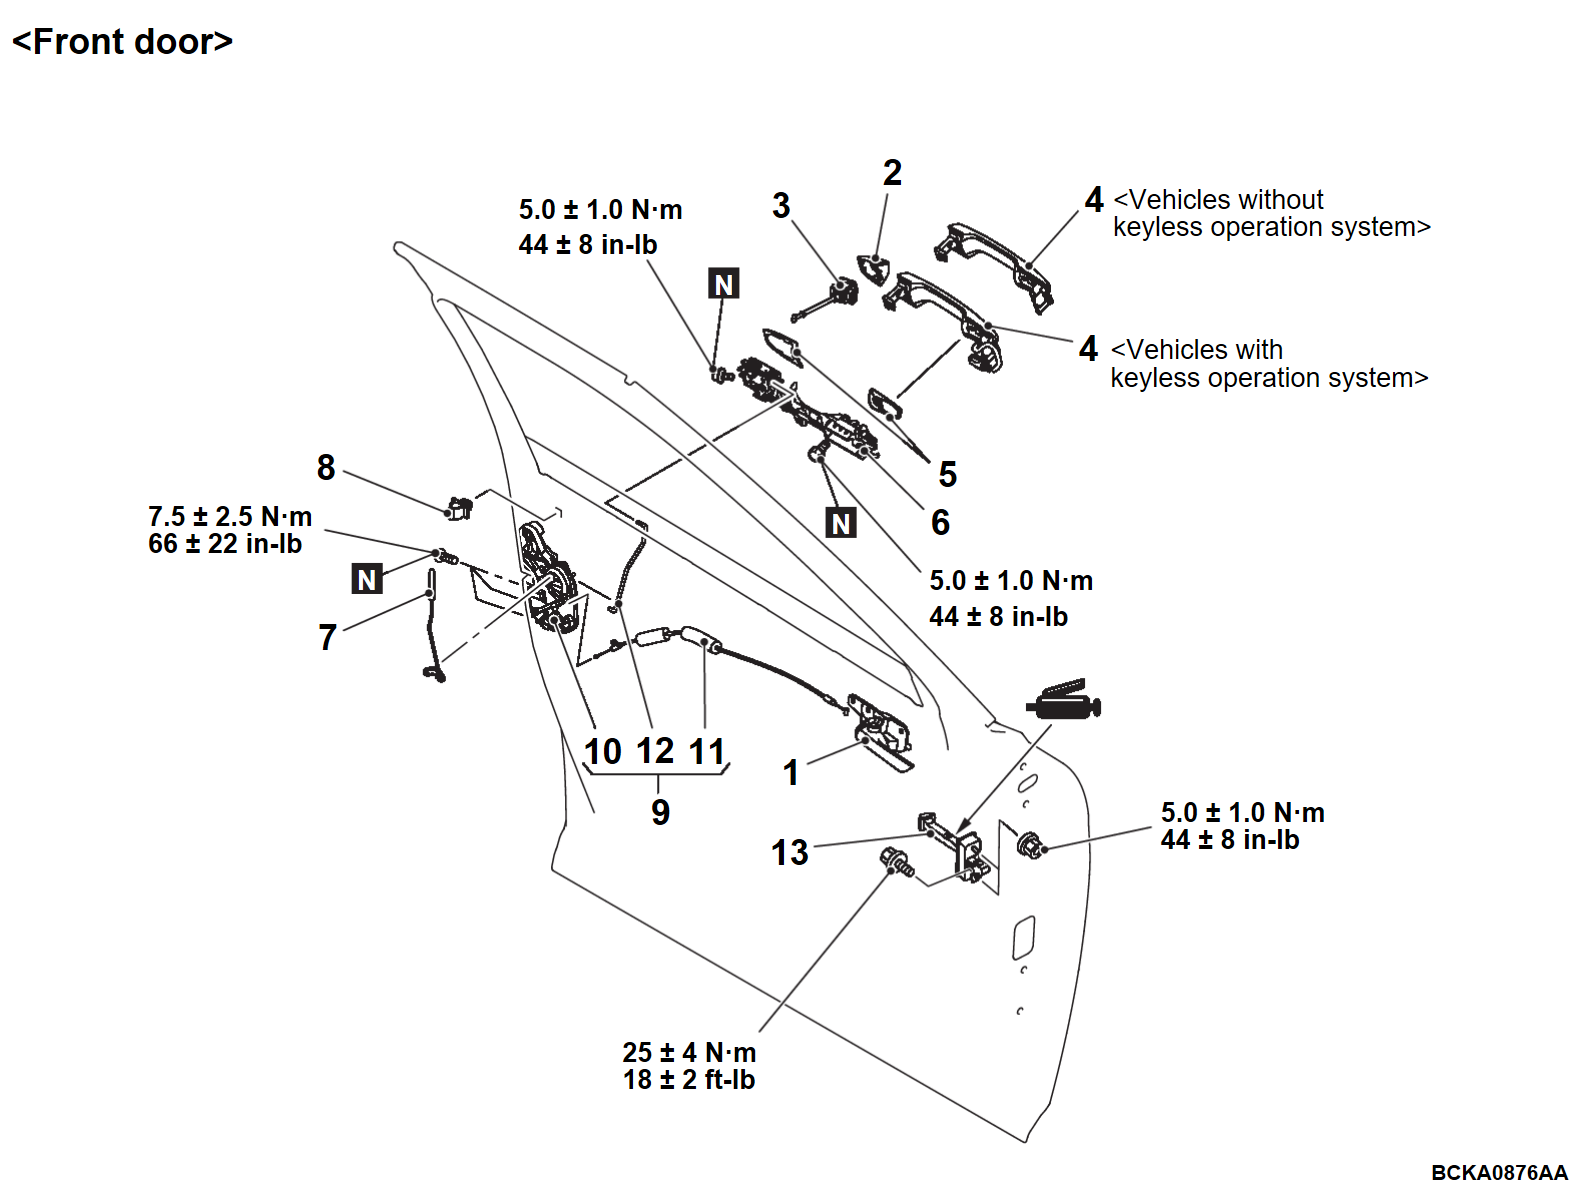
1.Front door inside handle
Door latch assembly removal steps
Door working hole rear cover (Refer to Door glass and regulator REMOVAL AND INSTALLATION)
2.Front door outside handle escutcheon
3.Door lock key cylinder (driver's side)
4.Front door outside handle grip
5.Door outside handle gasket
6.Front door outside handle bracket
7.Front door lock indicator rod
8.Clip
9.Door latch and cable assembly
10.Front door lock assembly
11.Door inside handle cable
12.Key rod
Door check removal steps
13.Front door check link
Door inside handle removal
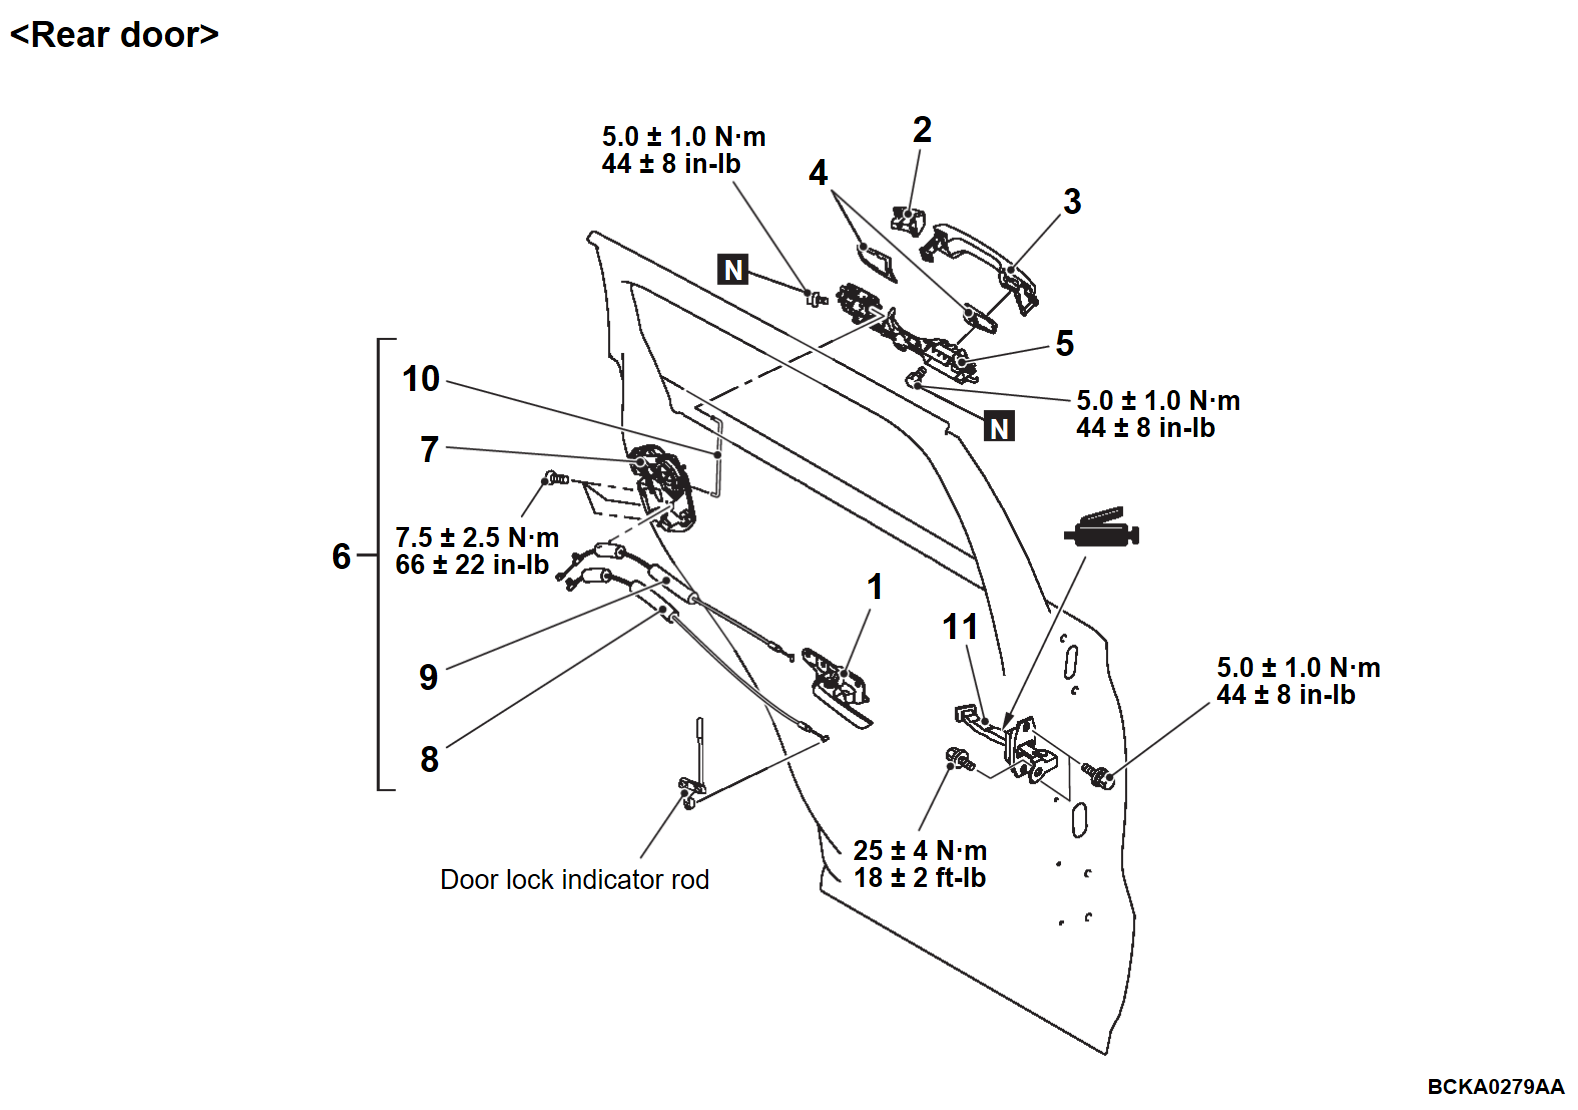
1.Rear door inside handle
Door latch assembly removal steps
Door working hole rear cover (Refer to REMOVAL AND INSTALLATION)
2.Rear door outside handle escutcheon
3.Rear door outside handle grip
4.Door outside handle gasket
5.Rear door outside handle bracket
Door window glass front lower sash (Refer to REMOVAL AND INSTALLATION)
6.Door latch and cable assembly
7.Rear door lock assembly
8.Door inside lock cable
9.Door inside lock cable
10.Door outside handle rod
Door check removal steps
11.Rear door check link
 
 
INSTALLATION SERVICE POINTS
 
 
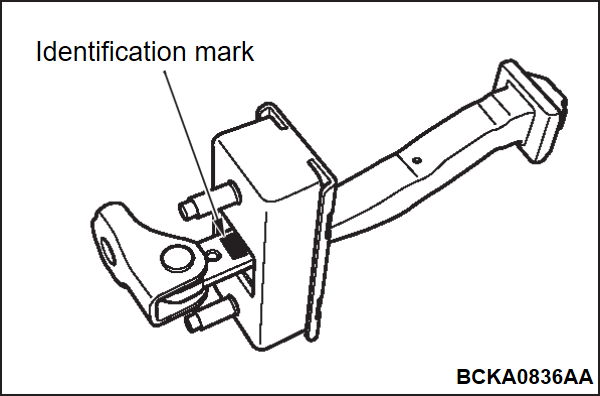
>>A<< DOOR CHECK INSTALLATION
Install the door check with the following identification mark facing upward.
 
ApplicationIdentification mark
Front doorLeft doorFL
Right doorFR
Rear doorLeft doorRL
Right doorRR


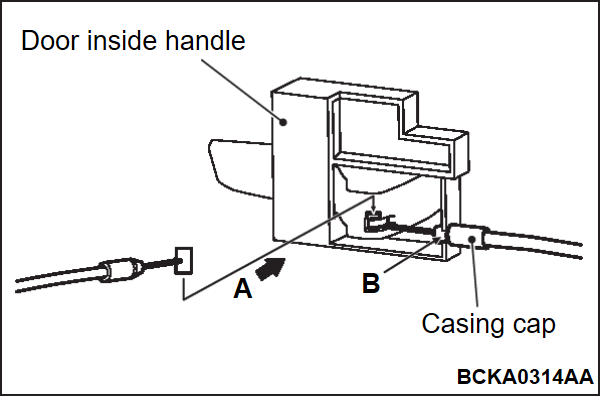
>>B<< DOOR INSIDE HANDLE CABLE INSTALLATION
1. Insert the end of the cable from direction A shown in the figure to install it.
2. Install the casing cap of the cable to B shown in the figure of the door inside handle.


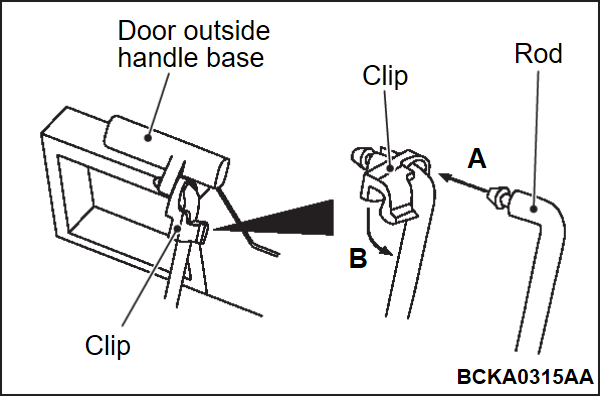
>>C<< DOOR OUTSIDE HANDLE BRACKET INSTALLATION
1. As shown by A in the figure, securely insert the door outside handle rod into the hole of the clip on the door outside handle base.
2. As shown by B in the figure, turn the clip to fit it into the rod.