Removal and Installation
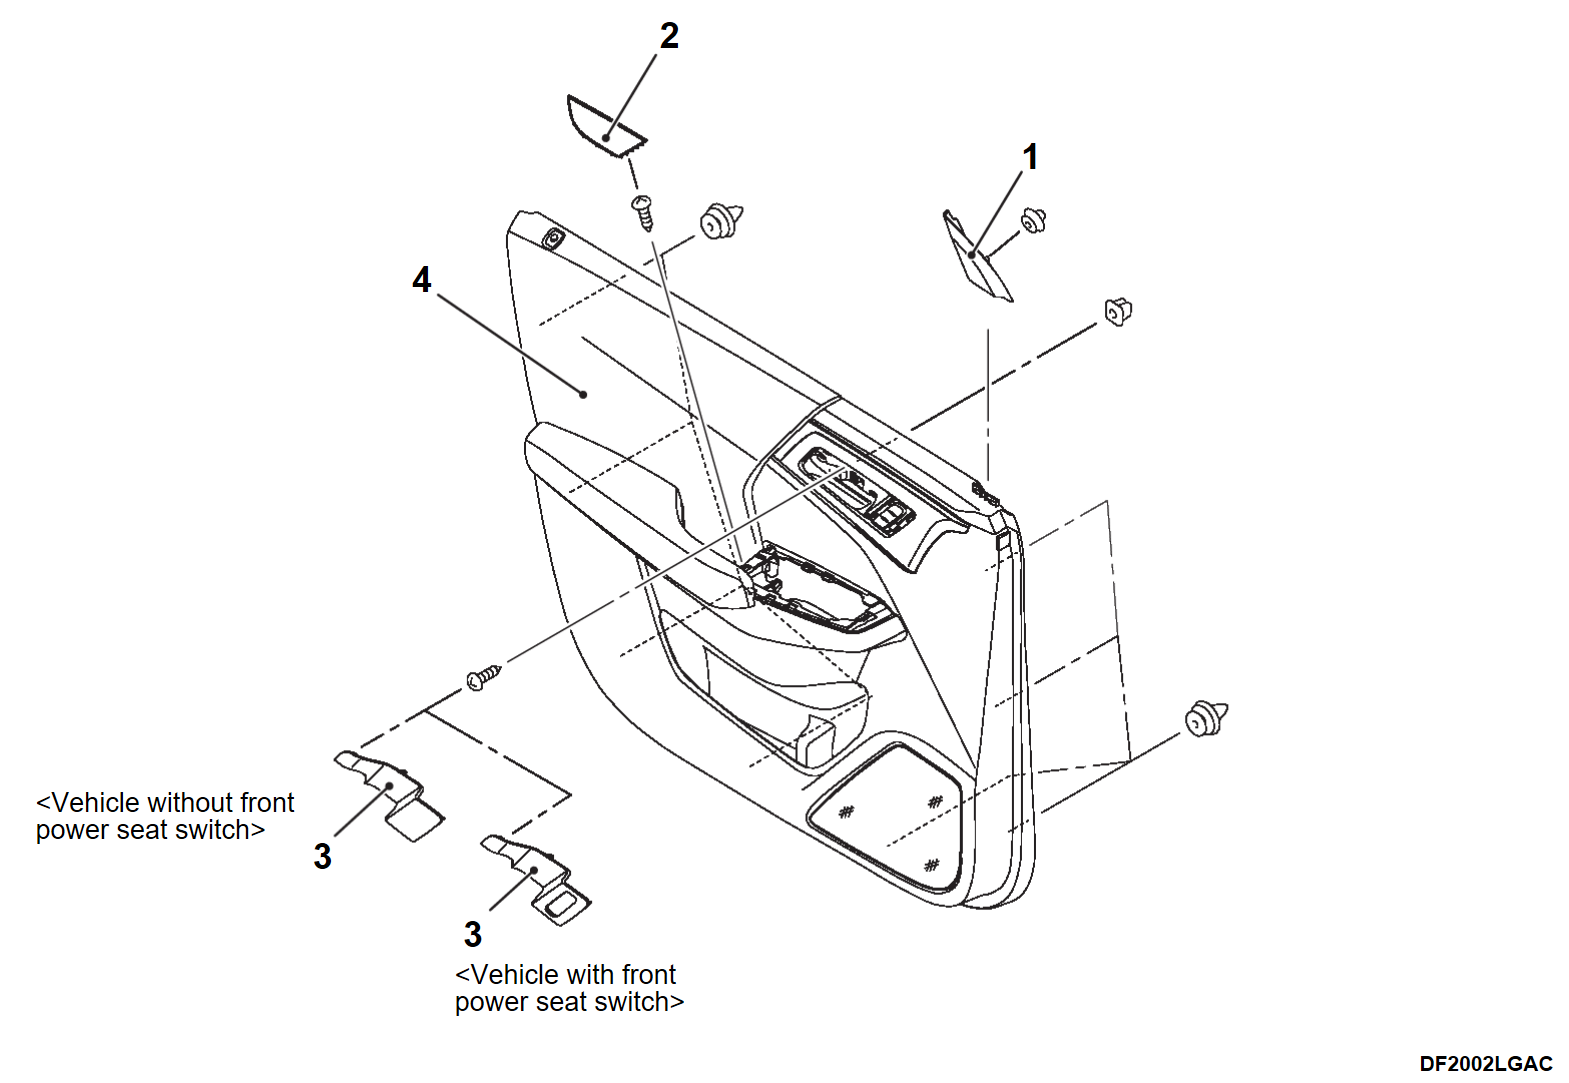
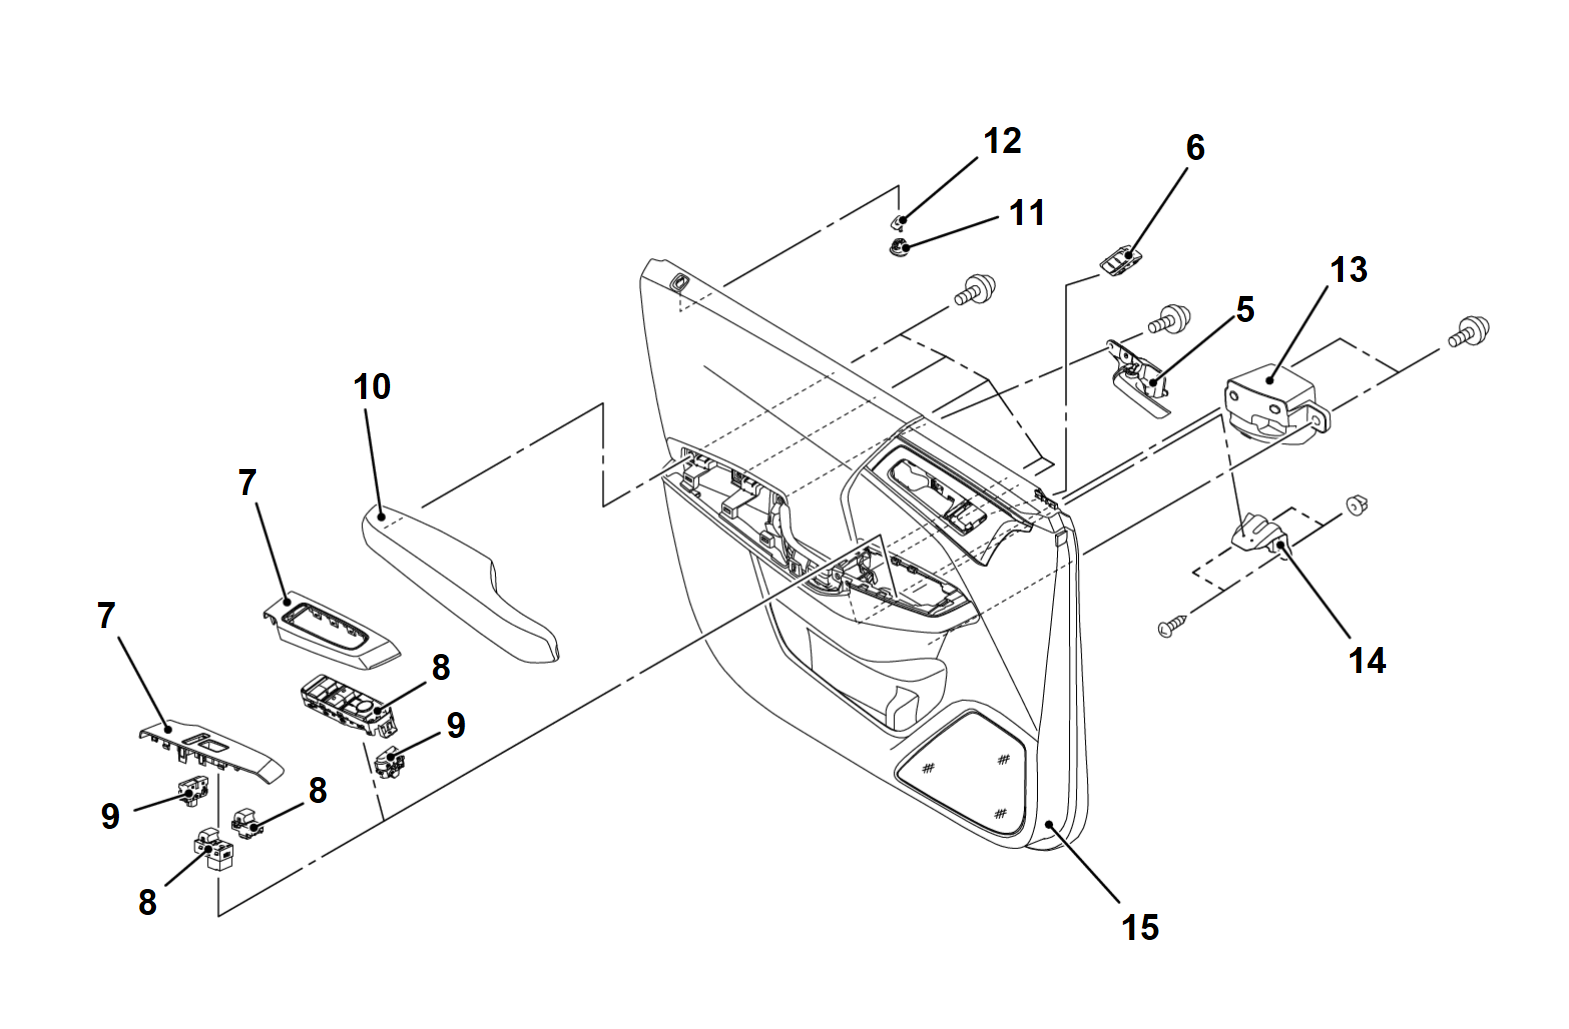
<Front door>
Post-installation Operation Door Inside Handle Check (Refer to Door Inside Handle Play Adjustment DOOR INSIDE HANDLE PLAY ADJUSTMENT  ) ) |
|
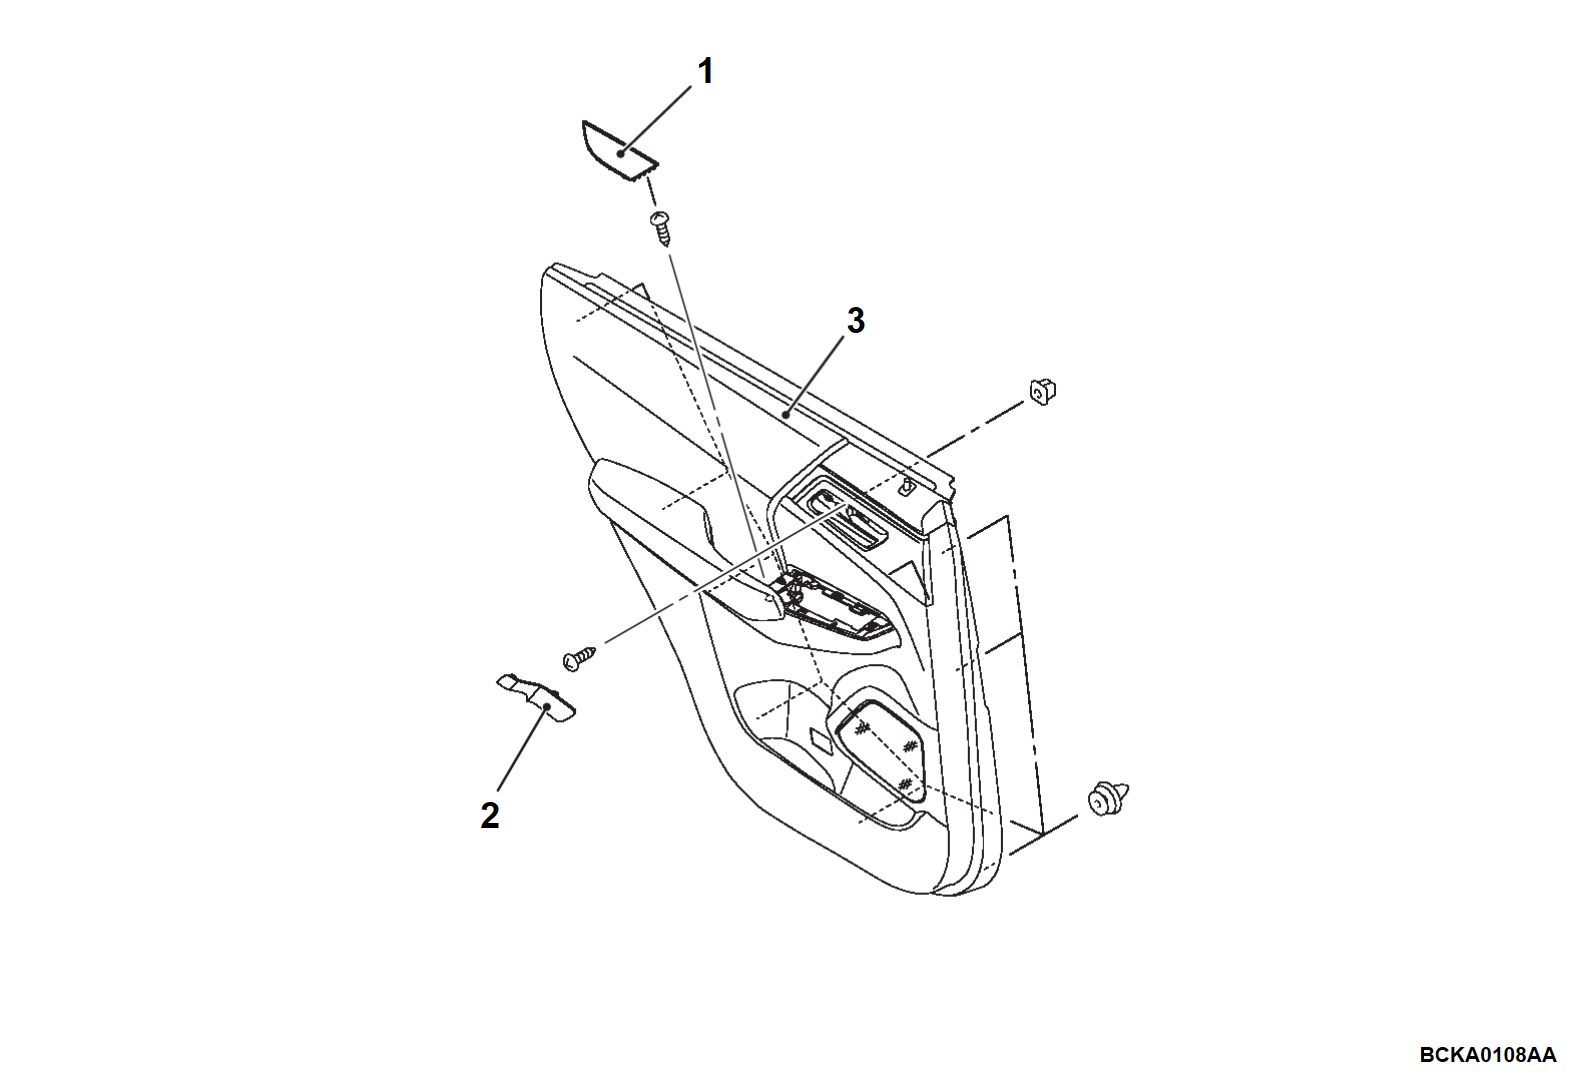
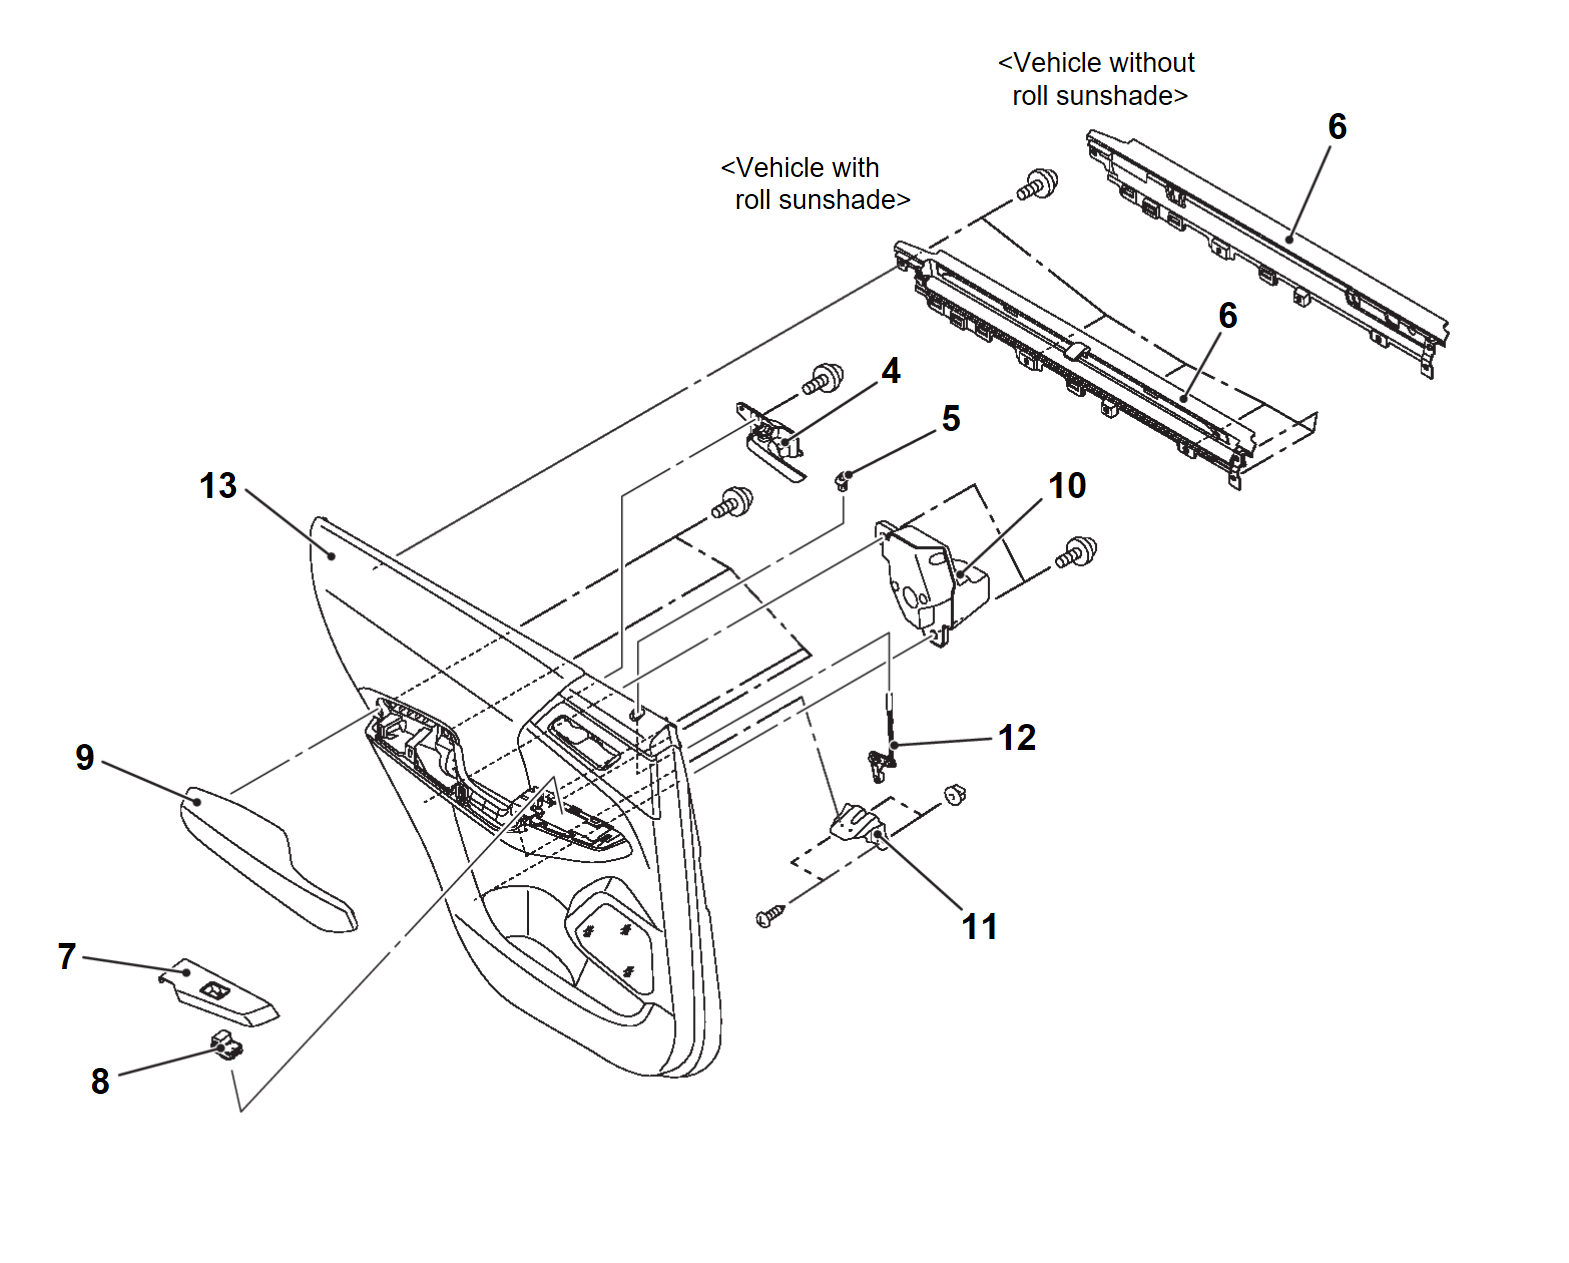
<Rear door>
Post-installation Operation Door Inside Handle Check (Refer to Door Inside Handle Play Adjustment DOOR INSIDE HANDLE PLAY ADJUSTMENT  ) ) |
|
Required Special Tool:
- MB990784: Ornament Remover
REMOVAL SERVICE POINTS
<<A>> FRONT DOOR FINISHER ASSEMBLY REMOVAL
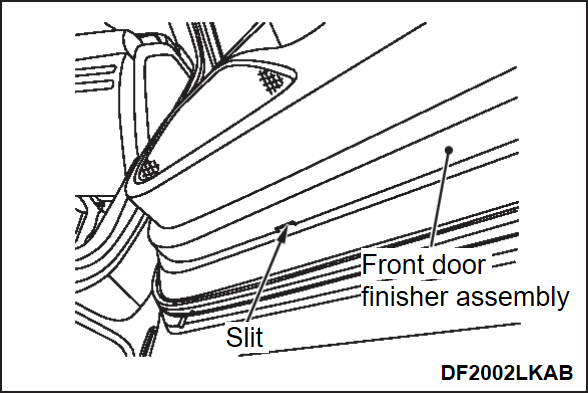
1. Insert special tool MB990784 in the slit of the front door finisher assembly, and lift the front door finisher assembly.
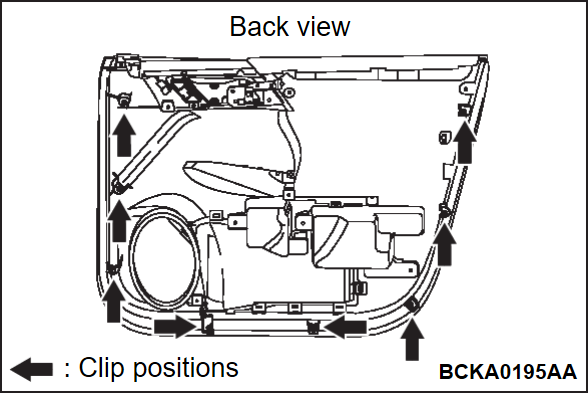
2. Remove the clips shown in the figure using special tool MB990784.
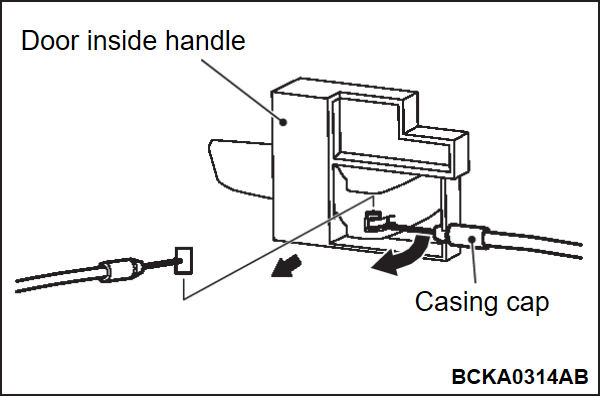
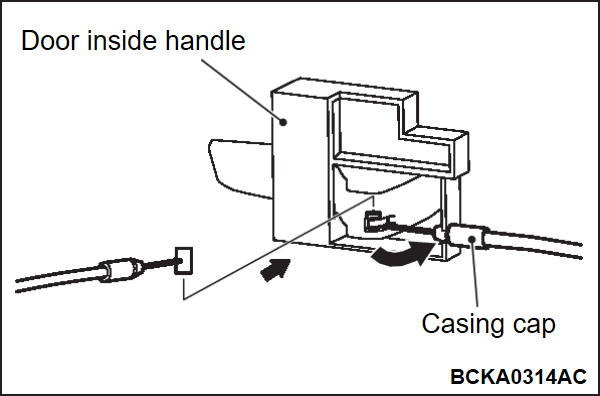
3. Disconnect the front door inside handle and the front door inside handle cable as shown in the figure.
<<B>> REAR DOOR FINISHER ASSEMBLY REMOVAL
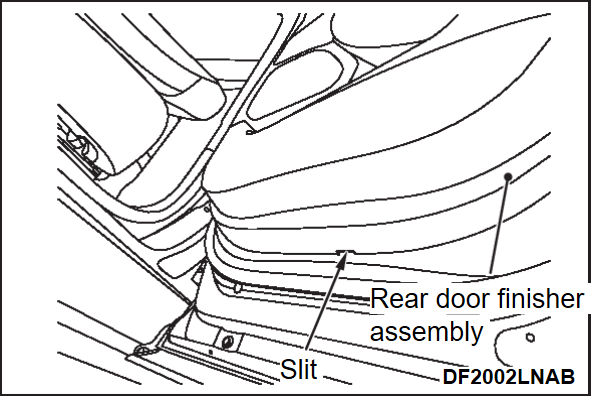
1. Insert special tool MB990784 in the slit of the rear door finisher assembly, and lift the rear door finisher assembly.
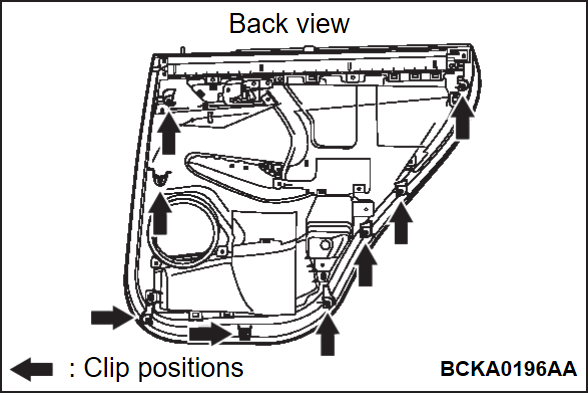
2. Remove the clips shown in the figure using special tool MB990784.
3. Disconnect the rear door inside handle and the rear door inside handle cable as shown in the figure.
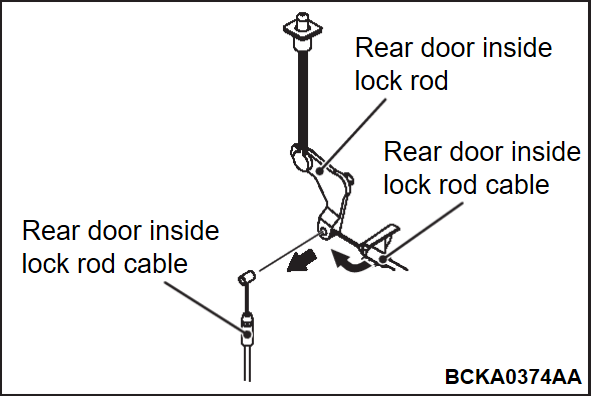
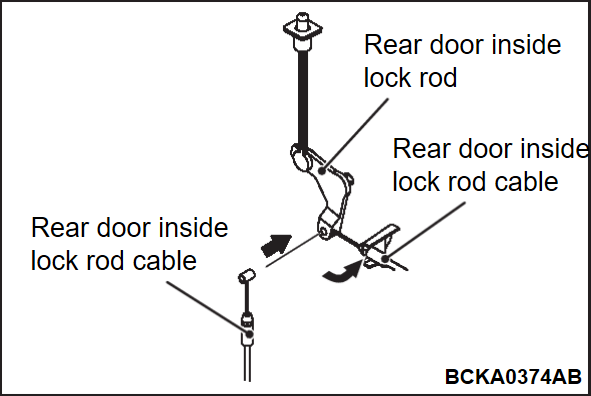
4. Disconnect the rear door inside lock rod and the rear door inside lock rod cable as shown in the figure.
INSTALLATION SERVICE POINTS
>>A<< FRONT DOOR FINISHER ASSEMBLY INSTALLATION
Connect the front door inside handle and the front door inside handle cable as shown in the figure.
![[Previous]](../../../buttons/fprev.png)
![[Next]](../../../buttons/fnext.png)
