[Previous][Next]
Removal and Installation
 
 
Pre-removal Operation
  • Rear Combination Light Assembly Removal (Refer to Rear Combination Light [Body Side] Removal and Installation)
  • Rear Fillet Molding (Rear Bumper Side) Removal (Refer to Removal and Installation)
  • Rear Wheel House Protector (Rear Bumper Side) Mount Clips Removal (Refer to REMOVAL AND INSTALLATION)
  • Rear End Wiring Harness and Rear Bumper Wiring Harness Combination Connector Disconnect
Post-installation Operation
  • Side Radar Alignment (Refer to Work Procedure)
  • Rear End Wiring Harness and Rear Bumper Wiring Harness Combination Connector Connect
  • Rear Wheel House Protector (Rear Bumper Side) Mount Clips Installation (Refer to REMOVAL AND INSTALLATION)
  • Rear Fillet Molding (Rear Bumper Side) Installation (Refer to Removal and Installation)
  • Rear Combination Light Assembly Installation (Refer to Rear Combination Light [Body Side] Removal and Installation)
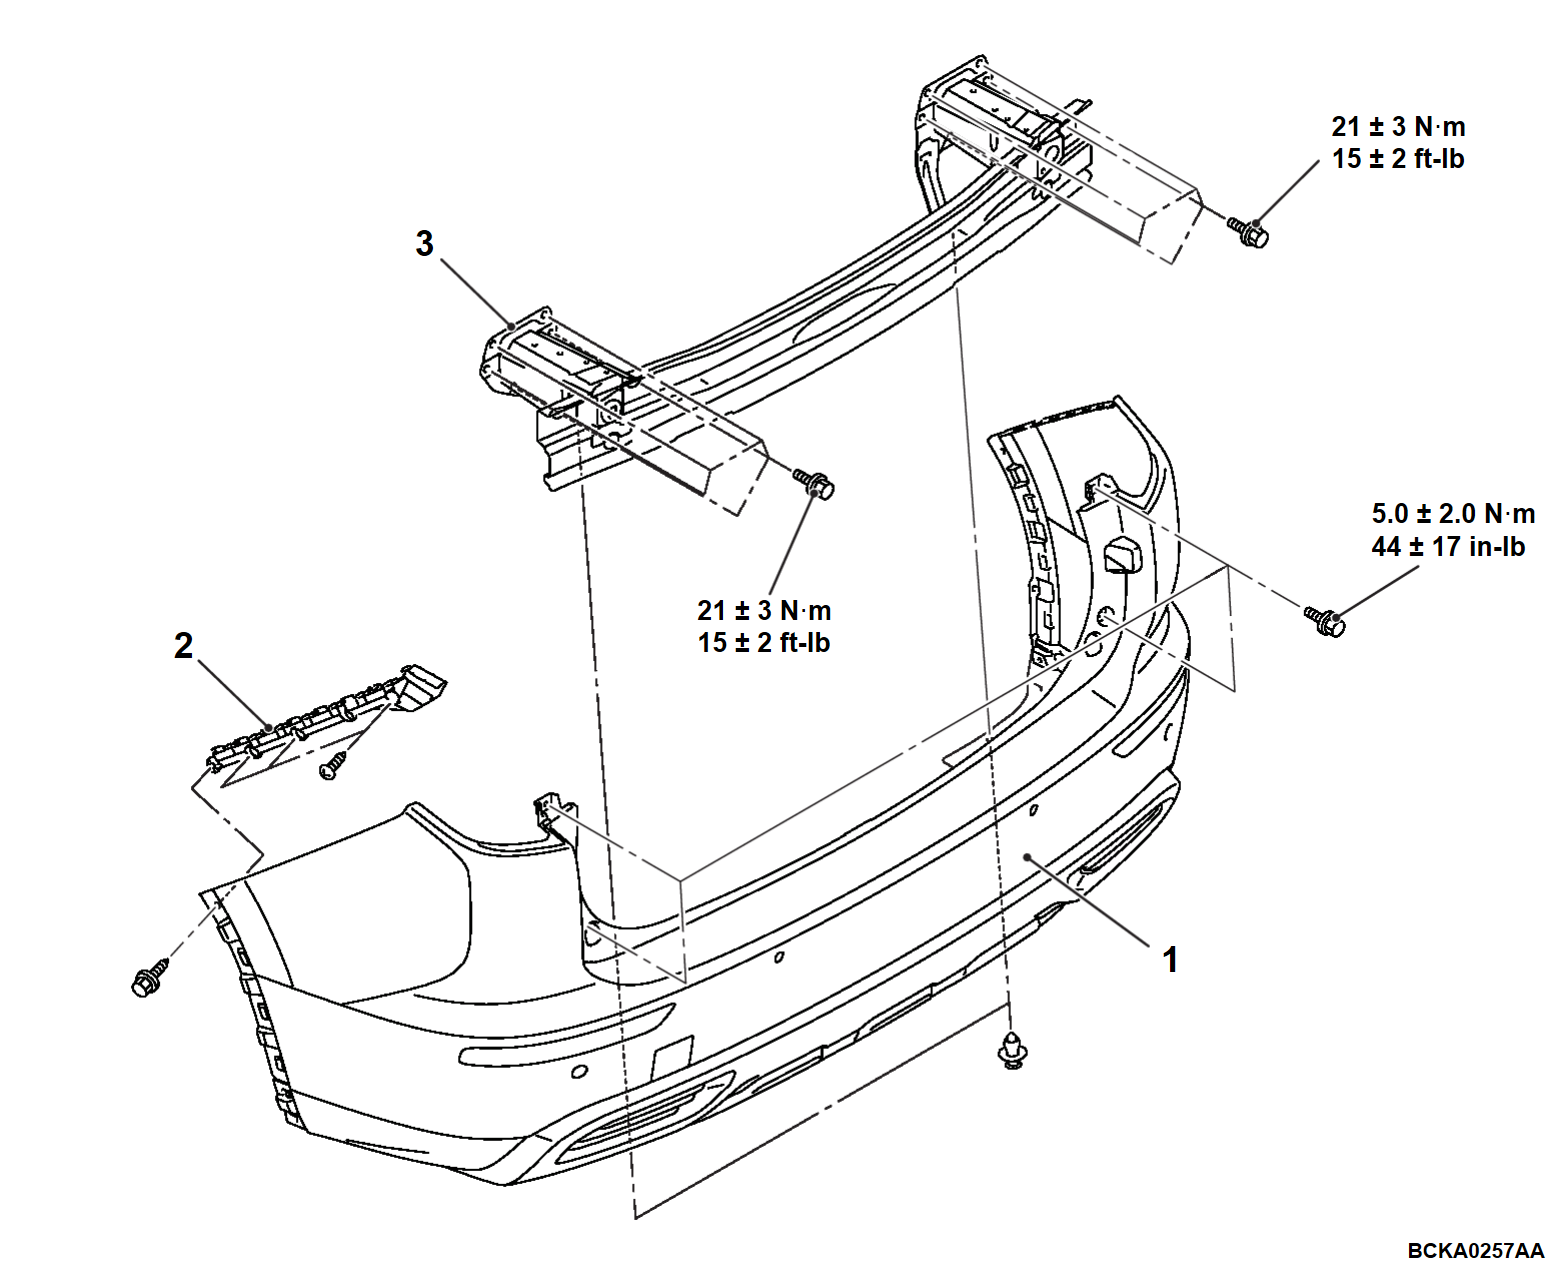
Removal steps
1.Rear bumper fascia assembly
2.Rear bumper side bracket
3.Rear bumper reinforcement
 
 
INSTALLATION SERVICE POINT
 
 
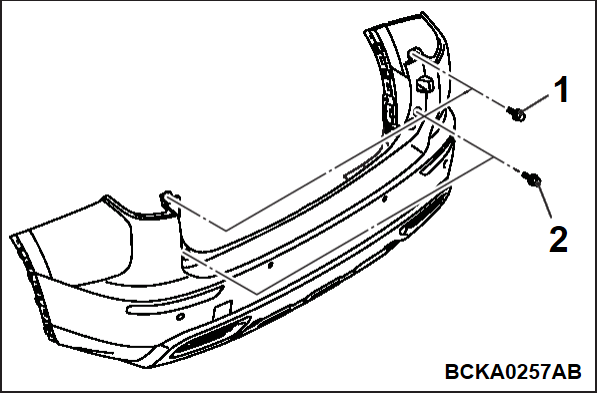
>>A<< REAR BUMPER FASCIA ASSEMBLY INSTALLATION
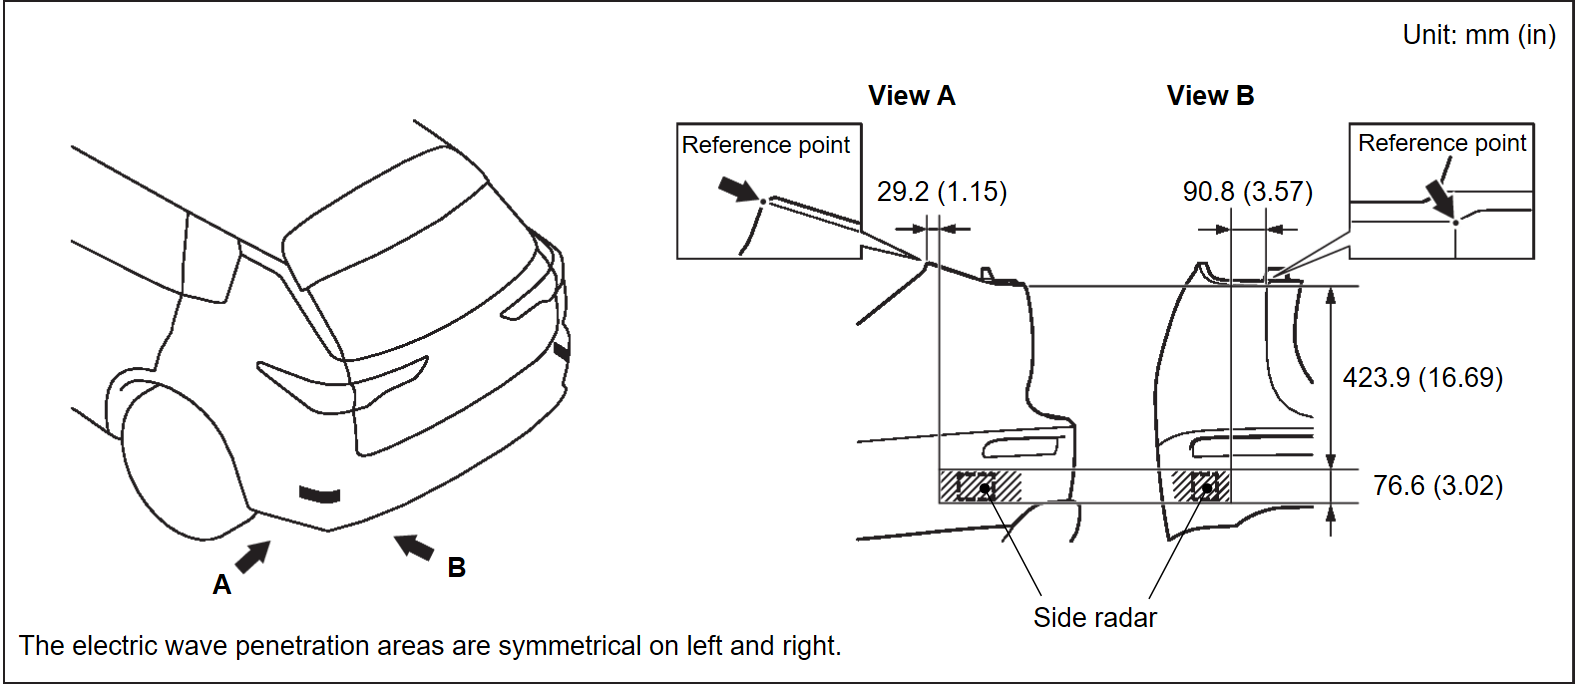
cautionAs for vehicles with Blind Spot Warning (BSW)/Rear Cross Traffic Alert (RCTA), pay attention to the following cautions.
  • Do not apply any sticker, paint or putty to the radar electric wave penetration area (shaded portion). However, only for Mitsubishi motors genuine colour, paint can be repaired.
  • Avoid any shocks or scratches.
Tightening the rear bumper bolts in the numerical order to 5.0 ± 2.0 N·m (44 ± 17 in-lb).