[Previous][Next]
Removal and Installation
 
 
caution
  • When you remove/install or replace the front bumper assembly and camera, you should check the camera image on the multi around monitor "Bird-eye view." If necessary, calibrate the monitor (Refer to Calibrating Camera Image [Multi-Around Monitor] Work Procedure).
  • To ensure the camera image is clearly visible, wipe the lens with a damped rag and then a dry rag to remove dust, rain drops or snow.
  • Be careful not to damage the camera. Any damage may have an adverse effect on the screen image.
Pre-removal Operation
  • Front Fillet Molding (Front Bumper Side) Removal (Refer to Removal and Installation)
  • Engine Room Under Cover Front A (Front Bumper Side) Removal (Refer to Removal and Installation)
  • Headlight Washer Tube Disconnection (Refer to Headlight Washer Removal and Installation) <Vehicles with Headlight Washer>
  • Front Wiring Harness and Front Bumper Wiring Harness Combination Connector Disconnection
  • Front Fender Protector (Front Bumper Side) Mount Clips Removal (Refer to REMOVAL AND INSTALLATION)
Post-installation Operation
  • Front Fender Protector (Front Bumper Side) Mount Clips Installation (Refer to REMOVAL AND INSTALLATION)
  • Front Wiring Harness and Front Bumper Wiring Harness Combination Connector Connection
  • Headlight Washer Tube Connection (Refer to Headlight Washer Removal and Installation) <Vehicles with Headlight Washer>
  • Washer Filling <Vehicles with Headlight Washer>
  • Engine Room Under Cover Front A (Front Bumper Side) Installation (Refer to Removal and Installation)
  • Front Fillet Molding (Front Bumper Side) Installation (Refer to Removal and Installation)
  • Front Fog Light Aiming Adjustment (Refer to FRONT FOG LIGHT AIMING ADJUSTMENT) <Vehicles with Front Fog Light>
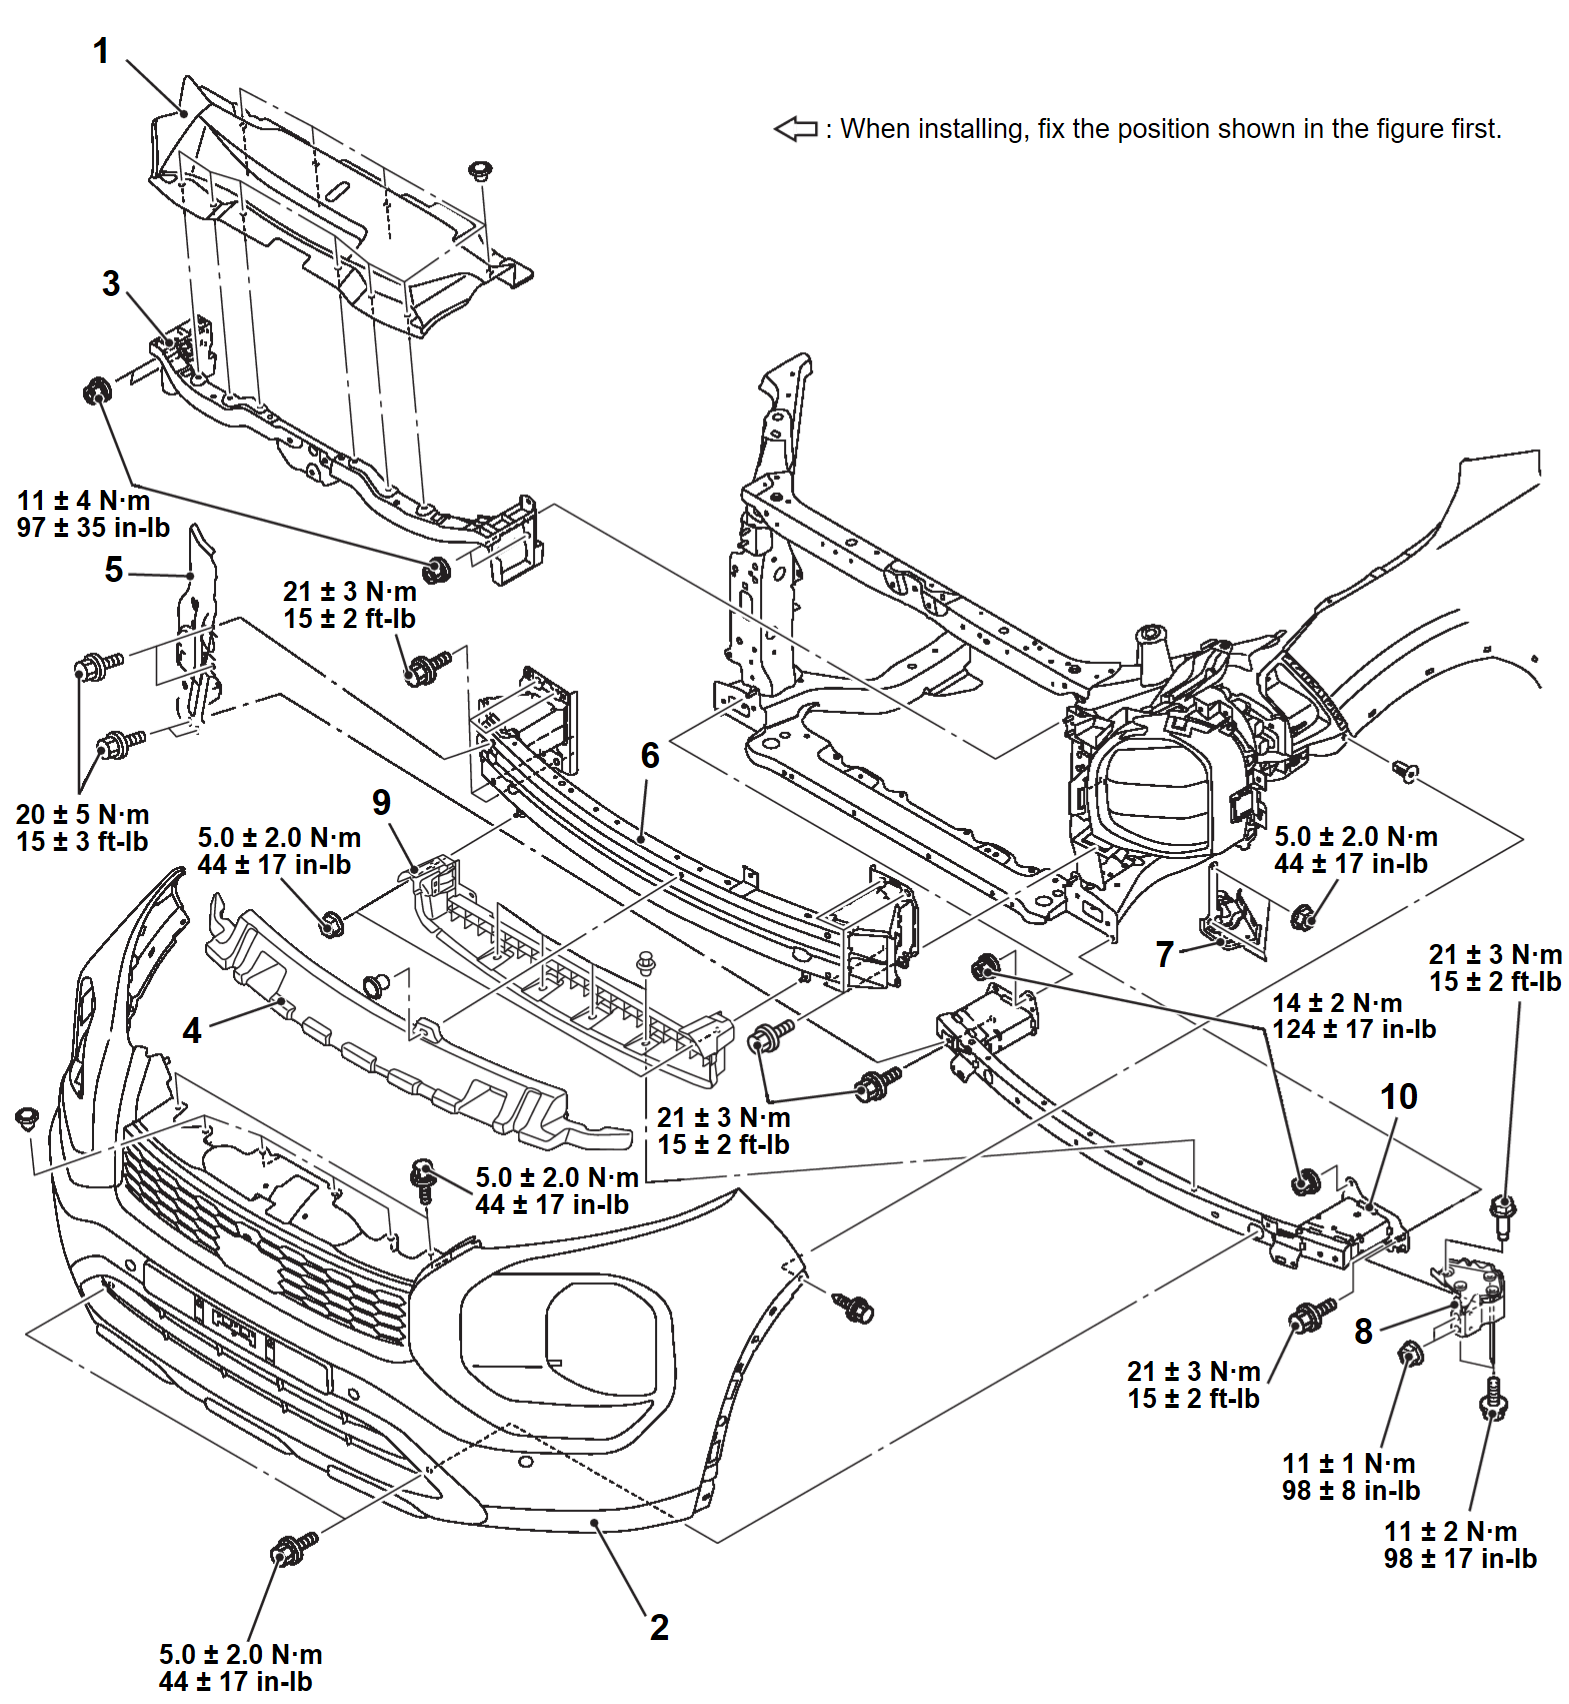
Removal steps
1.Front grille cover
2.Front bumper fascia assembly
3.Front bumper reinforcement center
4.Front bumper energy absorber
5.Front bumper side reinforcement
6.Front bumper reinforcement
7.Chassis wiring bracket
8.Electric oil pump bracket
Ambient sensor (Refer to Ambient Sensor Removal and Installation)
9.Air guide grille
AVAS speaker (LH) (Refer to AVAS Speaker [LH] Removal and Installation)
AVAS speaker (RH) (Refer to AVAS Speaker [RH] Removal and Installation)
10.Front bumper reinforcement lower
 
 
REMOVAL SERVICE POINT
 
 
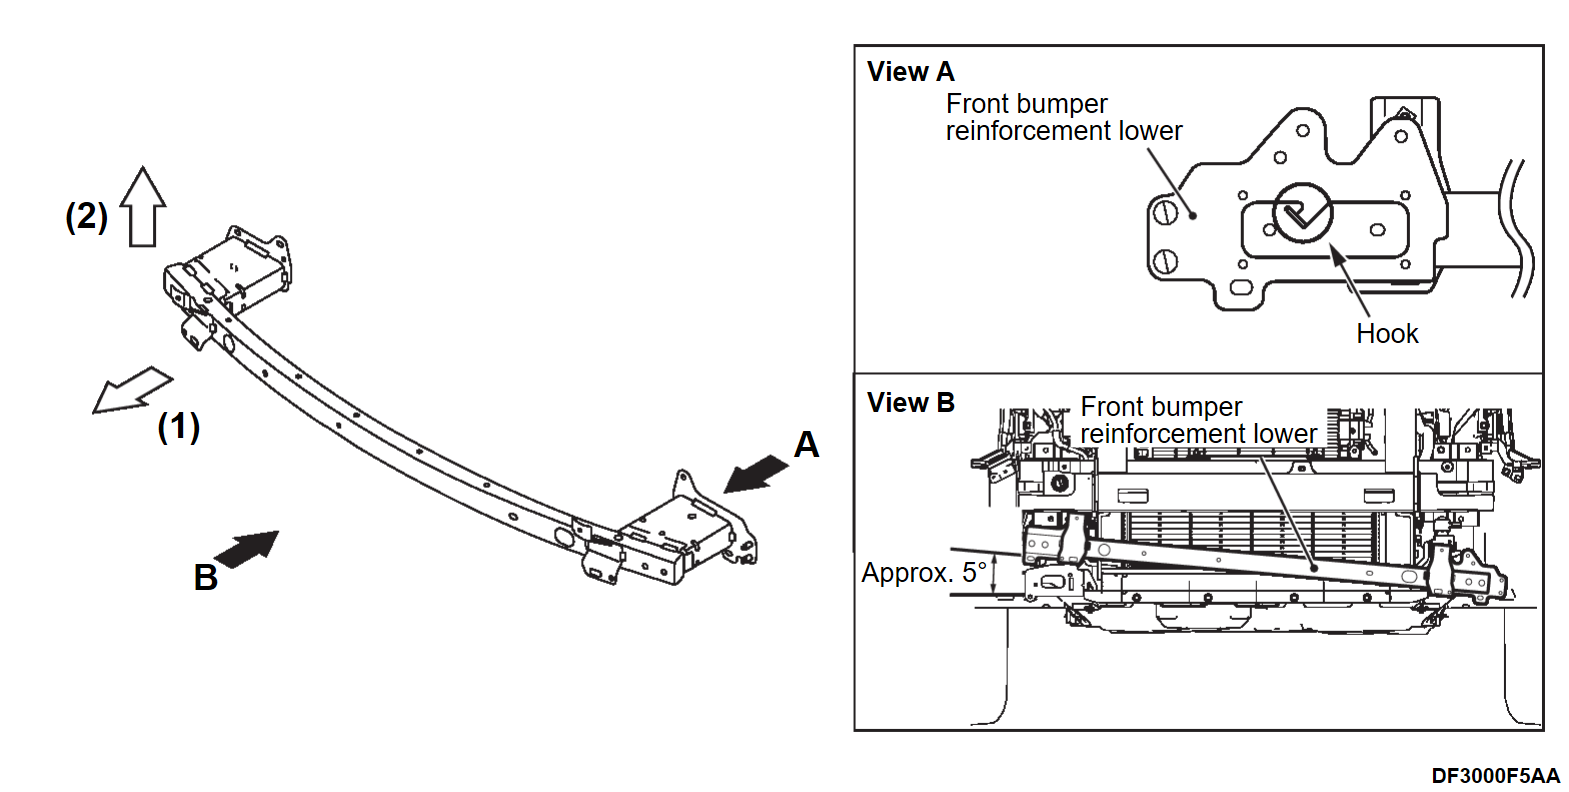
<<A>> FRONT BUMPER REINFORCEMENT LOWER REMOVAL
1. Remove all the front bumper reinforcement lower mounting bolts and nuts.
2. Disengage the hook (View A) located on the mounting surface of the front bumper reinforcement lower on the vehicle left side, by the following procedures.
(1) Pull the vehicle right side of the front bumper reinforcement lower to the direction of the arrow (1) shown in the illustration and remove it from the front suspension member stud bolt.
(2) Lift the vehicle right side of the front bumper reinforcement lower to the direction of the arrow (2) shown in the illustration.
3.
cautionBe careful not to damage the peripheral parts when removing the front bumper reinforcement lower.
Pull the front bumper reinforcement lower towards the vehicle front side and remove it.