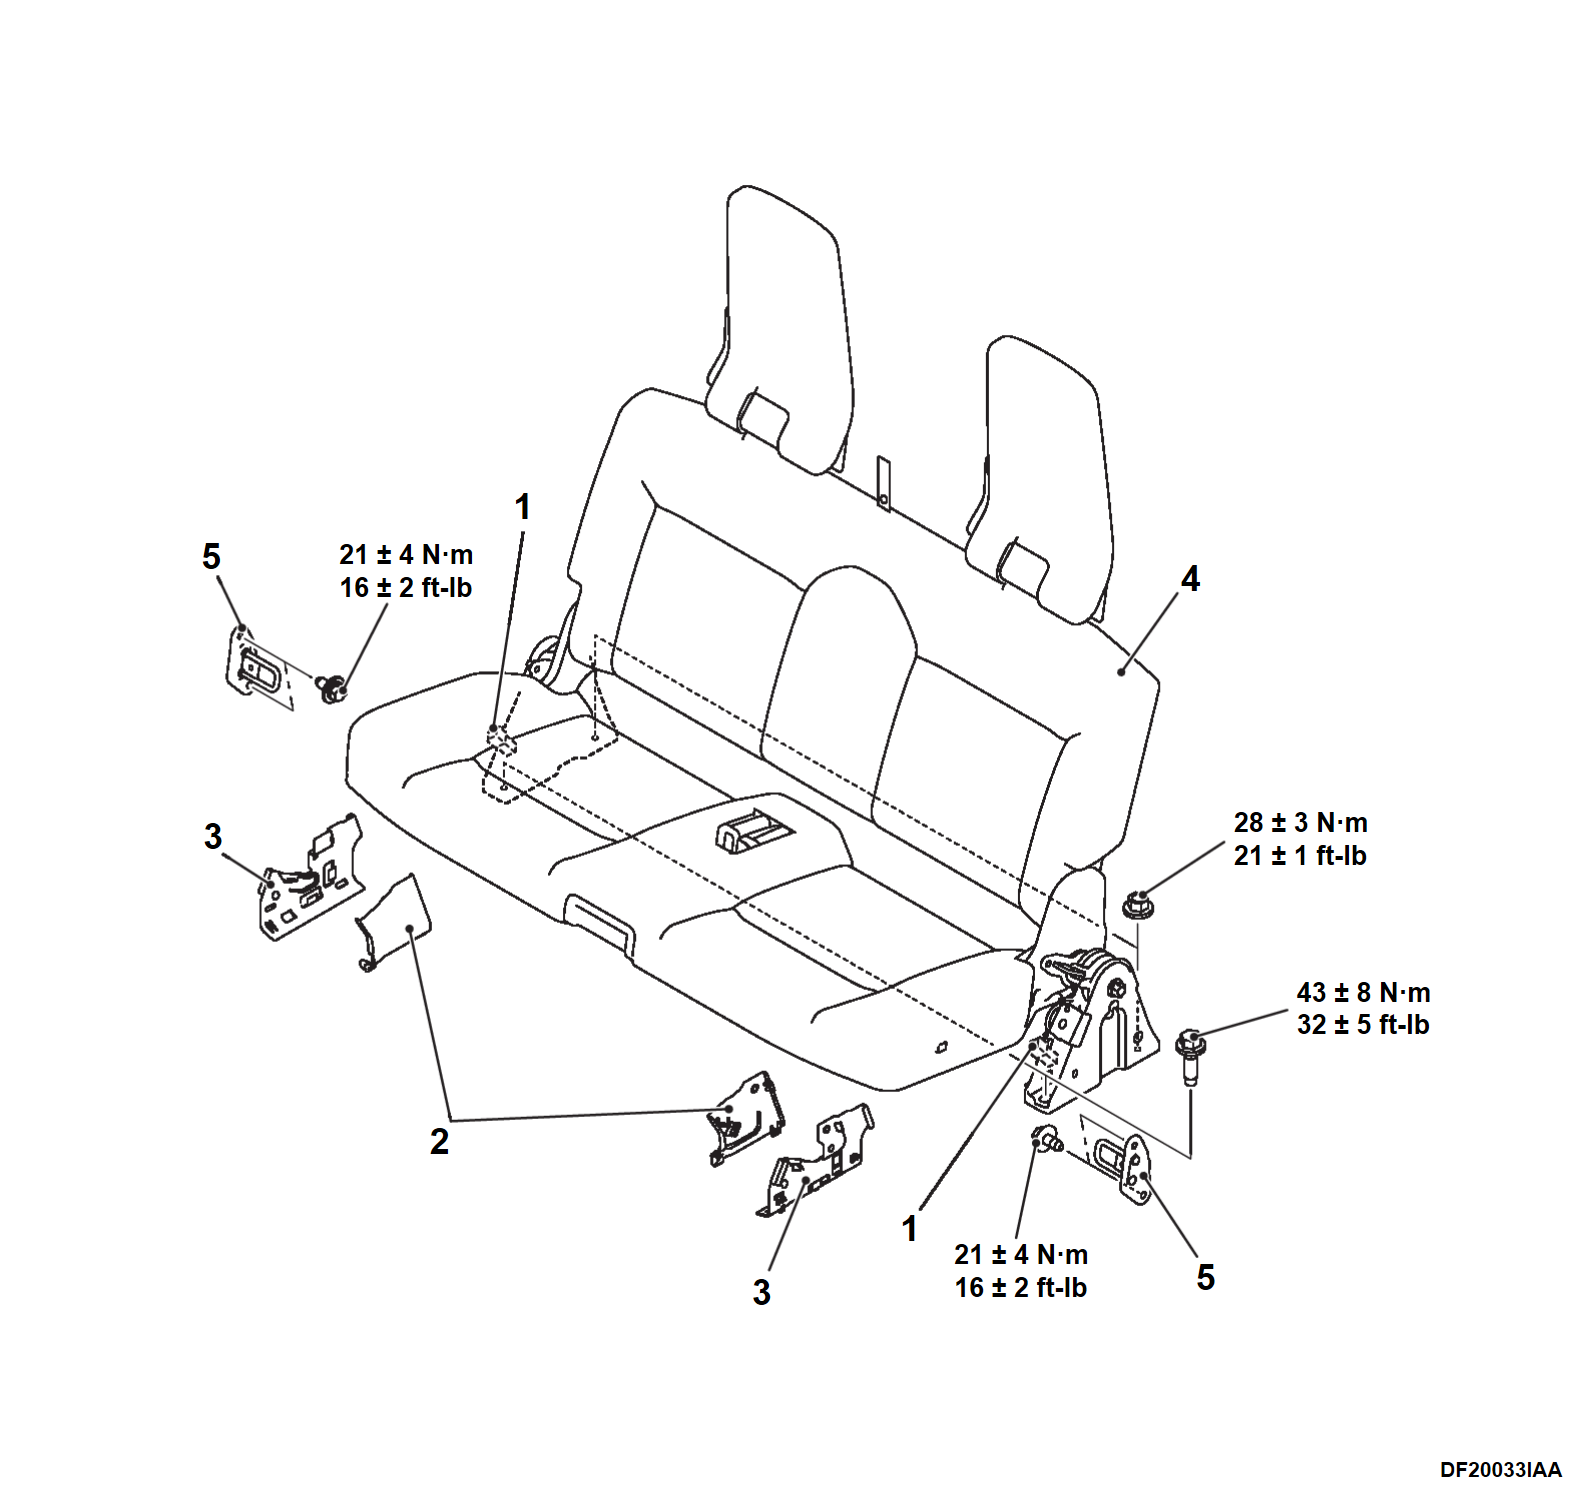
Removal and Installation
Pre-removal and Post-installation Operation
|
|
REMOVAL SERVICE POINTS
<<A>> THIRD SEAT ASSEMBLY/STRIKER REMOVAL
1. Remove the springs of the third seat assembly by the following procedures.
<When the felt is installed only on the right side>
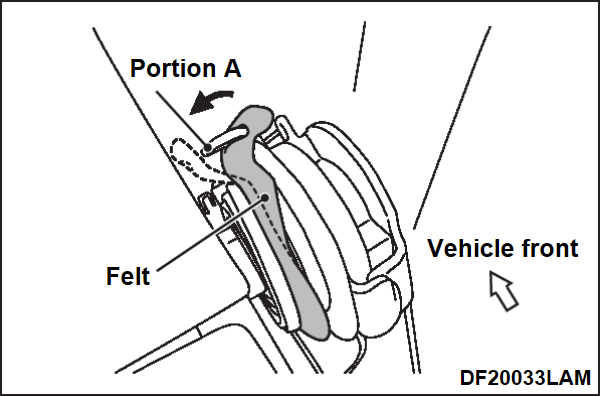
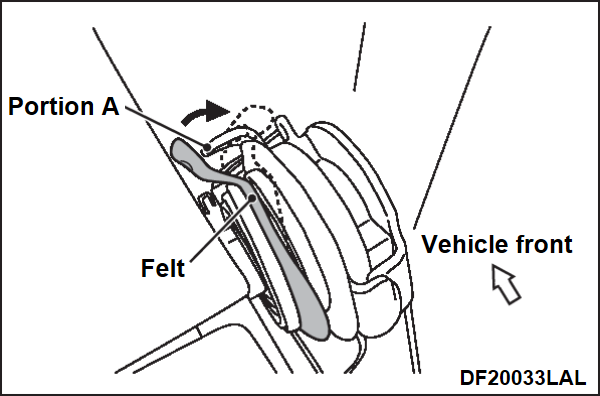
- Fold the seatback assembly forward, and pull out the slit of the felt from the portion A shown in the illustration. <Only right side>
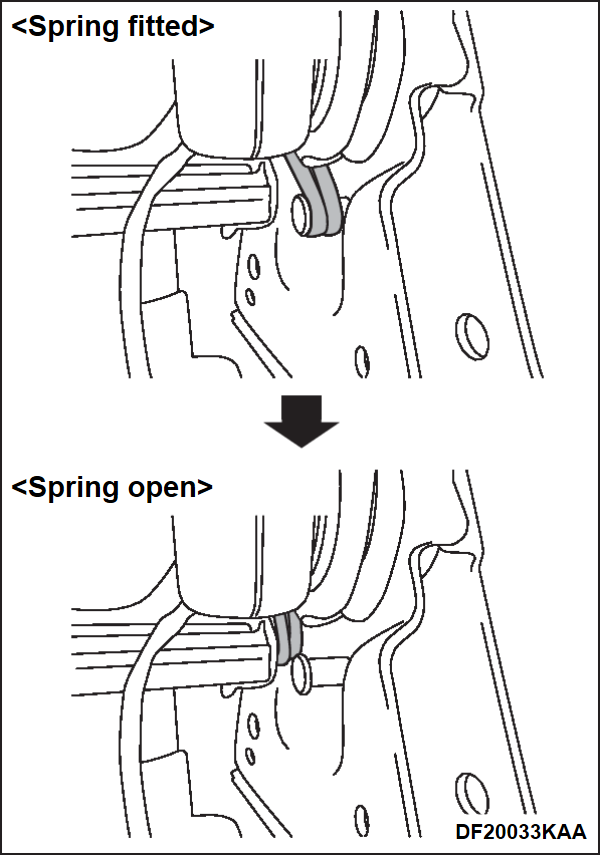
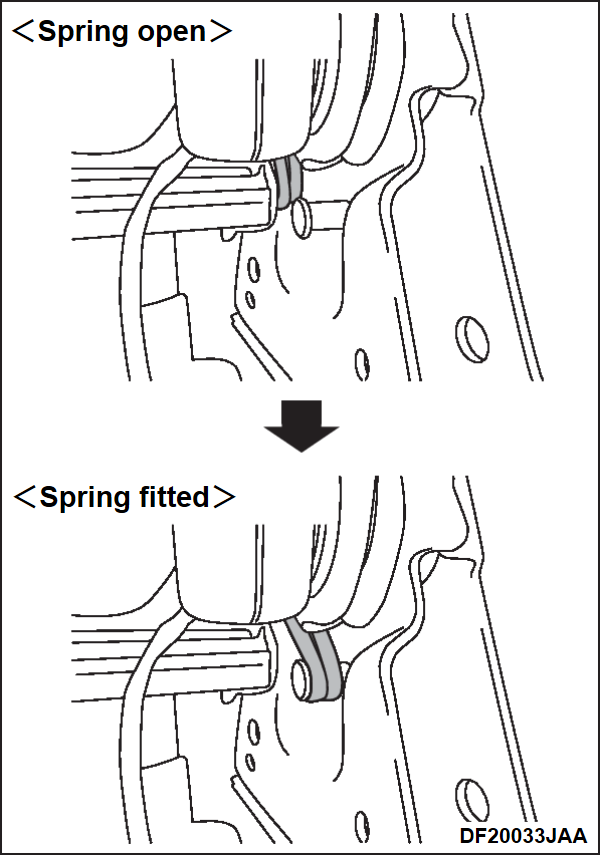
- With the third seat assembly folded forward, release the springs on the right side of the third seat assembly as shown in the illustration.
- Tip the third seat assembly backward, and release the springs on the left side of the third seat assembly in the same way as on the right side.
<When the felts are installed on the both side>
- Tip the third seat assembly backward, and pull out the slit of the left and right felts from the portion A shown in the illustration.
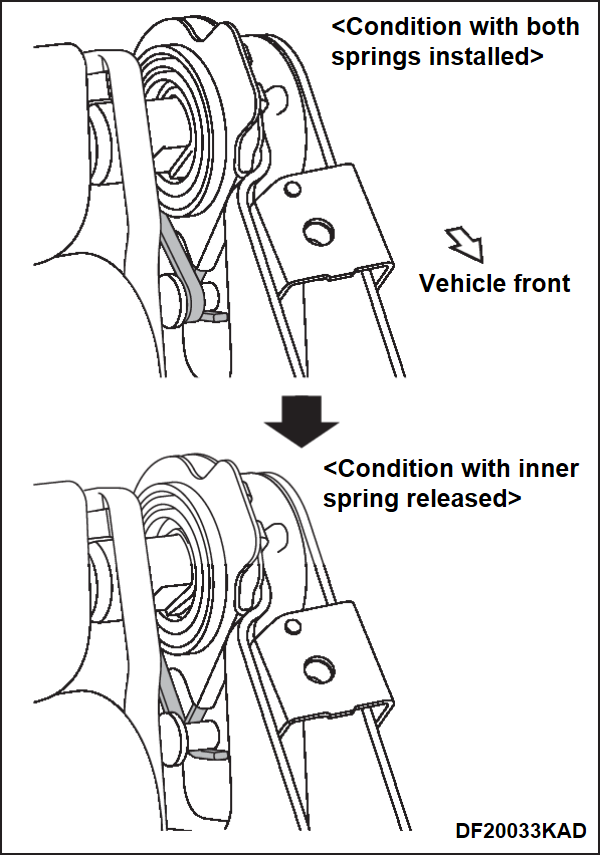
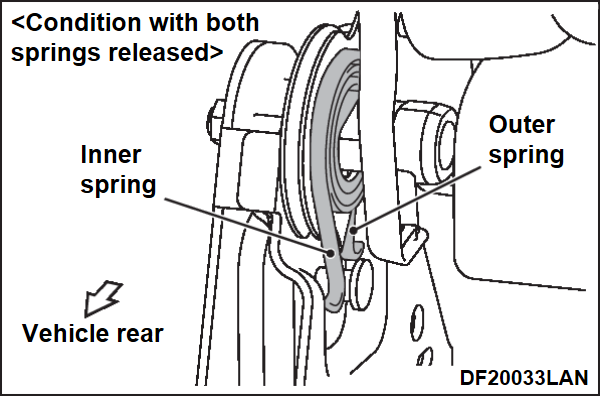
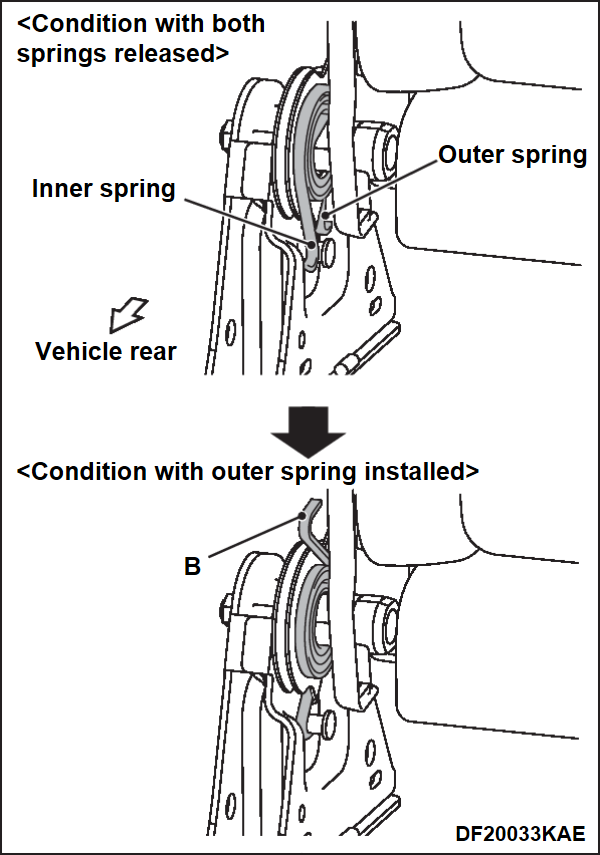
- While the third seat assembly is tipped backward, release the inner springs on the left and right side of the third seat assembly as shown in the illustration.
- Return the third seat assembly to its original position and fold the seatback assembly forward, then release the outer springs on the left and right side of the third seat assembly as shown in the illustration.
2. Remove the third seat assembly.
INSTALLATION SERVICE POINT
>>A<< STRIKER/THIRD SEAT ASSEMBLY INSTALLATION
1. Tighten the striker mounting bolt to the specified torque.
Tightening torque: 21 ± 4 N·m (16 ± 2 ft-lb)
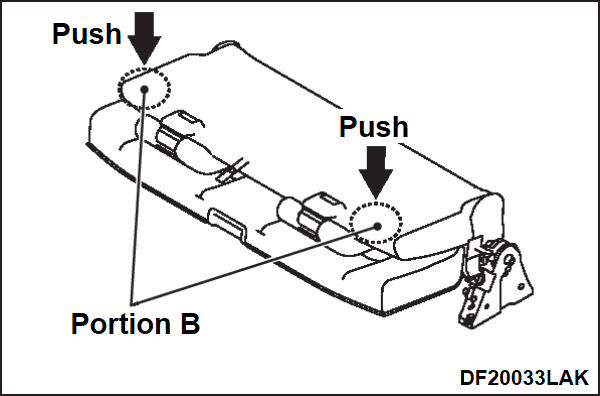
2. Push portions B at the same time and securely lock the third seat assembly to the striker.
3. Surely insert the hinge bracket of the third seat into the stud bolt of the body and tighten the nut to the specified torque.
Tightening torque: 28 ± 3 N·m (21 ± 1 ft-lb)
4. Tighten the front mounting bolt of the third seat hinge bracket to the specified torque.
Tightening torque: 43 ± 8 N·m (32 ± 5 ft-lb)
5. Installation the springs of the third seat assembly by the following procedures.
<When the felt is installed only on the right side>
- Tip the third seat assembly backward, and install the springs on the left side of the third seat assembly as shown in the illustration.
- Return the third seat assembly to its original position and fold the seatback assembly forward, and install the springs on the right side of the third seat assembly in the same way as on the left side.
- Hook the slit of the felt on the portion A as shown in the illustration. <Only right side>
<When the felts are installed on the both side>
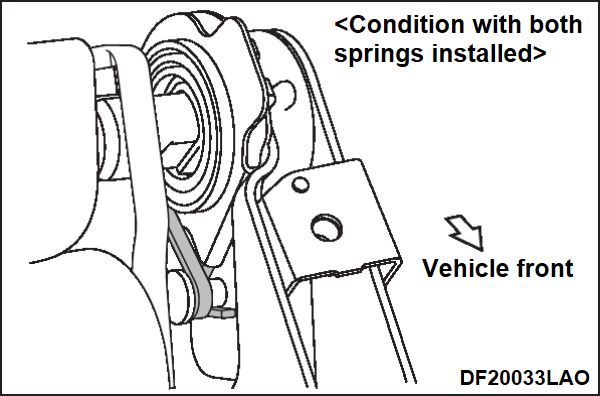
- Fold the seatback assembly forward, and install the outer springs on the left and right side of the third seat assembly as shown in the illustration.
Then, set the inner springs on the left and right side of the third seat assembly to the portion B shown in the illustration. - Tip the third seat assembly backward, and install the inner springs on the left side of the third seat assembly.
- Hook the slit of the left and right side felts on the portion A as shown in the illustration.
6. After installing the cargo floor box lid B and cargo floor cover, check the lock ability by the following steps. (Refer to Removal and Installation )
)
 )
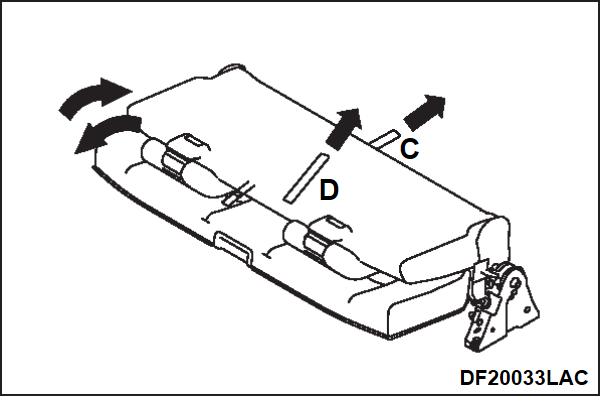
)(1) Check that the latch part of the third seat assembly is locked. If not, lock it.
(2) Check that the latch part can be unlocked with the strap C. Do not relock the latch part after releasing the strap C.
(3) Pull the strap D to raise the third seat assembly and release the strap at the 45° to 60° angle.
(4) Check that third seat assembly is securely locked by its own weight.
![[Previous]](../../../buttons/fprev.png)
![[Next]](../../../buttons/fnext.png)
