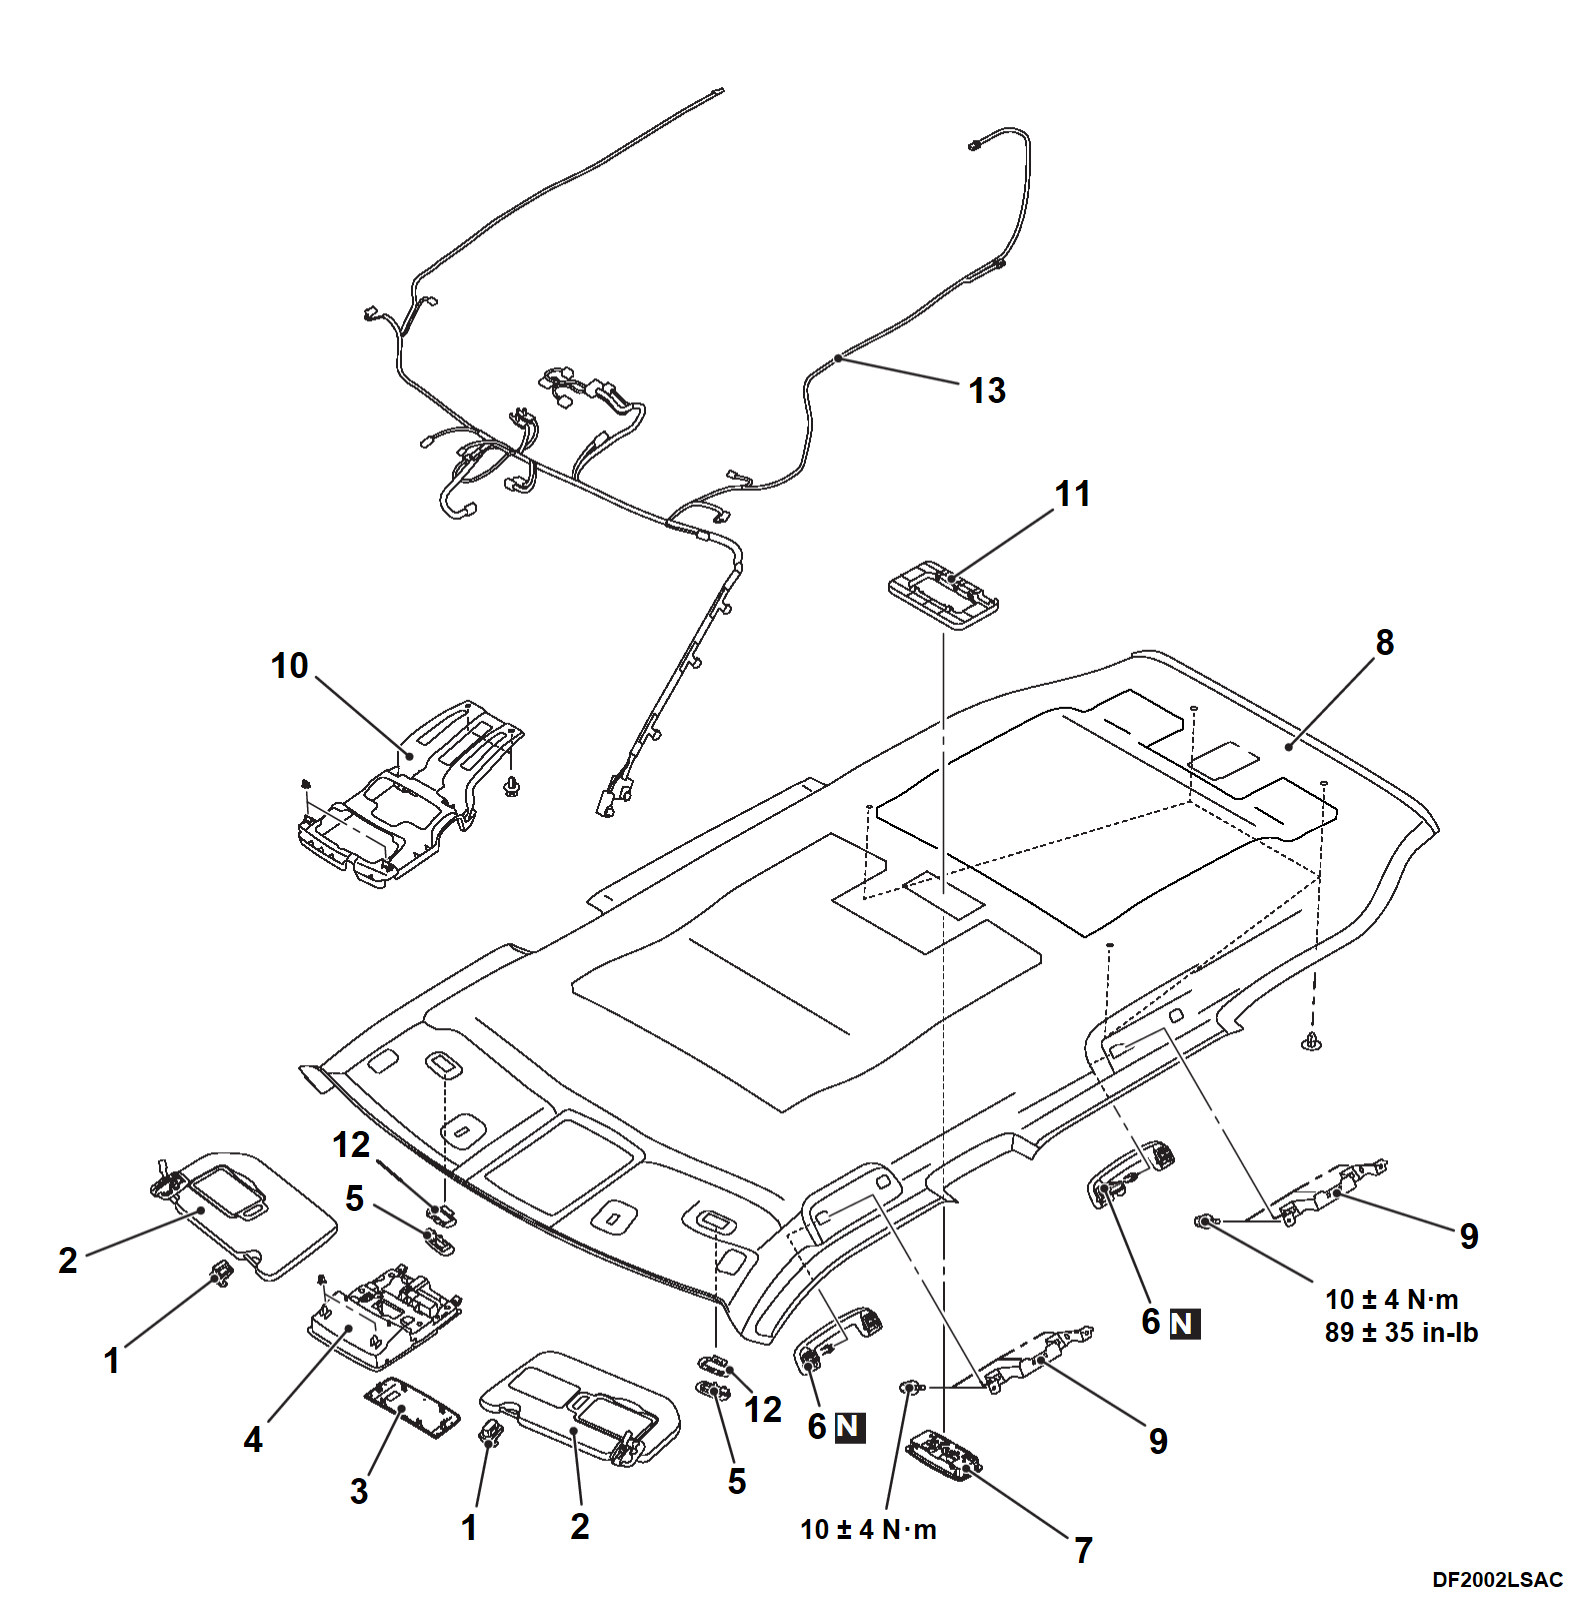
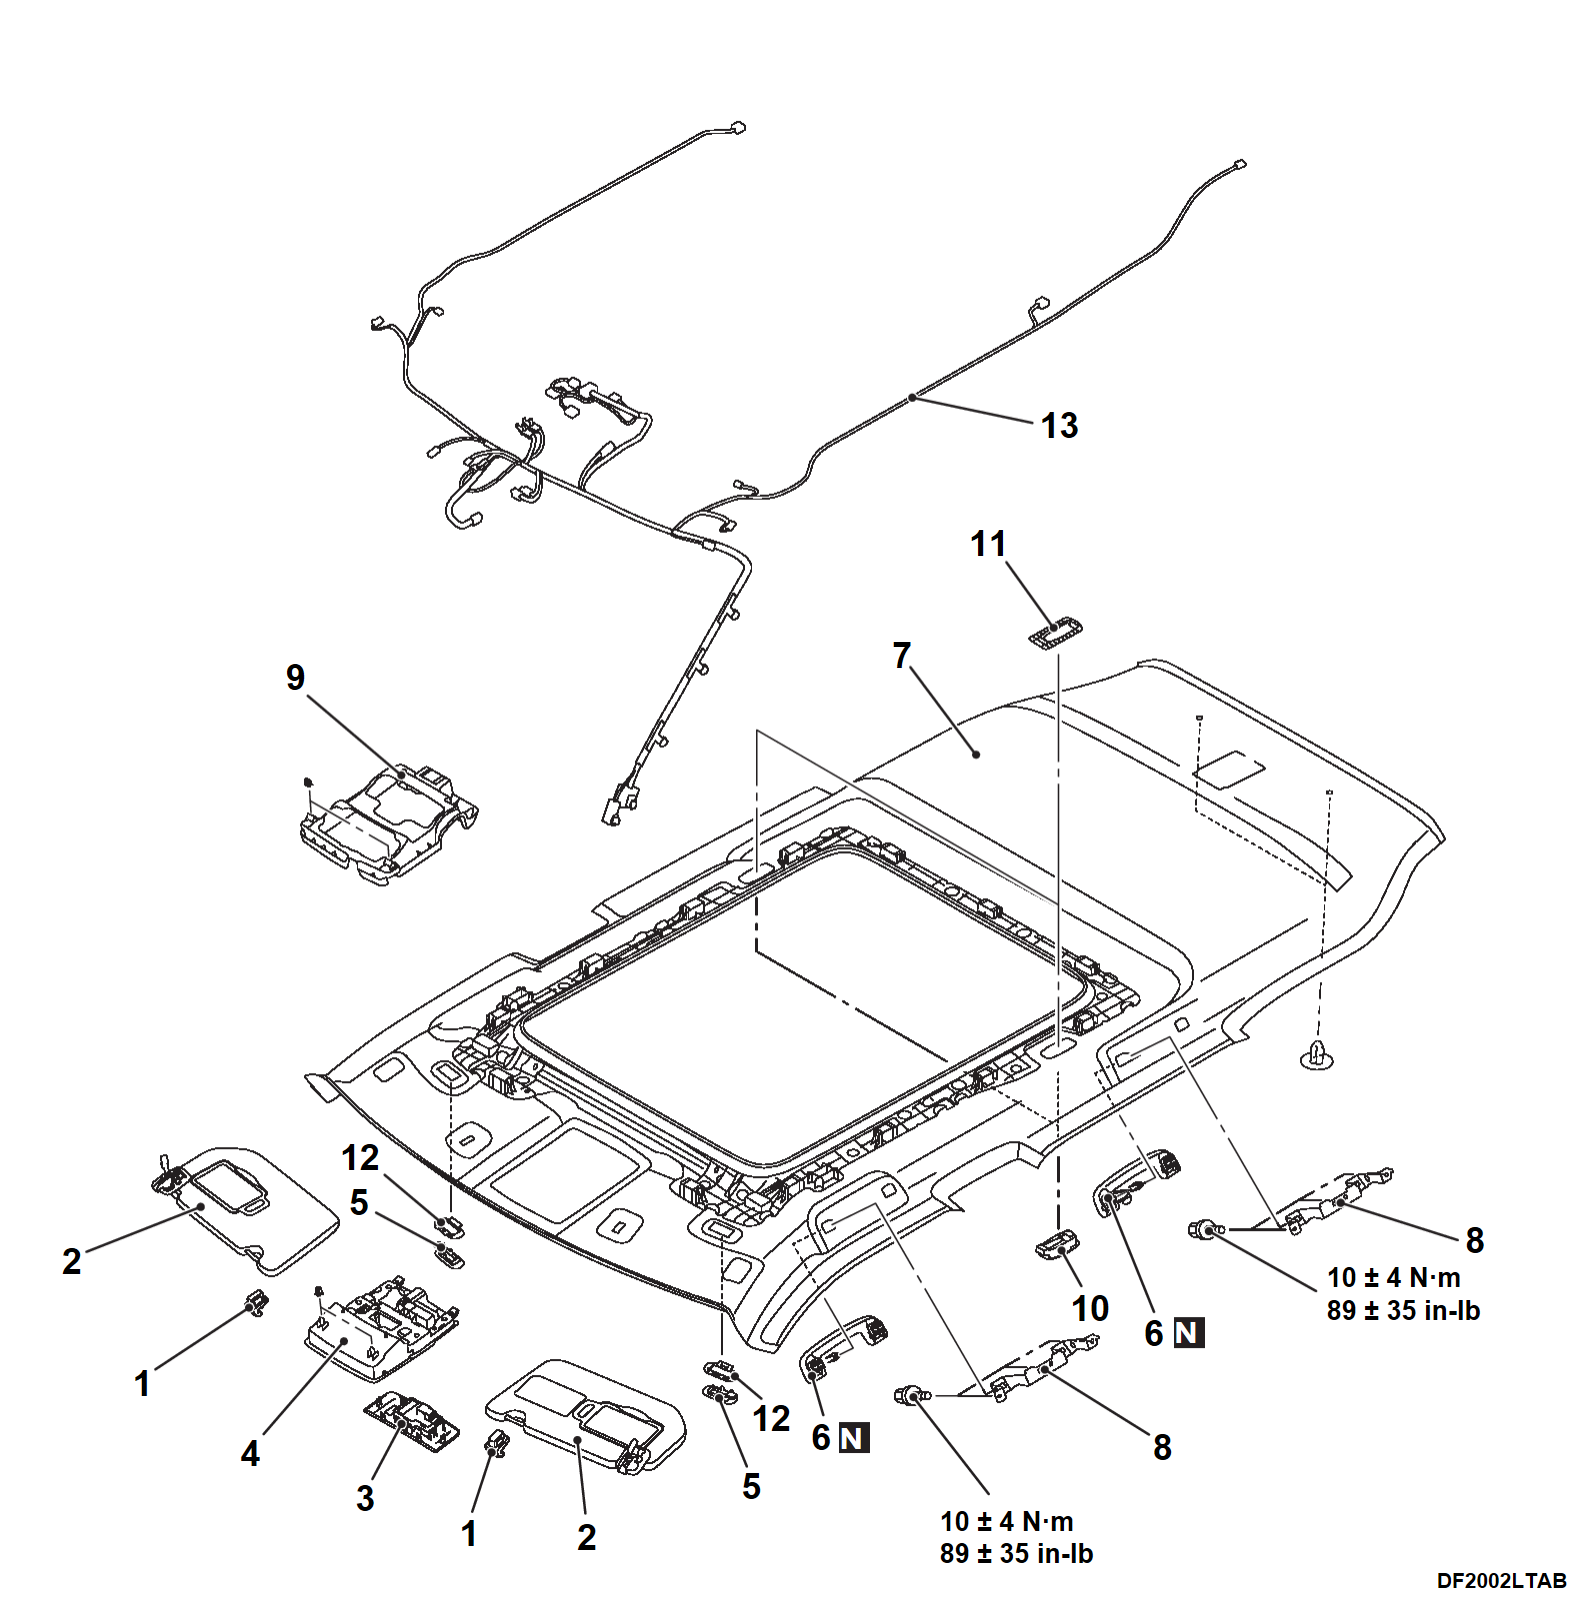
Removal and Installation
| caution | Before removing and installing the headlining, refer to SRS Airbag - Precaution (Precautions for Removing Battery Terminal , Precaution for Supplemental Restraint System (SRS) "AIR BAG" and "SEAT BELT PRE-TENSIONER" , Precaution for Supplemental Restraint System (SRS) "AIR BAG" and "SEAT BELT PRE-TENSIONER" ) and Curtain Air Bag Module (Removal and Installation ) and Curtain Air Bag Module (Removal and Installation ). ). |
Pre-removal and Post-installation Operation
|
<Vehicles with standard roof>
|
<Vehicles with sunroof>
|
Required Special Tool:
- MB990784: Ornament Remover
REMOVAL SERVICE POINTS
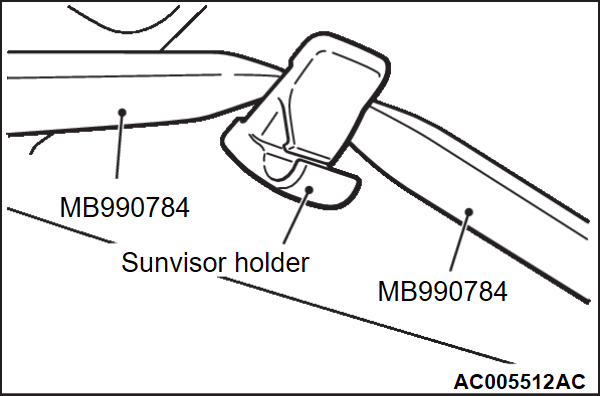
<<A>> SUNVISOR HOLDER REMOVAL
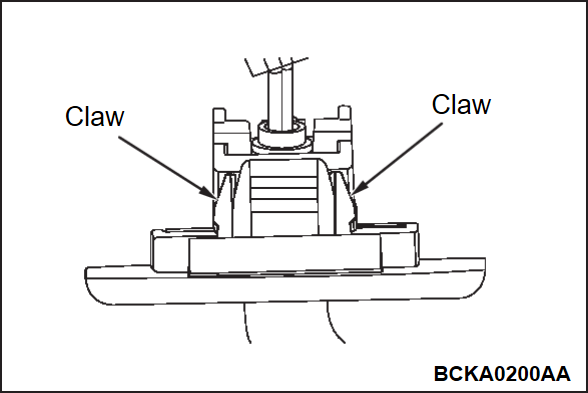
Insert special tools MB990784 into the sunvisor holder from its left and right sides to disengage the claws on the sunvisor holder sides.
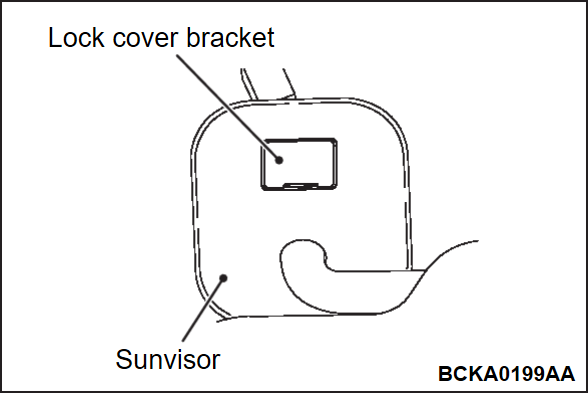
<<B>> SUNVISOR REMOVAL
1. Lift the lock cover bracket.
| caution | Be careful not to damage to the wiring harness of the vanity mirror light. |
2. Remove the sunvisor shown in the figure using a flat-tipped screwdriver.
3. Remove the claws shown in the figure using special tool MB990784.
<<C>> MAP LIGHT ASSEMBLY REMOVAL
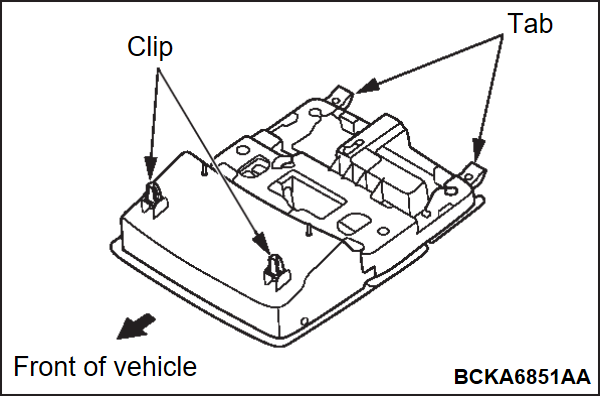
The map light assembly has clips on the front side and insertion type tabs on the rear side. Therefore, insert special tool MB990784 from the front side to remove the map light assembly.
<<D>> VANITY MIRROR LIGHT REMOVAL
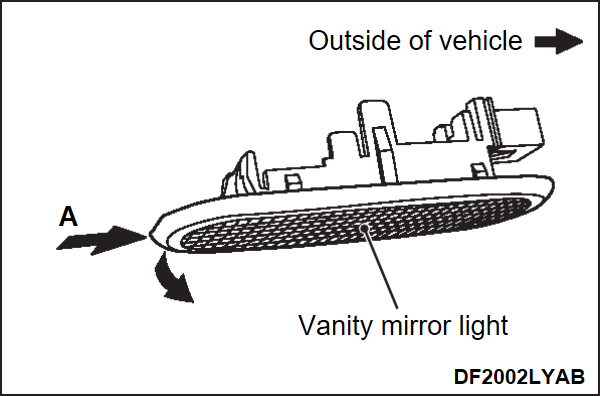
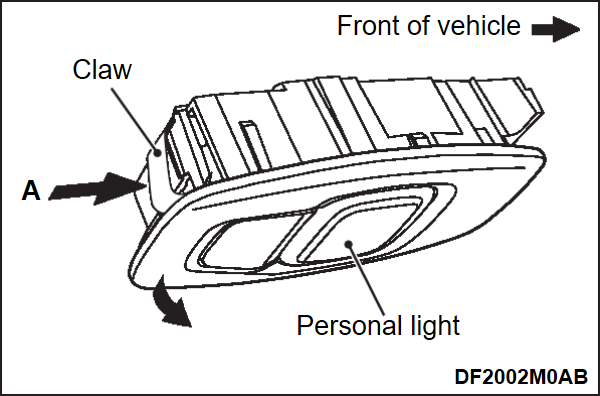
Remove the vanity mirror light by moving it toward the direction of the arrow (A) shown in the figure.
<<E>> ASSIST GRIP REMOVAL
1. Remove the assist grip.
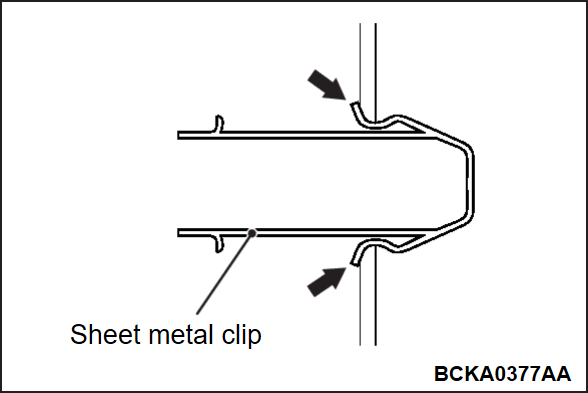
2. Grab the position shown in the figure of the sheet metal clip with pliers, and remove the clip.
<<F>> HEADLINING REMOVAL
1. Peel off dual lock fasteners between headlining assembly and roof panel.
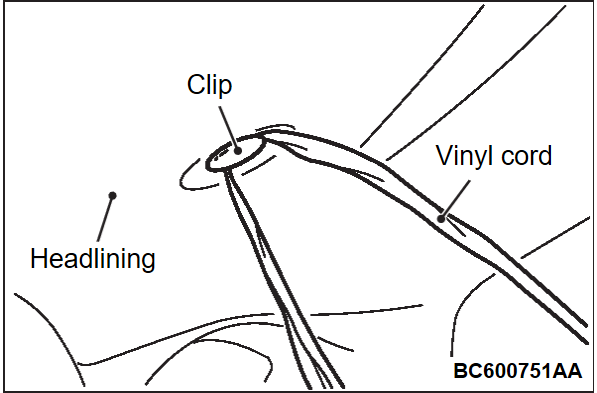
2. To remove the clip, insert a vinyl cord into a clearance between the clip and the headlining, and pass it around the clip. Then, pull out the clip downwards while pulling the vinyl cord.
3. Carry out the headlining assembly from the liftgate opening while deflecting the headlining.
INSTALLATION SERVICE POINTS
>>A<< ASSIST GRIP INSTALLATION
1. Attach the sheet metal clip to the assist grip.
2. Attach the assist grip to the mounting location.
![[Previous]](../../../buttons/fprev.png)
![[Next]](../../../buttons/fnext.png)
