U1D24-87 Communication error between HVAC2 and e-AC
| caution |
|
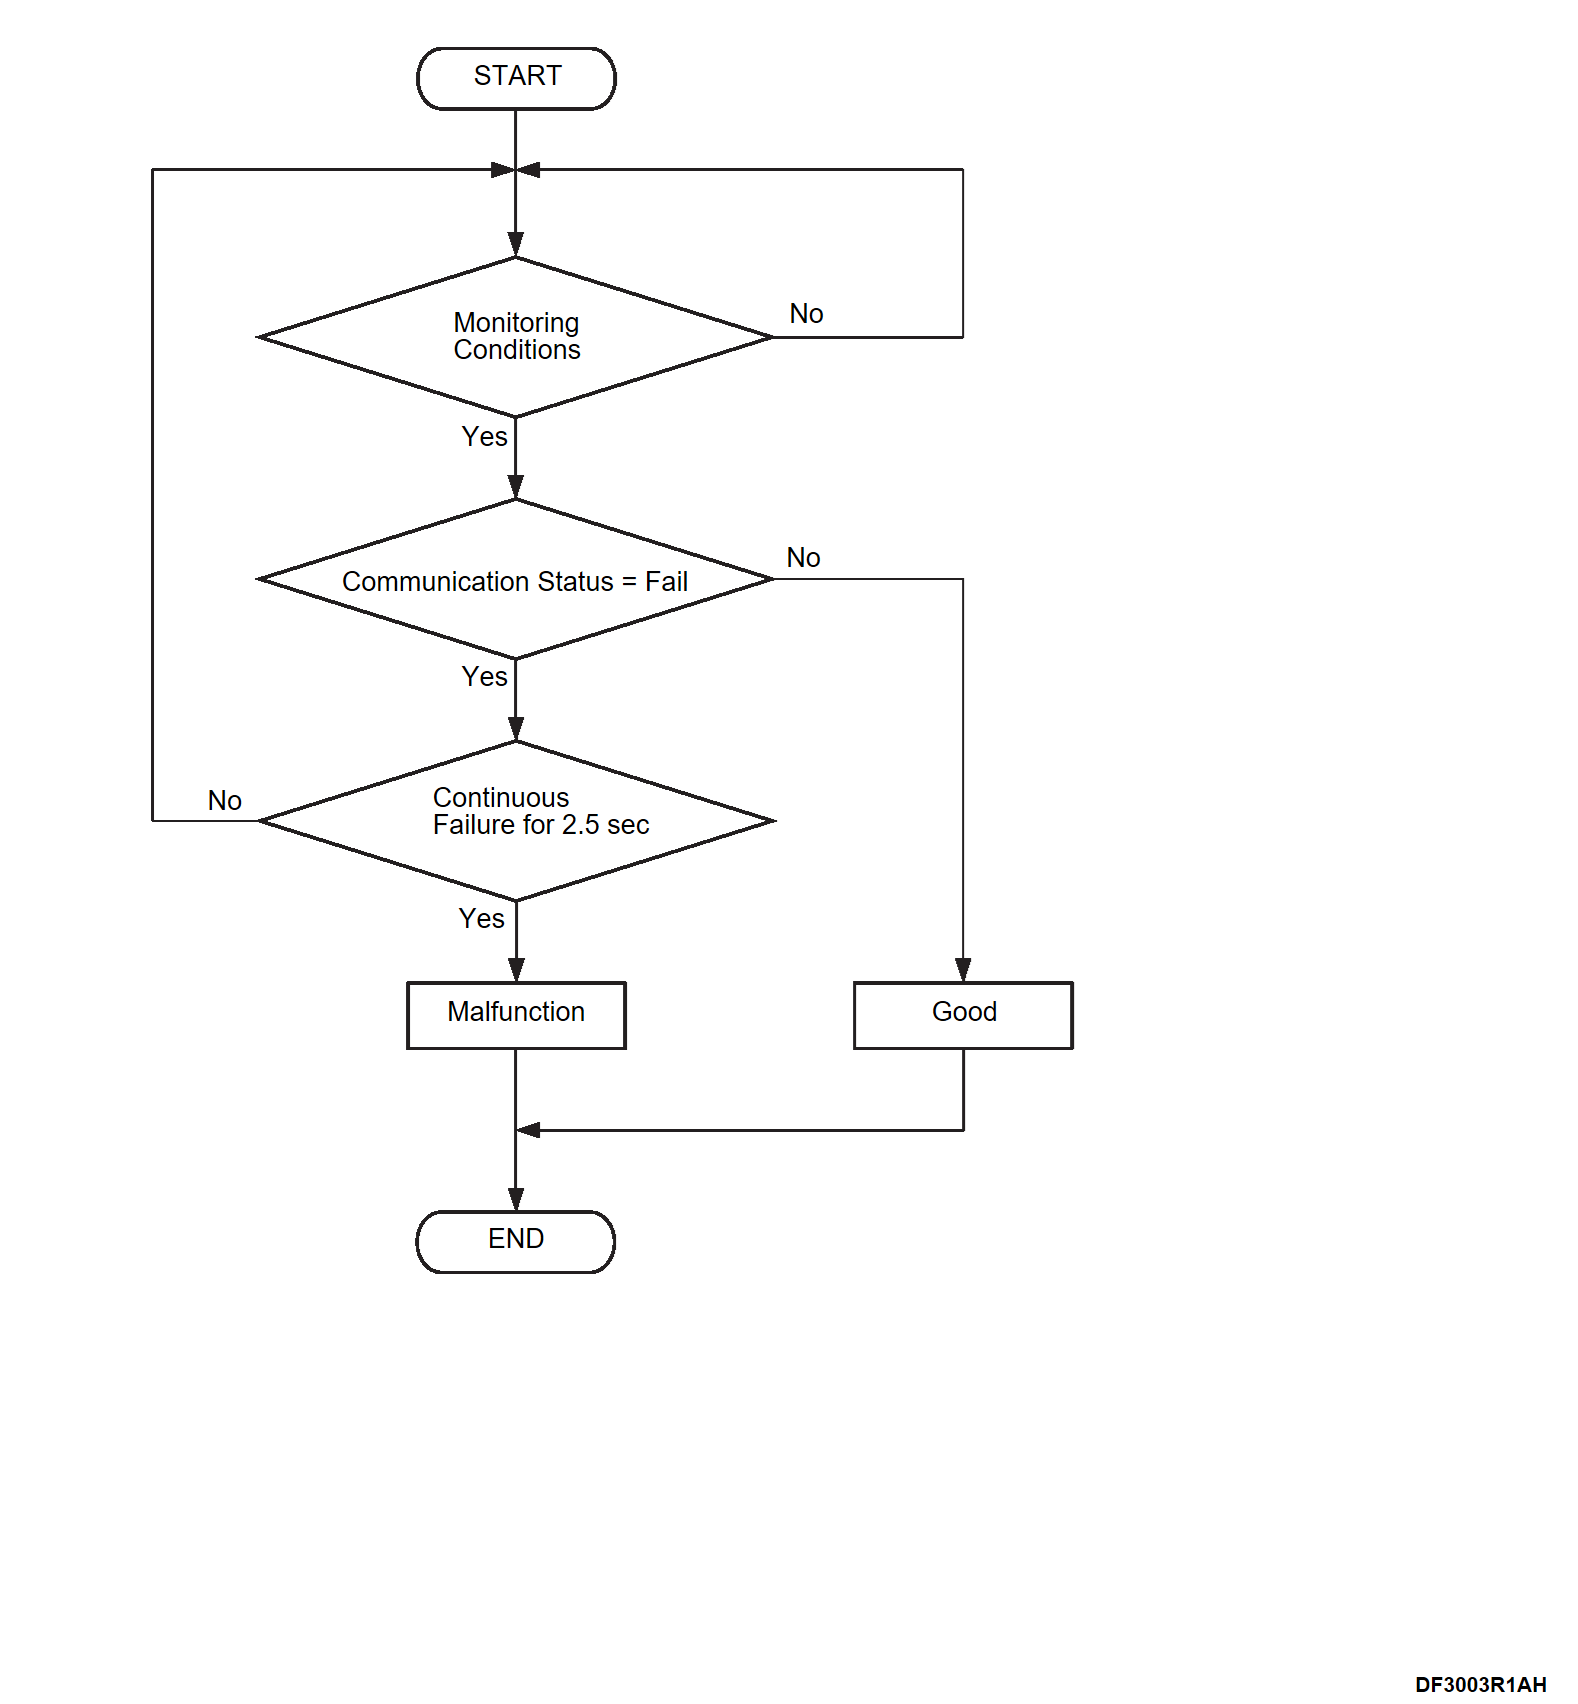
MONITOR EXECUTION
Continuous
MONITOR EXECUTION CONDITIONS (Other monitor and Sensor)
Other Monitor (There is no temporary DTC stored in memory for the item monitored below)
- Not applicable
Sensor (The sensor below is determined to be normal)
- Not applicable
TROUBLE JUDGMENT
Check Condition
- The heater PHEV A/C amp. power supply voltage is between 10 and 16 volts.
- Time after above conditions satisfy is 5 seconds or more
Judgment Criterion
- The LIN signal from the A/C compressor can not be received for 2.5 seconds or more.
OBD-II DRIVE CYCLE PATTERN
- Refer to OBD-II Drive Cycle – Pattern 4 OBD-II DRIVE CYCLE
 .
.
PROBABLE CAUSES
- Malfunction of LIN bus lines
- Malfunction of A/C compressor power supply circuit
- Malfunction of A/C compressor
- Malfunction of PHEV A/C amp.
DIAGNOSIS PROCEDURE
1.Voltage measurement at A/C compressor connector (F15 connector, terminal No.3)
(1) Disconnect the connector, and measure at the wiring harness side.
(2) Change the power supply mode of the electric motor switch to ON (READY indicator: ON).
(3) Measure the voltage between the A/C compressor connector (F15 connector, terminal No.3) and body ground.
OK : Battery power supply
Is the inspection result normal?
 Repair harness or connector.
2.Check of open circuit at A/C compressor connector (F15 connector, terminal No.3)
3.Check of open/short to ground circuit in LIN line between PHEV A/C amp. and A/C compressor
4.Check the LIN circuit voltage of the A/C compressor
(1) Disconnect the connector, and measure at the wiring harness side.
(2) Change the power supply mode of the electric motor switch to ON (READY indicator: ON).
(3) Measure the voltage between the PHEV A/C amp. connector (LIN terminal) and body ground.
OK : 1 V or less
Is the inspection result normal?
 Repair harness or connector.
5.Test the OBD-II drive cycle.
(1) Carry out a test drive with the drive cycle pattern. Refer to OBD-II Drive Cycle - Pattern 4 OBD-II DRIVE CYCLE .
.
 .
.(2) Check the DTC.
Is the DTC set?
 Replace PHEV A/C amp. Refer to Removal and Installation
 . then
 The trouble can be an intermittent malfunction. Refer to General Information - How to Use Troubleshooting/Inspection Service Points, How to Cope with Intermittent Malfunctions HOW TO COPE WITH INTERMITTENT MALFUNCTIONS
 .
.6.Test the OBD-II drive cycle.
(1) Carry out a test drive with the drive cycle pattern. Refer to OBD-II Drive Cycle - Pattern 4 OBD-II DRIVE CYCLE .
.
 .
.(2) Check the DTC.
Is the DTC set?
 Replace A/C compressor Refer to Removal and Installation
 .
. The trouble can be an intermittent malfunction. Refer to General Information - How to Use Troubleshooting/Inspection Service Points, How to Cope with Intermittent Malfunctions HOW TO COPE WITH INTERMITTENT MALFUNCTIONS
 .
.![[Previous]](../../../buttons/fprev.png)
![[Next]](../../../buttons/fnext.png)
