Removal and Installation
| caution | Never damage the roof panel. |
REMOVAL
With Sunroof Models
1. Remove front pillar garnish (LH and RH). Refer to Removal and Installation .
.
 .
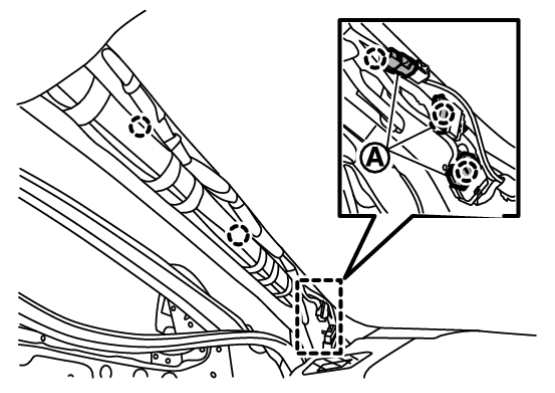
.2. Remove following parts of front pillar LH.
(1) Disconnect harness connectors  .
.
 .
.3. Remove center pillar upper garnish (LH and RH). Refer to Removal and Installation .
.
 .
.4. Remove luggage side upper finisher (LH and RH). Refer to Removal and Installation .
.
 .
.5. Remove map light assembly. Refer to Removal and Installation .
.
 .
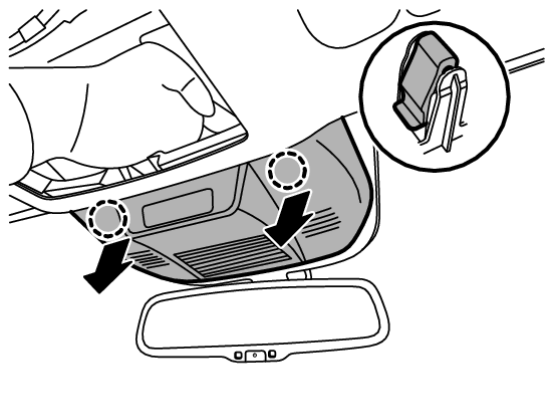
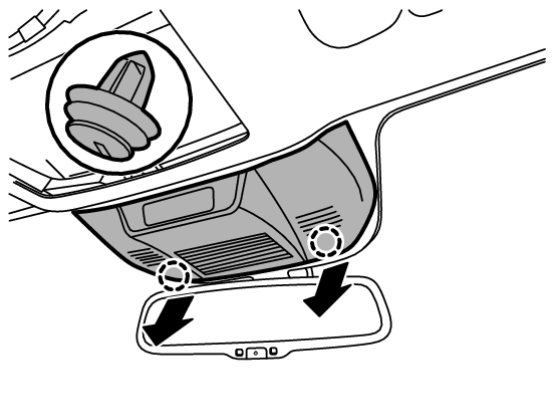
.6. Remove front camera unit cover.
(1) Disengage front camera unit cover fixing clips of rear end position indicated by arrows as shown in the figure.
 | : Clip |
(2) Disengage front camera unit cover fixing clips of front end position indicated by arrows as shown in the figure.
 | : Clip |
(3) Disconnect harness connector, and then remove front camera unit cover.
7. Disconnect following harness connectors.
- Auto anti-dazzling inside mirror (if equipped)
- Front camera unit
- Sunroof motor
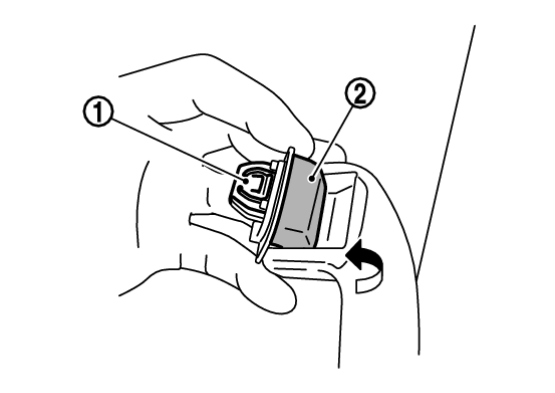
8. Remove all assist grips.
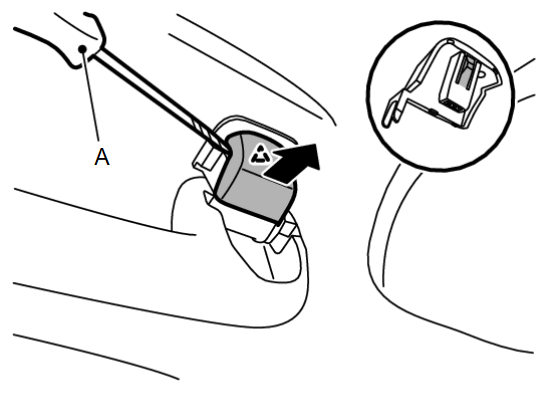
(1) Disengage assist grip cap fixing pawl using a remover tool (A), and then remove assist grip cap.
 | : Pawl |
(2) Remove fixing metal clips from body panel.
9. Remove sun visor assembly (LH and RH).
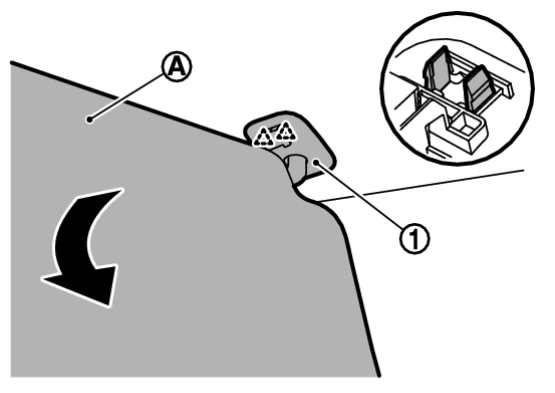
(1) Disengage bracket locker fixing pawls using a remover tool (A).
 | : Pawl |
| caution | Because the bracket locker has a stopper, never pull out the bracket locker from  position. position. |
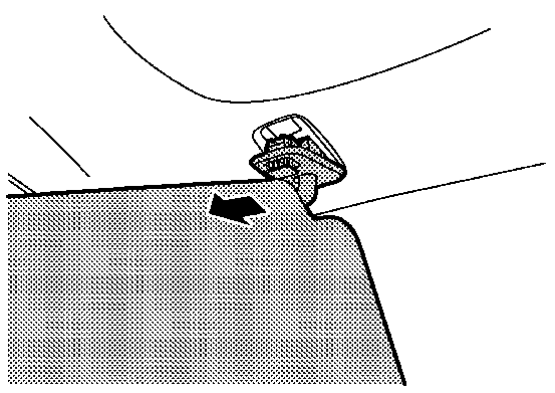
(2) Rotate the sun visor body  to the direction of the arrow as shown in the figure, and then remove sun visor bracket
  fixing pawls.
 to the direction of the arrow as shown in the figure, and then remove sun visor bracket
  fixing pawls.
 | : Pawl |
(4) Disconnect harness connector, and then remove sun visor assembly.
10. Insert the special tools MB990784 into the sunvisor holder from its left and right sides to disengage the claws on the sunvisor holder sides.
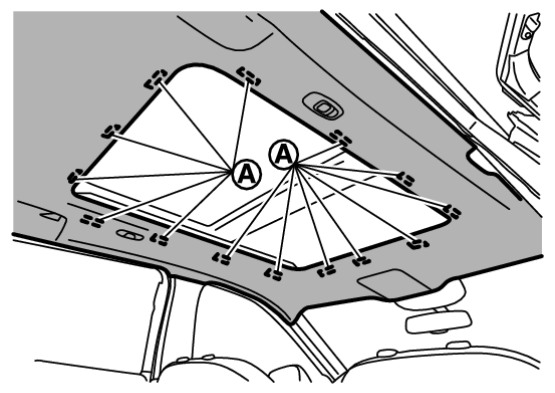
11. Peel off dual lock fasteners  between headlining assembly and roof panel.
 between headlining assembly and roof panel.
| caution |
|
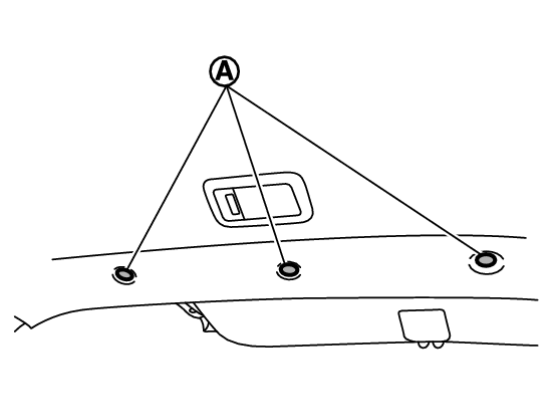
12. Remove headlining assembly fixing clips  .
.
 .
.| caution |
|
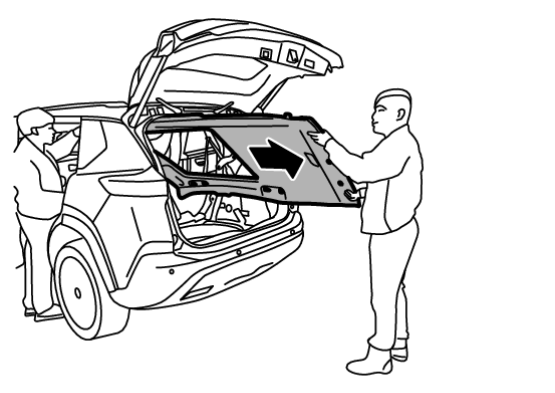
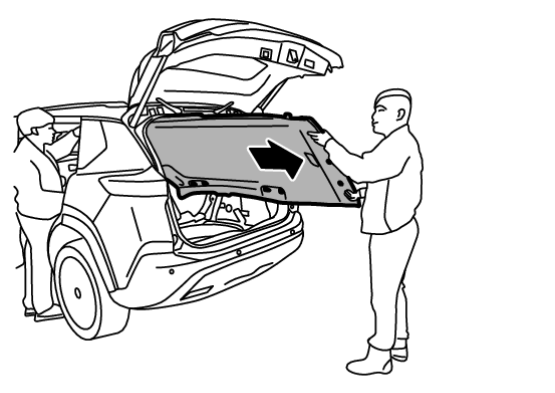
13. Remove headlining assembly according to direction indicated by arrow as shown in the figure.
| caution |
|
14. Remove assist grip bracket mounting bolts, and then remove assist grip brackets.
Without Sunroof Models
1. Remove front pillar garnish (LH and RH). Refer to Removal and Installation .
.
 .
.2. Remove following parts of front pillar LH.
(1) Disconnect harness connectors  .
.
 .
.3. Remove center pillar upper garnish (LH and RH). Refer to Removal and Installation .
.
 .
.4. Remove luggage side upper finisher (LH and RH). Refer to Removal and Installation .
.
 .
.5. Remove map light assembly. Refer to Removal and Installation .
.
 .
.6. Remove front camera unit cover.
(1) Disengage front camera unit cover fixing clips of rear end position indicated by arrows as shown in the figure.
 | : Clip |
(2) Disengage front camera unit cover fixing clips of front end position indicated by arrows as shown in the figure.
 | : Clip |
(3) Disconnect harness connector and then remove front camera unit cover.
7. Disconnect front camera unit harness connectors.
- Auto anti-dazzling inside mirror (if equipped)
- Front camera unit
8. Remove all assist grips.
(1) Disengage assist grip cap fixing pawl using a remover tool (A), and then remove assist grip cap.
 | : Pawl |
(2) Remove fixing metal clips from body panel.
9. Remove sun visor assembly (LH and RH).
(1) Disengage bracket locker fixing pawls using a remover tool (A).
 | : Pawl |
| caution | Because the bracket locker has a stopper, never pull out the bracket locker from  position. position. |
(2) Rotate the sun visor body  to the direction of the arrow as shown in the figure, and then remove sun visor bracket
  fixing pawls.
 to the direction of the arrow as shown in the figure, and then remove sun visor bracket
  fixing pawls.
 | : Pawl |
(4) Disconnect harness connector, and then remove sun visor assembly.
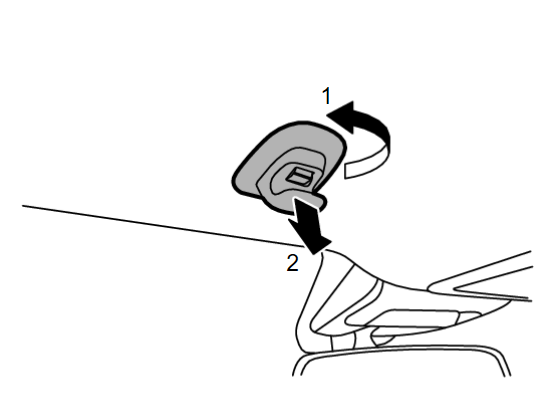
10. Remove sun visor holder (LH and RH) according to numerical order 1→2 indicated by arrows as shown in the figure.
11. Remove headlining assembly fixing clips  .
.
 .
.| caution |
|
INSTALLATION
Note the following items, and then install in the reverse order of removal.
| caution |
|
![[Previous]](../../../buttons/fprev.png)
![[Next]](../../../buttons/fnext.png)

 , and then install to the body panel.