DTC C2332 Master-Slave communication fail
| caution | Before replacing the ECU, ensure that the input and output signal circuits are normal. |
OPERATION
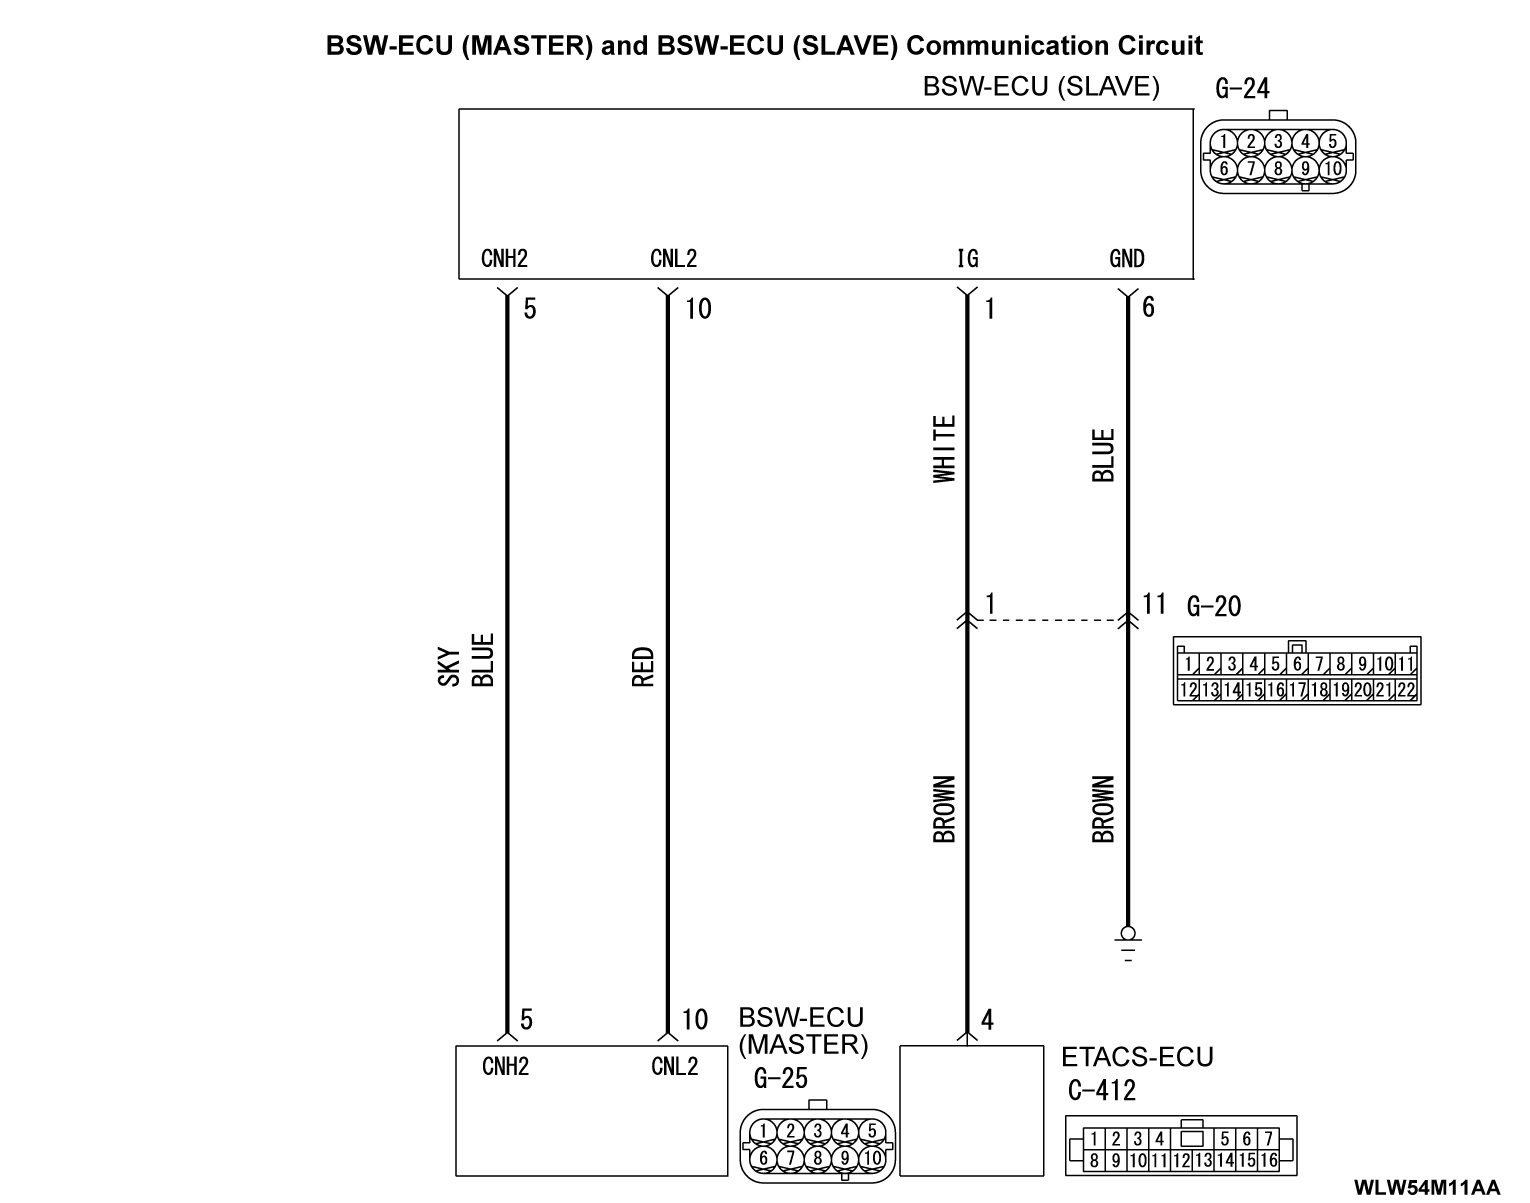
The BSW-ECU (master) communicates with the BSW-ECU (slave) through the local CAN lines.
CHECK CONDITION
When all of the conditions below are satisfied:
- Ignition switch is in the ON position.
- BSW-ECU (master) system voltage is at 9 to 16 volts.
DIAGNOSTIC FUNCTION AND JUDGMENT CRITERIA
When the BSW-ECU (master) cannot receive any CAN signal from the BSW-ECU (slave) for at least 1 second, the ECU will set DTC C2332.
TROUBLESHOOTING HINTS
- Local CAN bus circuit fails
- The power supply circuit to the BSW-ECU (slave) may be defective
- The BSW-ECU (master/slave) may be defective
DIAGNOSIS
Required Special Tools:
- MB991223: Harness Set
- MB992006: Extra Fine Probe
STEP 1. Using scan tool (M.U.T.-III) CAN bus diagnostics
Use the scan tool (M.U.T.-III) to diagnose the CAN bus lines.
(1)
| caution | To prevent damage to scan tool (M.U.T.-III), always turn the ignition switch to the "LOCK" (OFF) position before connecting or disconnecting scan tool (M.U.T.-III). |
(2) Turn the ignition switch to the "ON" position.
(3) Diagnose the CAN bus line.
(4) Turn the ignition switch to the "LOCK" (OFF) position.
Is the check result normal?
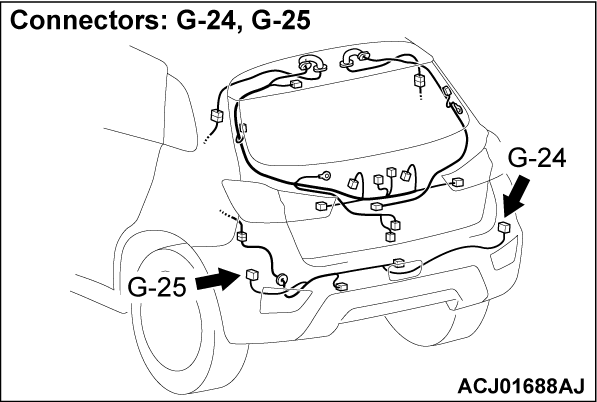
STEP 2. Connectors check: BSW-ECU (slave) connector G-24, BSW-ECU (master) connector G-25
Are BSW-ECU (slave) connector G-24 and BSW-ECU (master) connector G-25 in good condition?
 The wiring harness may be damaged or the connector(s) may have loose, corroded or damaged terminals, or terminals pushed back in the connector. Repair the wiring harness as necessary.
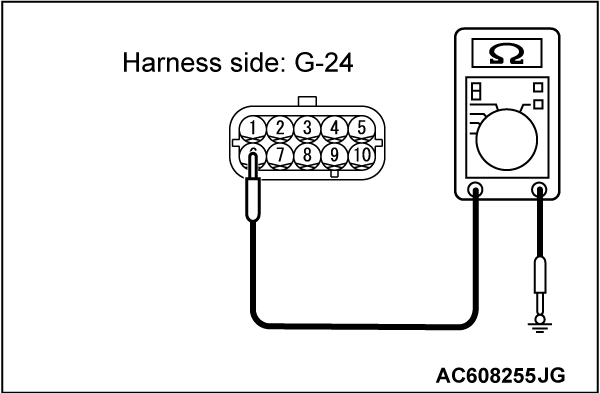
STEP 3. Resistance measurement at BSW-ECU (slave) connector G-24 (terminal No.6)
(1) Disconnect the connector, and measure at the wiring harness side.
(2) Measure the resistance between the BSW-ECU (slave) connector G-24 (terminal No.6) and body ground.
OK: Continuity exists (2 ohms or less)
Is the check result normal?
 The wiring harness may be damaged or the connector(s) may have loose, corroded or damaged terminals, or terminals pushed back in the connector. Repair the wiring harness as necessary.
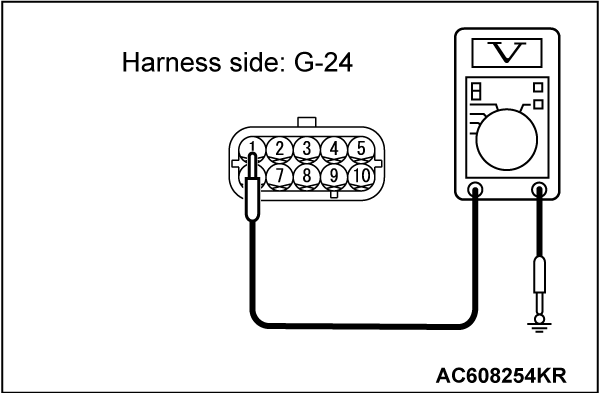
STEP 4. Voltage measurement at BSW-ECU (slave) connector G-24 (terminal No.1)
(1) Disconnect the connector, and measure at the wiring harness side.
(2) Turn the ignition switch from the "LOCK" (OFF) position to the "ON" position.
(3) Check the voltage between the BSW-ECU (slave) connector G-24 (terminal No.1) and body ground.
OK: Battery positive voltage
Is the check result normal?
 The wiring harness may be damaged or the connector(s) may have loose, corroded or damaged terminals, or terminals pushed back in the connector. Repair the wiring harness as necessary.
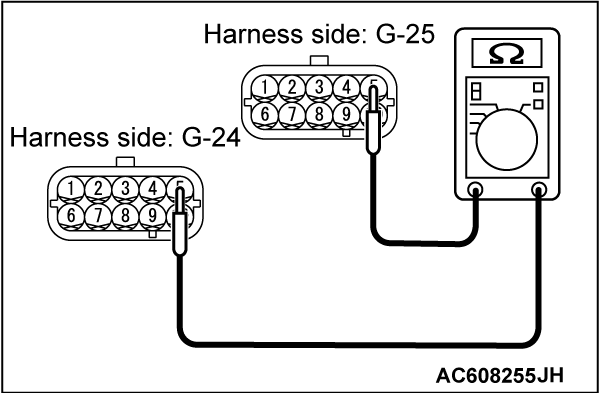
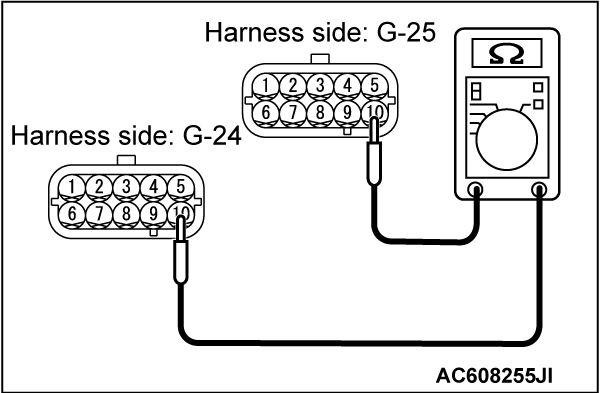
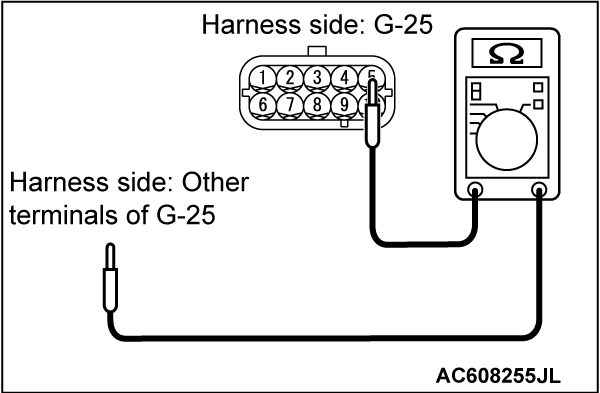
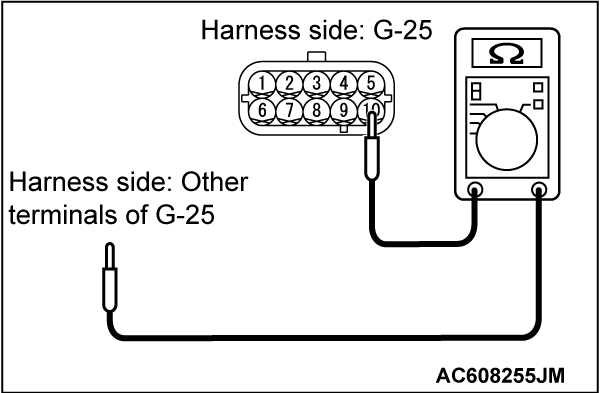
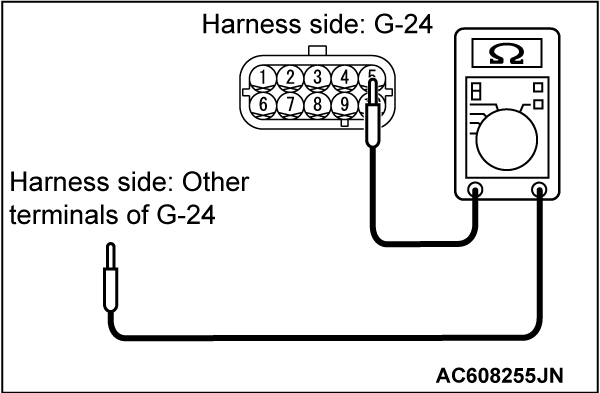
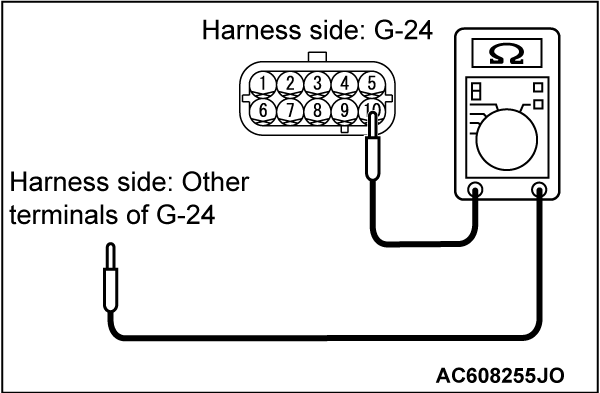
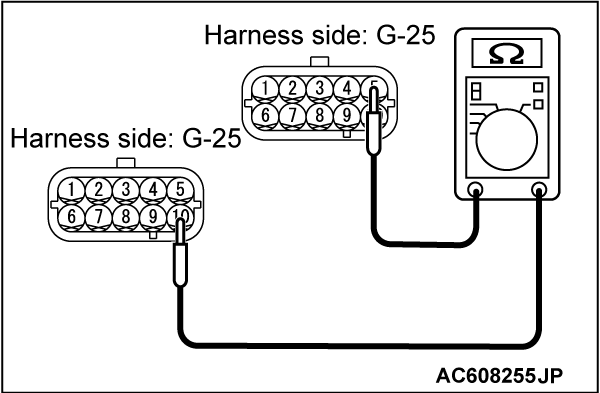
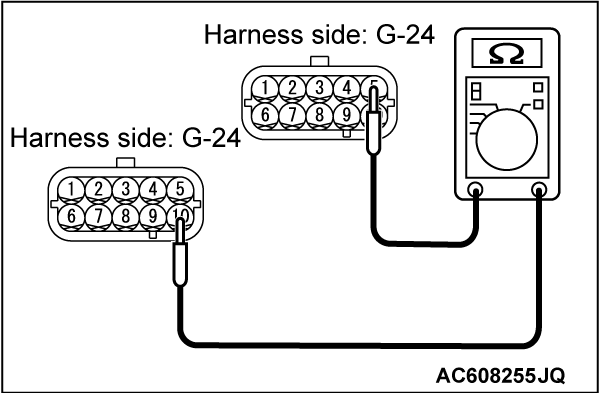
STEP 5. Check the wiring harness between BSW-ECU (master) connector G-25 (terminal No. 5, 10) and BSW-ECU (slave) connector G-24 (terminal No. 5, 10).
(1) Disconnect the connector, and measure at the wiring harness side.
(2) Measure the resistance between the BSW-ECU (master) connector G-25 (terminal No.5, 10) and the BSW-ECU (slave) connector G-24 (terminal No.5, 10).
OK: Continuity exists (2 ohms or less)
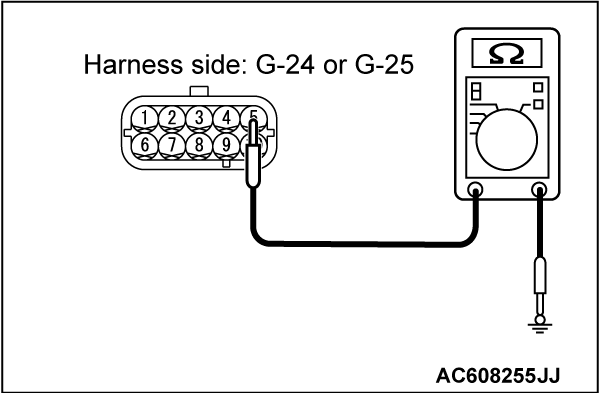
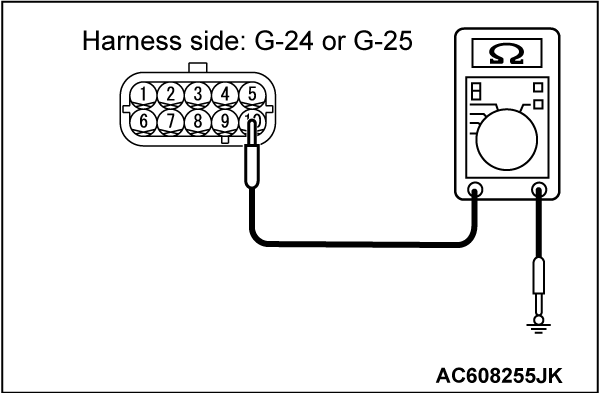
(3) Measure the resistance between the BSW-ECU (master) connector G-25 (terminal No.5, 10) and body ground, and between the BSW-ECU (master) connector G-24 (terminal No.5, 10) and body ground.
OK: No continuity
(4) Measure the resistance between the BSW-ECU (master) connector G-25 (terminal No.5, 10) and any of the other terminals, and between the BSW-ECU (master) connector G-24 (terminal No.5, 10) and any of the other terminals.
OK: No continuity
Is the check result normal?
 The wiring harness may be damaged or the connector(s) may have loose, corroded or damaged terminals, or terminals pushed back in the connector. Repair the wiring harness as necessary.
STEP 6. Measure the terminal resistance at the BSW-ECU.
| caution | A digital multimeter should be used. For details refer to  . . |
(1) Remove the BSW-ECU (master/slave), and measure at the wiring harness side.
(2) Resistance between the BSW-ECU (master) connector G-25 terminal No.5 and No.10.
OK: 120 ± 20 ohms
(3) Resistance between the BSW-ECU (slave) connector G-24 terminal No.5 and No.10.
OK: 120 ± 20 ohms
Is the check result normal?
 Replace a defective ECU.
STEP 7. Check whether the DTC is set again.
Check again if the DTC is set in the BSW-ECU (master).
(1) Erase the DTC.
(2) Turn the ignition switch from "LOCK" (OFF) position to "ON" position.
(3) Check if DTC is set.
Is the DTC set?
STEP 8. Check whether the DTC is set again.
Check again if the DTC is set in the BSW-ECU (master). Use the BSW-ECU (slave), which has been removed at step 7, as the BSW-ECU (master).
 This diagnosis is complete.
(1) Erase the DTC.
(2) Turn the ignition switch from "LOCK" (OFF) position to "ON" position.
(3) Check if DTC is set.
Is the DTC set?
 Use the BSW-ECU (slave), which has been removed at step 7, as the BSW-ECU (master).
 This diagnosis is complete.
![[Previous]](../../../buttons/fprev.png)
![[Next]](../../../buttons/fnext.png)
