[Previous][Next]
REMOVAL AND INSTALLATION
dangerWhen servicing the high voltage system parts, always shut off the high voltage by removing the service plug (Refer to GROUP 54Da - Precautions on how to use the high-voltage vehicle ).
 
 
Pre-removal and Post-installation Operation
  • Engine Coolant Draining and Refilling (Refer to GROUP 14A - On-vehicle Service ).
  • Second seat Removal and Installation (Refer to GROUP 52A - Second Seat Assembly ).
  • Cargo Floor Box Removal and Installation (Refer to GROUP 52A - Interior Trim ).
  • Front / Rear Scuff Plate, Center Pillar Trim Lower Removal and Installation (Refer to GROUP 52A - Interior Trim ).
  • Turn up the rear floor carpet.
  • Rear Seat Anchor Cover Removal and Installation (Refer to GROUP 52A - Front Seat Assembly ).
Removal steps
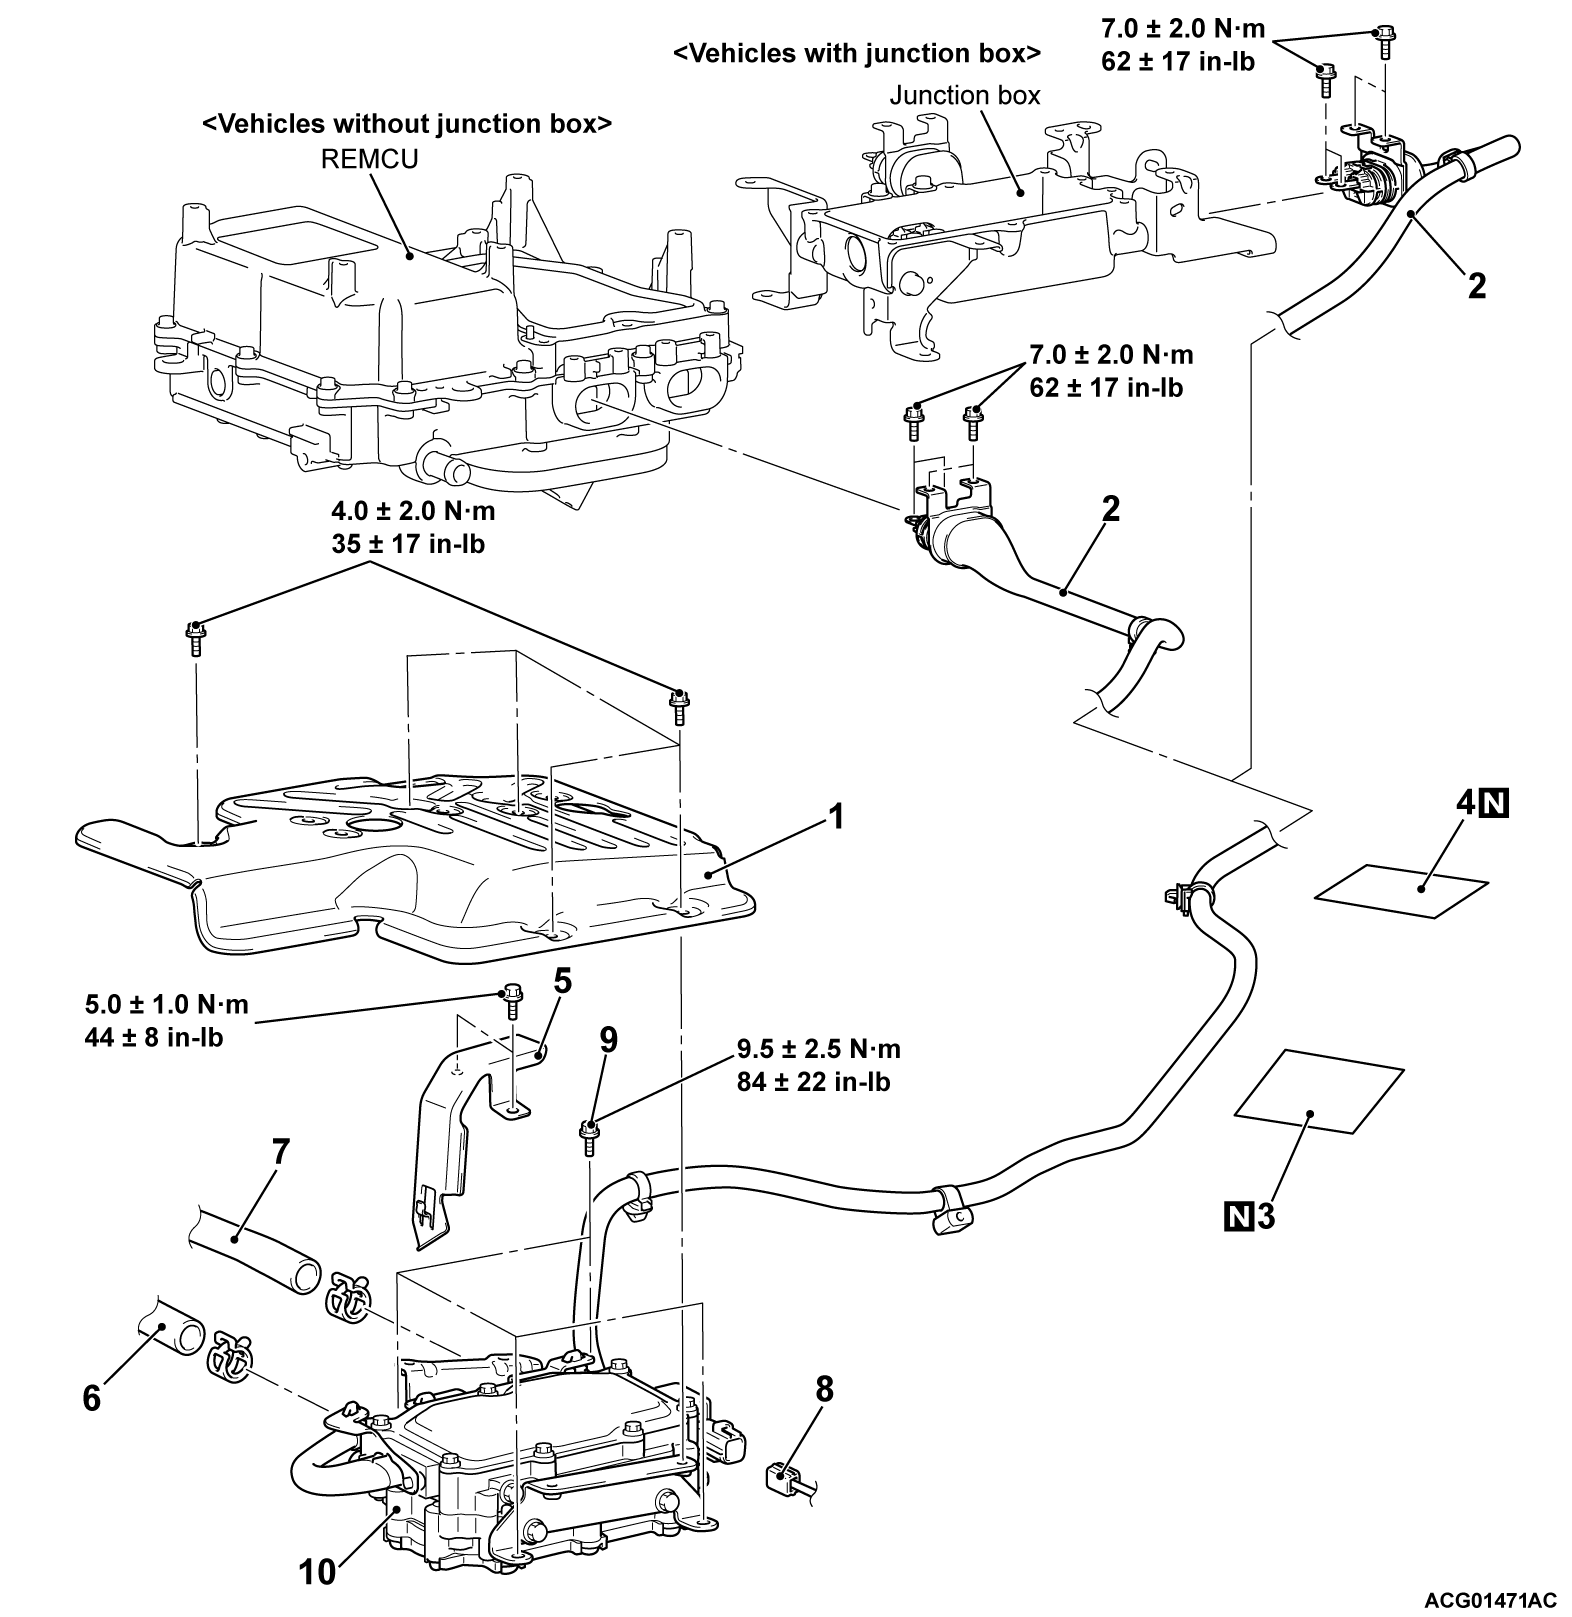
1.Electric heater cover
2.Connection with the REMCU (rear motor control unit) side connector <vehicles without AC inverter> or with the junction box side connector <vehicles with AC inverter>
>>B<<3.Tape A
>>B<<4.Tape B
5.Heater control harness protector
<<A>>>>A<<6.Heater piping hose I connection
<<A>>>>A<<7.Heater piping hose J connection
8.Electric heater connector connection
9.Ground bolt
10.Electric heater
 
 
REMOVAL SERVICE POINT
 
 
<<A>> HEATER PIPING HOSE I, J DISCONNECTION
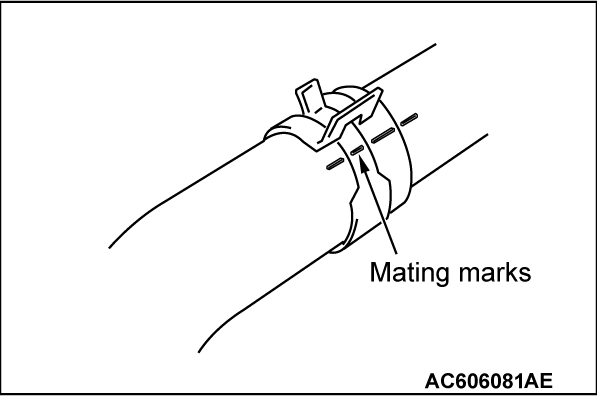
Make mating marks on the heater piping hose I, J and hose clip as shown to install them in the original position.


INSTALLATION SERVICE POINTS
 
 
>>A<< HEATER PIPING HOSE I, J CONNECTION
1. Make mating mark on a new hose clip in the same position as the remove one.
2. Align the mating marks on the heater piping hose I, J and hose clip.


>>B<< TAPE A, B INSTALLATION
Apply adhesive tapes A and B as shown. The end of tape B should be applied along the slit of the silencer.