[Previous][Next]
REMOVAL AND INSTALLATION
 
 
cautionFor the removal of the headlining, refer to GROUP 52B, Service Precautions (Refer to ) and Curtain Air Bag Module (Refer to ).
Pre-removal and Post-installation Operation
  • Front Pillar Trim, Rear Scuff Plate, Front Scuff Plate, Cowl Side Trim, Upper Center Pillar Trim, Lower Center Pillar Trim, Front Door Opening Trim, Rear Door Opening Trim, Quarter Trim Lower, Quarter Trim Upper, Rear End Trim, Rear Pillar Trim Removal and Installation (Refer to ).
  • Front Door Assembly (RH) Removal and Installation (Refer to GROUP 42A - Door Assembly ).
  • Instrument Panel Assembly Removal and Installation (Refer to ).
  • Front Seat Assembly Removal and Installation (Refer to ).
  • Front Floor Console Assembly Removal and Installation (Refer to ).
  • Center Flame Assembly Removal and Installation (Refer to GROUP 55 - Heater Unit and Blower Assembly ).
  • Front Deck Crossmember Removal and Installation (Refer to GROUP 55 - Heater Unit and Blower Assembly ).
Removal steps
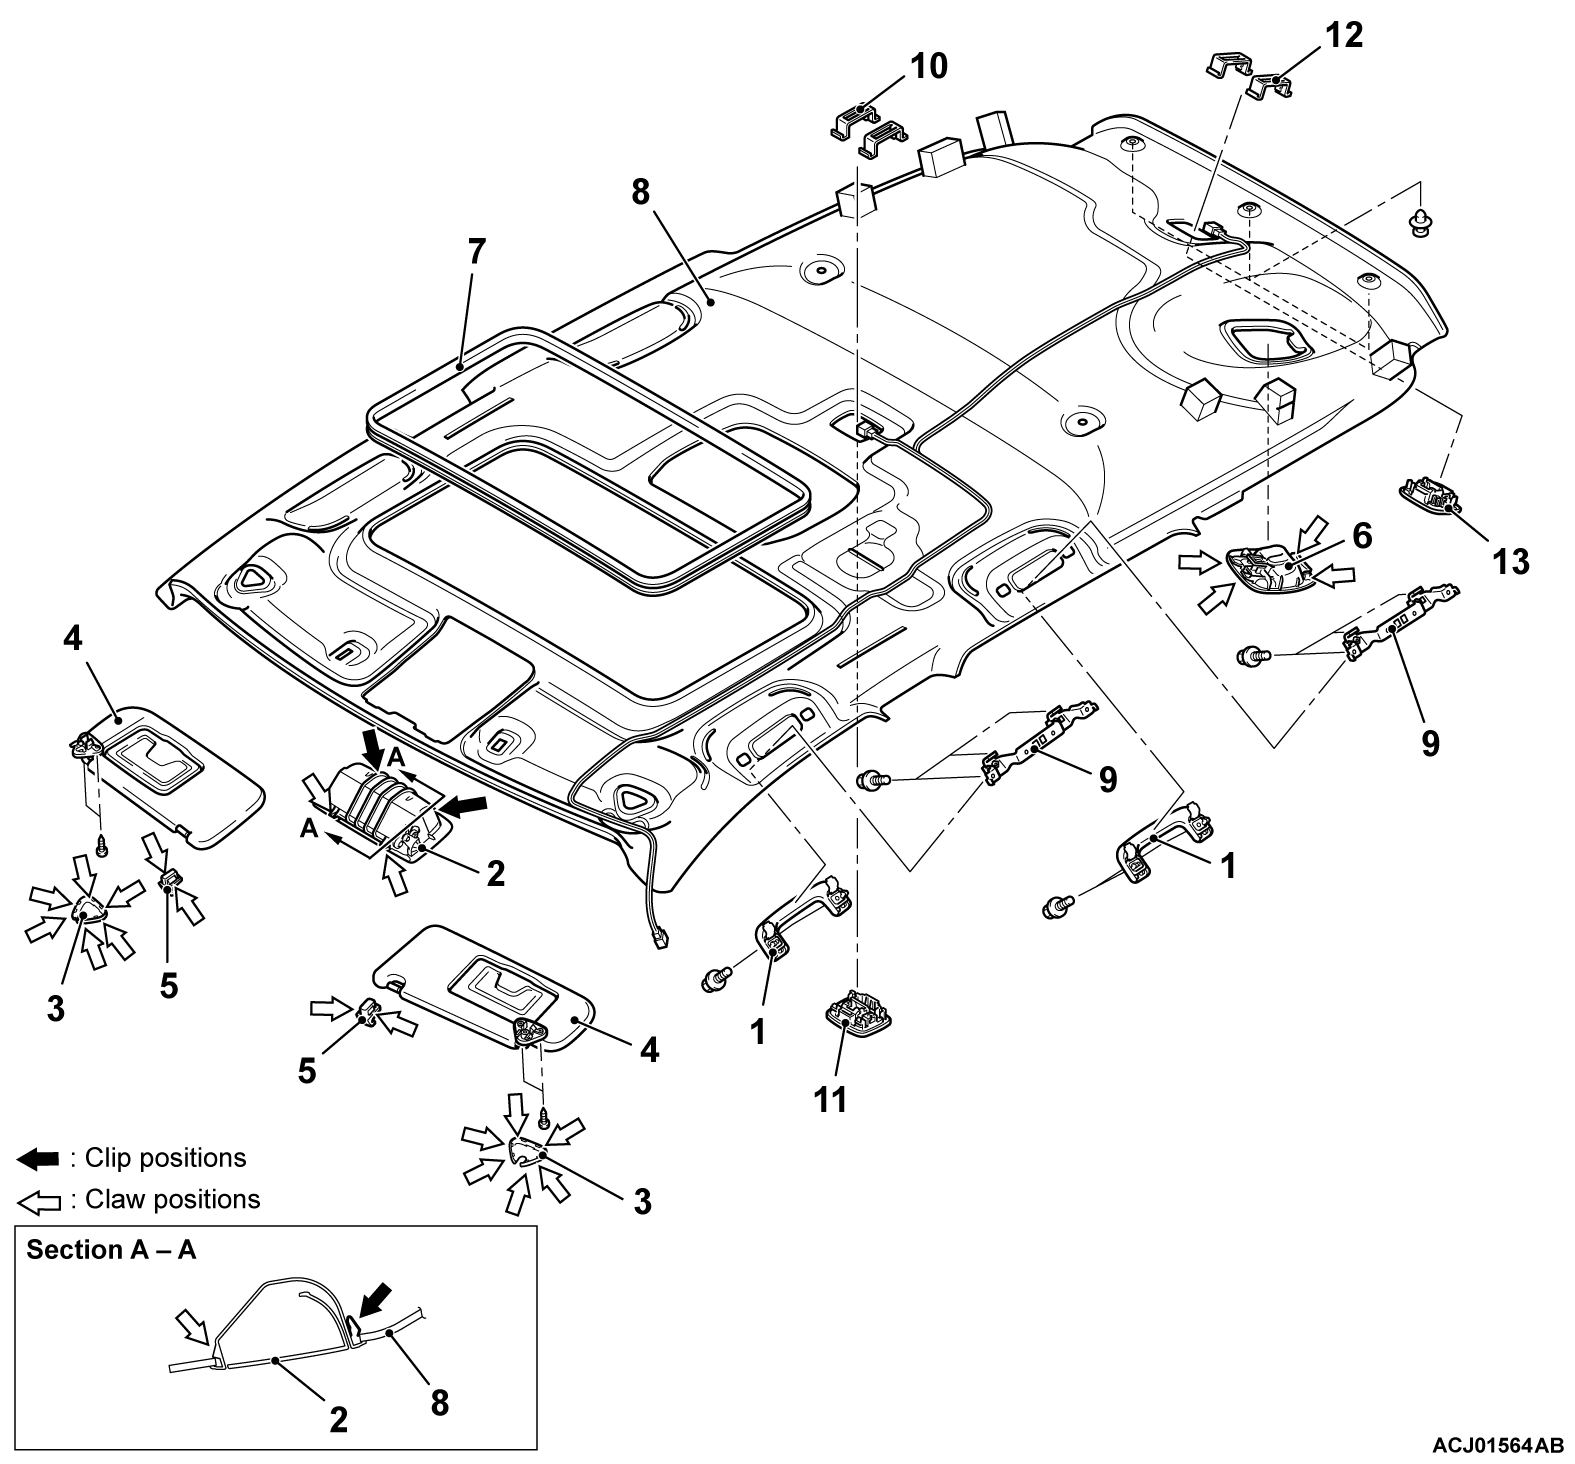
1.Assist grip
Overhead bezel assembly (Refer to GROUP 54A - Dome Light ).
2.Sunglass pocket <Vehicles without sunroof>
3.Sunvisor bracket cover
4.Sunvisor
5.Sunvisor holder
<<A>>6.Rear seatbelt outer cover
7.Sunroof lid inner weather strip rear <Vehicles with sunroof>
8.Headlining
<<B>>9.Assist grip bracket
10.Rear dome light bracket
11.Rear dome light assembly
12.Cargo dome light bracket
13.Cargo dome light assembly
 
 
REMOVAL SERVICE POINTS
 
 
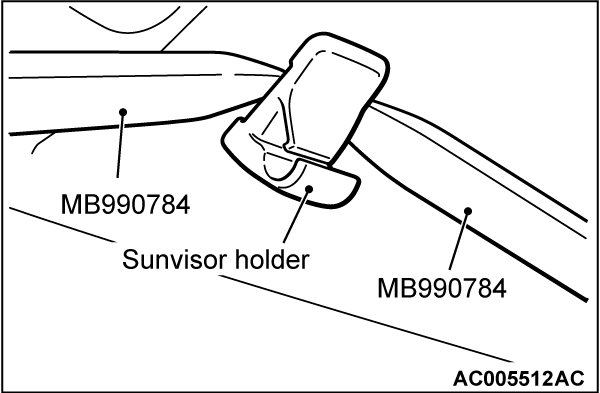
<<A>> SUNVISOR HOLDER REMOVAL
Insert the special tools ornament remover (MB990784) into the sunvisor holder from its left and right sides to disengage the claws on the sunvisor holder sides.


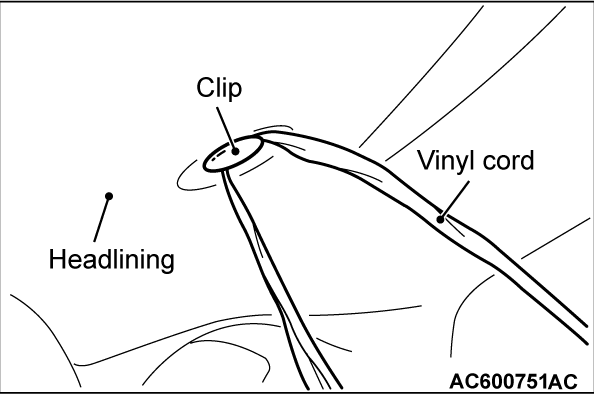
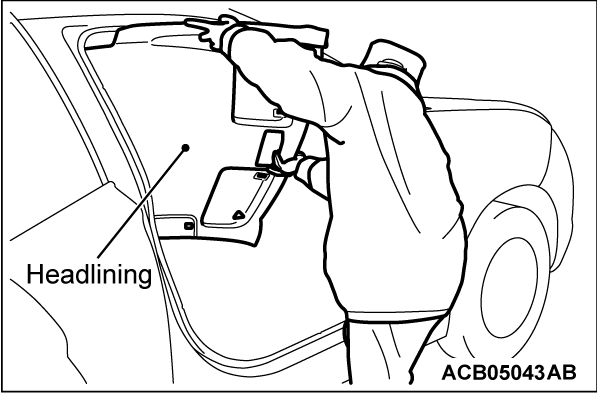
<<B>> HEADLINING REMOVAL
1. To remove the clip, insert a vinyl cord into a clearance between the clip and the headlining, and pass it around the clip. Then, pull out the clip downwards while pulling the vinyl cord.
2. Take out the headlining assembly through the front passenger's door opening.