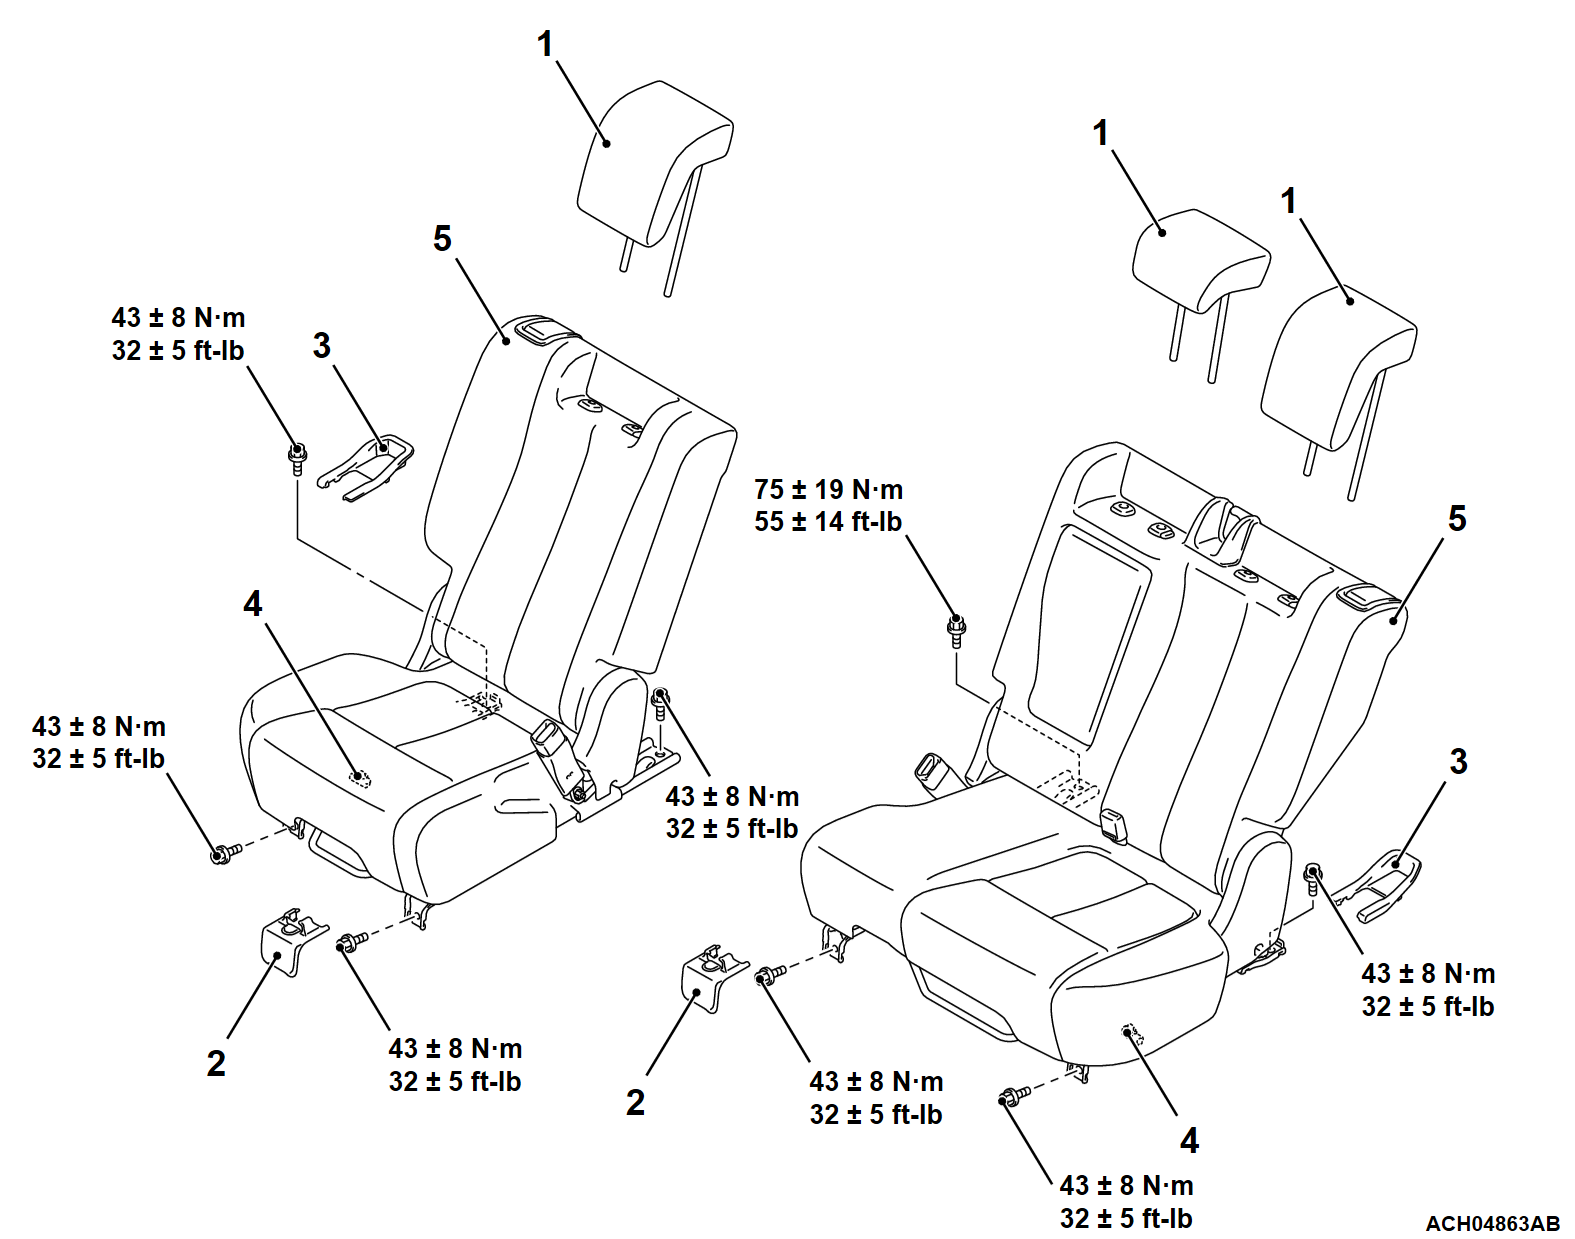
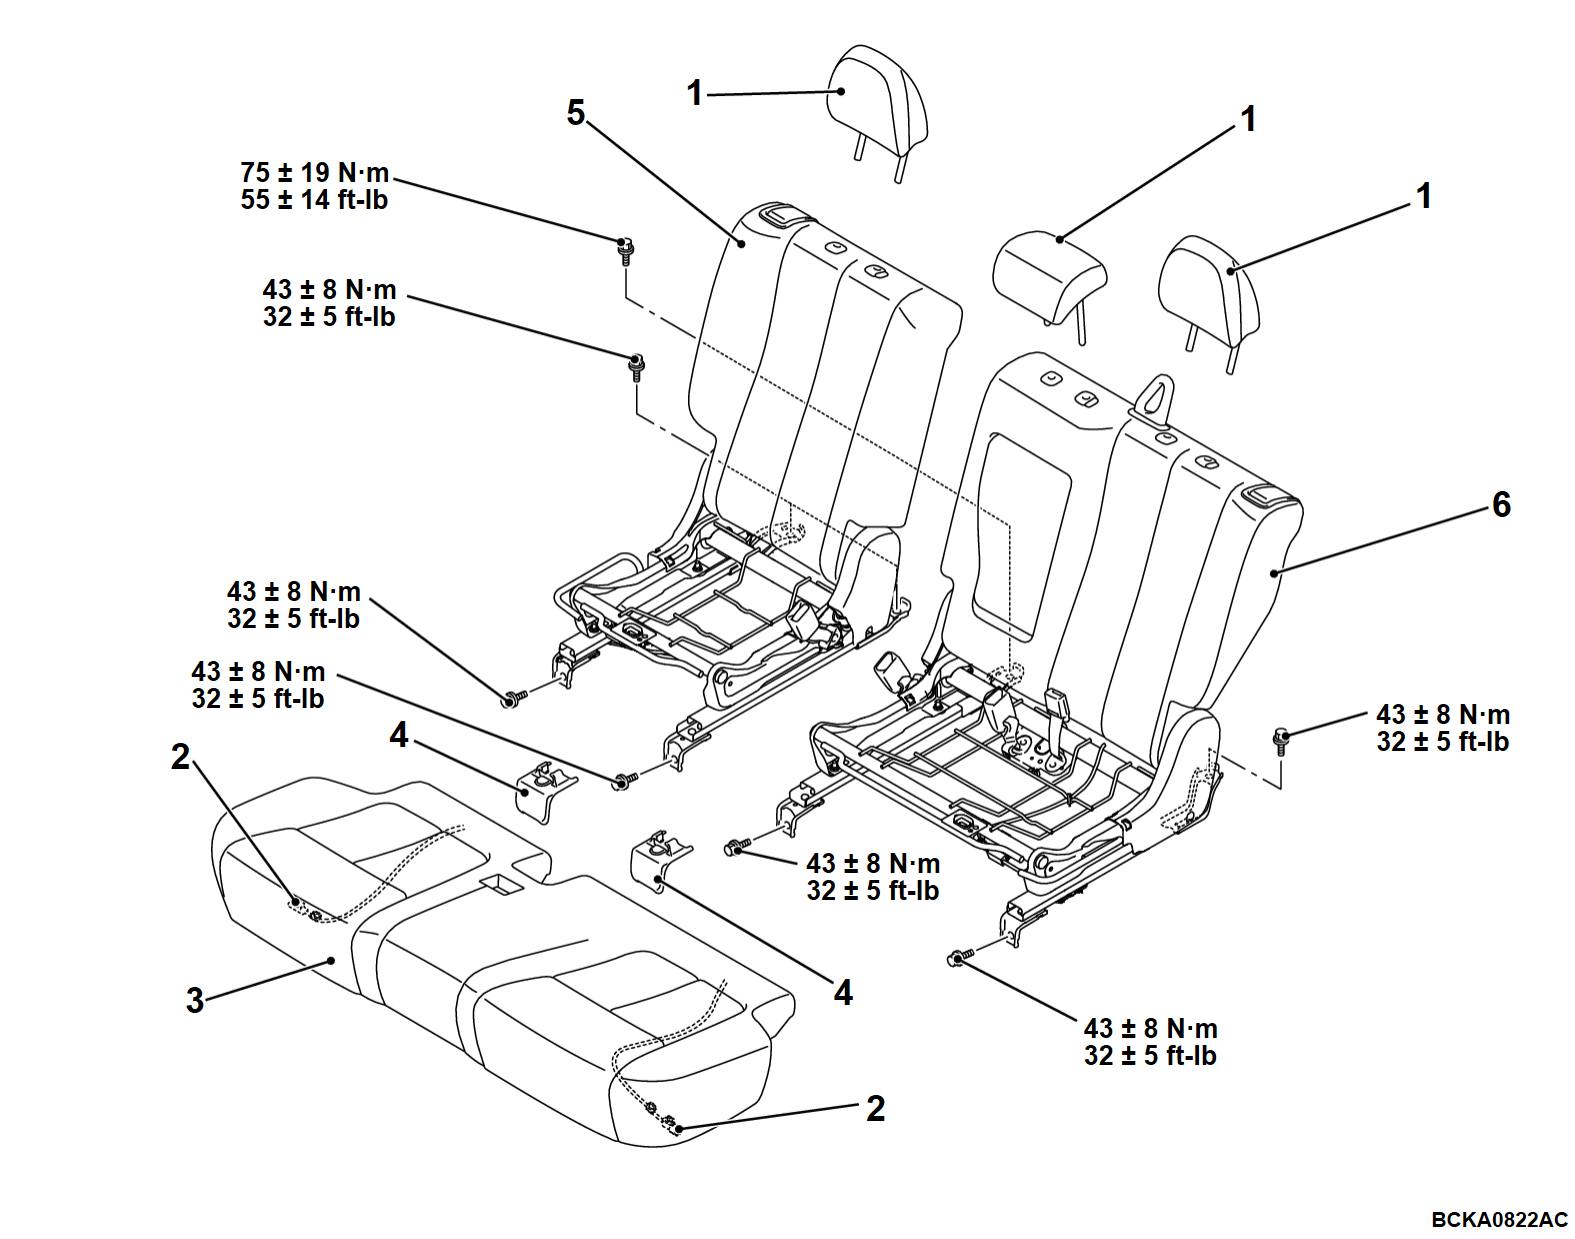
REMOVAL AND INSTALLATION
<Up to 20 Model year>
INSTALLATION SERVICE POINT <Up to 20 Model year>
>>A<< REAR SEAT ASSEMBLY INSTALLATION
1. Insert the seat pins to holes of the body securely.
2. Confirm that both the seat slides are locked, and then temporarily tighten the front side bolts so that no load is applied to the seat cushion.
3. Tighten the front side bolts to the specified torque.
Tightening torque: 43 ± 8 N·m (32 ± 5 ft-lb)
4. Move the seat forward.
5. Confirm that both the seat slides are locked, and then temporarily tighten the rear side bolts so that no load is applied to the seat cushion.
6. Tighten the rear side bolts to the specified torque.
Tightening torque:
- M10: 43 ± 8 N·m (32 ± 5 ft-lb)
- M12: 75 ± 19 N·m (55 ± 14 ft-lb)
<From 22 Model year>
REMOVAL SERVICE POINT <From 22 Model year>
<<A>> REAR SEAT CUSHION ASSEMBLY REMOVAL
1. Bounce up the rear seat cushion assembly.
2. Remove the wiring harness clamp [heated seat (rear)].
3. Remove the rear seat cushion assembly.
INSTALLATION SERVICE POINTS <From 22 Model year>
>>A<< REAR SEAT ASSEMBLY INSTALLATION
1. Insert the seat pins to holes of the body securely.
2. Then temporarily tighten the front side bolts so that no load is applied to the seat cushion.
3. Tighten the front inner side bolts to the specified torque.
Tightening torque: 43 ± 8 N·m (32 ± 5 ft-lb)
4. Tighten the front outer side bolts to the specified torque.
Tightening torque: 43 ± 8 N·m (32 ± 5 ft-lb)
5. Then temporarily tighten the rear side bolts so that no load is applied to the seat cushion.
6. Tighten the rear inner side bolts to the specified torque.
Tightening torque:
- <LH bolt>: 75 ± 19 N·m (55 ± 14 ft-lb)
- <RH bolt>: 43 ± 8 N·m (32 ± 5 ft-lb)
7. Tighten the rear outer side bolts to the specified torque.
Tightening torque: 43 ± 8 N·m (32 ± 5 ft-lb)
>>B<< REAR SEAT CUSHION ASSEMBLY INSTALLATION
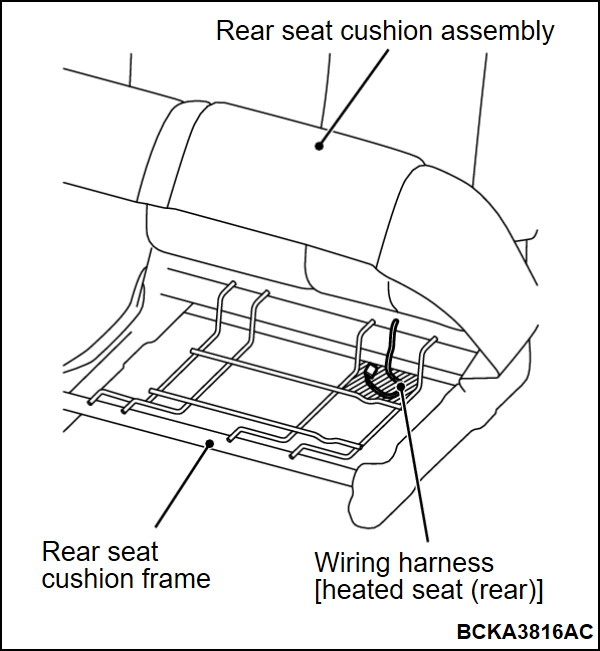
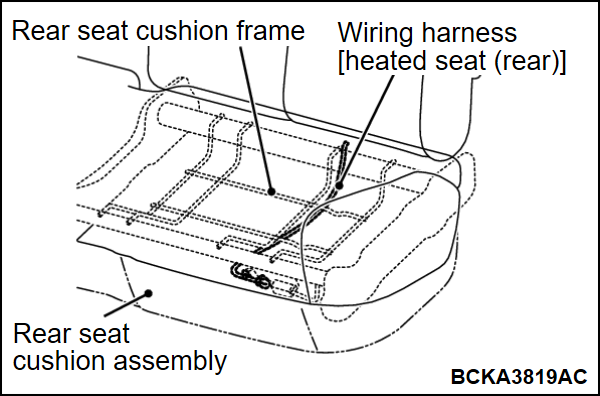
1. Temporarily place the wiring harness [heated seat (rear)] through the illustrated position of the rear seat cushion frame.
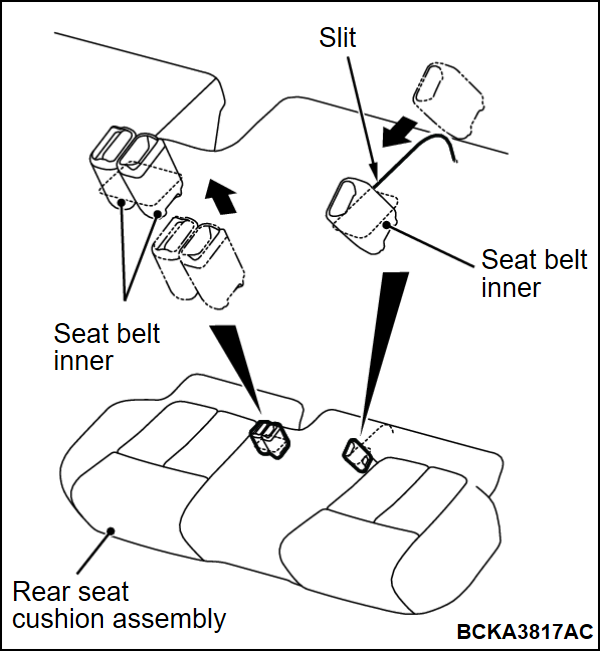
2. Insert the seat belt inner into rear seat cushion assembly as shown in the figure, and then, pull it up to the upper side of the seat as shown in the figure.
3. Insert the rear seat center seat belt inner (LH) to the space between the rear seat assembly and rear seat cushion assembly.
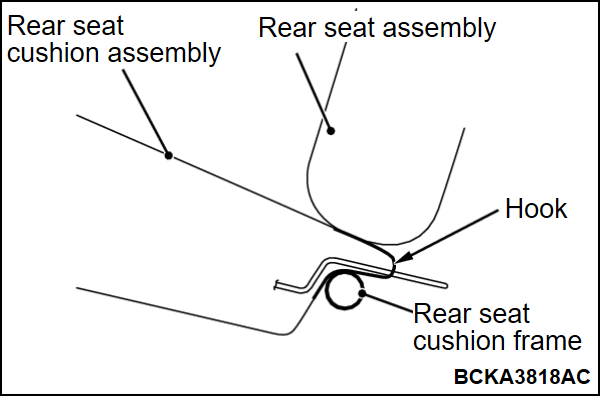
4. Insert the hook of rear seat cushion assembly to the gap between the rear seat assembly and the pipe frame of rear seat cushion frame.
5. Lift the front end of the rear seat cushion assembly and pass the wiring harness [heated seat (rear)] under the wire of the rear seat cushion frame.
6. For reliable operation of the heated seat, make sure no foreign matter is found, and then connect the connector securely.
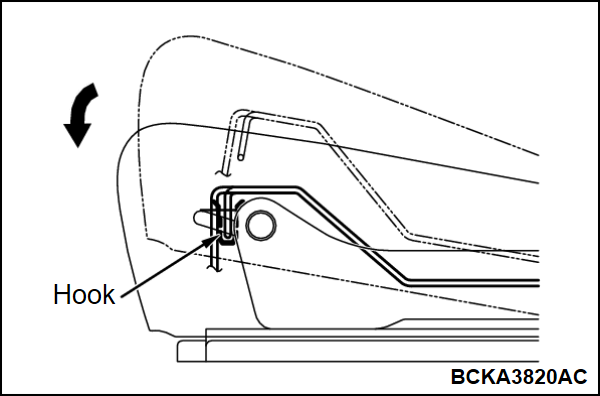
7. Insert the front side of the rear seat cushion assembly to the hook of the rear seat cushion frame securely, as shown in the figure.
![[Previous]](../../../buttons/fprev.png)
![[Next]](../../../buttons/fnext.png)
