LIFTGATE ALIGNMENT
| caution | When you have adjusted the striker so that it is engaged with the latch properly and adjusted the liftgate height, you should check the camera image on the multi around monitor "Bird-eye view." If necessary, calibrate the monitor. <Vehicles with multi around monitor> |
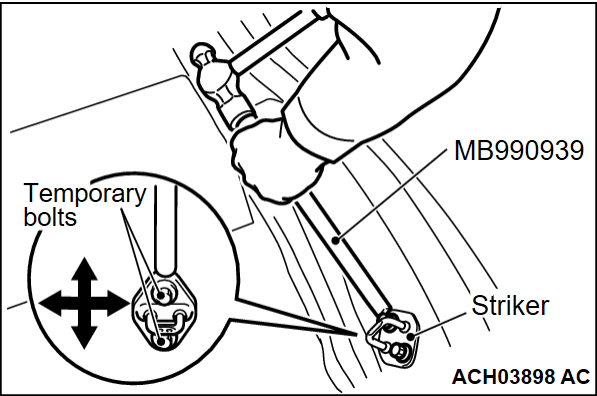
ADJUSTMENT OF ENGAGEMENT BETWEEN STRIKER AND LATCH <Up to 20 Model year>
2. Replace the striker mounting screws with temporary bolts, and use the remover bar (special tool: MB990939) and a hammer to tap the temporary bolt to the desired direction.
3. Tighten the striker mounting screws.
Tightening torque: 22 ± 3 N·m (16 ± 2 ft-lb)
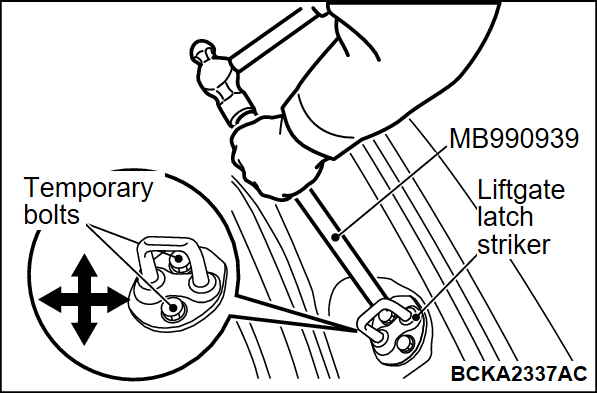
ADJUSTMENT OF ENGAGEMENT BETWEEN LIFTGATE LATCH STRIKER AND LATCH <From 22 Model year>
2. Replace the liftgate latch striker mounting screws with temporary bolts, and use the remover bar (special tool: MB990939) and a hammer to tap the temporary bolt to the desired direction.
3. Tighten the striker mounting screws.
Tightening torque: 22 ± 3 N·m (16 ± 2 ft-lb)
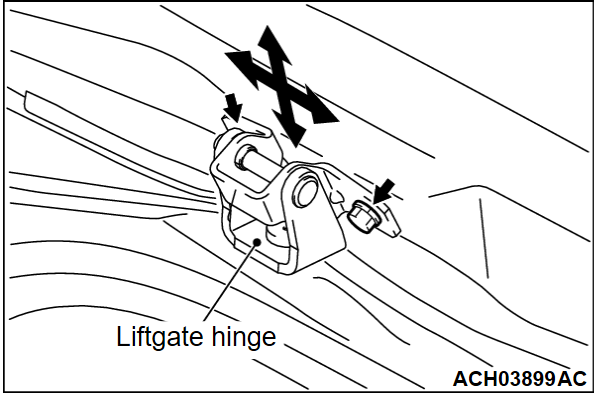
ADJUSTMENT OF CLEARANCE BETWEEN LIFTGATE AND BODY <Up to 20 Model year>
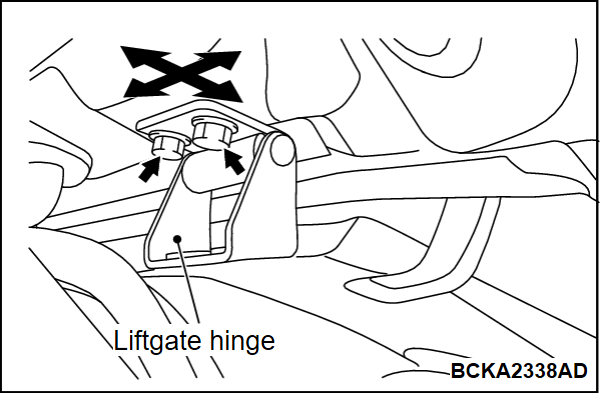
1. Loosen the liftgate hinge mounting bolts to adjust the clearance between the liftgate and body.
2. Tighten the liftgate hinge mounting bolts.
Tightening torque: 24 ± 2 N·m (18 ± 1 ft-lb)
![[Previous]](../../../buttons/fprev.png)
![[Next]](../../../buttons/fnext.png)


