[Previous][Next]
REMOVAL AND INSTALLATION
 
 
cautionWhen the engine assembly is replaced, initialize the learned value using scan tool (M.U.T.-III) (Refer to GROUP 00, Precautions before Service - Initialization Procedure for Learning Value in MFI Engine ).
Pre-removal Operation
  • Fuel Line Pressure Reduction (Refer to GROUP 13A, On-vehicle Service - Reduce Pressurized Fuel Lines ).
  • Engine Room Under Cover Removal (Refer to GROUP 51, Under Cover ).
  • Engine Coolant Draining (Refer to GROUP 14, On-vehicle Service - Engine Coolant Replacement ).
  • Engine Oil Draining (Refer to GROUP 12, On-vehicle Service - Engine Oil Replacement ).
  • Transmission Oil Draining (Refer to GROUP 22A, On-vehicle Service - Transmission Oil Replacement ) <M/T>.
  • CVT Fluid Draining (Refer to GROUP 23A, On-vehicle Service - CVT Fluid Replacement ) <CVT>.
  • Starter Assembly Removal (Refer to GROUP 16, Starting System - Starter Assembly ).
  • Bell Housing Cover Removal (Refer to ).
  • Drive Shaft Assembly Removal (Refer to GROUP 26, Drive Shaft Assembly ).
  • Exhaust Manifold Removal (Refer to GROUP 15, Exhaust Manifold ).
  • Air Cleaner Assembly Removal (Refer to GROUP 15, Air Cleaner ).
  • Radiator Assembly Removal (Refer to GROUP 14, Radiator ).
Post-installation Operation
  • Radiator Assembly Installation (Refer to GROUP 14, Radiator ).
  • Air Cleaner Assembly Installation (Refer to GROUP 15, Air Cleaner ).
  • Exhaust Manifold Installation (Refer to GROUP 15, Exhaust Manifold ).
  • Drive Shaft Assembly Installation (Refer to GROUP 26, Drive Shaft Assembly ).
  • Bell Housing Cover Installation (Refer to ).
  • Starter Assembly Installation (Refer to GROUP 16, Starting System - Starter Assembly ).
  • Transmission Oil Refilling (Refer to GROUP 22A, On-vehicle Service - Transmission Oil Replacement ). <M/T>.
  • CVT Fluid Refilling (Refer to GROUP 23A, On-vehicle Service - CVT Fluid Replacement ) <CVT>.
  • Engine Oil Refilling (Refer to GROUP 12, On-vehicle Service - Engine Oil Replacement ).
  • Engine Coolant Refilling (Refer to GROUP 14, On-vehicle Service - Engine Coolant Replacement ).
  • Fuel Leak Check
  • Engine Room Under Cover Installation (Refer to GROUP 51, Under Cover ).
Removal steps
>>C<<Control wiring harness connection
Brake booster vacuum hose connection (Refer to GROUP 35A, Master Cylinder Assembly and Brake Booster Assembly ).
Purge hose connection (Refer to GROUP 11B, Fuel and Emission Parts ).
Clutch cable connection (Refer to GROUP 21A, Clutch Control ) <M/T>.
Gearshift cable and select cable connection (Refer to GROUP 22A, Transaxle Assembly ) <M/T>.
Transaxle control cable connection (Refer to GROUP 23A, Transaxle Assembly ) <CVT>.
Torque converter and drive plate coupling bolt (Refer to GROUP 23A, Transaxle Assembly ) <CVT>.
<<A>>A/C compressor and clutch assembly (Refer to GROUP 55A, Compressor Assembly ) <Vehicles with A/C>.
Heater water hose A connection (Refer to ).
Heater water hose B connection (Refer to GROUP 14, Water Hose and Water Pipe ).
Fuel main pipe connection (Refer to GROUP 13A, Injector ).
<<B>>>>B<<Engine mounting insulator (Refer to GROUP 32, Engine Mounting ).
<<B>>>>B<<Transaxle mounting insulator (Refer to GROUP 32, Transaxle Mounting ).
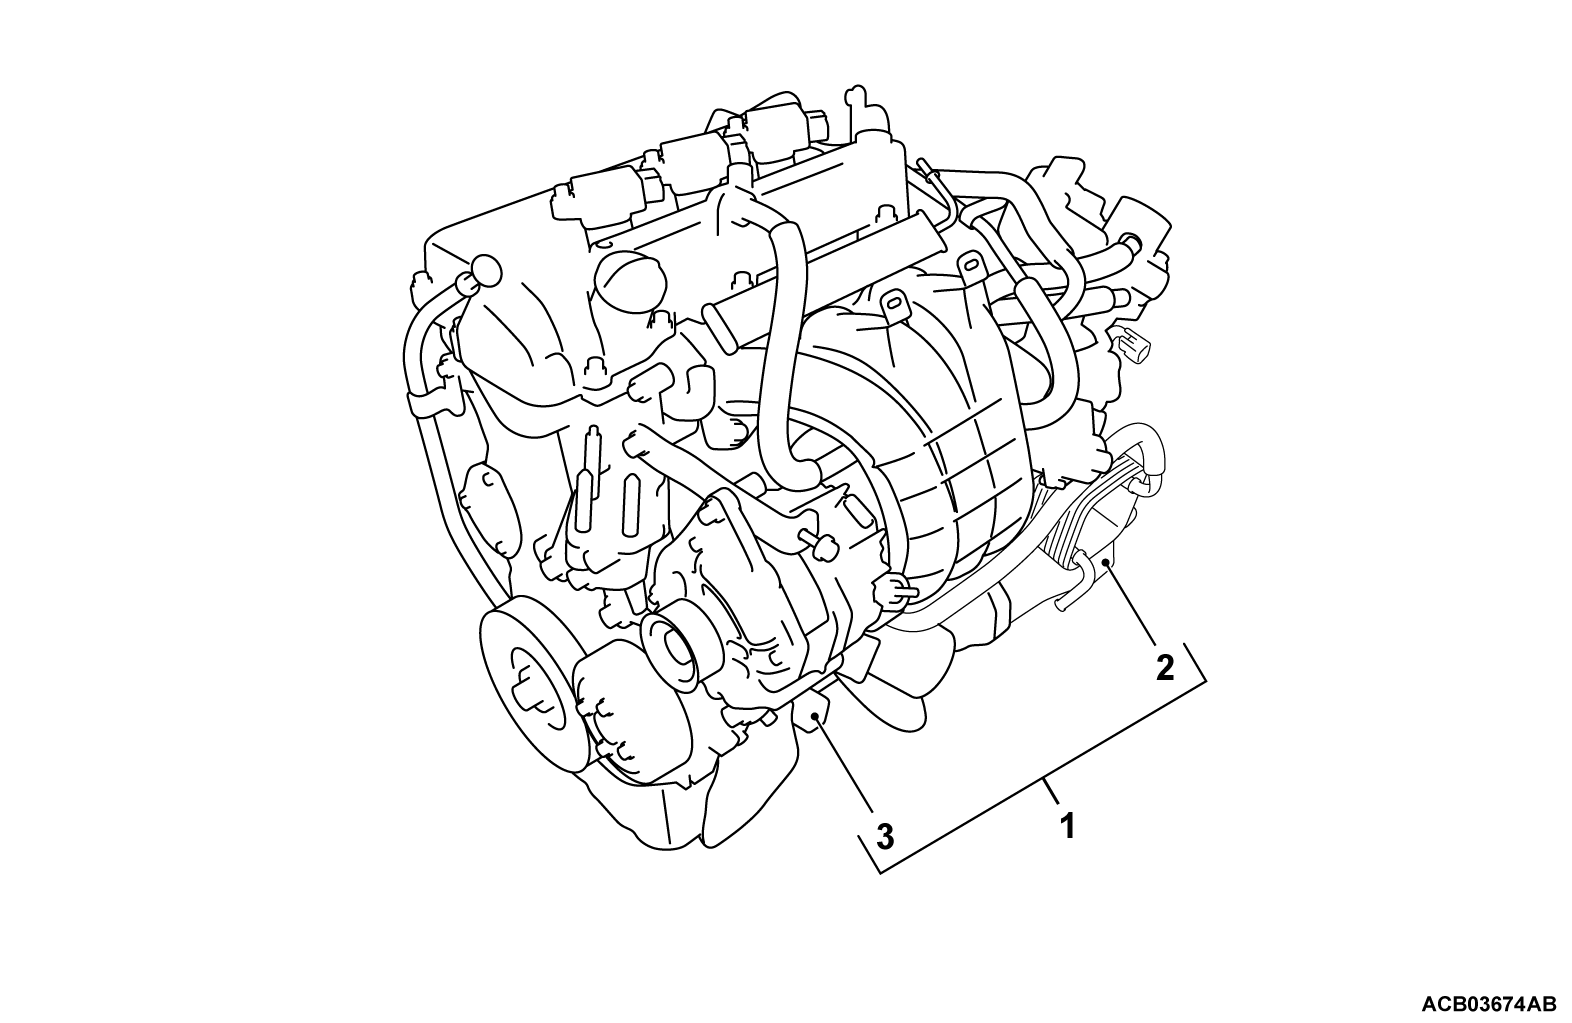
<<C>>>>A<<1.Engine and transaxle assembly
Transaxle assembly coupling bolt (Refer to GROUP 22A, Transaxle Assembly ) <M/T>.
Transaxle assembly coupling bolt (Refer to GROUP 23A, Transaxle Assembly ) <CVT>.
2.Transaxle assembly
3.Engine assembly
Required Special Tools:
 
 
REMOVAL SERVICE POINTS
 
 
<<A>> A/C COMPRESSOR AND CLUTCH ASSEMBLY REMOVAL
1. Remove the A/C compressor and clutch assembly together with the hose from the bracket.
2. Tie the removed A/C compressor and clutch assembly with a string at a position where they will not interfere with the removal and installation of engine and transaxle assembly.


<<B>> ENGINE MOUNTING INSULATOR/TRANSAXLE MOUNTING INSULATOR REMOVAL
1. Secure the engine hanger special tool (MB991928 or MB991895) for holding the engine and transaxle assembly (Refer to GROUP 22A, Transaxle Assembly ) <M/T> or (Refer to GROUP 23A, Transaxle Assembly ) <CVT>.
2. Adjust the engine hanger special tool (MB991928 or MB991895) not to allow the weight of the engine and transaxle assembly to rest on the engine mounting insulator and transaxle mounting insulator. Then remove the engine mounting insulator and transaxle mounting insulator.


<<C>> ENGINE AND TRANSAXLE ASSEMBLY REMOVAL
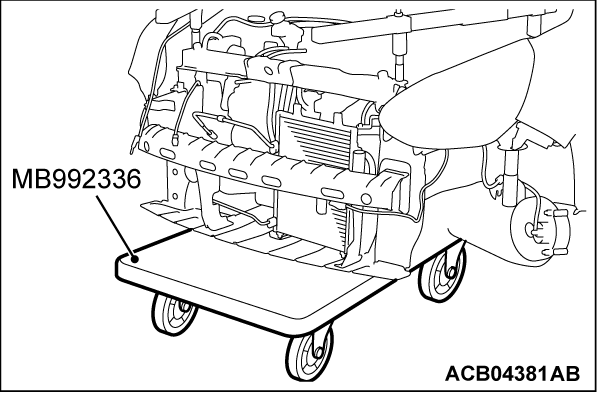
1. Place the special tool MB992336 below the engine and transaxle assembly.
2.
cautionWhen supporting the engine and transaxle assembly with special tool, be careful not to deform the oil pan.
Place the special tool MB992336 against the oil pan with a piece of wood in between to support the engine and transaxle assembly.
3. Remove the engine hanger special tool (MB991928 or MB991895).
4. Confirm that the cable, the hose and the harness connector are all disconnected.
5.
cautionDo not bend the fuel main pipe.
Raise the body slowly with a lift, and remove the engine and transaxle assembly.


INSTALLATION SERVICE POINTS
 
 
>>A<< ENGINE AND TRANSAXLE ASSEMBLY INSTALLATION
Use the special tool MB992336 as during removal to install the engine and transaxle assembly.


>>B<< TRANSAXLE MOUNTING INSULATOR/ENGINE MOUNTING INSULATOR INSTALLATION
Use the engine hanger special tool (MB991928 or MB991895) as during removal to install the transaxle mounting insulator and engine mounting insulator.


>>C<< CONTROL WIRING HARNESS CONNECTION
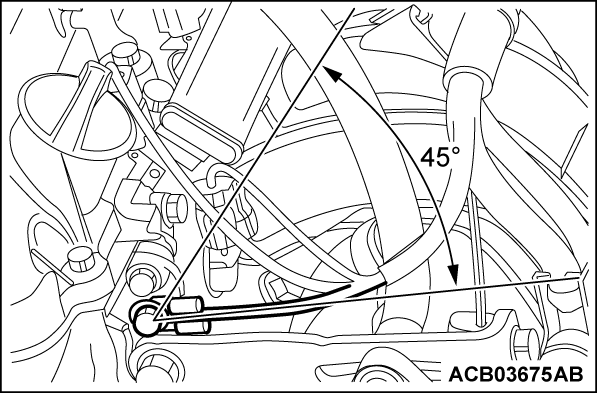
1. Install the ground terminal to the timing chain case as shown.
2. Tighten the ground terminal mounting bolt to the specified torque.
Tightening torque: 9.0 ± 2.0 N·m (80 ± 17 in-lb)