Removal and Installation
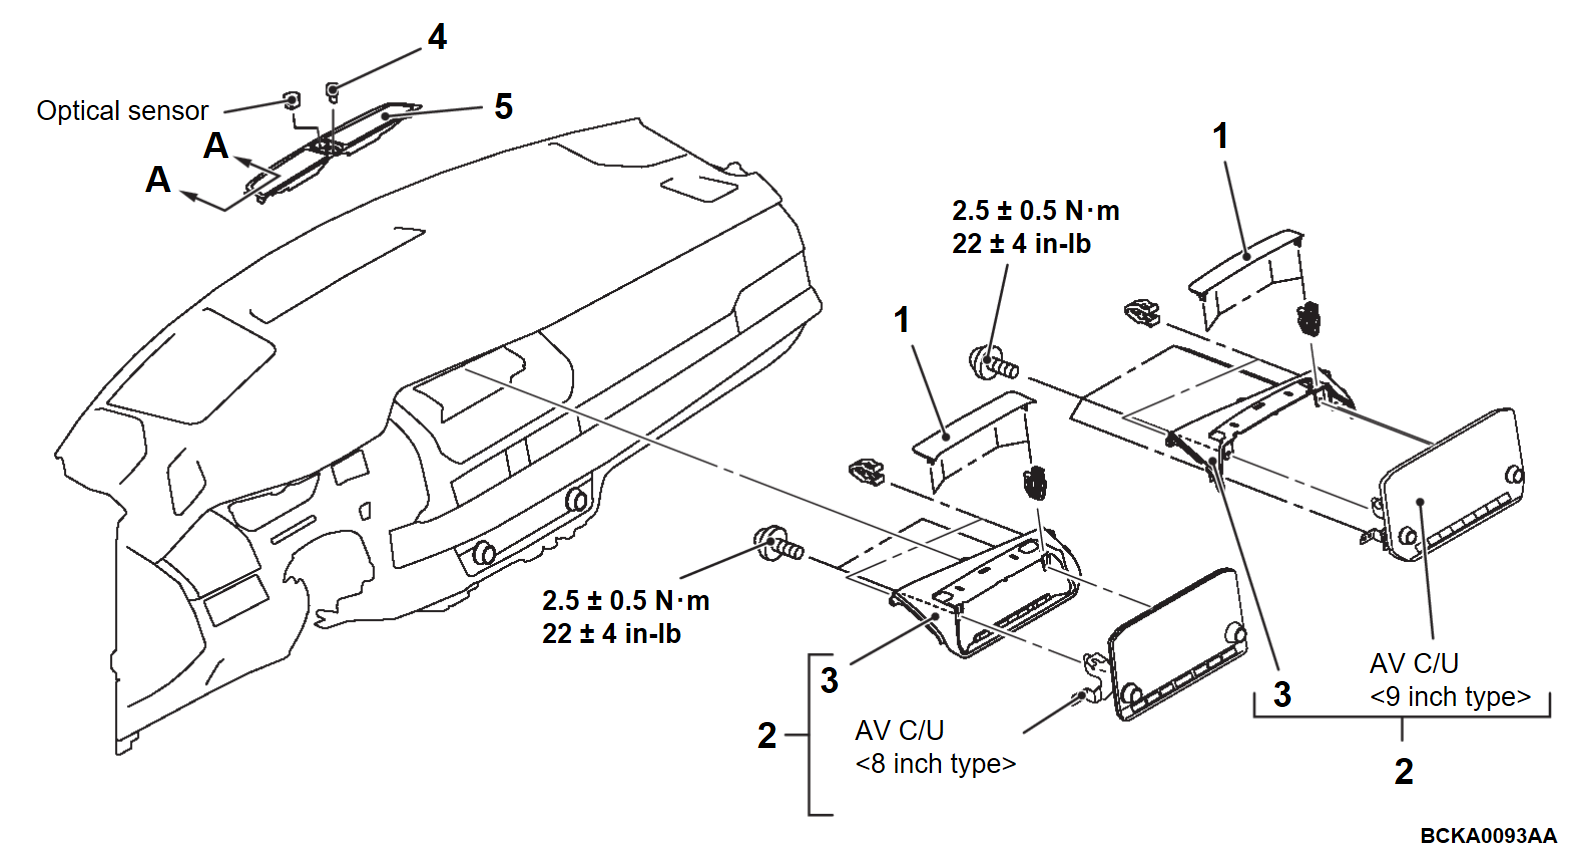
| Pre-removal and Post-installation Operation Side ventilator grille assembly (Passenger's Side) Removal and Installation (Refer to Removal and Installation  ). ). |
|
Required Special Tool:
- MB990784: Ornament Remover
REMOVAL SERVICE POINTS
<<A>> INSTRUMENT PANEL PLUG REMOVAL
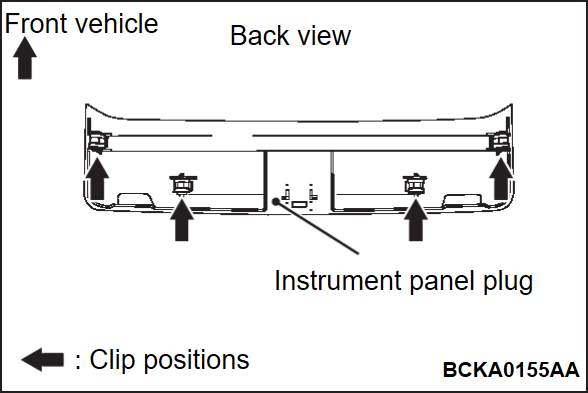
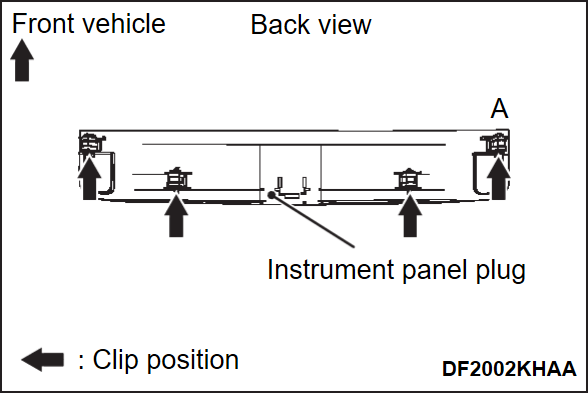
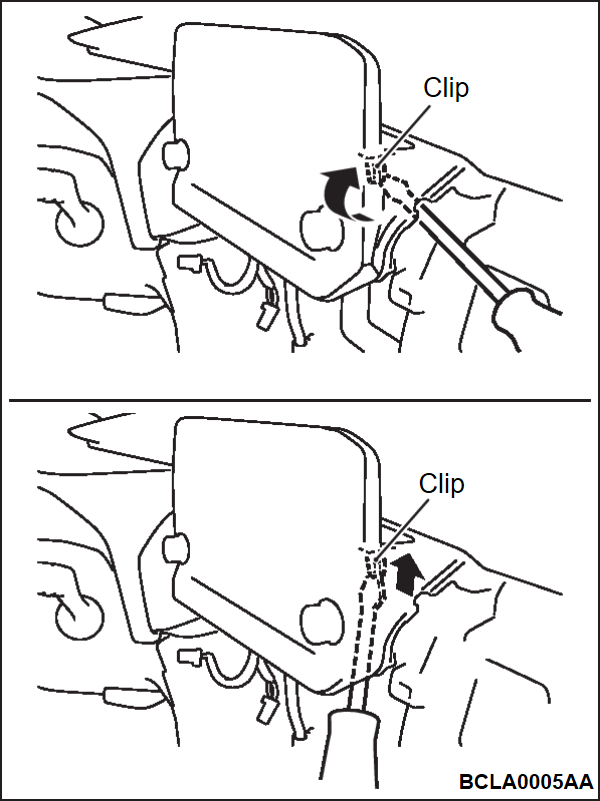
Remove the clips shown in the figure. Starting from the clip on the front passenger's side, insert a flat-tipped screwdriver from the side or the lower side of the instrument panel center cover as shown in the figure and disengage the clips.
| caution | Be sure to remove the instrument panel center cover by following the procedure below, otherwise the instrument panel plug may be damaged. |
1. Insert a flat-tipped screwdriver from the side or bottom of the instrument panel center cover and remove the clip A shown in the illustration.
| caution | When inserting the remover, apply protective tape on the instrument panel center cover to protect it from damage. |
2. Insert the remover to the gap from which clip A was removed, and disengage the rest of the clips.
![[Previous]](../../../buttons/fprev.png)
![[Next]](../../../buttons/fnext.png)
