REMOVAL AND INSTALLATION <FRONT>
| danger |
|
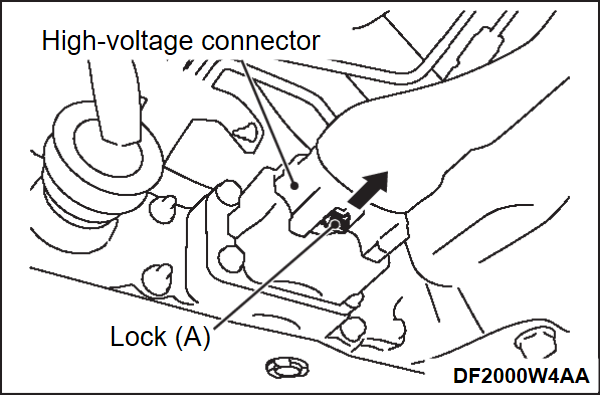
| caution | Be sure to release the lock of the connector with your hands, because use of a tool or others may damage the connector. |
Pre-removal and Post-installation Operation
|
REMOVAL SERVICE POINT
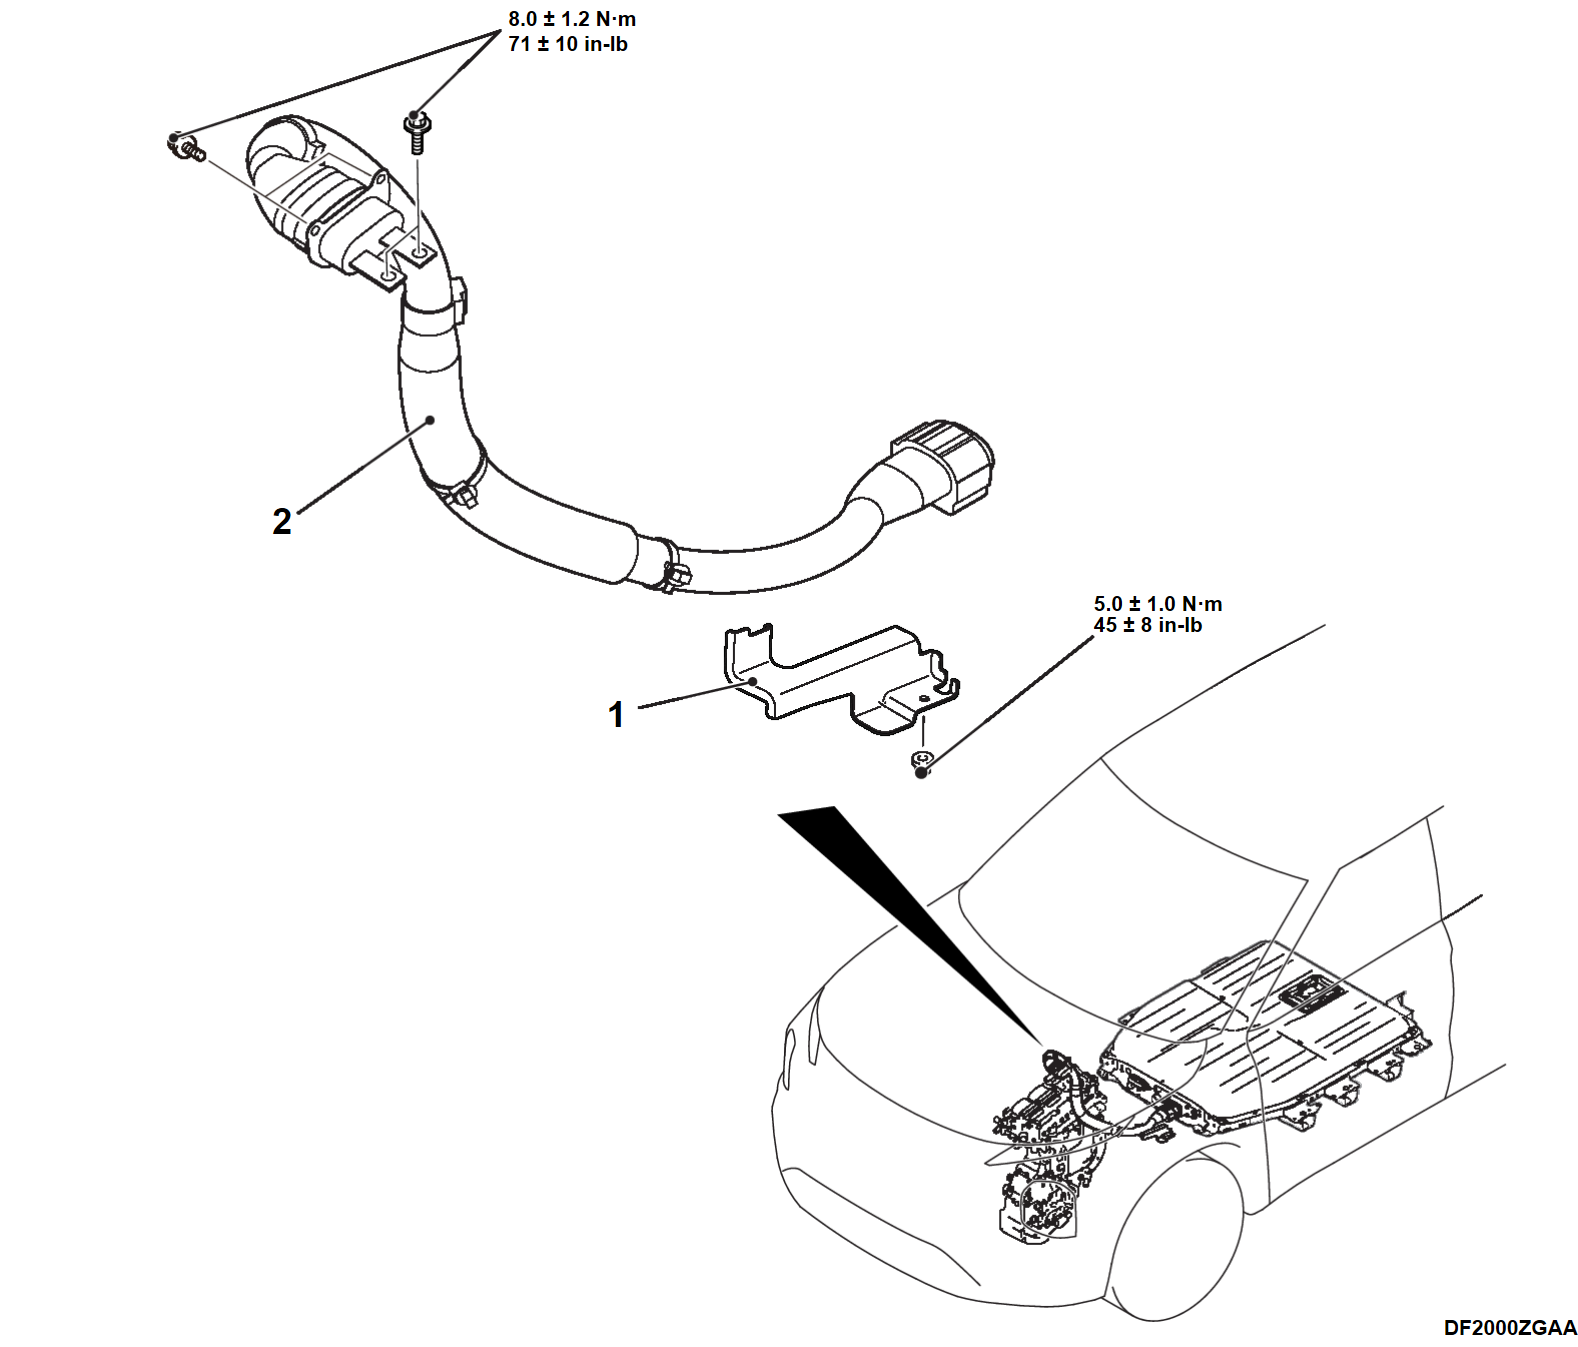
<<A>> DRIVE BATTERY FRONT CABLE (P, N LINE) REMOVAL
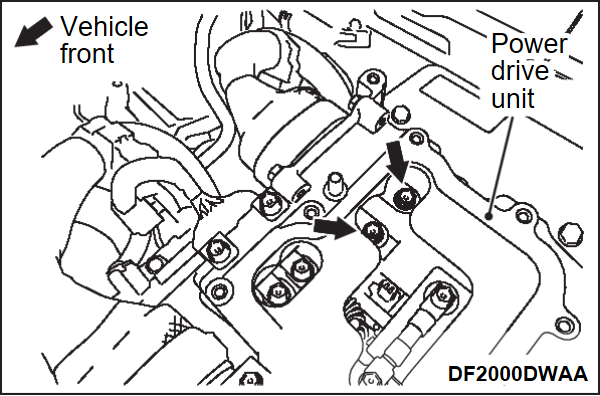
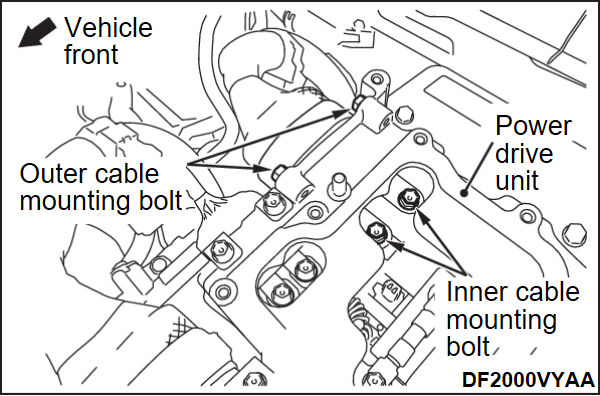
1. Remove the power drive unit side inner cable mounting bolts (2 places).
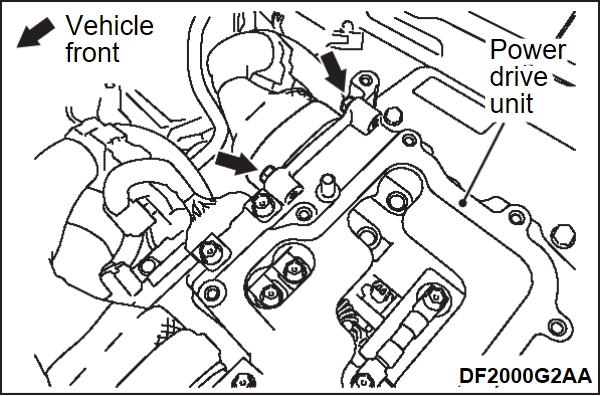
2. Remove the power drive unit side outer cable mounting bolts (2 places).
3. Pull out the drive battery front cable (P, N line) from the power drive unit.
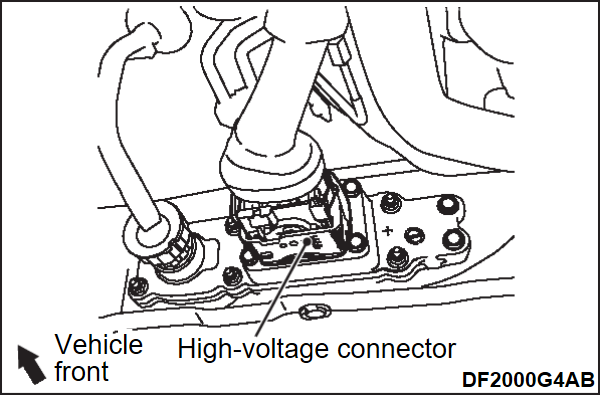
4. Move the lock (A) of the drive battery side high voltage connector to the direction of the arrow.
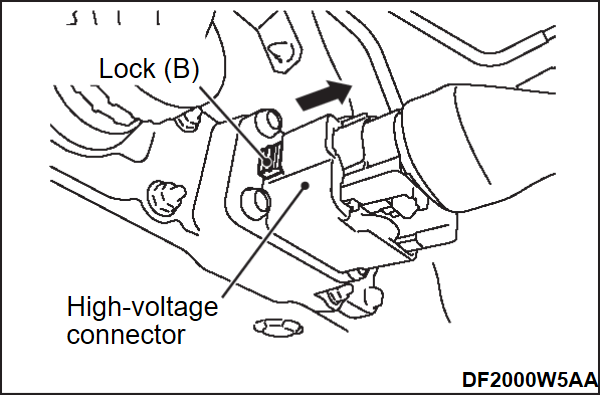
5. Pull the high voltage connector to the direction of the arrow until it stops while pushing the lock (B).
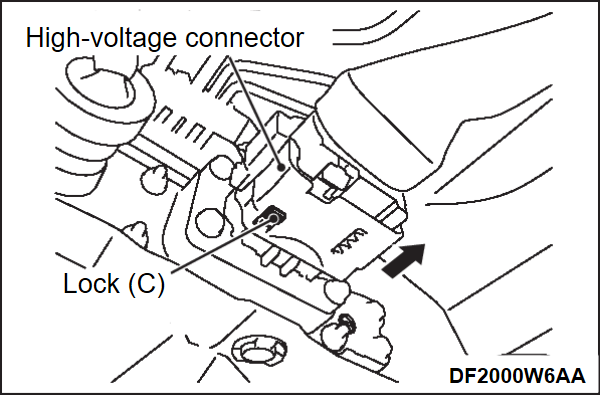
6. Pull out the high voltage connector to the direction of the arrow while pushing the lock (C).
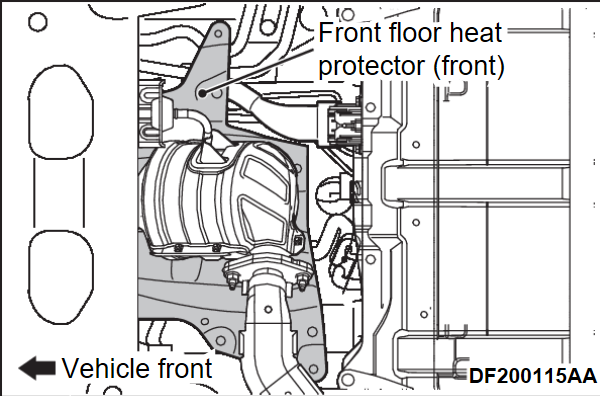
7. Remove the nuts of the front floor heat protector (front) to secure the working space.
8. Remove the drive battery front cable.
INSTALLATION SERVICE POINT
>>A<< DRIVE BATTERY FRONT CABLE (P, N LINE) INSTALLATION
1. Install the high voltage connector of drive battery front cable (P, N line) to the drive battery
2. Install the outer cable mounting bolts and inner cable mounting bolts in this order, and tighten with the specified torque.
Tightening torque: 8.0 ± 1.2 N·m (71 ± 10 in-lb)
![[Previous]](../../../buttons/fprev.png)
![[Next]](../../../buttons/fnext.png)

