[Previous][Next]
DISASSEMBLY AND REASSEMBLY
 
 
Post-installation Operation
  • Headlight Washer Hose and Headlight Washer Actuator Assembly Removal and Installation (Refer to Headlight Washer REMOVAL AND INSTALLATION) <Vehicles with Headlight Washer>.
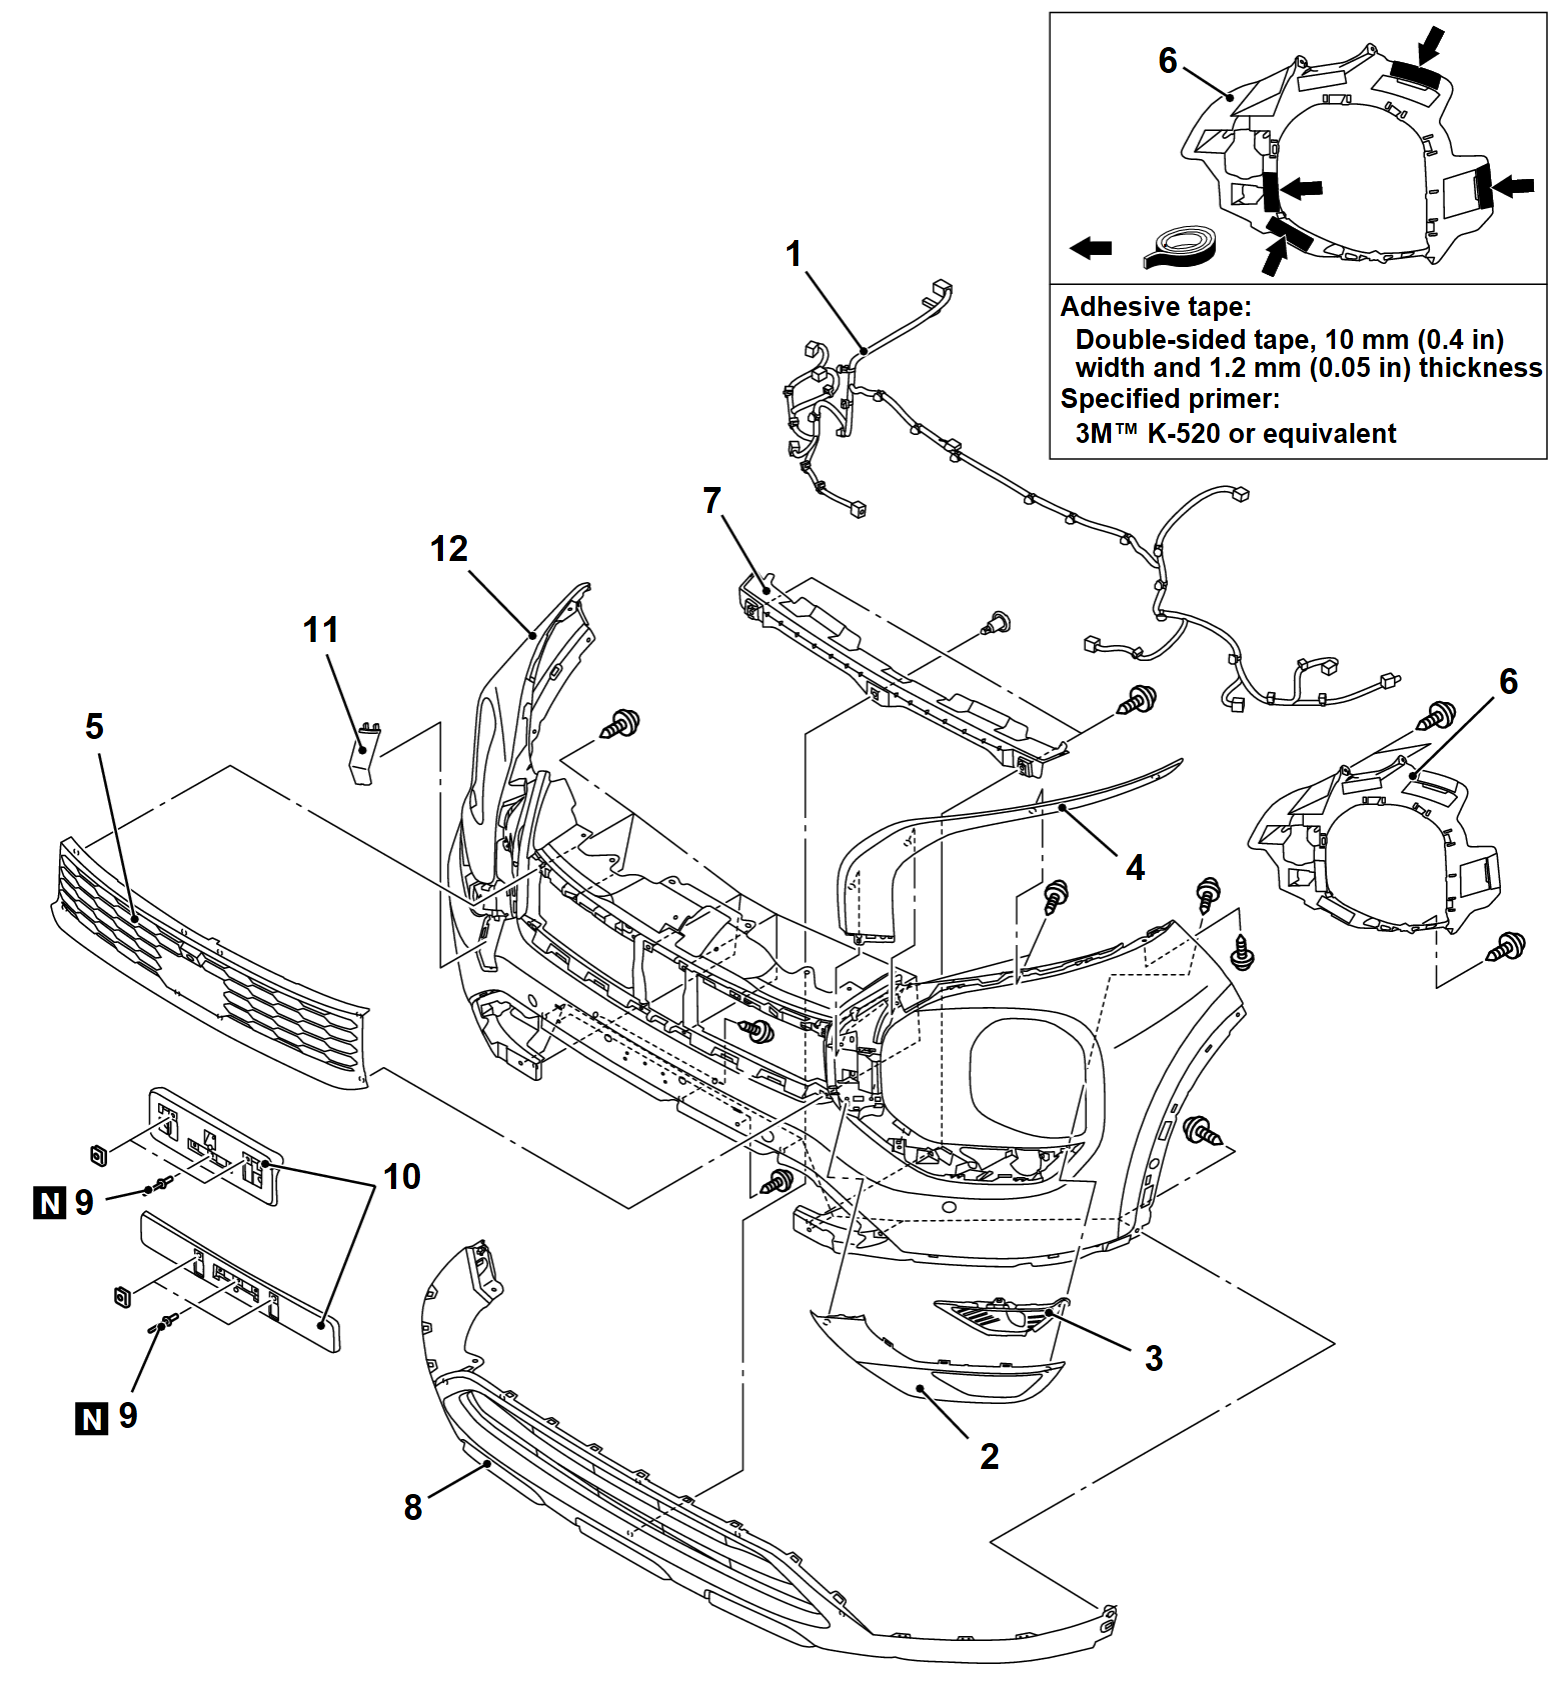
Disassembly steps
1.Front bumper wiring harness assembly <some models>
Front fog light assembly (Refer to Removal and Installation) <Vehicles with Front fog light>
2.Front bumper side lower garnish
3.Front fog light bezel
4.Front bumper side upper garnish
Front camera (Refer to Front Camera Removal and Installation) <Vehicles with multi-around monitor>
5.Front bumper cover
6.Front bumper side inner bracket
7.Front bumper lower duct
8.Front bumper lower face
9.Rivet <Vehicles for CANADA (22 model year)>
10.License plate garnish <Vehicles for CANADA (22 model year)>
11.Towing cover
Front sonar sensor inner holder/front sonar sensor outer holder (Refer to Removal and Installation) <Vehicles with front sonar sensor>
12.Front bumper upper face
 
 
DISASSEMBLY SERVICE POINT
 
 
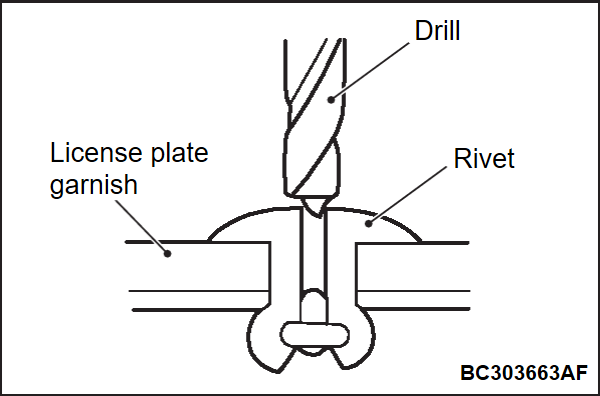
<<A>> RIVETS REMOVAL <Vehicles for CANADA (22 model year)>
Use a drill [Φ 4.0 mm (0.16 inch) to make a hole in the rivet to break it, and remove the rivet.


REASSEMBLY SERVICE POINT
 
 
>>A<< RIVETS INSTALLATION <Vehicles for CANADA (22 model year)>
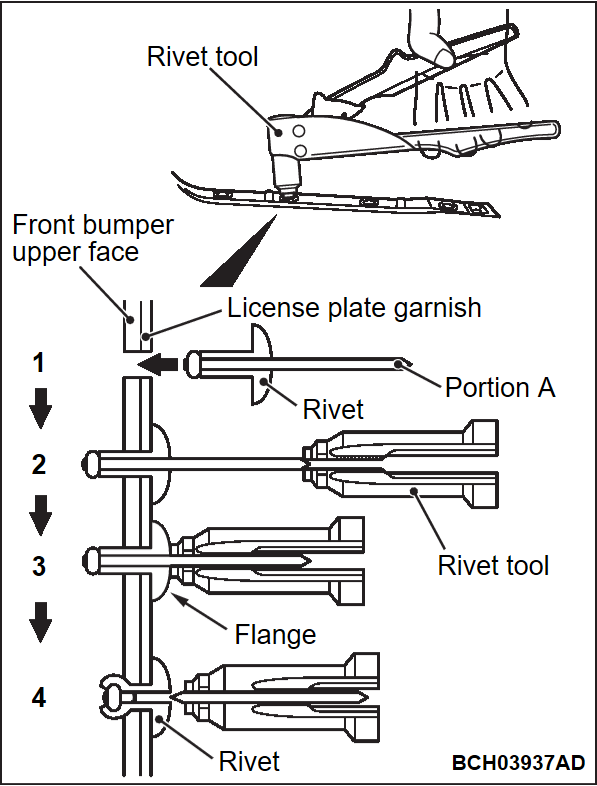
Use a rivet tool shown as in the illustration to connect the parts with rivets by the following procedures:
1. Insert the rivet into a corresponding location.
2. Set the rivet tool at a portion A of rivet.
3. While pushing the flange surface of the rivet onto parts to be fixed with the rivet tool, press the handle of the tool.
4. Thin part of portion A of the rivet will be cut off and the part is fixed in position.