Removal and Installation
REMOVAL
| caution | Be sure to perform “ADDITIONAL SERVICE WHEN REPLACING ADAS CONTROL UNIT 2” when replacing ADAS control unit 2. Refer to Work Procedure . . |
1. Remove center console assembly. Refer to Removal and Installation .
.
 .
.2. Remove around view monitor control unit. Refer to Removal and Installation .
.
 .
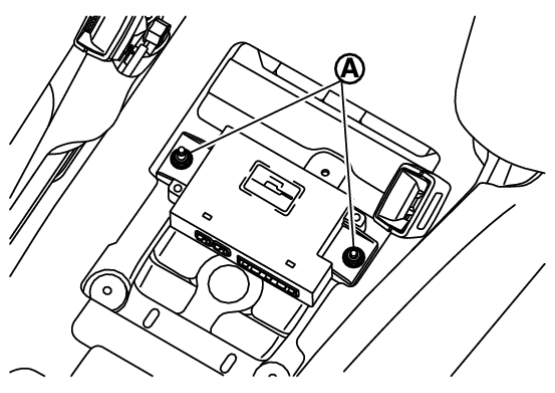
.3. Remove ADAS control unit 2 nuts .
.
 .
.| note | The harness connector is difficult to remove unless removing the ADAS control unit 2 first (The connector lock is located on the lower side). |
INSTALLATION
Note the following, and install in the reverse order of removal.
- Tighten the ADAS control unit 2 nuts to the specified torque.
Nut : 8 N·m (0.82 kg-m, 71 ft-lb)
 : 8 N·m (0.82 kg-m, 71 ft-lb)
| caution | Be sure to perform “ADDITIONAL SERVICE WHEN REPLACING ADAS CONTROL UNIT 2” when replacing ADAS control unit 2. Refer to Work Procedure . . |
![[Previous]](../../../buttons/fprev.png)
![[Next]](../../../buttons/fnext.png)

 as shown by the arrow in the figure and disconnect the harness connector from the ADAS control unit 2.