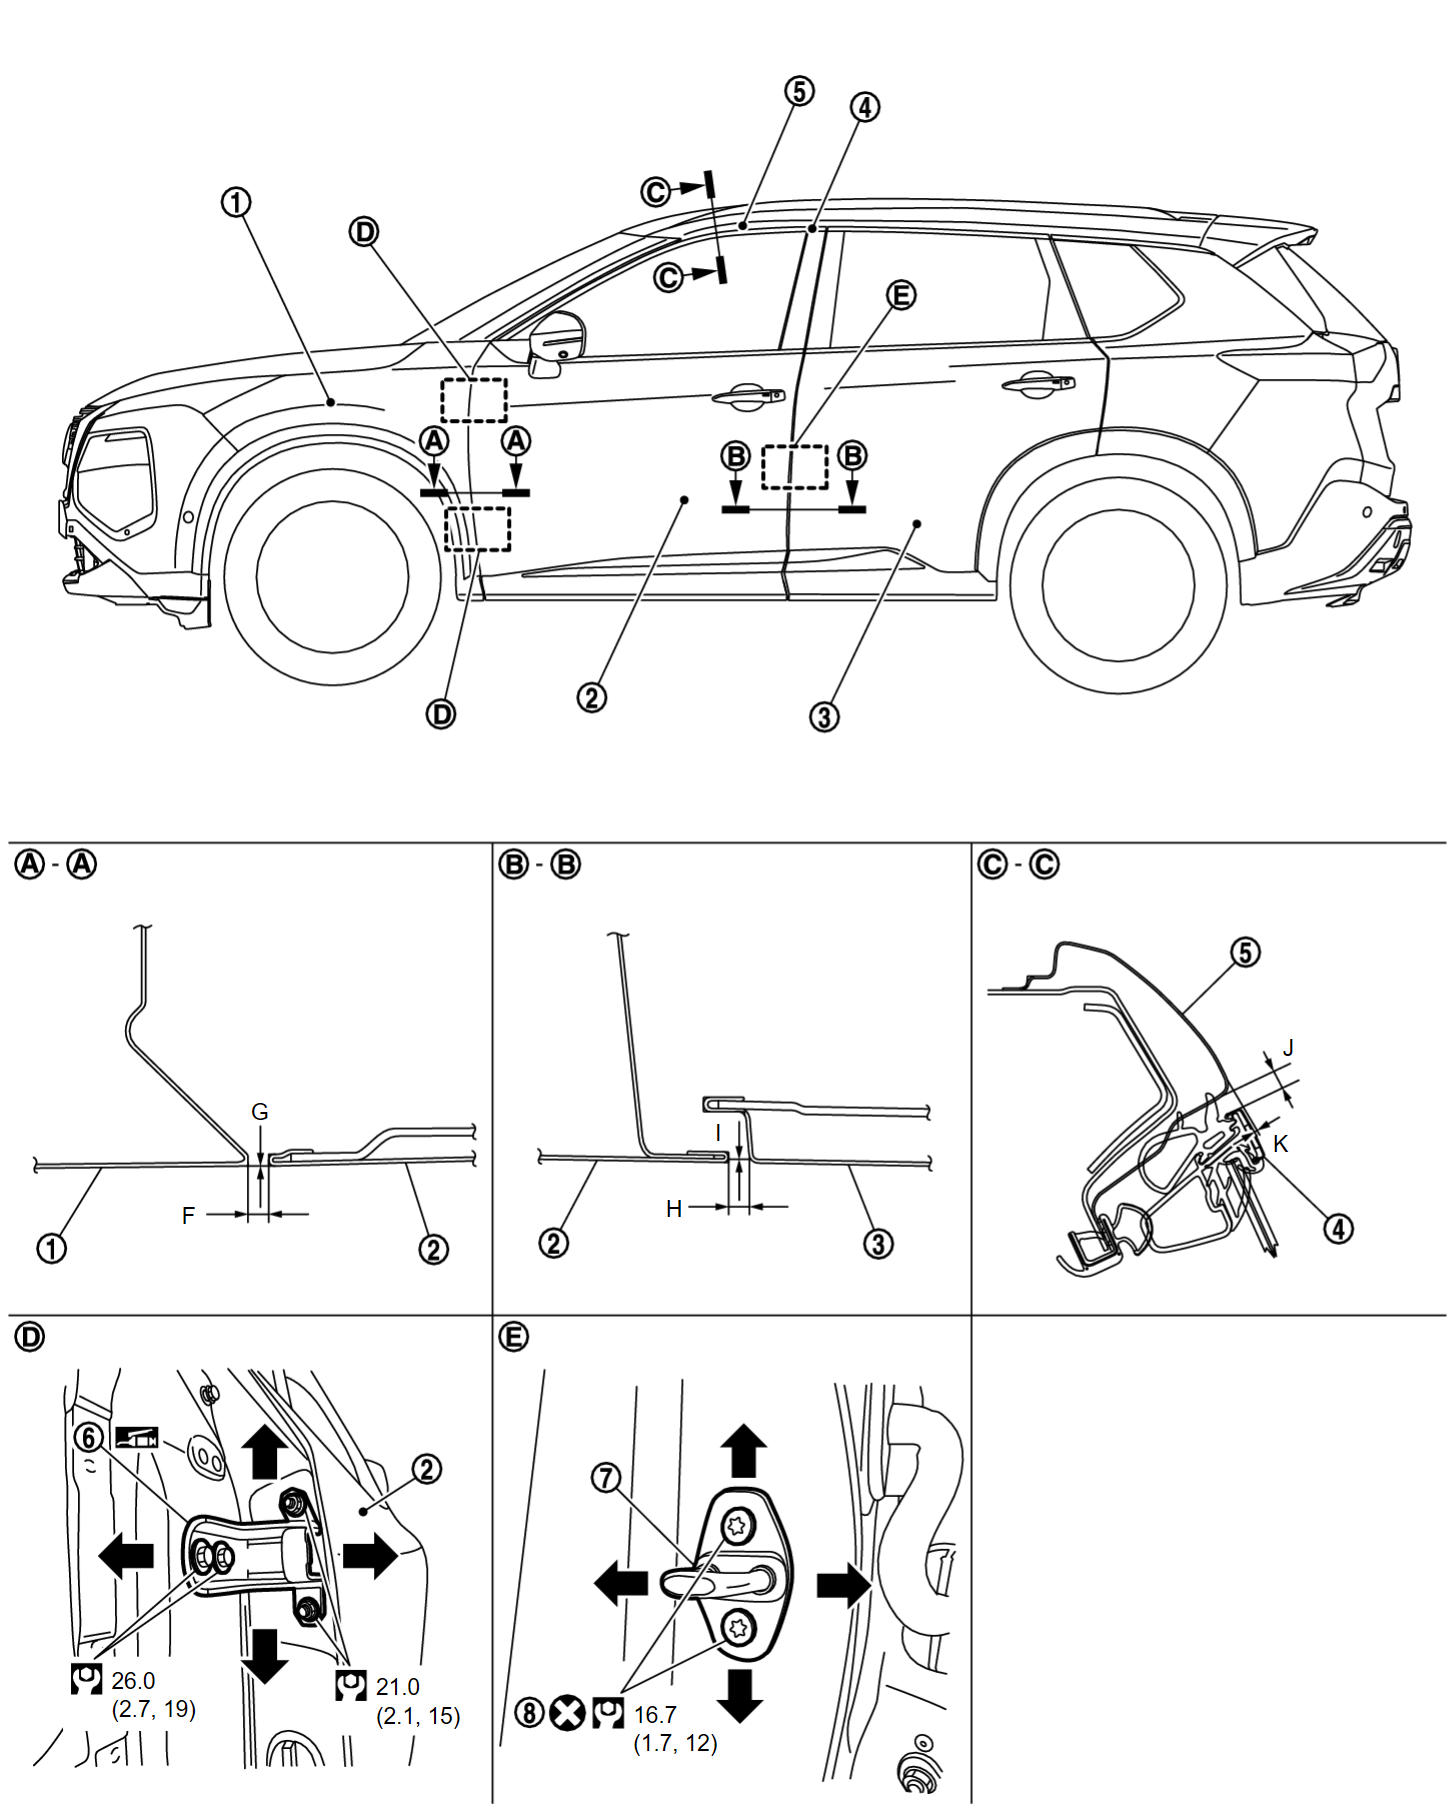
Adjustment
FITTING ADJUSTMENT
Fitting Adjustment Standard Dimension
| |||||||||||||||||||||||||||||||||||||
Unit: mm [in]
| Portion | Standard | |||
| Front door panel – Front fender assembly |  – – | F | Clearance | 3.0 – 5.0 [0.118 – 0.197] |
| G | Surface height | (−1.0) – (+1.0) [(−0.039) – (+0.039)] | ||
| Front door panel – Rear door panel |  – – | H | Clearance | 3.4 – 5.4 [0.134 – 0.213] |
| I | Surface height | (−1.0) – (+1.0) [(−0.039) – (+0.039)] | ||
| Front door sash molding – Body side outer |  – – | J | Clearance | 4.7 – 7.7 [0.185 – 0.303] |
| K | Surface height | (−0.5) – (+2.5) [(−0.020) – (+0.098)] | ||
Check the clearance and surface height between front door and each part by visually and touching.
If the clearance and the surface height are out of specification, adjust them according to the procedures shown below.
Fitting Adjustment Procedure
1. Remove front fender assembly. Refer to Removal and Installation .
.
 .
.2. Loosen front door hinge mounting bolts.
3. Adjust the clearance of front door according to the fitting adjustment standard dimension by moving front door panel.
4. Tighten front door hinge mounting bolts to the specified torque.
| caution | After tightening, apply touch-up paint (the body color) onto the head of hinge mounting bolts. |
5. Install front fender assembly. Refer to Removal and Installation .
.
 .
.6. Loosen front door hinge mounting nuts.
7. Adjust the surface height of front door according to the fitting adjustment standard dimension by moving front door panel.
8. Tighten front door hinge mounting nuts to the specified torque.
| caution | After tightening, apply touch-up paint (the body color) onto the head of hinge mounting nuts. |
DOOR STRIKER ADJUSTMENT
Adjust front door striker so that it becomes parallel with door lock insertion direction.
![[Previous]](../../../buttons/fprev.png)
![[Next]](../../../buttons/fnext.png)


